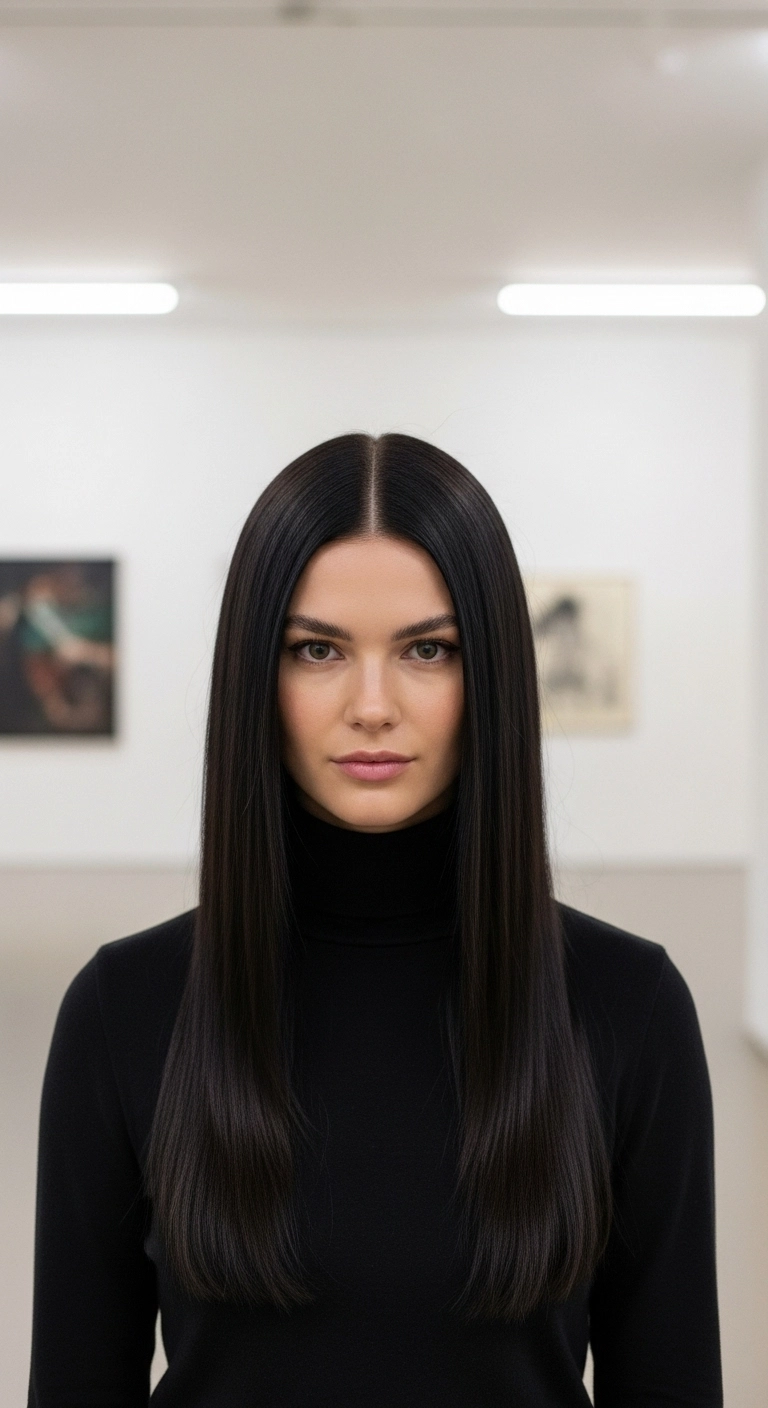
This sleek glass hair look is honestly pure perfection and so effortlessly chic! I am obsessed with the sharp middle part and that insane mirror-like shine against a dark turtleneck. If you have naturally straight or slightly wavy hair and want a super clean, powerful statement look, this is definitely the one for you!
How to do this
1. Start by washing your hair thoroughly and prepping damp strands with the smoothing blow dry cream listed below to lock out frizz and provide thermal protection.
2. Blow dry the hair straight down in sections using a paddle brush and directional concentrator nozzle, directing airflow from roots to ends for maximum cuticle flatting.
3. Use the tail comb listed below to carve out an ultra-precise, crisp center part straight down the middle of your head.
4. Mist thin vertical sections with the heat protectant spray listed below to shield hair from iron heat.
5. Pass a high-quality titanium flat iron down small 1-inch sections, following immediately behind a fine-tooth comb (the chase method) to achieve that glass-like, pin-straight finish.
6. Warm two to three drops of the high-shine hair serum listed below between your palms and smooth gently from mid-lengths down to ends to eliminate flyaways.
7. Set everything into place with a light mist of the anti-humidity finishing spray listed below to keep it sleek and frizz-free all day.
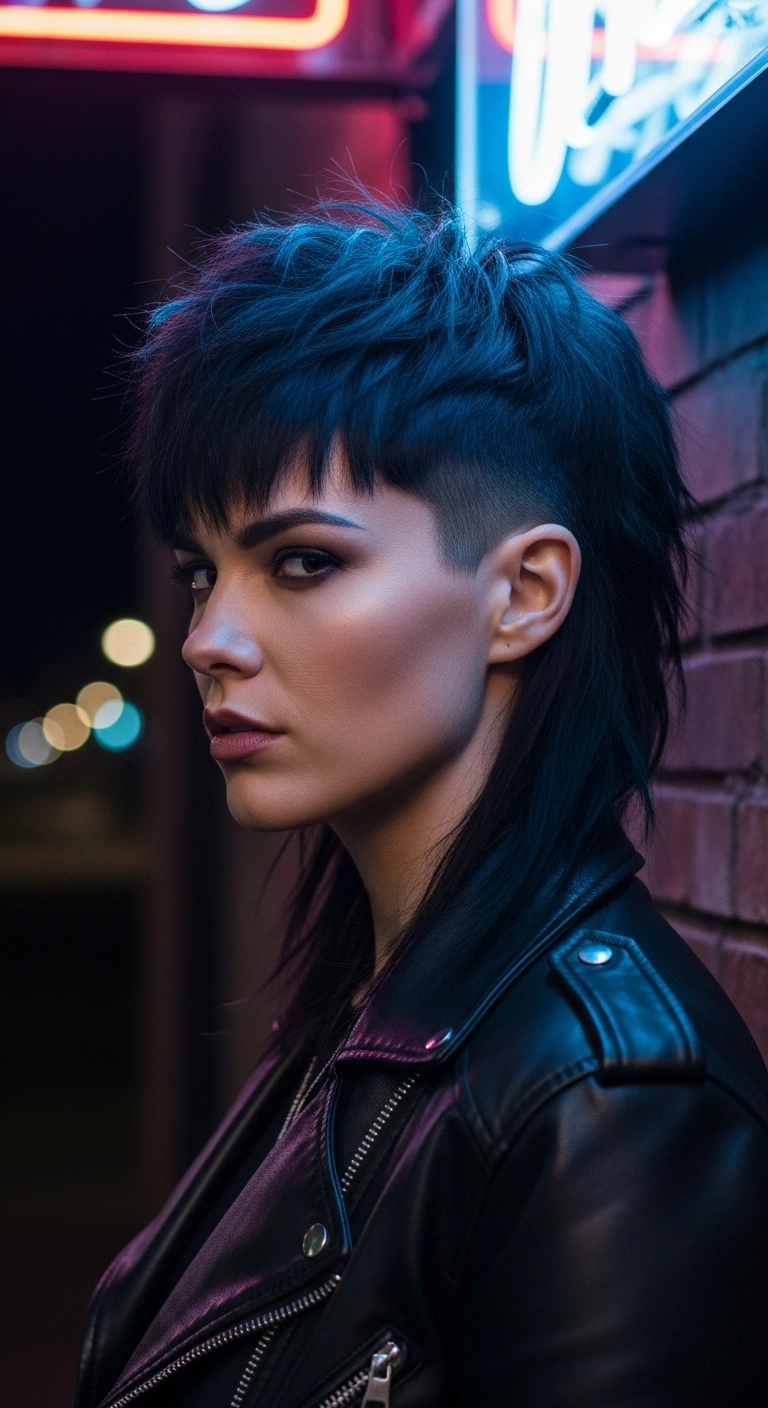
If you're ready to make a bold statement, this razor-sharp modern mullet is your ultimate inspiration. The contrast between the tight buzzed sides, chopped micro bangs, and long, feathered back layers gives off an effortlessly cool rock-and-roll vibe. Pair it with a little matte paste for that perfectly undone, lived-in texture that stays rebellious all day long.
How to do this
1. Start by sectioning off the sides around the ears and clip the top and back sections completely out of the way.
2. Use professional hair clippers using the hair clippers listed below with a guard #2 or #3 to create clean, sharp buzzed fades on both sides above the ears.
3. Cut micro, choppy fringe right above the eyebrows using razor shears for a piecey, feathered finish.
4. Razor cut heavy interior layers through the crown to build volume, while preserving the longer length cascading down the nape towards the collarbones.
5. Prep damp hair with a golf ball-sized dollop of the texturizing mousse listed below, working it from roots to ends.
6. Rough-dry the hair with a blow dryer using your fingers to pull and piece apart the crown layers for maximum height and separation.
7. Rub a dime-sized amount of the matte styling paste listed below between your palms and piece through the top layers and bangs to define the spiked, punk texture.
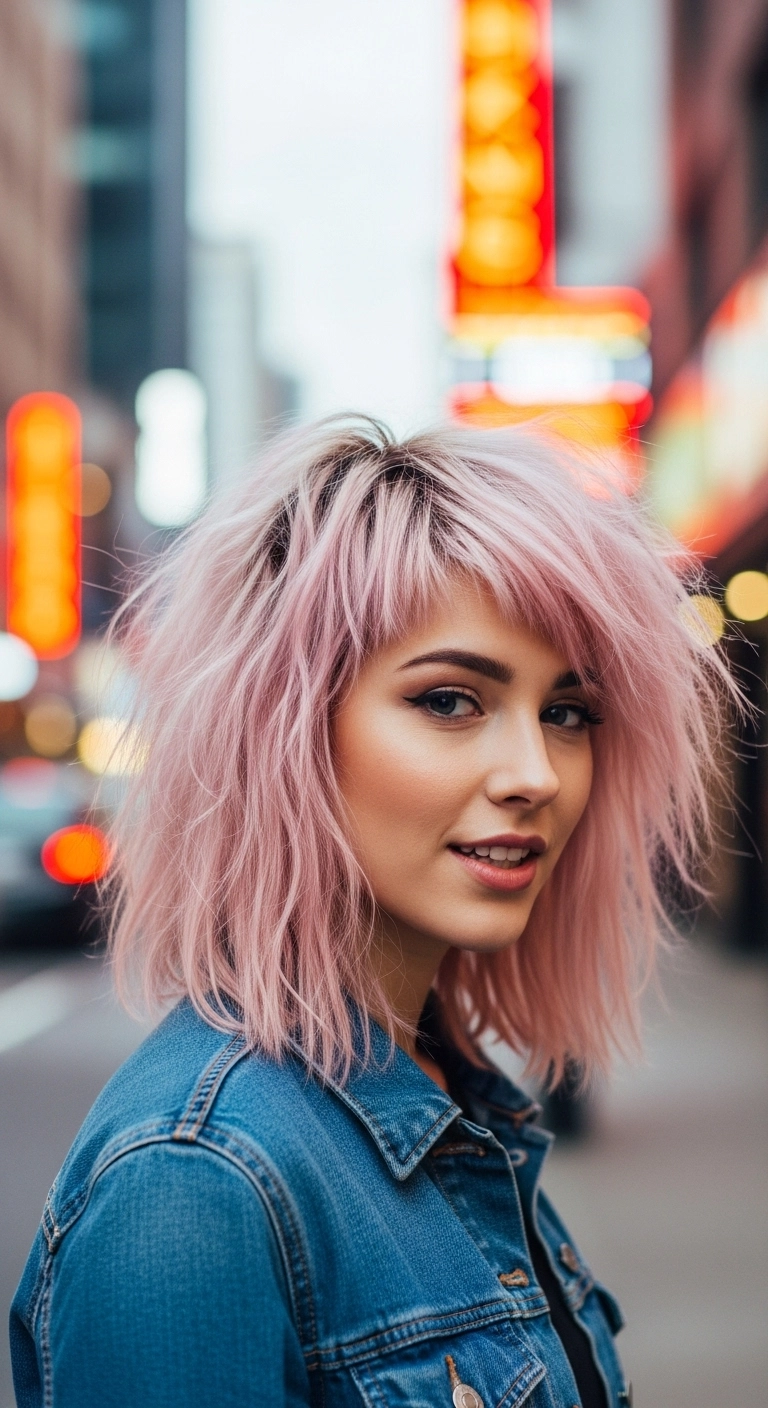
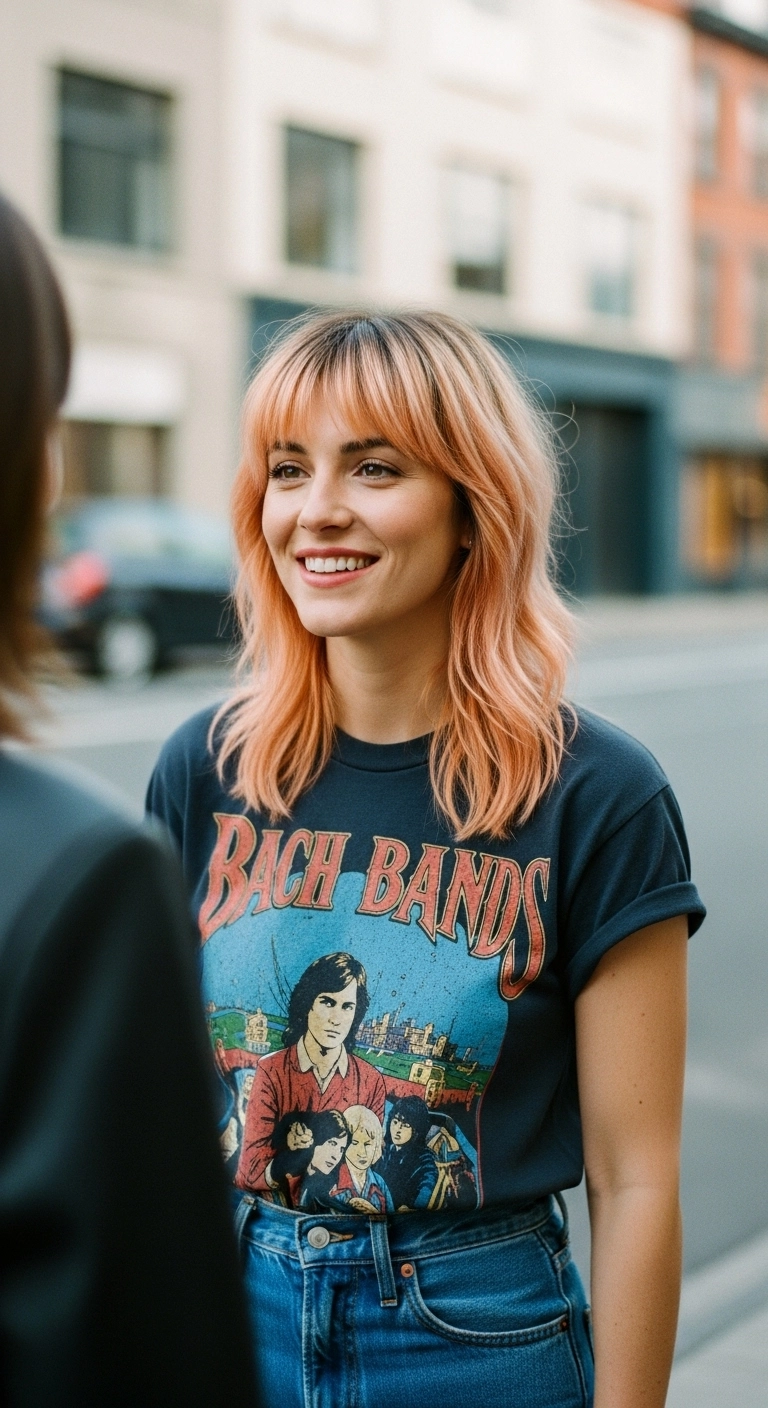
If you want to bring out your inner cool-girl rocker, this pastel pink shaggy lob is everything! It gives that perfectly undone, lived-in bedhead vibe with tons of textured layers and choppy angled bangs. A quick blast of texturizing spray, pinch the ends, and you look effortlessly edgy in seconds!
How to do this
1. Start by bleaching your hair to a clean level 10 platinum blonde using the hair lightening kit listed below, making sure the canvas is completely even.
2. Deposit an all-over pastel blush toner using the pastel pink semi-permanent hair color listed below, allowing it to process fully to get that soft cotton candy shade.
3. Cut the hair into a textured collarbone-skimming lob with heavy razored layers throughout the crown and choppy, angled side-swept bangs.
4. Prep damp hair with a small amount of the lightweight volumizing mousse listed below, working it from roots to ends for lift.
5. Rough dry your hair upside down with a blow dryer to encourage maximum volume and separation.
6. Once dry, mist sections with the dry texturizing spray listed below and lightly scrunch or pinch ends using the matte styling paste listed below to define that piecey, rocker-chic texture.
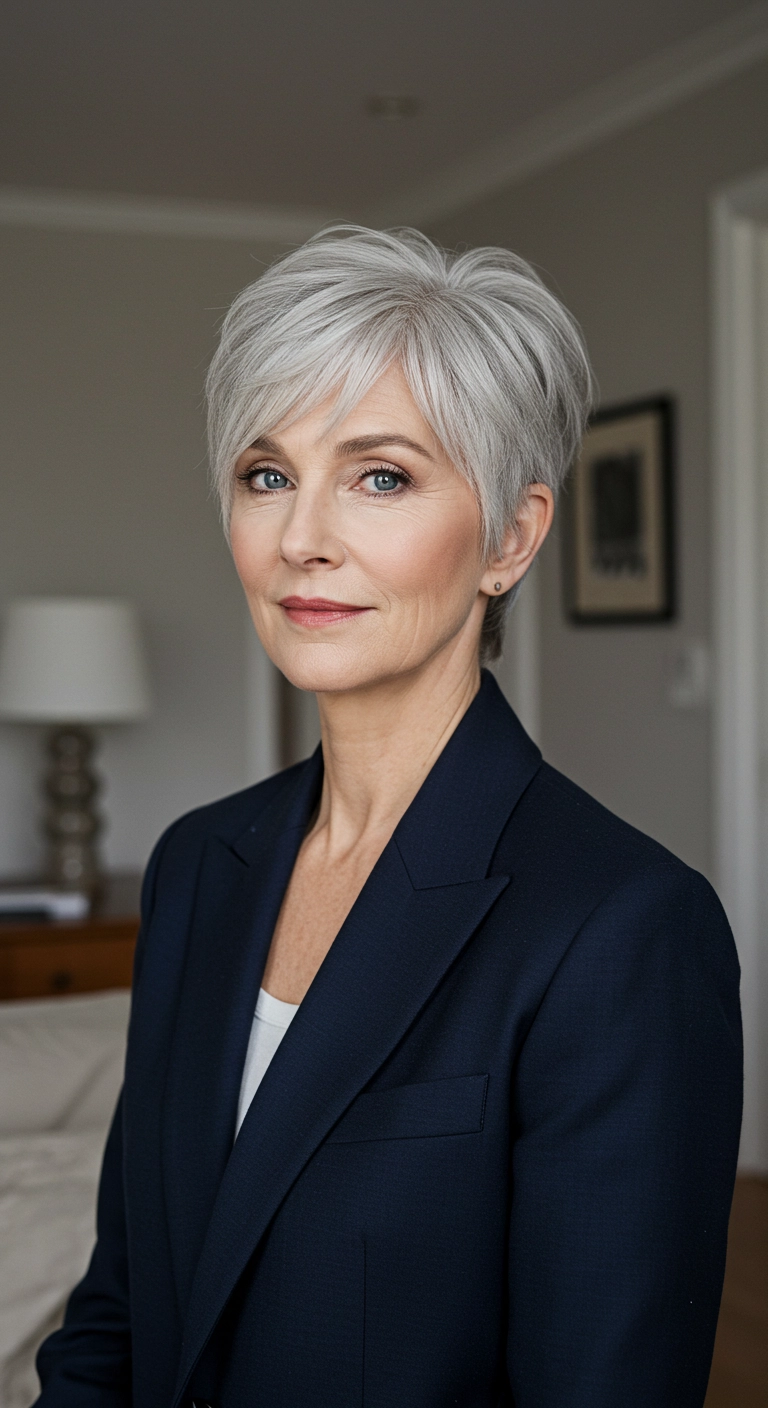
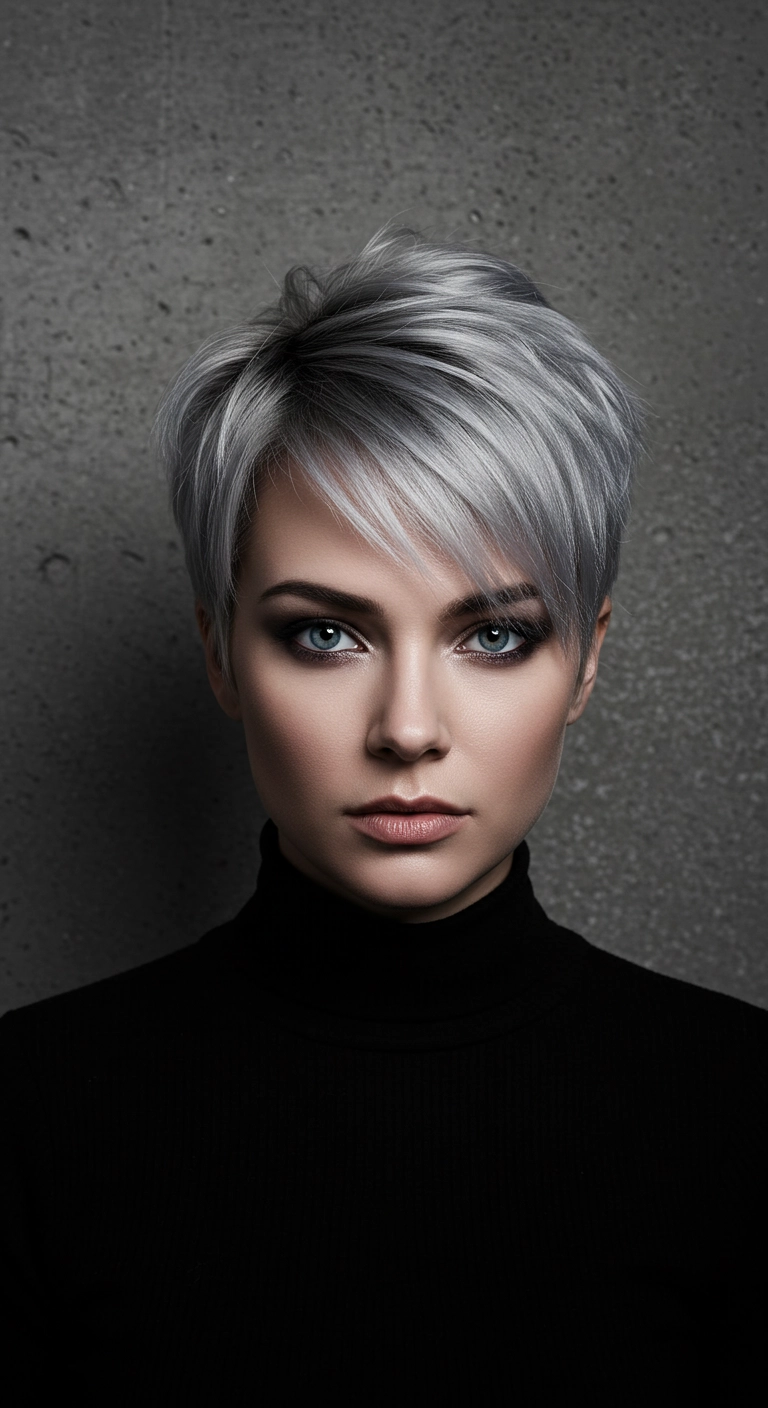
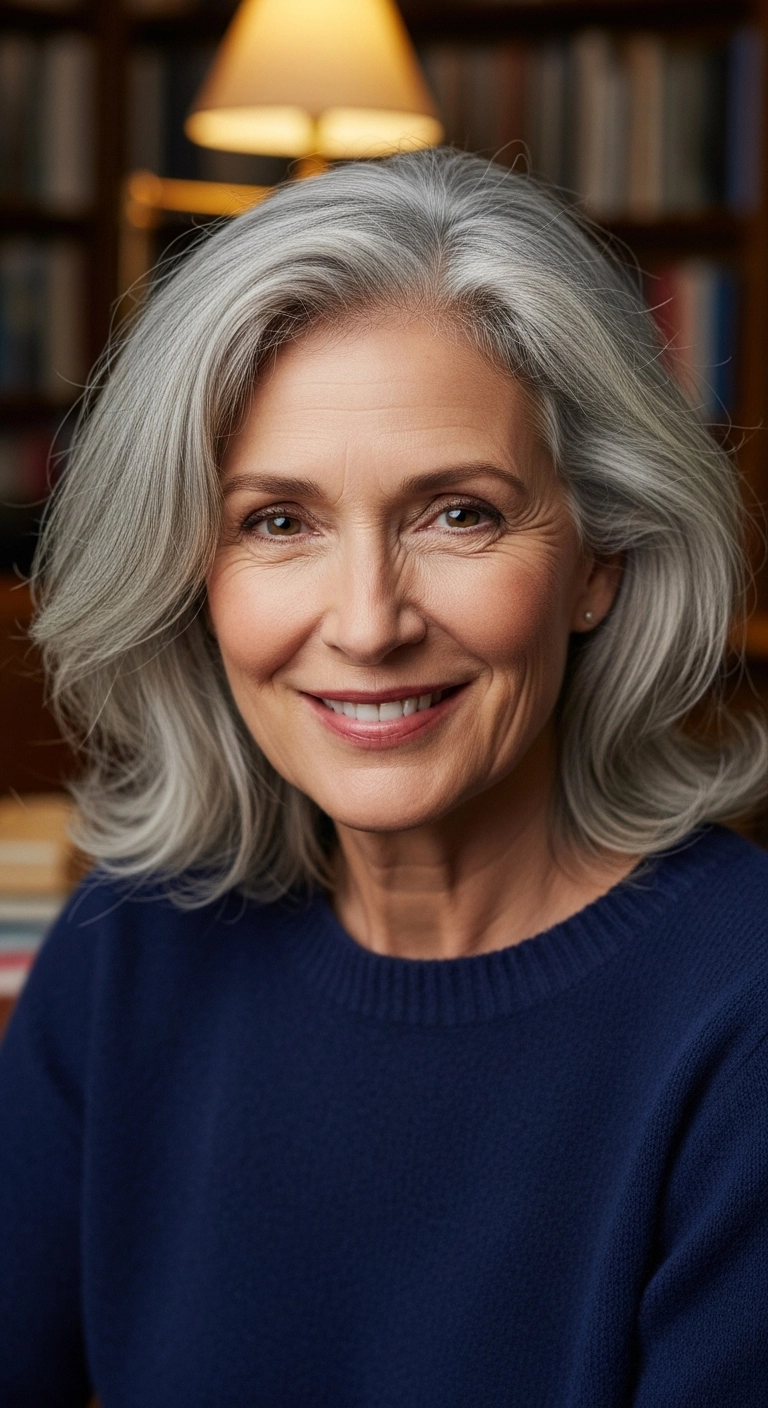
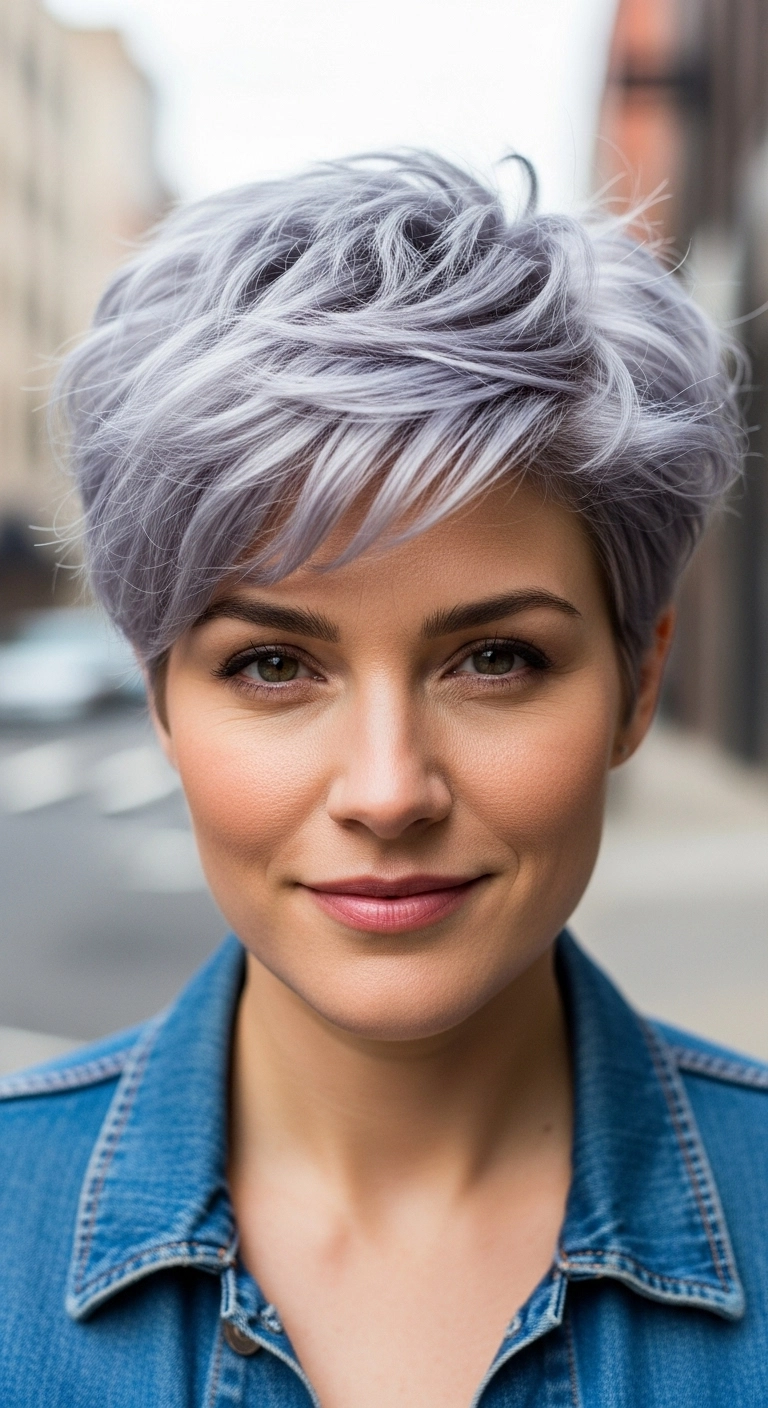
Embracing natural silver has never looked so effortless. A tailored pixie cut with piecey, face-framing fringe gives instant lift and structure without feeling fussy or stiff. Pair it with a classic blazer, and you've got a crisp, put-together look that takes about five minutes to style in the morning.
How to do this
1. Start by washing hair with a purple or silver enhancing shampoo to eliminate brassiness and keep the silver tones crisp and bright.
2. On damp hair, work in a dime-sized amount of the lightweight volumizing mousse listed below from roots to tips to create lift at the crown.
3. Blow dry using a small ceramic round brush or a vent brush, directing the top and front sections forward and slightly to the side to create the soft, swept fringe.
4. Smooth down the sides around the ears with the airflow pointed downwards to ensure a clean, tailored contour.
5. Warm a pea-sized amount of the matte styling paste listed below between your fingertips and lightly piece out the ends of the bangs and crown layers for separation.
6. Finish with a light mist of the flexible hold hairspray listed below to lock the volume and piecey texture in place all day.
Products Used
Sulfate-Free Purple Toning Shampoo for Silver Hair
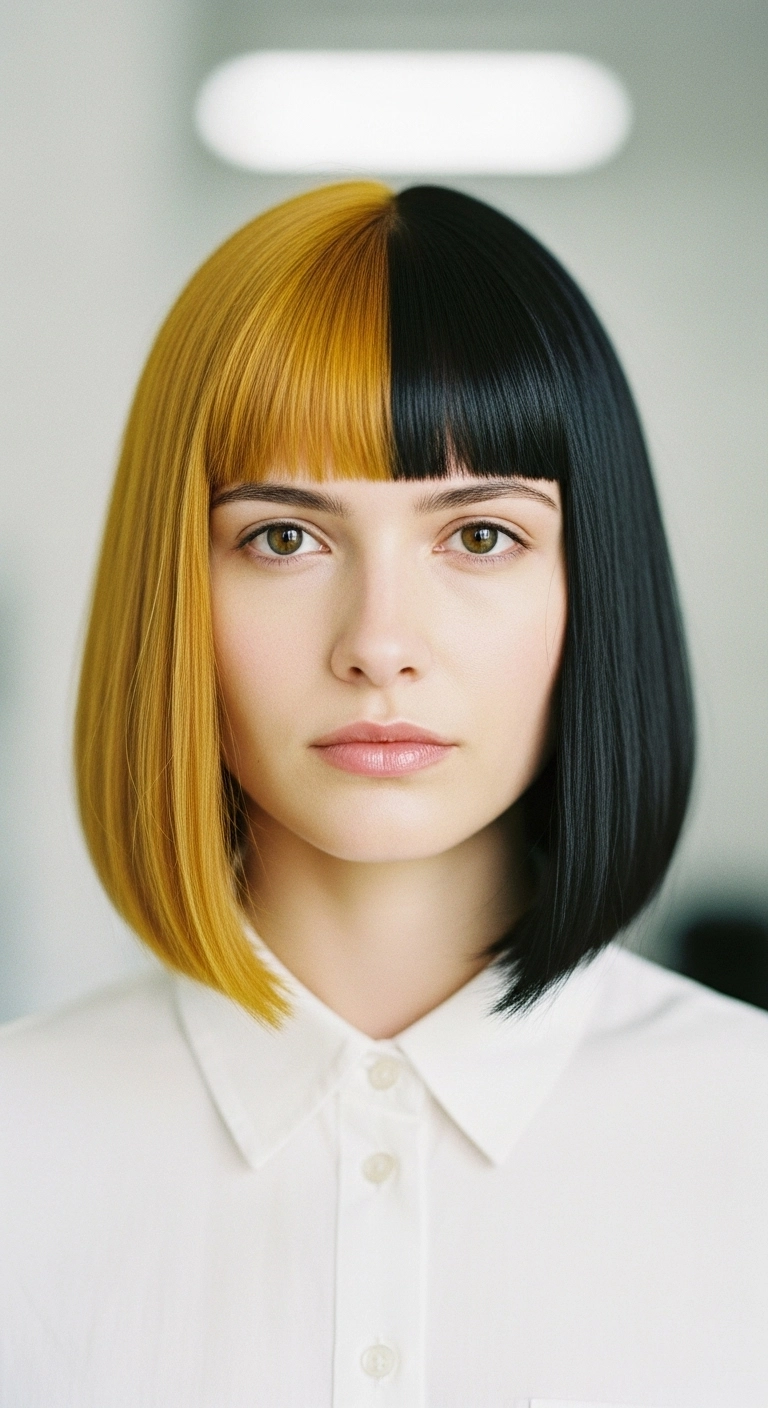
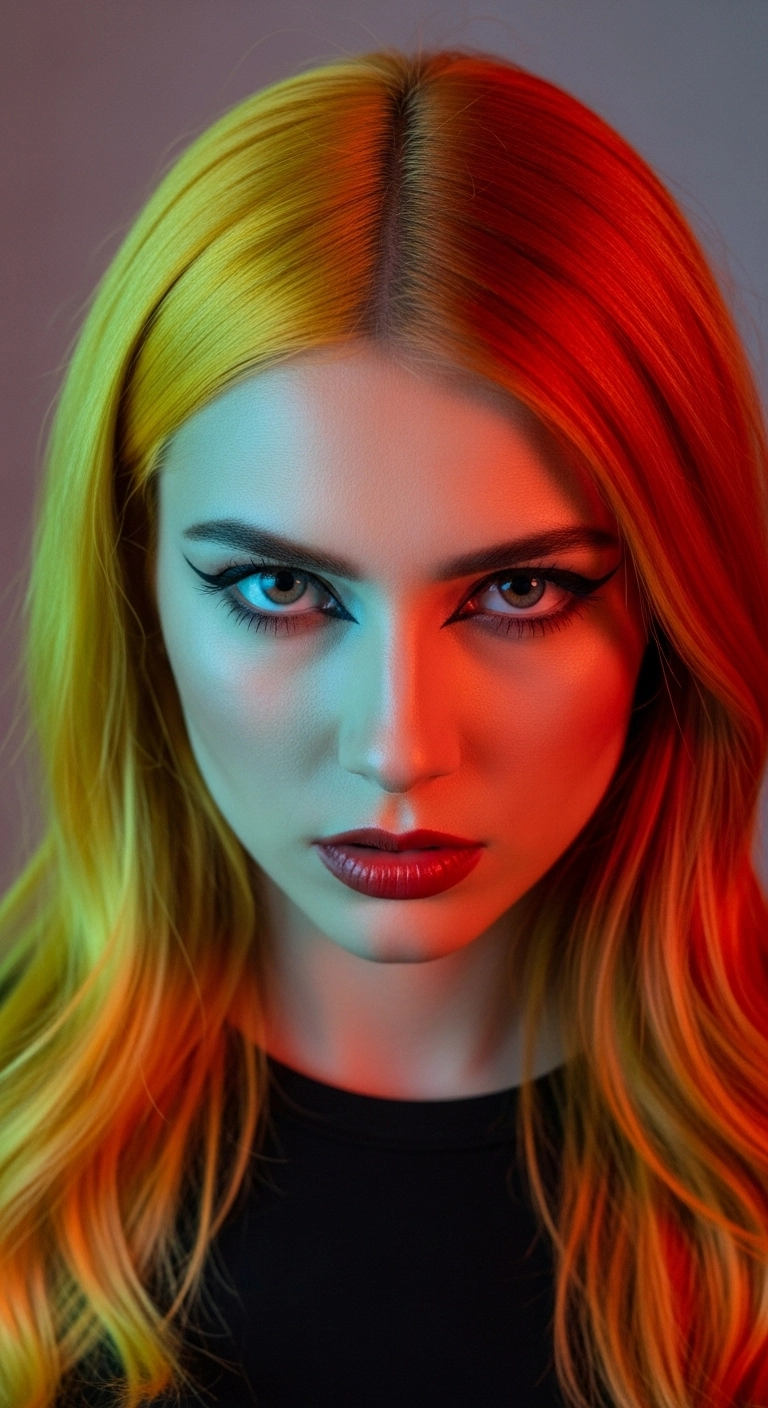
I have always loved high-contrast hair, and this half-and-half split dye takes things to a whole new level! Combining deep jet black with a rich golden yellow makes the graphic silhouette of a blunt bob pop like crazy. To really make it feel edgy and modern, the micro bangs are cut super crisp right across the forehead. It feels totally bold and dramatic, but keeping it styled sleek and turned under makes it wearable for everyday cool-girl energy!
How to do this
1. Start by dividing the hair completely in half down the center from the front hairline all the way to the nape using a precision tail comb listed below.
2. Secure one side tightly while you bleach and tone the other side to a vibrant golden yellow, keeping the dividing line exceptionally clean with foil barrier strips.
3. Apply a rich jet-black semi-permanent or permanent gloss on the opposite side, taking care not to overlap into the lightened section.
4. Cut the base into a sharp, chin-length blunt bob, curving subtly inward towards the front perimeter.
5. Section out the fringe and cut blunt, straight-across micro-bangs sitting right above the brow line to match the split color divide.
6. Prep dry hair with the heat protectant spray listed below, then run a precision ceramic flat iron down small sections, beveling slightly inward at the ends.
7. Finish the sleek geometric look with a lightweight anti-frizz shine serum listed below to lock in that glass-hair gloss.
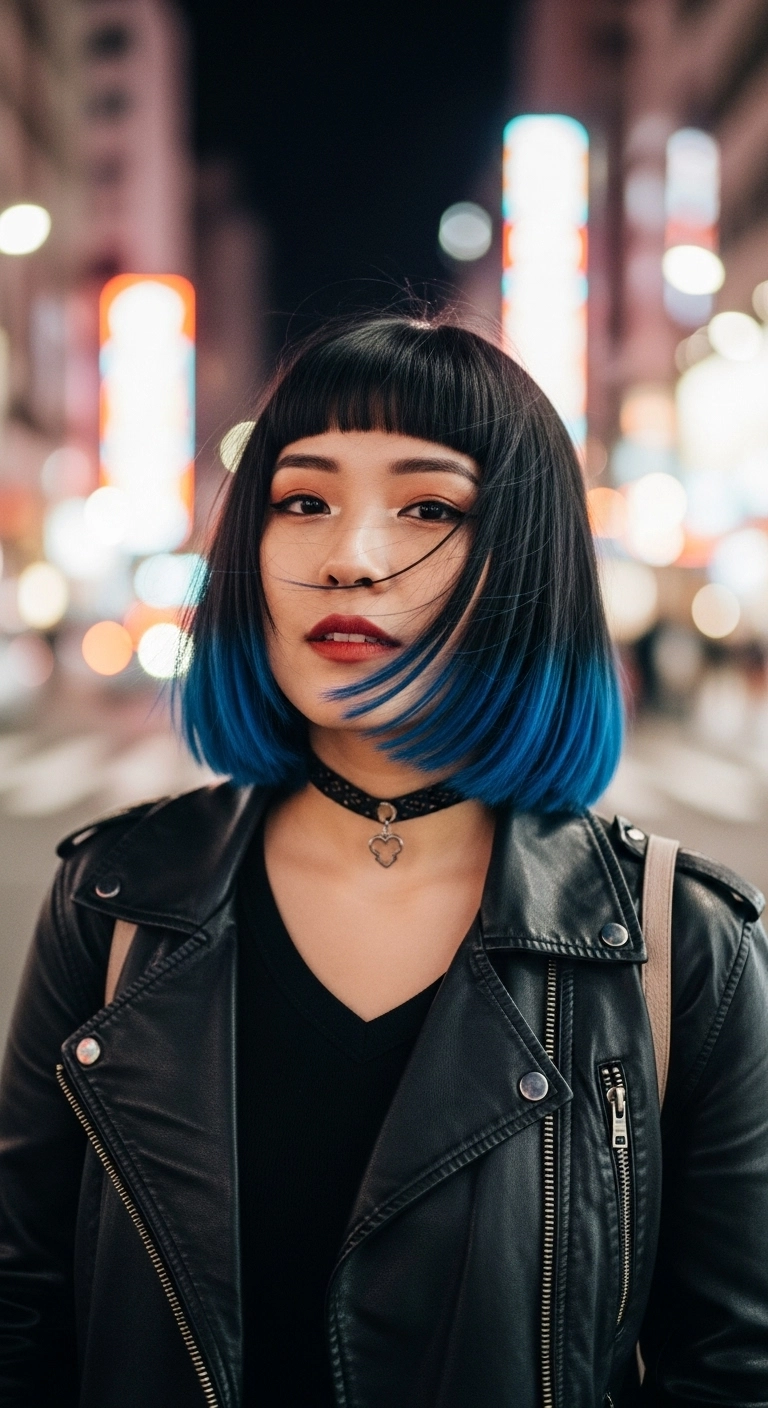
If you want a look that's bold, sleek, and has an effortless cyberpunk edge, this electric blue dipped bob is everything!! The blunt micro bangs frame the eyes so well, and that pop of vivid cyan on the ends gives classic straight black hair an instant alt-girl upgrade without having to bleach your whole head.
How to do this
1. Start by getting a precision blunt bob cut that rests right along the jawline/neck, paired with blunt micro baby bangs sitting an inch above the eyebrows.
2. Section off the lower 2 to 3 inches of the perimeter ends, and lighten them to a pale level 9 or 10 blonde using the hair lightening powder and developer listed below.
3. Apply a vibrant semi-permanent electric blue dye to the lightened ends using the direct dye listed below, gently blending the color upwards into the black base with a tint brush to create a smooth gradient melt.
4. Once processed and rinsed thoroughly in cold water, prep damp hair with the heat protectant straightening spray listed below.
5. Blow dry with a directional nozzle using the ceramic round brush listed below, gently curving the ends inward toward the neck.
6. Run a flat iron through 1-inch sections from roots to tips to get that glass-smooth straightness, beveling slightly under at the very bottom.
7. Finish the bangs and ends by misting a light veil of the anti-frizz shine spray listed below to lock down flyaways and give that mirror-like gloss.
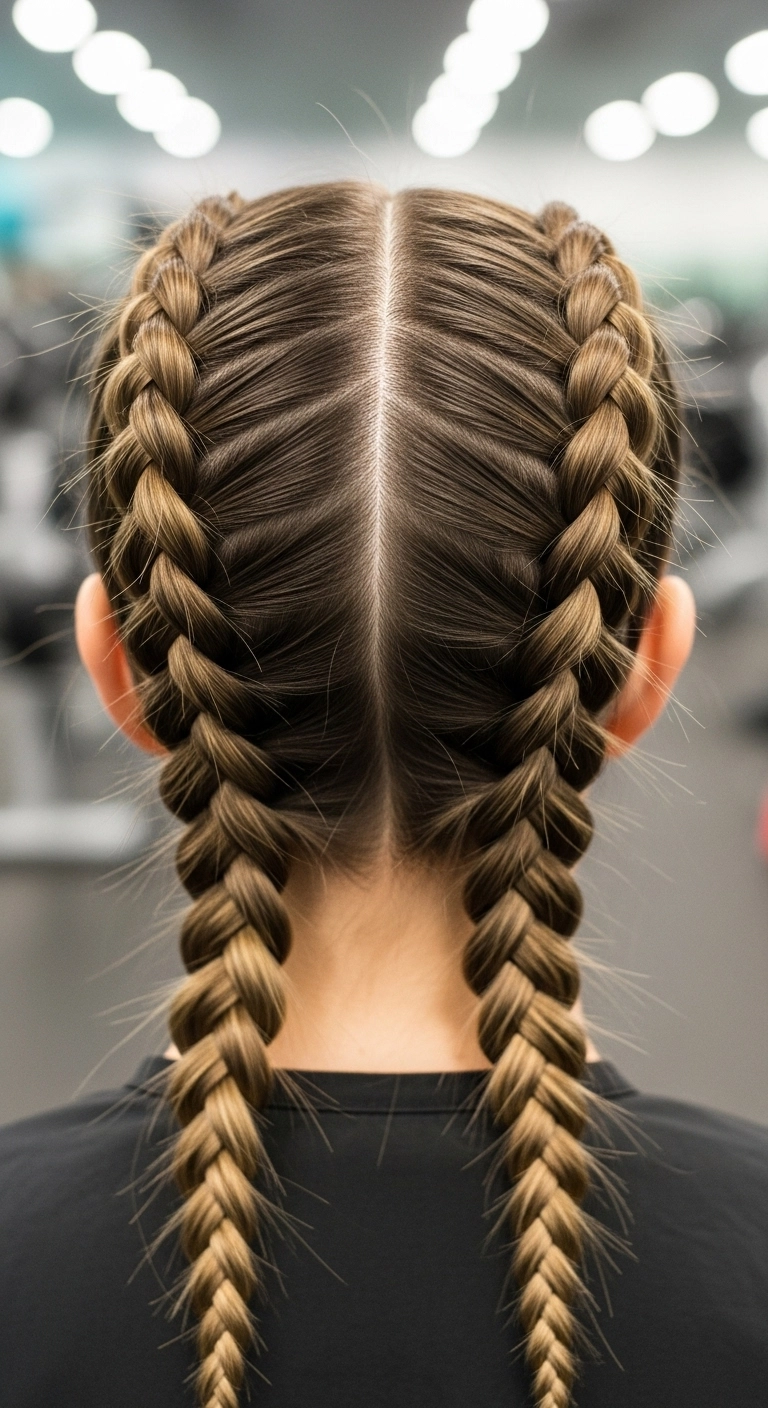
I love these clean double Dutch boxer braids!! I love how crisp the center part is and how securely everything stays in place, making it the absolute best look for a workout or a busy day running errands. Keeping your sections small and even as you braid underneath is the secret to getting that bold, 3D raised effect!
How to do this
1. Start with clean, detangled hair and create an ultra-straight center part from the front hairline all the way down to the nape of the neck using the rat tail comb listed below.
2. Clip away one side tightly to keep it completely out of the way while you work on the first braid.
3. Apply a small amount of the smoothing hair styling wax stick listed below along the hairline and parting to tame flyaways and ensure sharp, sleek definition.
4. Take a small triangular section right at the front hairline, divide it into three equal strands, and begin a Dutch braid by crossing the strands under the middle rather than over.
5. Continue braiding backward towards the nape of the neck, consistently incorporating clean, even sections of hair into the outer strands before passing them underneath.
6. Once you reach the nape and all hair from that side is incorporated, continue braiding in a standard three-strand underhand pattern down the length of the tail and secure with the clear mini elastic bands listed below.
7. Repeat the exact same braiding process on the opposite side, keeping tension firm and consistent.
8. Mist both braids thoroughly with the strong hold anti-humidity hairspray listed below to lock down any remaining baby hairs and keep the style sweat-proof.
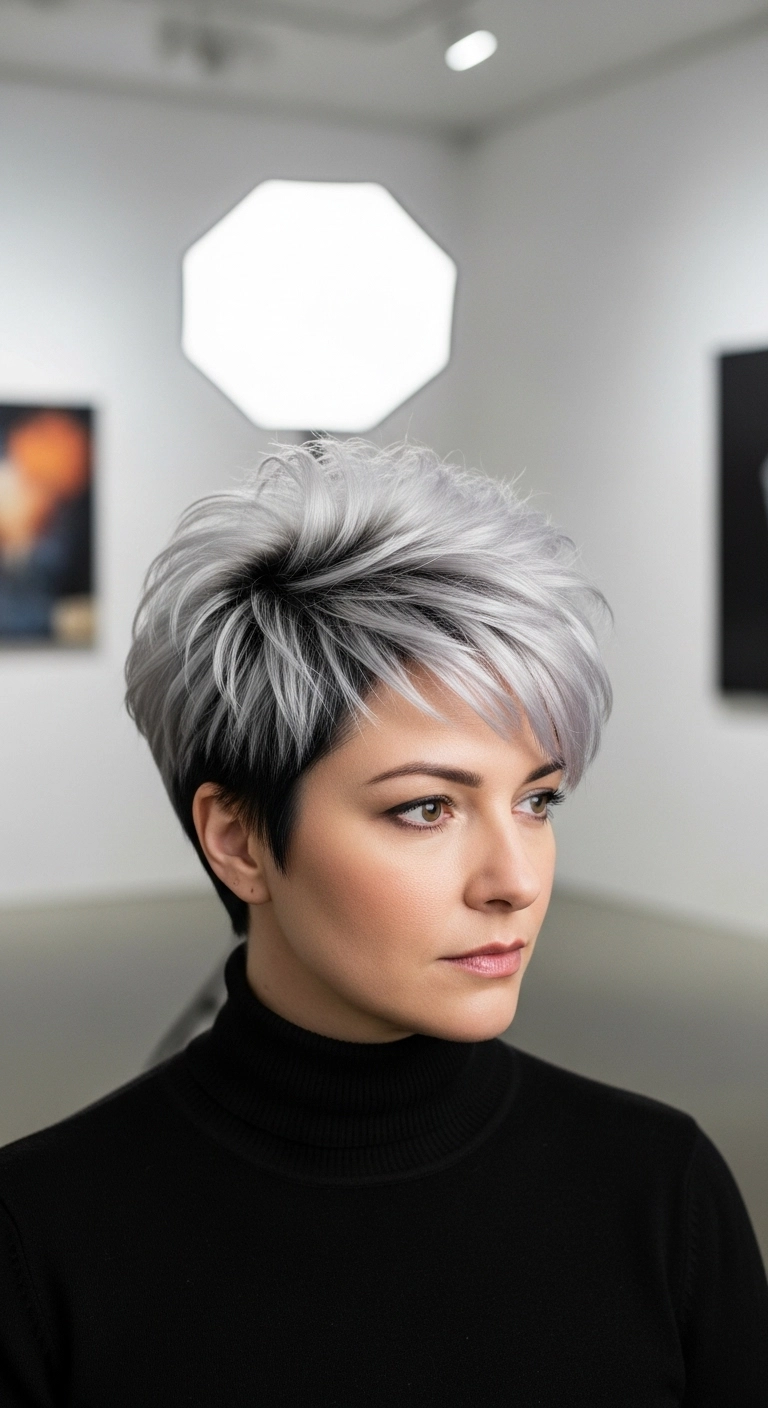
A striking pixie cut is the ultimate power move, especially when paired with a high-contrast color palette. The combination of a deep, tapered undercut against icy silver feathered layers gives incredible depth and modern edge. If you want a short style that feels light and effortless while packing maximum visual impact, playing with root contrast and soft piecey texture is the way to go.
How to do this
1. Start by getting a tailored undercut pixie cut with closely tapered sides and back, leaving textured, longer feathered layers through the crown and front fringe.
2. Maintain dark natural roots while pre-lightening the top canopy to a pale level 10 blonde, then tone using the cool silver toner listed below to achieve an icy metallic finish.
3. On freshly washed, damp hair, apply a dollop of the lightweight volumizing mousse listed below through the roots and mid-lengths of the longer sections.
4. Blow dry using the small ceramic round brush listed below, lifting upwards at the crown to maximize volume and sweeping the front layers forward and to the side.
5. Rub a dime-sized amount of the matte styling paste listed below between your palms and gently piece out the ends to define texture and create airy separation.
6. Finish with a spritz of the flexible hold hairspray listed below to keep the feathered volume in place all day without feeling stiff.
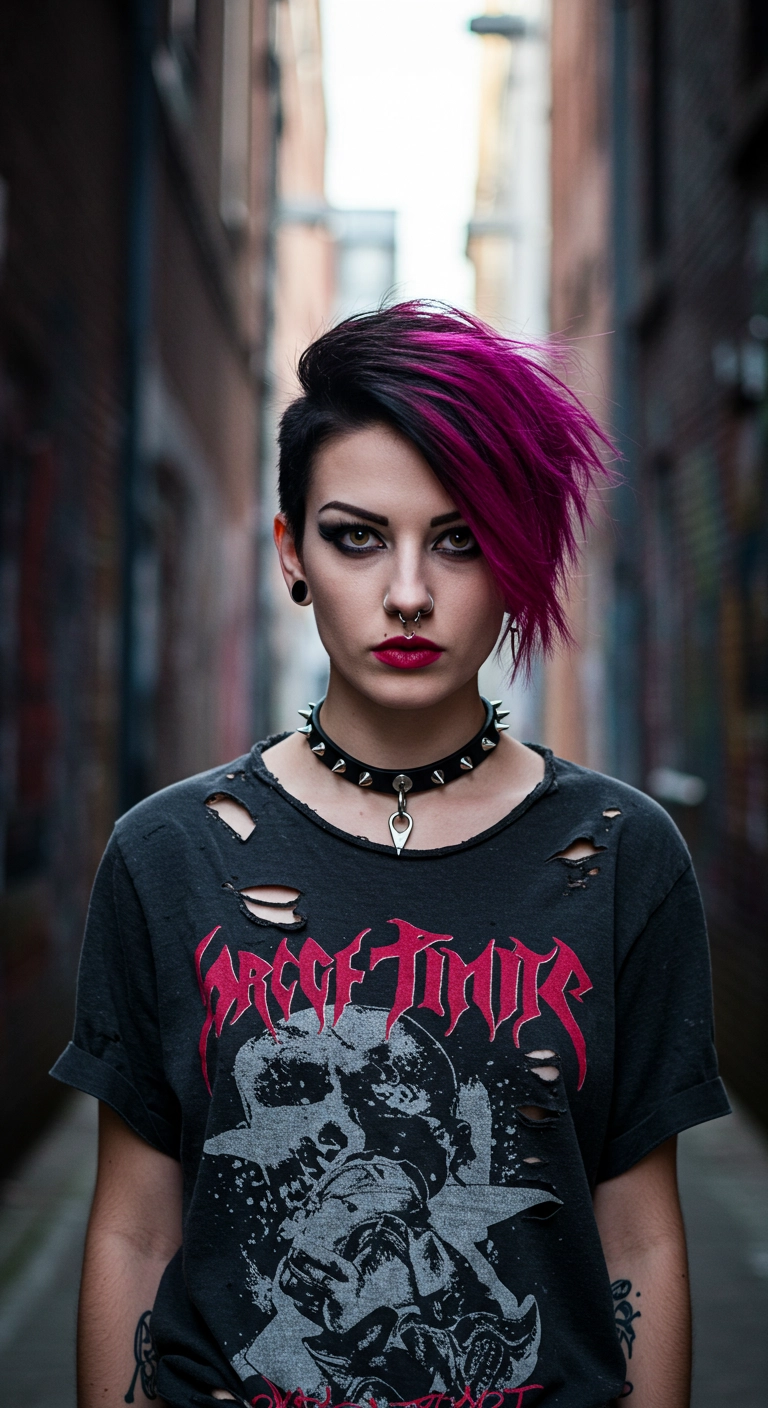
A bold pixie cut with a severe side sweep is the ultimate power move if you want an edgy, alternative look. The contrast between deep black and vivid magenta turns the front layers into a total focal point. Don't be afraid to keep the styling piecey and slightly undone; using a touch of matte paste at the ends will give you that effortlessly sharp, lived-in punk rock texture that stays in place all day.
How to do this
1. Start by prepping damp hair with a small amount of lightweight heat protectant spray to protect against blow-drying and styling damage.
2. Use a directional blow-dry technique: direct the shaved/tapered side down flat against the scalp, then blow-dry the crown and longer fringe up and over across the face to create lift and asymmetric sweep using a vent brush.
3. Once dry, smooth out the ends of the long fringe with a slim mini flat iron to create jagged, defined points rather than rounded curls.
4. Emulsify a dime-sized amount of matte texture styling paste listed below between your palms and work it through the roots and ends to add separation and hold the piecey texture.
5. Dust a tiny sprinkle of volumizing root powder right at the crown where the fringe parts to keep the dramatic volume locked in all day.
6. Finish with a flexible strong-hold finishing hairspray listed below, focusing on the spiked ends of your fringe so they maintain their sharp, edgy shape.
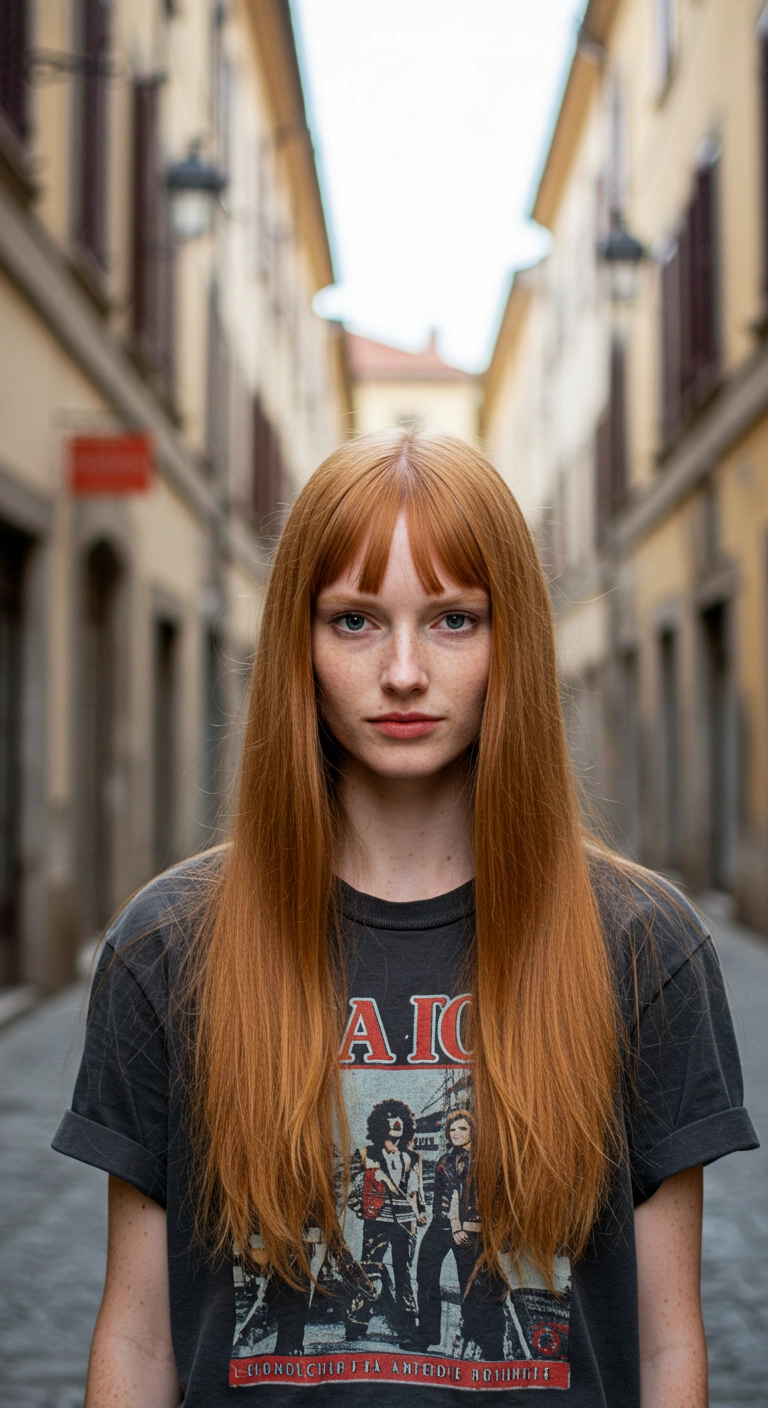
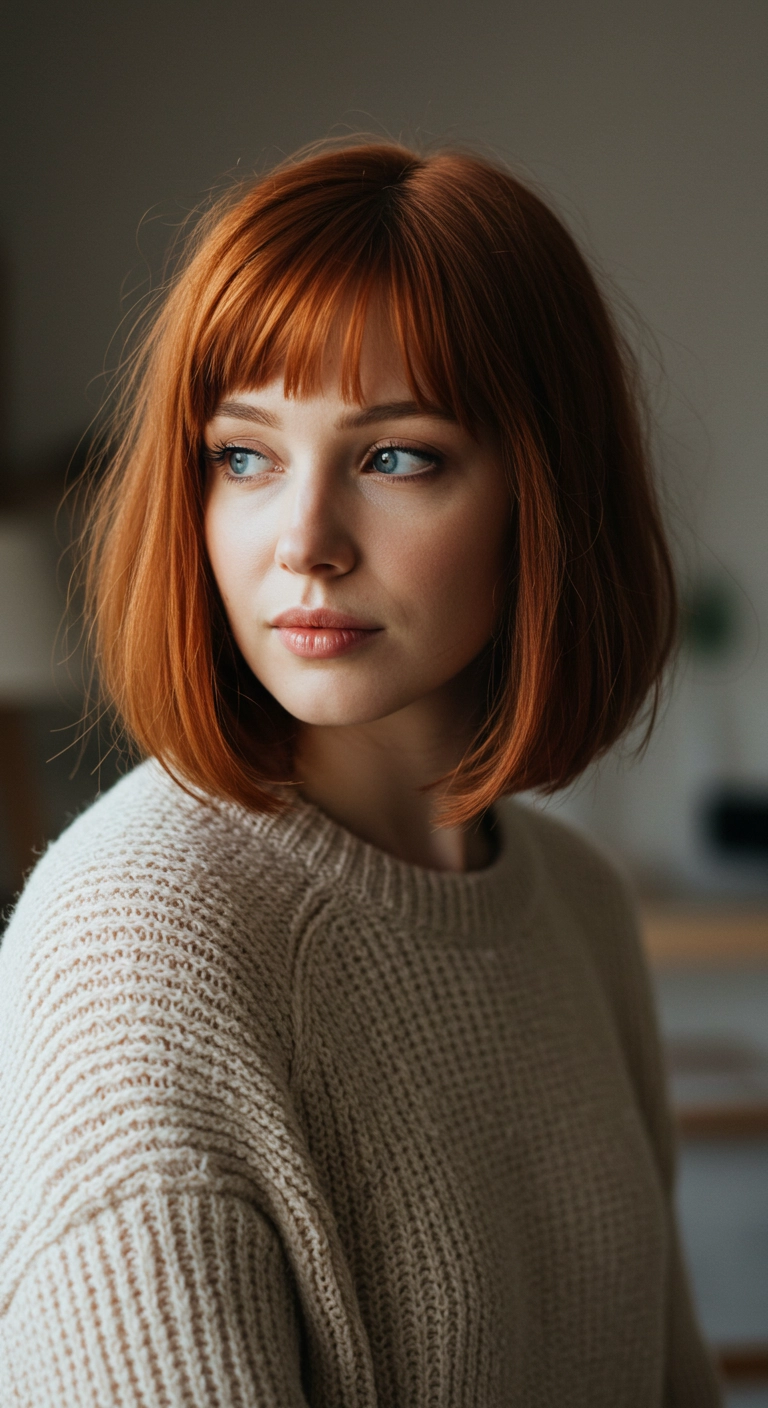
Are you completely obsessed with rich ginger tones and effortless fringe like I am? I added this stunning long copper style to the list because it gives that effortlessly cool indie-rock edge while remaining super wearable! You can pair these piecey micro bangs with a band tee for a grunge aesthetic, or blow it completely straight for a high-fashion runway feel. It totally brings out lighter eyes and freckles in the best way possible!
How to do this
1. Start by washing hair with the gentle color-protecting shampoo listed below to keep your copper hue super vibrant and fresh.
2. On damp, towel-dried hair, apply a dime-sized amount of the heat protectant smoothing serum listed below from mid-lengths to ends.
3. Section out your short bangs and blow-dry them flat using a small paddle brush or fine-tooth comb, directing the airflow straight down from above to keep them sleek and piecey.
4. Blow-dry the rest of your hair in horizontal sections with the ceramic round brush listed below, gently pulling straight down with a soft roll at the ends for natural movement.
5. If needed, take a flat iron over small face-framing sections to polish the look while maintaining a natural, effortless texture.
6. Finish off by lightly misting the lightweight texturizing spray listed below through the lengths and pinch the tips of your bangs with a touch of hair pomade for that cool-girl separation.
Products Used
Color-Protecting Sulfate-Free Shampoo for Red Hair
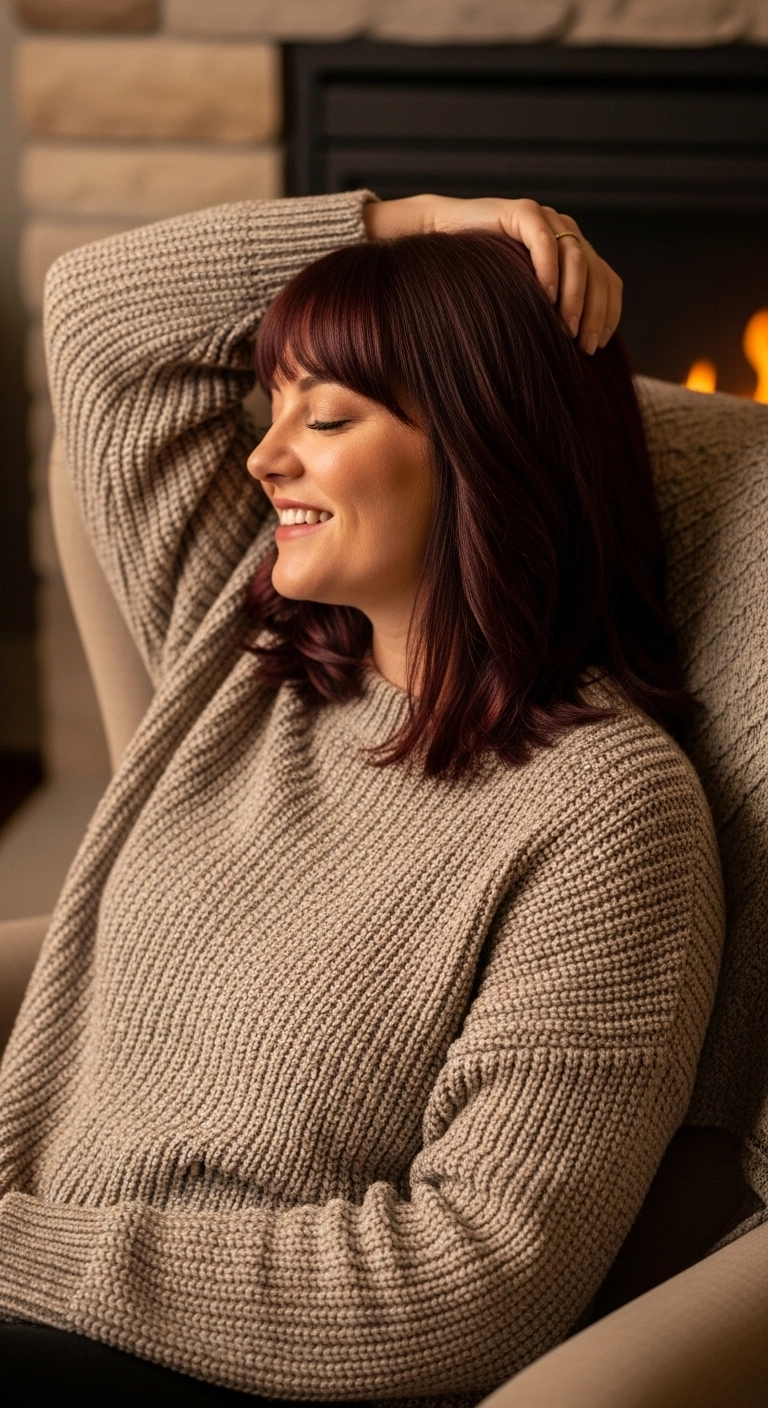
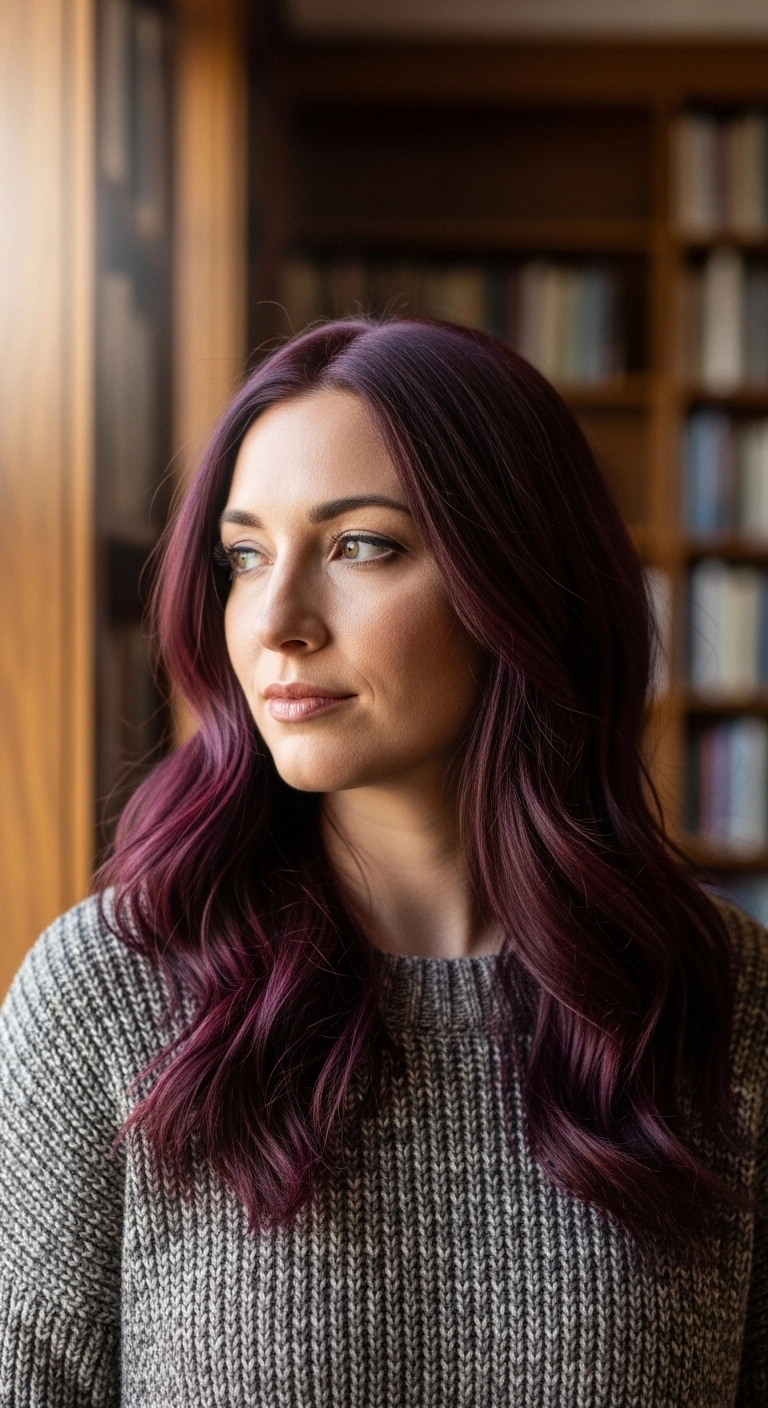
The rich burgundy lob with bangs. Such a vibe! I love how warm and cozy this deep wine shade feels, especially paired with soft brow-skimming bangs. It’s effortless, flirty, and gives everyday hair an instant elevated look without requiring hours of styling.
How to do this
1. Start on freshly washed hair and apply a quarter-sized amount of the smoothing blowout cream listed below to damp mid-lengths and ends.
2. Mist your entire head with the thermal heat protectant spray listed below to shield your rich color from heat fade.
3. Blow-dry your fringe first using the small ceramic round brush listed below, rolling slightly under and sweeping gently to eliminate cowlicks.
4. Section off the rest of your hair into 2-inch horizontal layers and blow-dry with the medium boar bristle round brush listed below, turning the ends under softly for natural bounce.
5. Warm a couple of drops of the lightweight shine hair serum listed below between your palms and smooth over the lengths to add luminous gloss and tame flyaways.
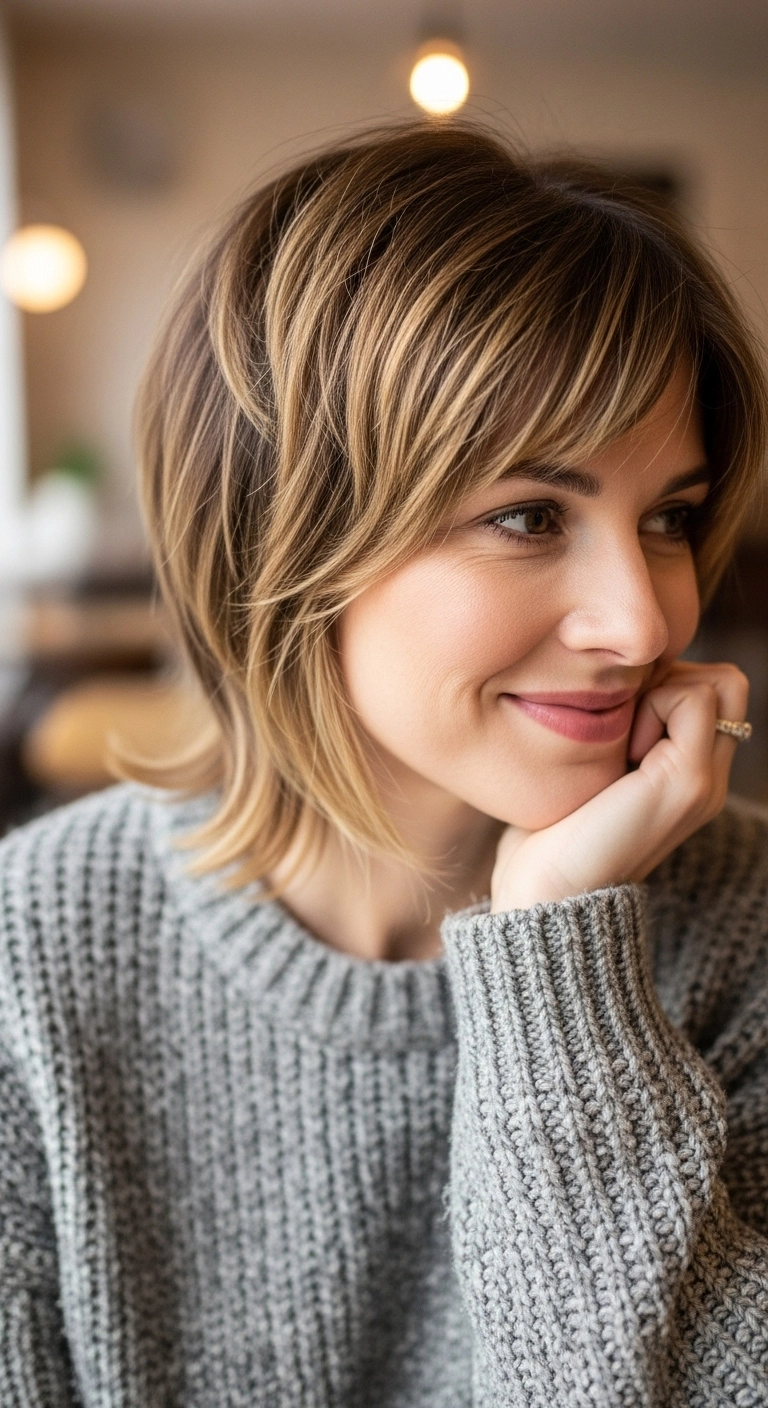
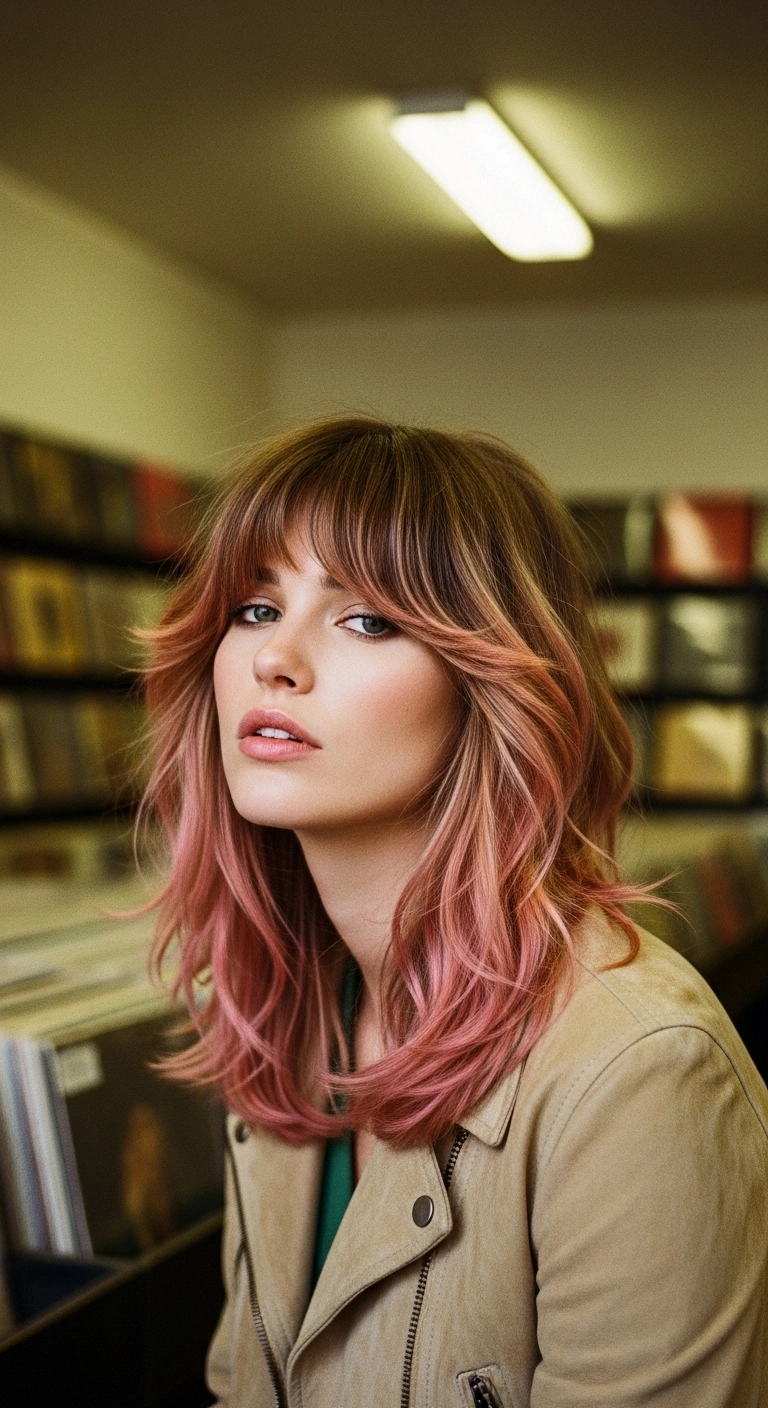
I love how effortless and chic a feathered bob looks, especially when it has that subtle outward flip at the ends! The soft, side-swept layers do an amazing job framing the cheekbones and jawline, making it super flattering on almost every face shape. Adding warm golden highlights over a light brown base gives it so much depth and makes styling it with a simple round brush look like a million bucks.
How to do this
1. Start with towel-dried hair and apply a quarter-sized amount of the lightweight volumizing mousse listed below from roots to ends for lift and movement.
2. Mist your strands thoroughly using the thermal heat protectant spray listed below to shield your hair during heat styling.
3. Using a medium ceramic round brush and blow dryer, lift sections upward at the crown to build body, rolling the brush through the mid-lengths.
4. When blow-drying the lower nape sections, roll the brush upward and outward to create that flirty, flicked-out edge.
5. Sweep the fringe forward and slightly to the side with the round brush, blowing dry on low speed to set a soft, wispy curtain effect.
6. Work a pea-sized dab of the pliable texturizing paste listed below between your palms and gently piece out the ends and face-framing layers.
7. Finish the style with an all-over mist of the flexible hold hairspray listed below to keep the movement natural without feeling stiff.
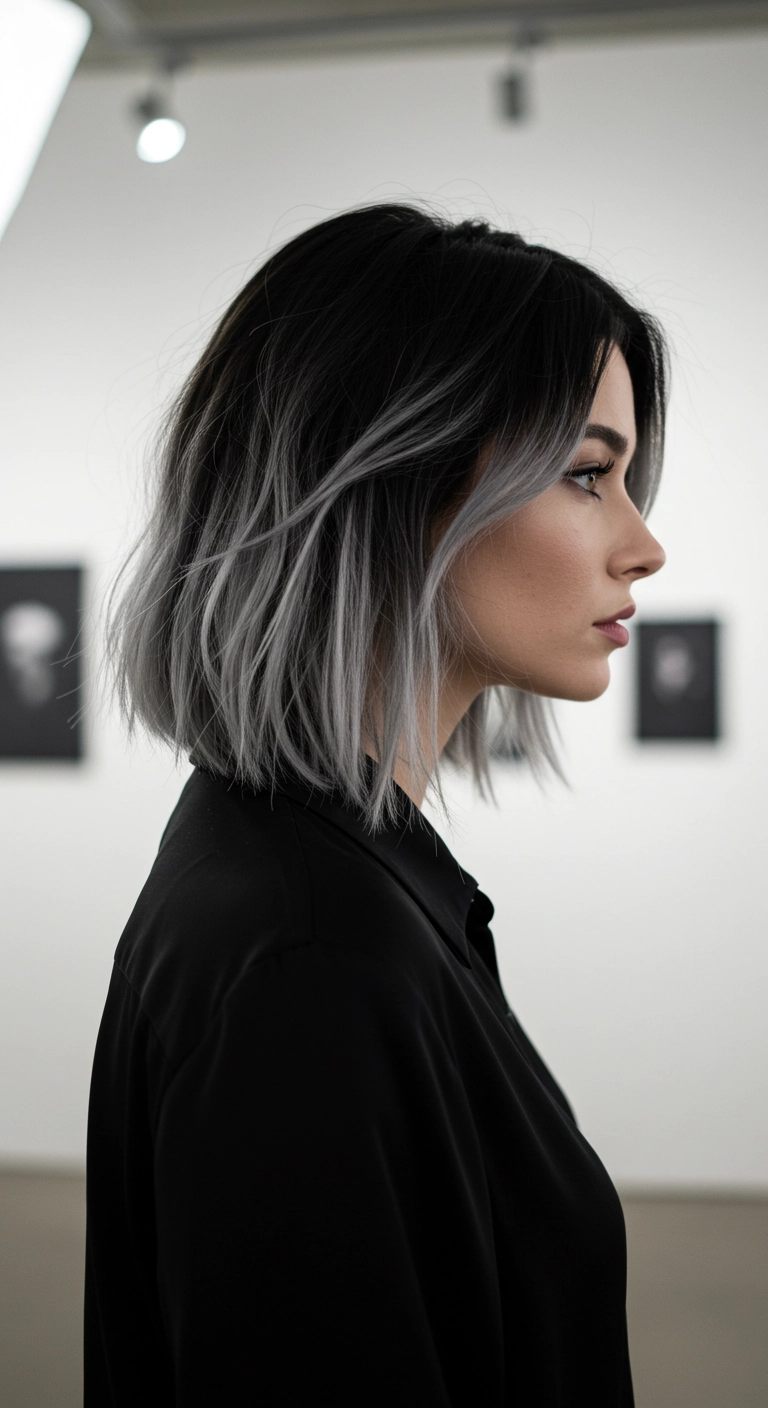
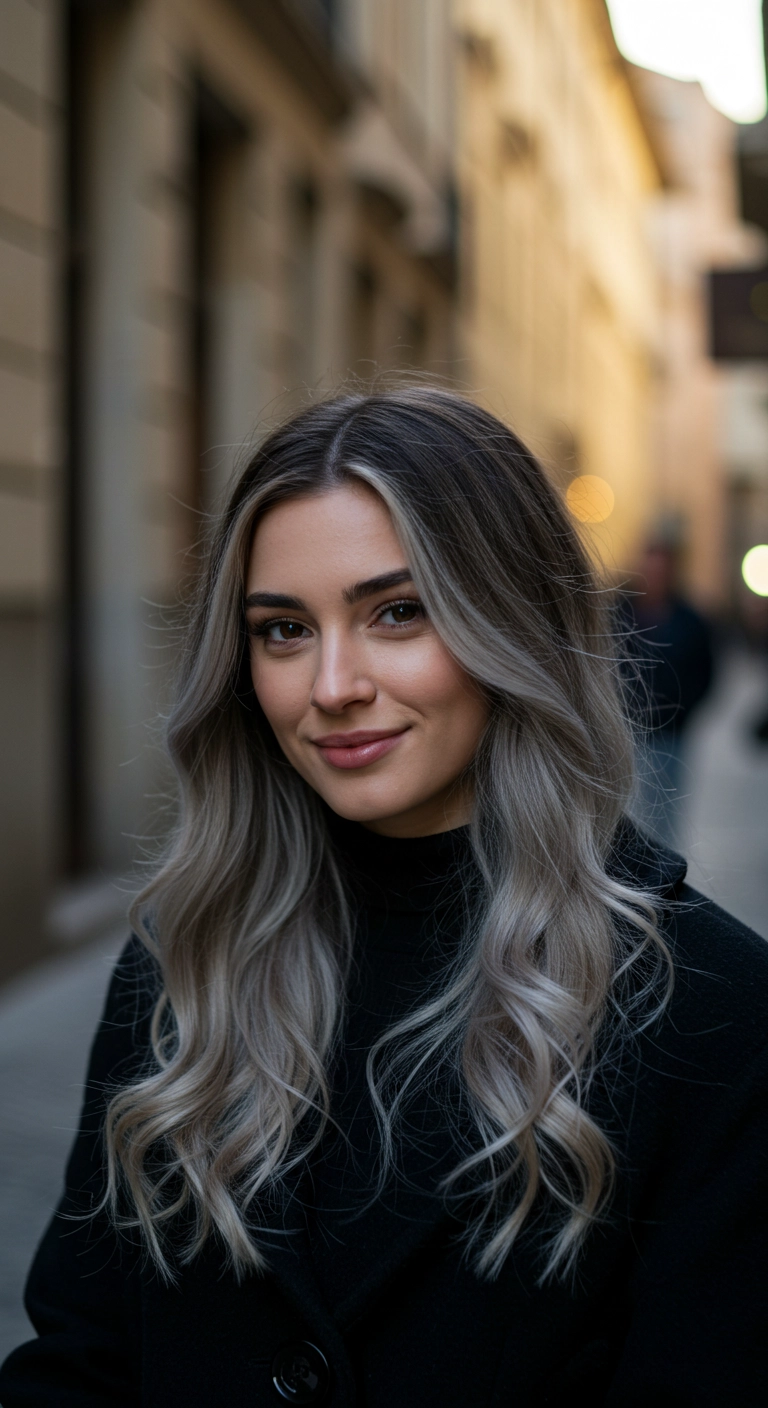
I've always been obsessed with high-contrast hair colors, but this black-to-smoky-silver melt completely stole my heart! The seamless blend between the natural dark roots and the cool icy ends makes it look super edgy without feeling harsh. I styled it with a straight, slightly textured finish to keep that effortless, modern vibe intact. If you want a cool-toned statement cut that turns heads wherever you go, this lived-in silver lob is definitely the one to try!
How to do this
1. Start by prepping towel-dried hair with a lightweight leave-in conditioner and a heat protectant spray using the heat protectant spray listed below to shield strands before heat styling.
2. Blow-dry hair using a medium round brush or paddle brush, lifting slightly at the roots for natural volume while keeping the overall shape sleek and straight.
3. Once the hair is fully dry, take a 1-inch flat iron and smooth down small sections from mid-lengths to ends, adding an extremely subtle, natural bend right through the mid-shafts for that effortless, lived-in feel.
4. To enhance the cool, smoky silver color and prevent brassiness between salon visits, make sure to wash weekly with the purple toning shampoo listed below.
5. Work a tiny drop of nourishing hair oil through the bleached ends using the lightweight hair styling oil listed below to restore moisture and add high shine.
6. Finish the look by misting a generous amount of texturizing spray using the dry texturizing spray listed below through the mid-lengths and ends, shaking it out lightly with your fingers for defined, piecey separation.
OK, if you ever wanted a blonde that absolutely commands attention in every lighting, this is it! We kept the base a gorgeous golden blonde with a super subtle root tap to give it depth, then styled it out with a polished blowout and just a hint of a bend. It's bold, sleek, and gives off major futuristic chic energy!
How to do this
1. Prep freshly washed, damp hair by applying a heat protectant spray with argan oil listed below from roots to ends to shield against heat damage.
2. Blow-dry the hair smooth using a ceramic round blowout brush listed below, focusing on lifting at the roots for subtle body and smoothing down the cuticles.
3. Use a tail comb to carve a clean, precise center part down the middle of the scalp.
4. Take a 1.5-inch titanium curling iron listed below and wrap large vertical mid-length sections outward just once to create soft, flowing, elongated bends rather than tight curls.
5. Gently brush through the lengths with a cushioned boar bristle paddle brush listed below to relax the wave pattern into a seamless, flowing drape.
6. Finish the look by misting a lightweight smoothing hair shine serum listed below across the mid-lengths and ends for a sleek, reflective finish.
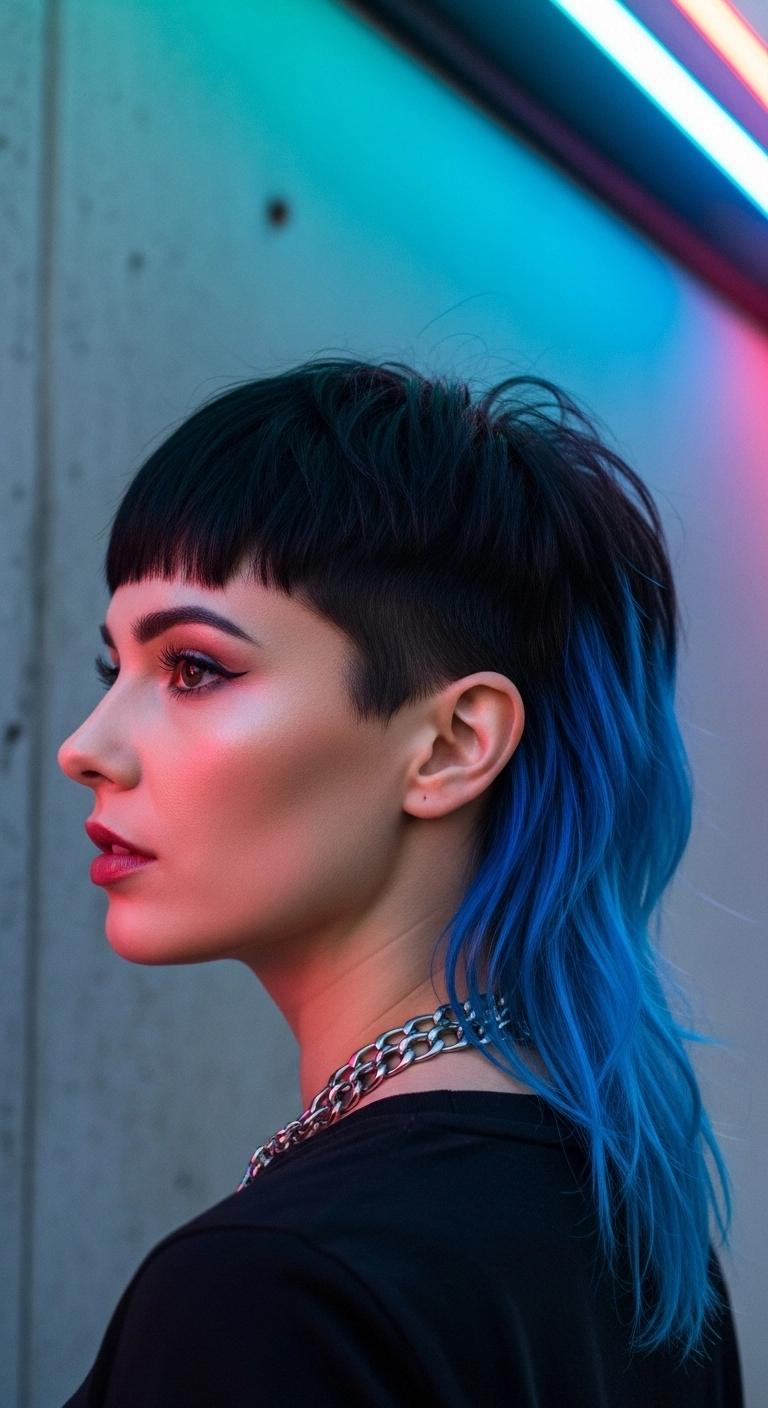
I’m seriously obsessed with this edgy modern mullet. The contrast between that midnight black base and the shocking electric blue tips is just pure cyberpunk perfection. It has super sharp micro bangs and tight faded sides that show off your cheekbones, while the longer layers in the back keep it fun and rebellious. This is definitely the ultimate cool-girl statement haircut for concerts, festivals, or anyone wanting to totally reinvent their vibe.
How to do this
1. Start by sectioning off the hair to establish the modern mullet shape, buzzing or closely clipper-cutting the temple and sideburn area using electric hair clippers listed below.
2. Precision cut the fringe straight across the mid-forehead to create sharp micro bangs, then layer the crown heavily for choppy texture and movement.
3. Keep the nape section long and point-cut into the ends to give them a piecey, feathered finish.
4. Pre-lighten the lower half of the back tail to a clean level 9 or 10 blonde using the hair lightening powder and developer listed below.
5. Apply a vivid semi-permanent electric blue dye to the bleached ends, seamlessly feathering upwards into the natural black base to create a soft dip-dye gradient.
6. Once rinsed and dried, rub a dime-sized amount of the matte styling paste listed below between your palms and work it through the crown and bangs to separate pieces and give that lived-in, punk edge.
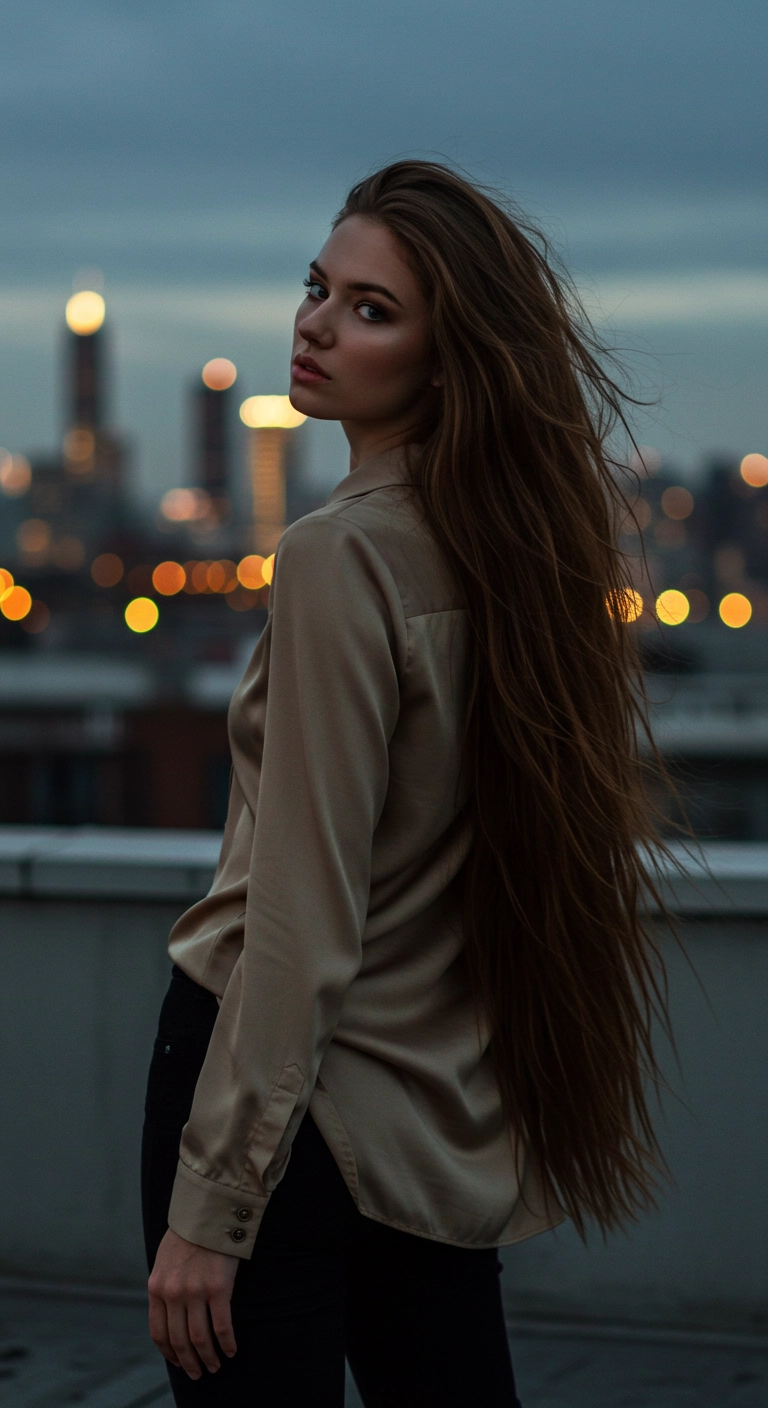
I’m seriously obsessed with this look. It’s that dreamy, Rapunzel-level extra long chestnut hair that flows effortlessly down past the waist. It has just enough soft texture and movement to feel super modern, chic, and completely lived-in rather than stiff. Whether you're dressing it up with a satin blouse for an evening date or letting it blow in the wind for everyday street style, this length makes an absolute statement.
How to do this
1. Prep freshly washed, damp hair with a lightweight leave-in conditioner and a thermal spray using the heat protectant spray with argan oil listed below to safeguard those ultra-long lengths from heat damage.
2. Gently detangle starting from the ends and moving upward towards the roots using the wide-tooth detangling comb listed below to prevent breakage.
3. Blow-dry using a high-velocity blow dryer with a concentrator nozzle and a large ceramic round brush, smoothing the cuticle downwards to create natural sleekness without losing volume.
4. For ultra-long lengths that may need extra fullness or length, seamlessly blend in clip-in or tape-in pieces using the seamless clip-in remy human hair extensions listed below.
5. Use a large 1.5-inch curling iron or flat iron to add just the slightest, barely-there bend through mid-lengths for a wind-blown, natural aesthetic.
6. Finish by warming a few drops of the lightweight hair smoothing serum listed below between your palms and running it down through the ends to tame flyaways and enhance glossy shine.
7. Give the hair a light mist of the flexible hold hairspray listed below for touchable, all-night hold that still moves beautifully in the breeze.
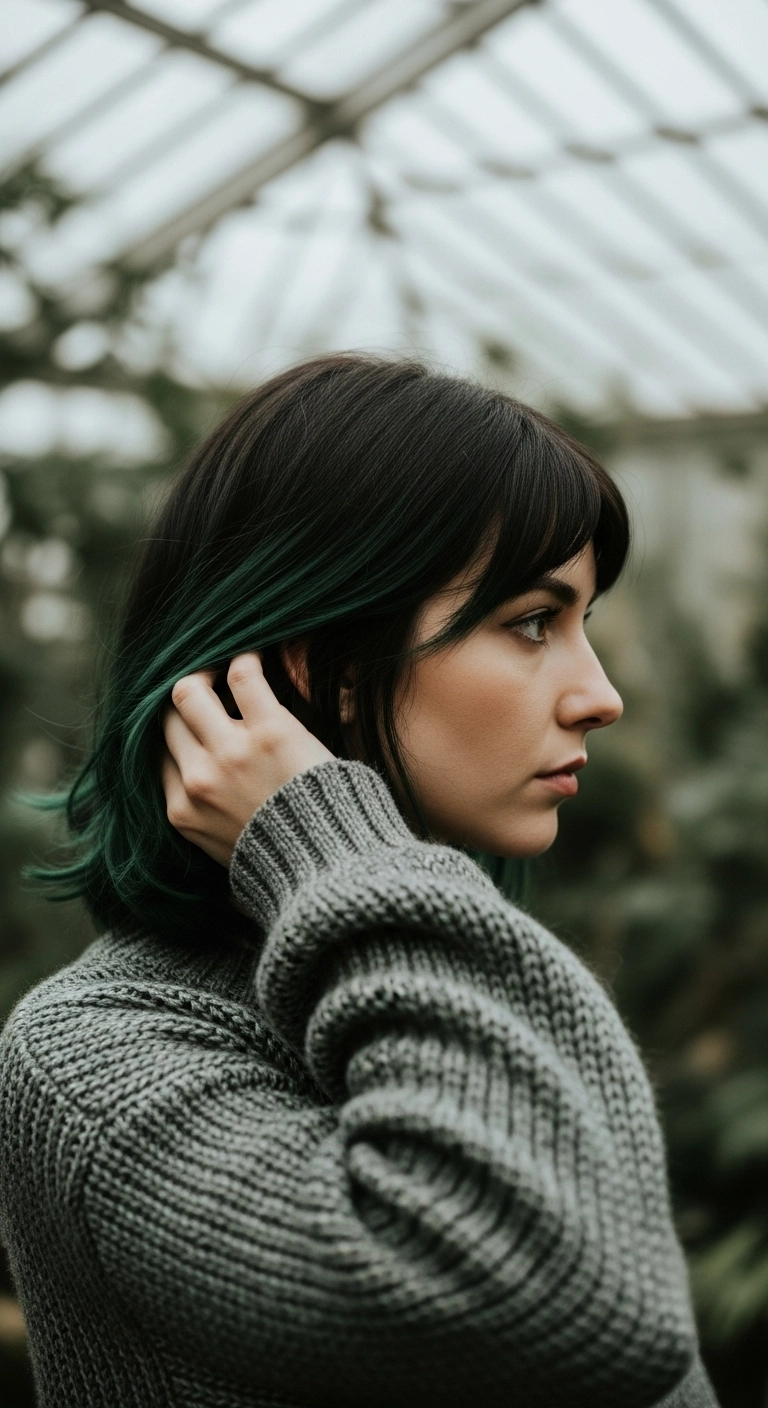
If you want a moody, edgy color without committing your entire head, this look is pure magic. I'm obsessed with how the deep emerald green secretly peeks through the classic black lob every time you move or tuck your hair behind your ear. It gives total mysterious cool-girl vibes while staying surprisingly wearable!
How to do this
1. Start by sectioning away the crown and top layers of your hair using the hair sectioning clips listed below to isolate the underneath layer.
2. Lighten the lower interior section using the gentle hair bleaching kit listed below until you reach an even level 8 or 9 pale yellow base.
3. Apply a rich, semi-permanent emerald green dye using the direct dye brush and bowl listed below to saturate the pre-lightened underneath sections thoroughly.
4. Let the color process according to instructions, then rinse with cold water and lock in hydration with the color-safe deep conditioning mask listed below.
5. Cut soft, wispy bangs that gently curve across the forehead and blend slightly into subtle face-framing angles along the jawline.
6. Blow dry using the ceramic round brush listed below, turning the ends slightly outward and tucking one side behind the ear to show off that gorgeous hidden pop of green.
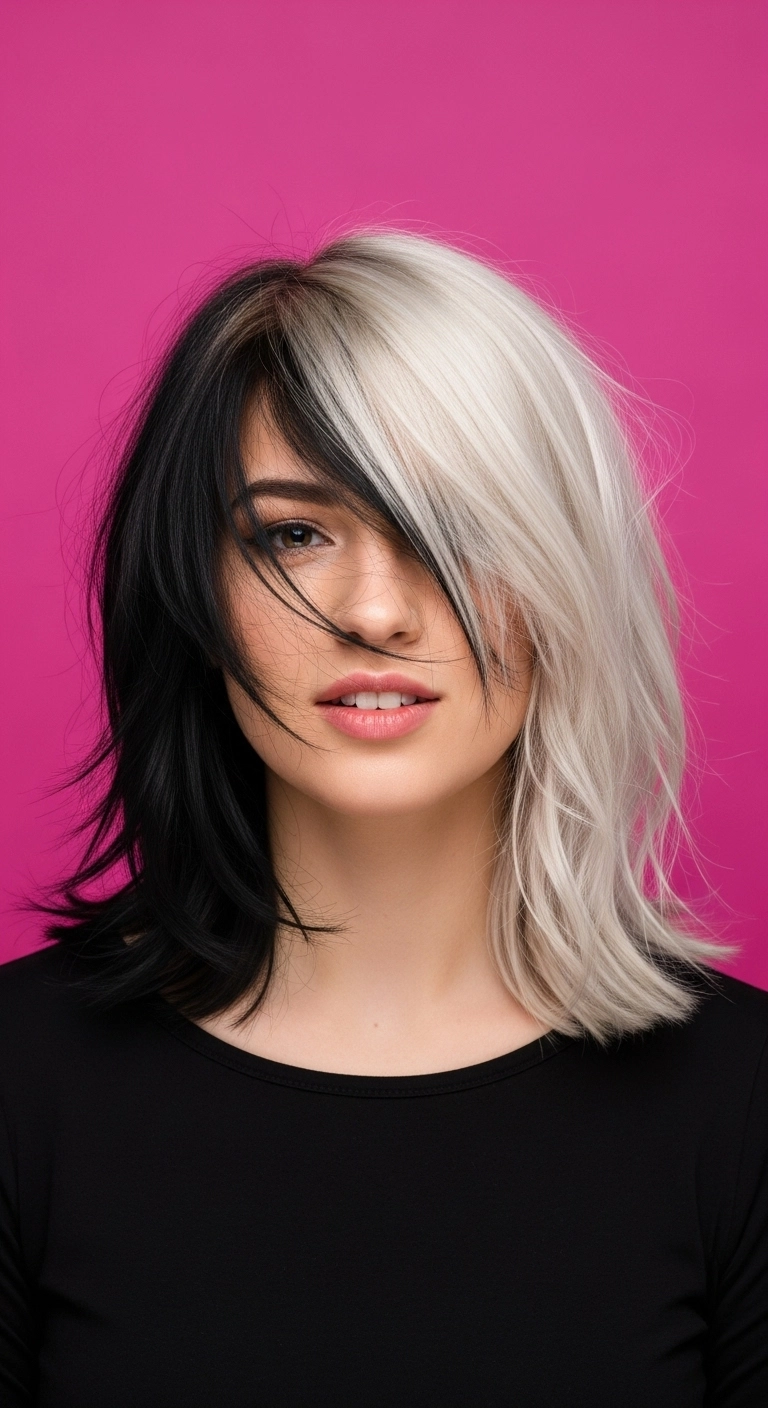
I am totally obsessed with split-dye hair, and this black-and-platinum combo is giving peak edgy energy. You get the best of both worlds—moody jet black on one side and icy, high-impact blonde on the other. Paired with that deep sweeping fringe and textured collarbone cut, it looks cool without trying too hard.
How to do this
1. Start by parting clean, dry hair precisely down the center from forehead to nape to prep for the split dye, clipping each half securely away.
2. Lighten the chosen half of your hair to a pale level 10 blonde using the hair bleach powder and developer listed below, making sure to avoid overlapping onto the opposite section.
3. Once lifted, tone the blonde side to eliminate brassiness using the cool violet toning shampoo listed below to achieve an icy platinum finish.
4. Apply a rich jet-black demi or permanent color to the other half, rinsing each side carefully with cool water so the dark pigment doesn't bleed into the light side.
5. Prep damp hair with the lightweight heat protectant spray listed below before blow-drying.
6. Use a medium round ceramic brush and blow dryer to sweep the long front fringe across the face, slightly beveling the ends of the lob outward for that effortless, piecey kick.
7. Finish the look by misting the dry texturizing spray listed below through the mid-lengths and roots to give it gritty volume and separation.
I think the best way to rock a dramatic silver color is with a bold, textured pixie cut. Keeping the roots dark and smudged gives it that effortless, modern edge and buys you so much more time between salon visits. You can sweep the top layers forward across your forehead for a softer fringe, or push them back and piece them out when you want something a little more daring!
How to do this
1. Start by washing hair with a purple toning shampoo to keep cool silver tones bright and eliminate brassiness.
2. Apply a dime-sized amount of the lightweight blow dry smoothing cream listed below to damp hair.
3. Using a small paddle or flat vent brush, blow-dry the hair forward and to one side, following the natural contour of your head to create a sleek yet textured drape.
4. For piecey definition and separation on the bangs and crown, work a pea-sized amount of the matte styling paste listed below between your fingertips.
5. Lightly pinch the ends of the fringe across the brow line to achieve that wispy, piecey fringe finish.
6. Lock the texture and root volume in place using the flexible hold finishing mist listed below.
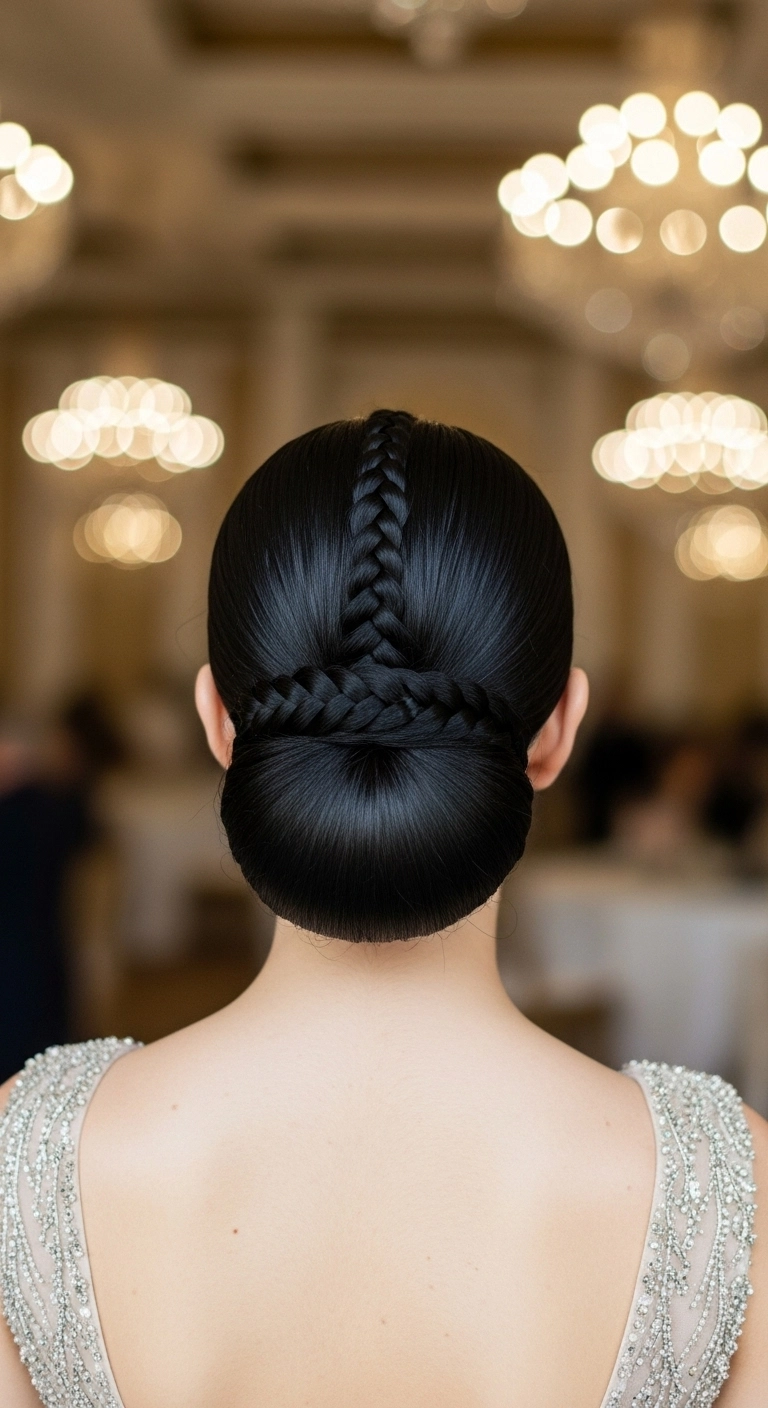
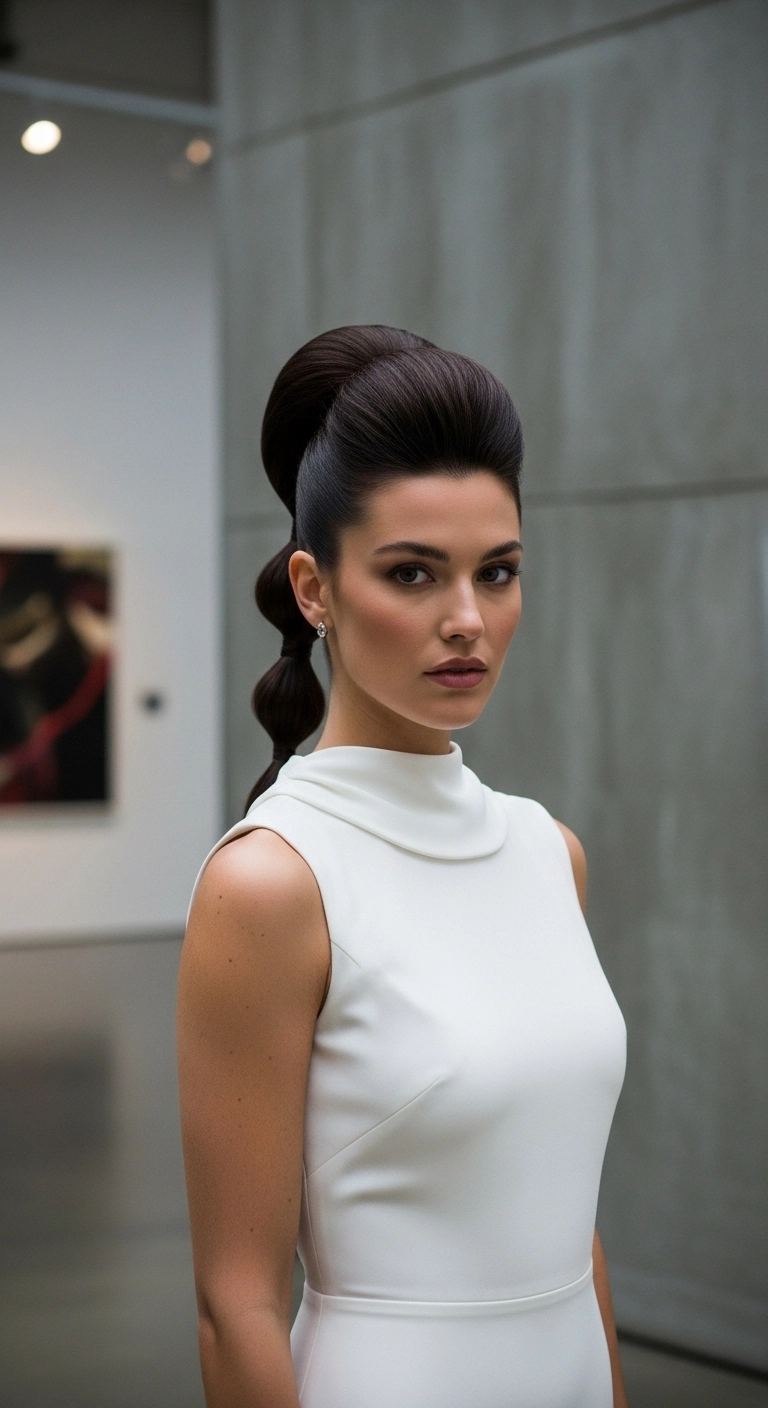
Isn’t this sculpted braided chignon just pure royal perfection?? This hairstyle looks unbelievable for brides, formal galas, or black-tie events where you want every single strand to stay flawlessly in place. What makes this look so striking is the contrast between the intricate central braid and that glassy, rounded low bun. It’s definitely a high-glam statement that turns heads from every angle!
How to do this
1. Start by straightening the hair thoroughly with a ceramic flat iron and applying a smoothing heat protectant serum to achieve an ultra-glossy, pin-straight base.
2. Section out the center strip of hair down the crown to begin your central inverted Dutch braid, keeping the sides neatly separated with sectioning clips.
3. Braid the center panel tightly against the head, working downward towards the nape, and secure the end with a small clear elastic band.
4. Gather the remaining side and lower sections seamlessly into a sleek low ponytail at the nape using a boar bristle smoothing brush and strong-hold hair styling pomade listed below.
5. Form the smooth voluminous chignon over a hair donut padding or roll the ponytail under and pin firmly against the nape with sturdy bobby pins.
6. Take the tail of the central braid and side accent braids, wrap them cleanly across the top rim of the bun to conceal the base, and pin seamlessly beneath.
7. Mist generously with the extra-hold shine hairspray listed below to eliminate any micro-flyaways and ensure a glass-like finish throughout the evening.
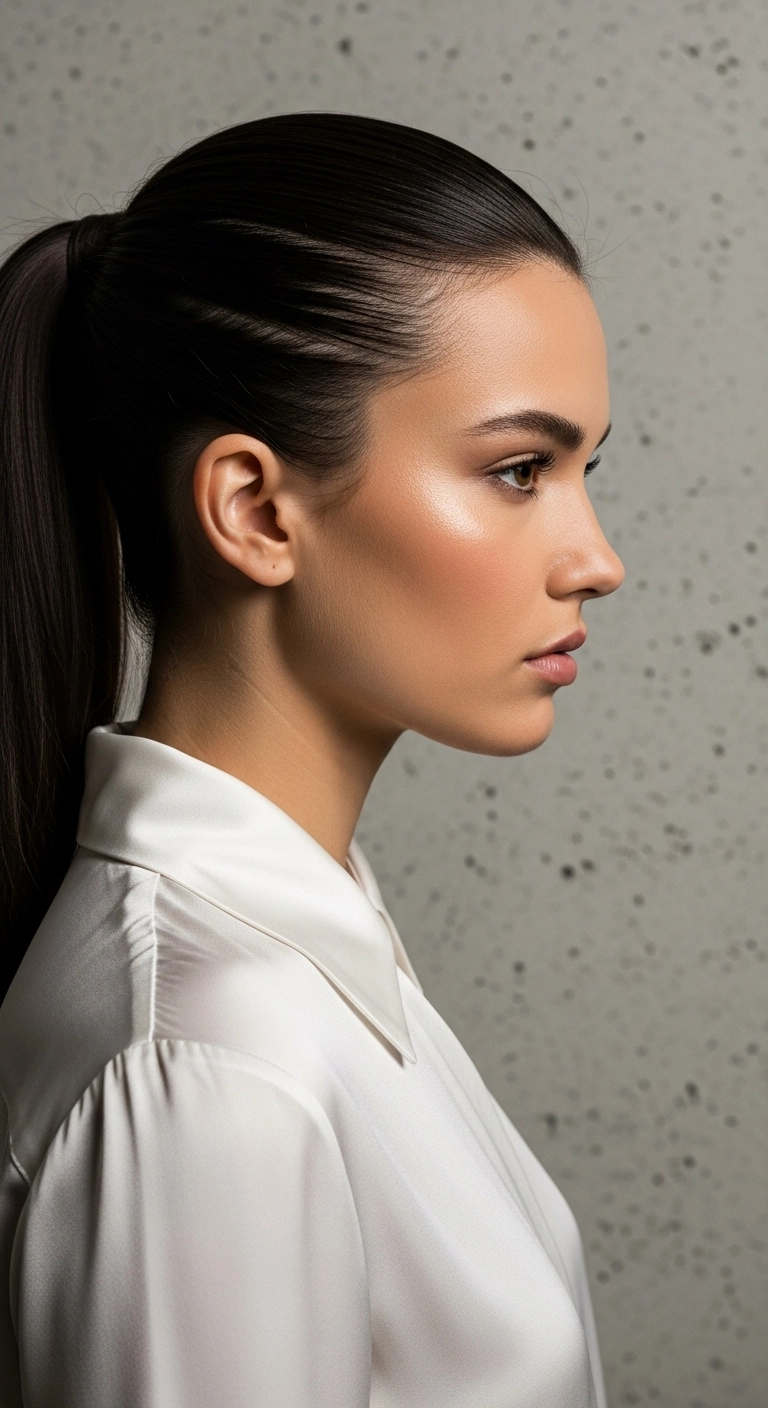
I’m honestly obsessed with this hairstyle. It gives that ultimate clean girl, snatched vibe that instantly elevates your entire face. It's chic enough to rock on a red carpet or at a formal event, but honestly looks just as amazing paired with a crisp button-down for the office or a casual dinner date. It's sophisticated, polished, and surprisingly quick to pull together once you get the brushing technique down.
How to do this
1. Start by prepping damp hair with a smoothing blow-dry cream listed below and blow it out straight using a round brush or paddle brush.
2. Once completely dry, run a flat iron through small sections to get that glass-like, pin-straight finish.
3. Apply a small amount of sleek styling pomade or hair wax listed below to your roots, temple, and hairline area.
4. Using the boar bristle smoothing brush listed below, sweep all your hair upward and back towards the crown, working section by section to eliminate any lumps or bumps.
5. Secure tightly at the crown with a strong snag-free elastic hair tie listed below.
6. Take a small half-inch piece of hair from underneath the ponytail and wrap it cleanly around the base to hide the hair tie, pinning it underneath with a bobby pin.
7. Finish the look by misting a strong-hold sleek hairspray and high-shine glossing mist listed below to tame every single flyaway and lock in incredible shine.
Embracing natural silver has never looked so effortless and chic. This layered collarbone lob has just the right amount of flicked-out bounce at the bottom to keep things playful, paired with a sweeping side fringe that frames the cheekbones beautifully. It feels totally fresh, super low-stress, and proves that going grey gracefully is always in style.
How to do this
1. Start with clean, towel-dried hair and apply a quarter-sized amount of the lightweight volumizing mousse listed below through the roots and mid-lengths to give lift and body.
2. Mist your strands thoroughly with the heat protectant spray listed below to shield your silver locks from yellowing and thermal damage.
3. Section hair into manageable tiers, beginning at the nape of your neck, and use the large ceramic round brush listed below while blow drying with the ionic hair dryer listed below.
4. Roll the brush outwards and upward at the ends as you dry each section to create those soft, bouncy, flicked-out ends.
5. Use the round brush on the front crown sections, rolling hair up and back away from the face to create a natural side-swept swoop that frames your cheekbones.
6. Finish by smoothing a tiny drop of the anti-yellowing silver hair serum listed below through the ends for brilliant shine, followed by a light mist of the flexible hold hairspray listed below to keep the bounce in place all day.
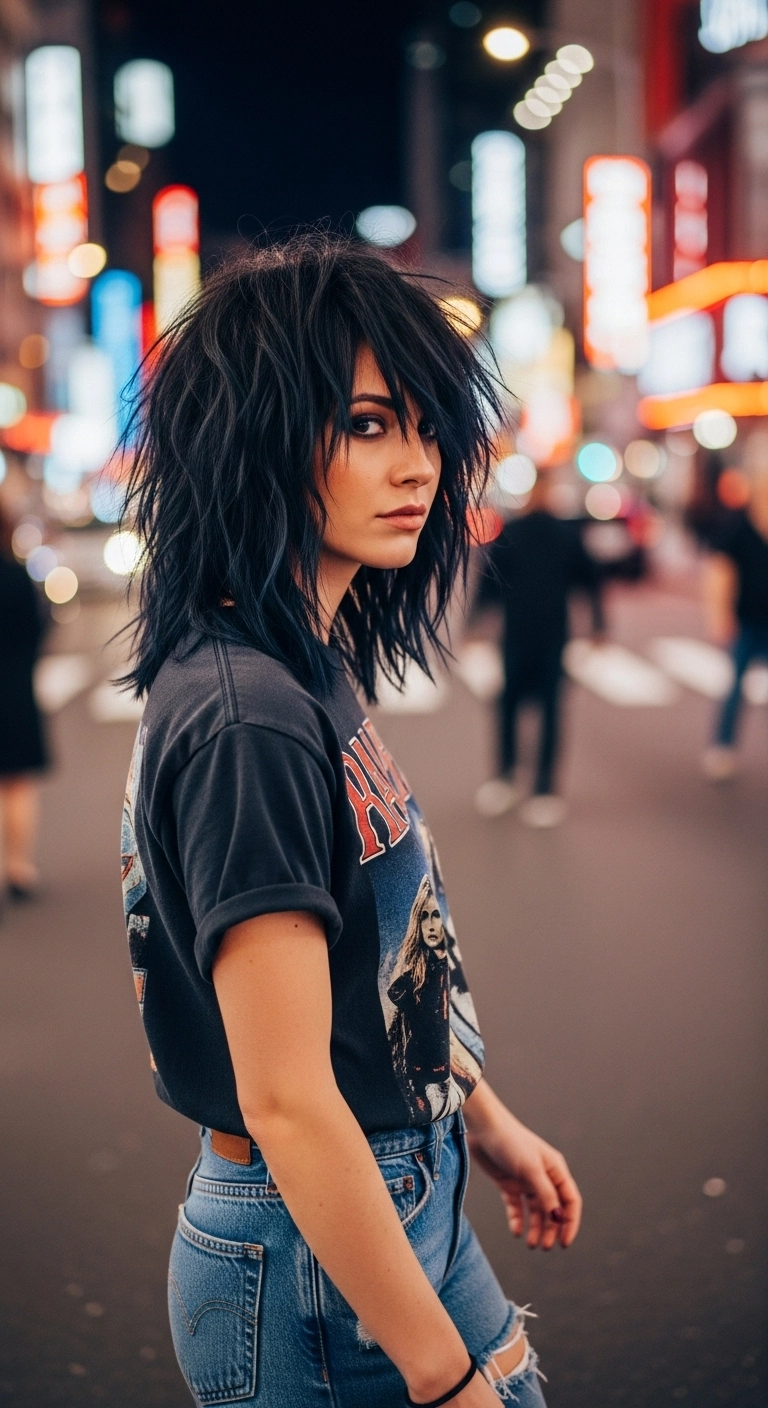
Total 80s rock-and-roll icon vibes right here. I’ve always been obsessed with heavy shag layers, and pairing that chopped-up fringe with deep inky black is just unmatched. It’s got that cool, lived-in bedhead volume that looks effortlessly cool paired with a graphic tee. Seriously, if you want something with tons of attitude and movement, this cut is it.
How to do this
1. Start on freshly washed, towel-dried hair and apply a golf-ball-sized dollop of the texturizing styling foam listed below from roots to ends for gritty body.
2. Flip your head upside down and rough-dry using a blow dryer with a concentrator nozzle, vigorously shaking your roots with your fingers to build maximum crown lift.
3. Once the hair is fully dry, take random 1-inch pieces and use a flat iron to create subtle, alternating bends and jagged flicks rather than smooth curls.
4. Generously mist the dry texturizing spray listed below throughout the mid-lengths and root area, flipping your head back and forth to disperse the grit.
5. Work a small dime-sized amount of the matte styling wax listed below between your palms and pinch individual tips around your fringe and outer layers to define that signature piecey, razor-cut texture.
6. Finish with a spritz of the flexible hold hairspray listed below to keep the edgy rock-and-roll volume intact all night.
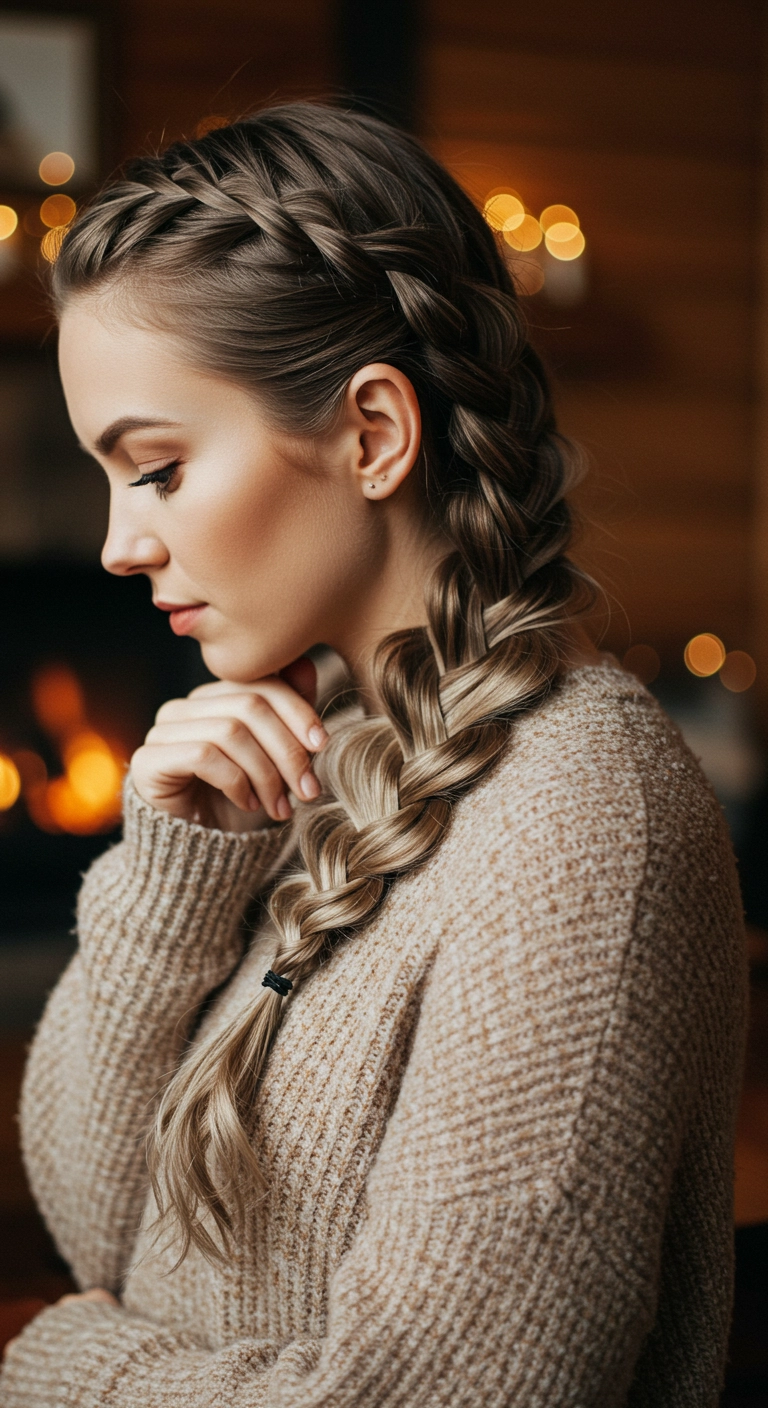
This hairstyle is what I like to call the cozy fireside side braid. You start right along your front hairline, weaving a reverse French or Dutch braid so the plait pops right off your head. Gather all your hair diagonally down around your ear and pull it over your shoulder. Once you tie off the end, just gently pancake the outer edges to make it look effortlessly full and thick.
How to do this
1. Prep your dry hair by misting lightly with the dry texturizing spray listed below to give your strands extra grip and volume.
2. Create a deep side part or angle the hairline back, then take a three-inch section of hair right along the front hairline.
3. Divide this piece into three equal strands and begin a Dutch braid (crossing the side strands under the middle strand) to make the braid sit prominently on top.
4. As you work your way down around the curve of your head and behind your ear, continuously incorporate small sections of hair into the outer strands.
5. Direct the braid diagonally across the nape of your neck so that all remaining hair gathers neatly over one shoulder.
6. Continue braiding down the length of your hair as a standard three-strand braid, leaving about two to three inches at the end.
7. Secure the end tightly using the small elastic hair ties listed below.
8. Gently pull and tug on the outer loops of the braid (pancaking) to widen the stitches and create that soft, thick, dimensional look.
9. Finish with a spritz of the flexible hold hairspray listed below to tame flyaways while keeping the style flexible and cozy.
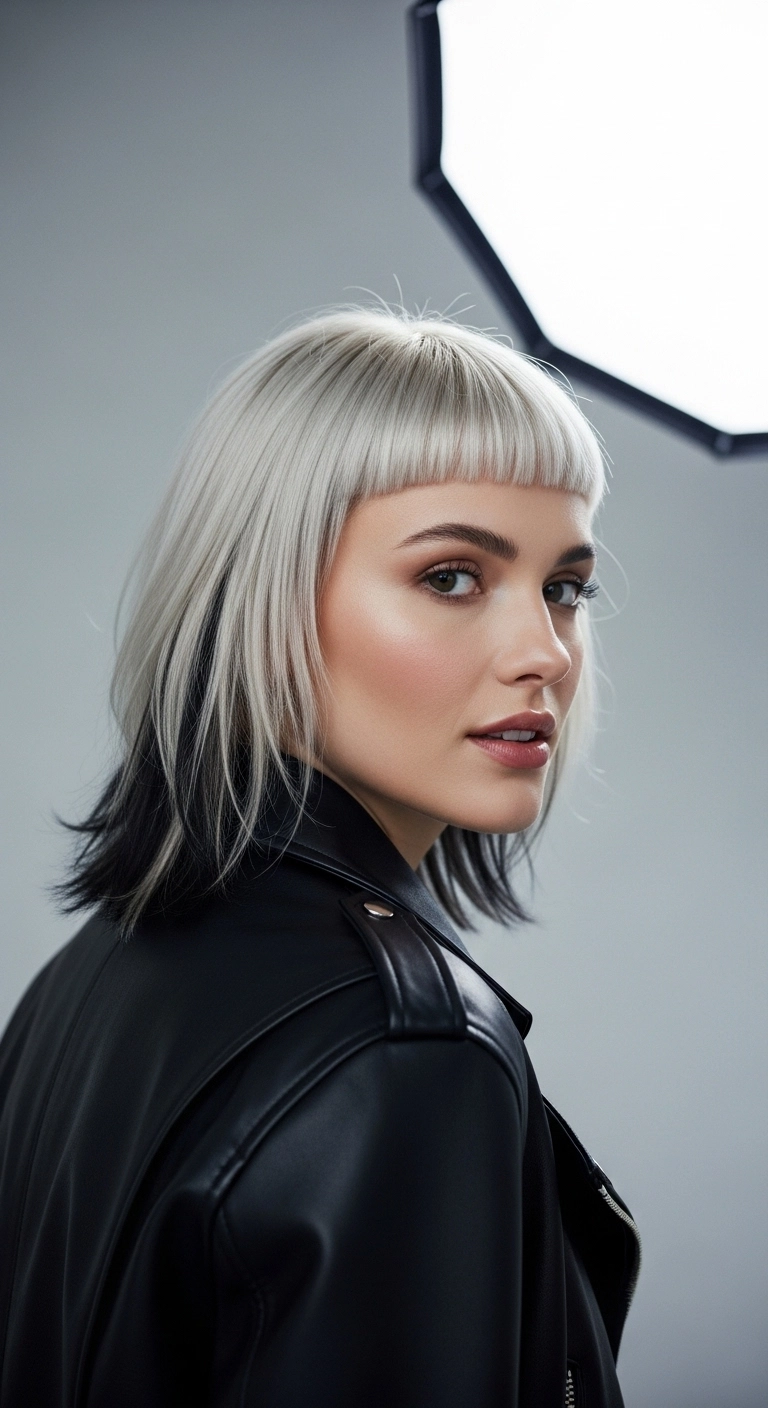
If you want an edgy contrast style that turns heads everywhere, this two-tone lob is seriously so good! The sharp baby bangs frame the face perfectly + the peekaboo black layer peeking out beneath the cool platinum makes it look effortless and super chic with a leather jacket.
How to do this
1. Start by sectioning off the perimeter and lower half of the hair from ear to ear, applying a deep jet-black semi-permanent color while keeping the top crown horseshoe section separated.
2. Lighten the remaining top section to a clean level 10 pale yellow, then tone to an icy platinum finish using the purple toning hair mask listed below.
3. Cut the overall length into a blunt collarbone lob, slightly texturizing the bottom perimeter with point cutting for movement.
4. Section off the front fringe area straight across the forehead and cut sharp, blunt micro baby bangs sitting about an inch above the eyebrows.
5. Apply a dime-sized amount of the heat protectant straightening serum listed below to damp hair.
6. Blow dry smooth with a paddle brush, keeping the bangs flat and directing airflow downward using the professional ionic hair dryer listed below.
7. Run through ends with the ceramic flat iron listed below with a gentle bevel, then finish with a mist of the lightweight anti-humidity shine spray listed below to tame flyaways and enhance the two-tone contrast.
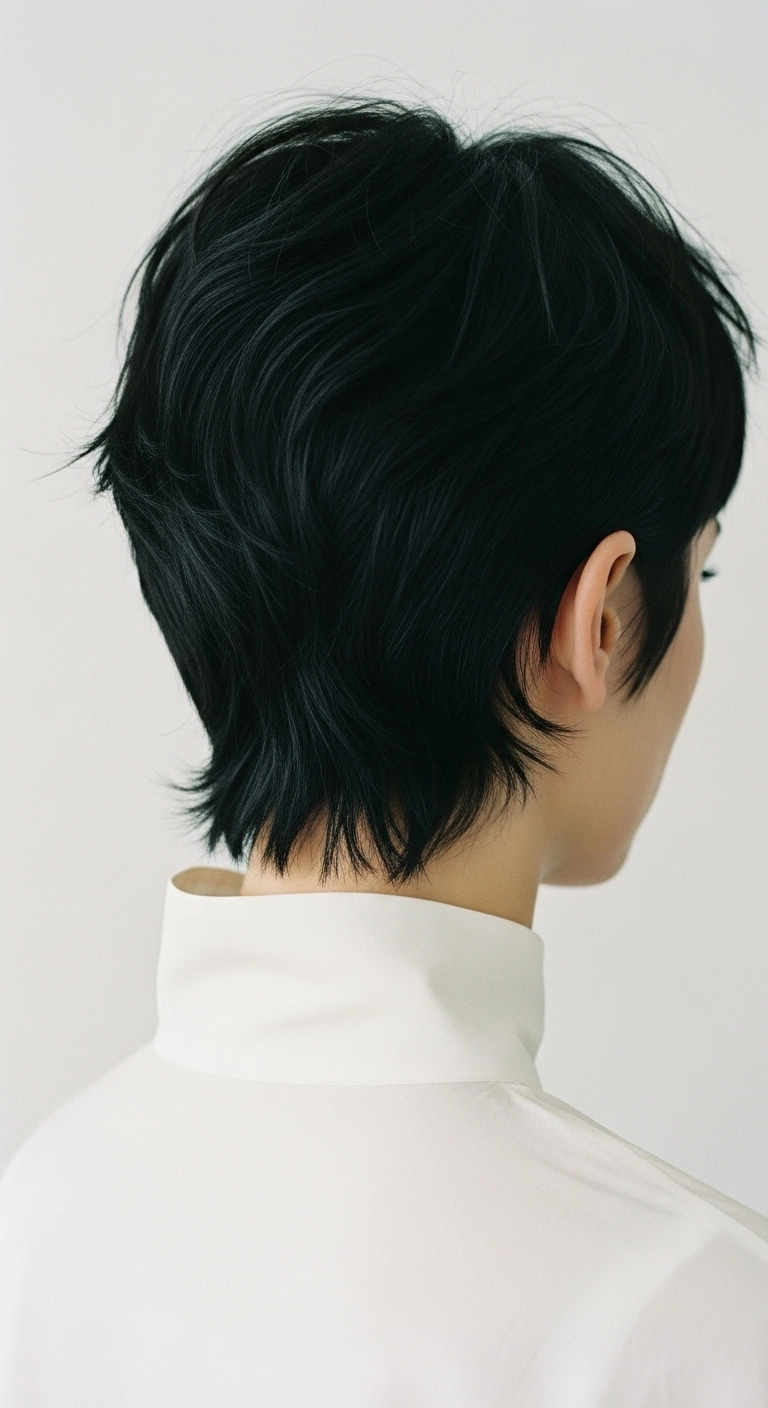
This modern mixie cut is seriously so chic and cool! It gives you that effortless edge with the soft feathered nape and pieced-out crown, but still feels super sleek and elevated in deep jet black. If you've been wanting to go short without losing all your styling fun, this cut is absolute perfection!
How to do this
1. Start by prepping damp, towel-dried hair with a lightweight styling cream or the leave-in conditioning spray listed below to keep strands soft and manageable.
2. Blow dry using a nozzle attachment and a flat styling brush, directing the airflow down along the nape to hug the neck while gently lifting the crown for subtle volume.
3. Once dry, take a mini flat iron or detail styler to flick out random ends at the nape and around the ears for that playful, piecey texture.
4. Warm a dime-sized amount of the matte styling paste listed below between your palms and work it through the back and crown to create defined separation and movement.
5. Use your fingertips to pinch and pull out small sections at the neckline and sideburn areas to emphasize the wispy, tapered silhouette.
6. Finish off with a light mist of the flexible hold texturizing spray listed below to lock in the airy shape without feeling stiff or crunchy.
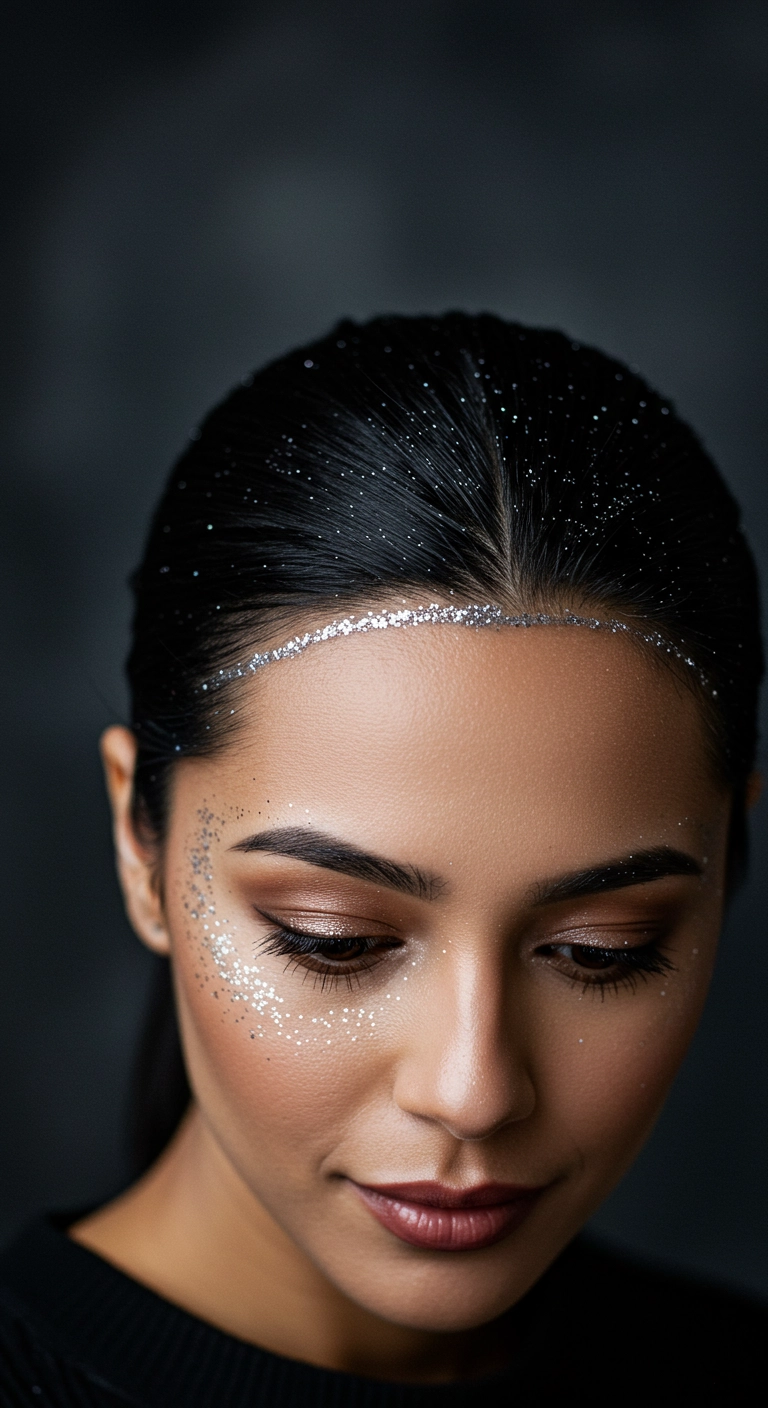
I love how simple yet show-stopping this look is! A sharp center part and a snatched low pony or bun is always stunning, but adding silver glitter right along the front hairline totally takes it to the next level for festivals or New Year's Eve parties.
How to do this
1. Start by prepping clean, dry hair with a smoothing serum and use a precision tail comb to carve out a super clean, razor-sharp center part right down the middle.
2. Smooth both sides flat against your head using a firm boar bristle brush listed below along with a generous amount of strong-hold edge styling gel.
3. Gather the hair tightly at the nape of the neck and secure it into a sleek low ponytail or neat chignon using a snag-free elastic band.
4. Tame any remaining flyaways using a strong-hold smoothing hair wax stick listed below to get that ultra-glassy, clean girl base.
5. Mix fine cosmetic silver craft glitter with clear hair styling gel or aloe vera gel in a small mixing dish.
6. Dip a flat synthetic makeup brush into the glitter gel mixture and paint a precise band directly along the front hairline, softly dusting remaining specks backward onto the crown.
7. Lock everything firmly into place with a generous mist of high-shine finishing hairspray so the glitter stays put all night long.
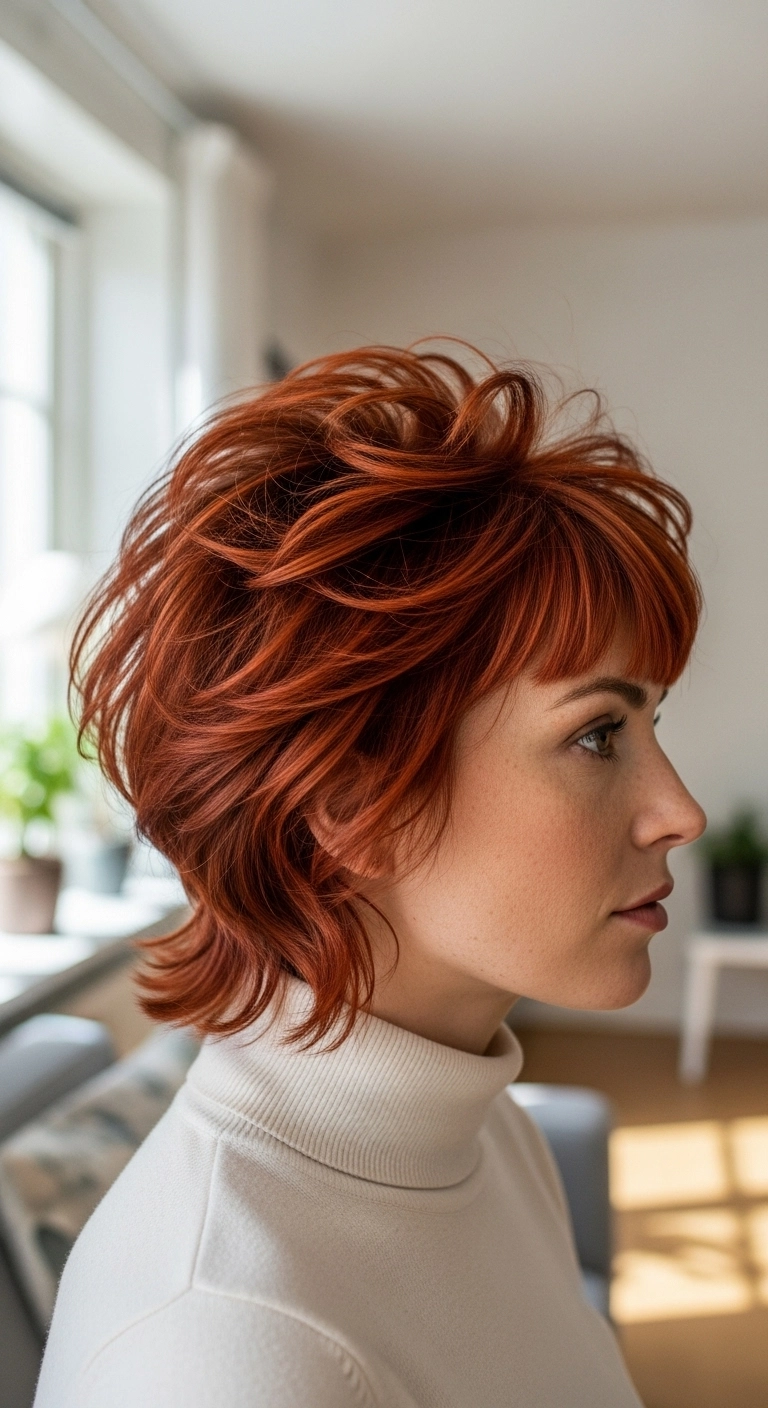
A copper shag is the ultimate statement cut if you love effortless drama. The feathered layers give so much natural bounce and volume, while the flipped-out neckline adds an ultra-cool vintage touch. If you want a cut that basically styles itself with a little texture spray, this lived-in bixie is your best friend.
How to do this
1. Start by prepping damp, towel-dried hair with a lightweight volumizing mousse to provide hold and lift through the crown.
2. Blow-dry the bangs straight down with a small paddle brush using the ionic blow dryer listed below to keep them smooth and slightly rounded.
3. Use a medium ceramic round brush to dry the crown and side layers, lifting up and rolling backwards away from the face to create airy feathered movement.
4. When drying the nape section, use the round brush or your fingers to flick the ends outwards slightly along the neckline.
5. Use a small dab of the matte styling paste listed below between your palms and piece out individual feathered layers, pulling strands gently for texture.
6. Finish with a spritz of the dry texturizing spray listed below at the roots and through the layers to maintain effortless volume all day.
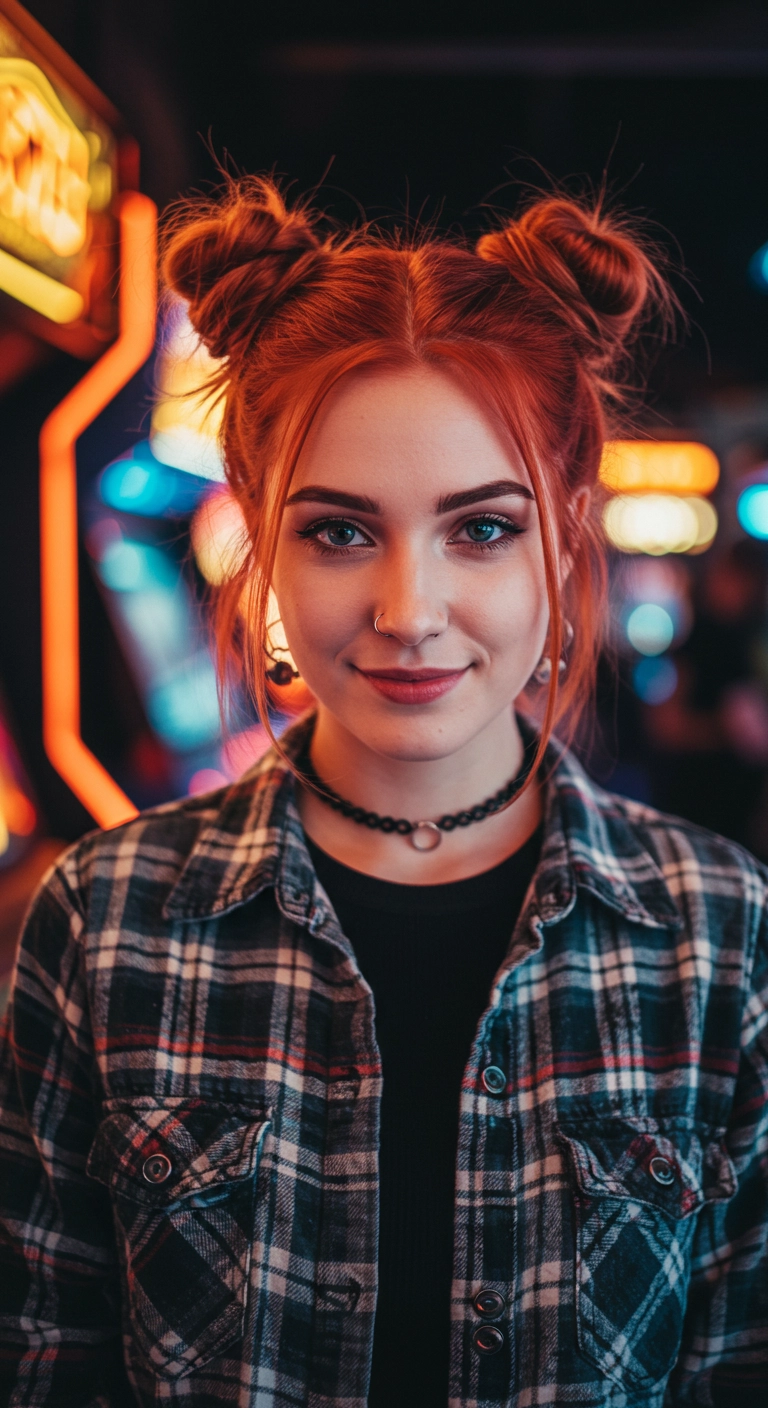
Channeling pure 90s grunge nostalgia with these adorable space buns! It takes literally five minutes to twist up, and pulling out a couple of soft tendrils around the front instantly softens the whole vibe. Perfect for festivals, arcade nights, or days when you want something fun and effortless!
How to do this
1. Start by parting your hair straight down the middle from the forehead to the nape of the neck using the tail comb listed below.
2. Before securing, pull out two soft, face-framing sections around both sides of your face to frame your jawline.
3. Gather each half of your hair into a high ponytail near the crown and secure loosely using the clear elastic hair ties listed below.
4. Twist each ponytail gently and coil it loosely around its base into a cute, rounded bun shape, pinning it in place using the bobby pins listed below.
5. Gently tug at the outer edges of the buns to give them that effortless, full, lived-in texture.
6. Mist all over with the flexible hold texturizing hairspray listed below to keep everything locked in place while maintaining movement.
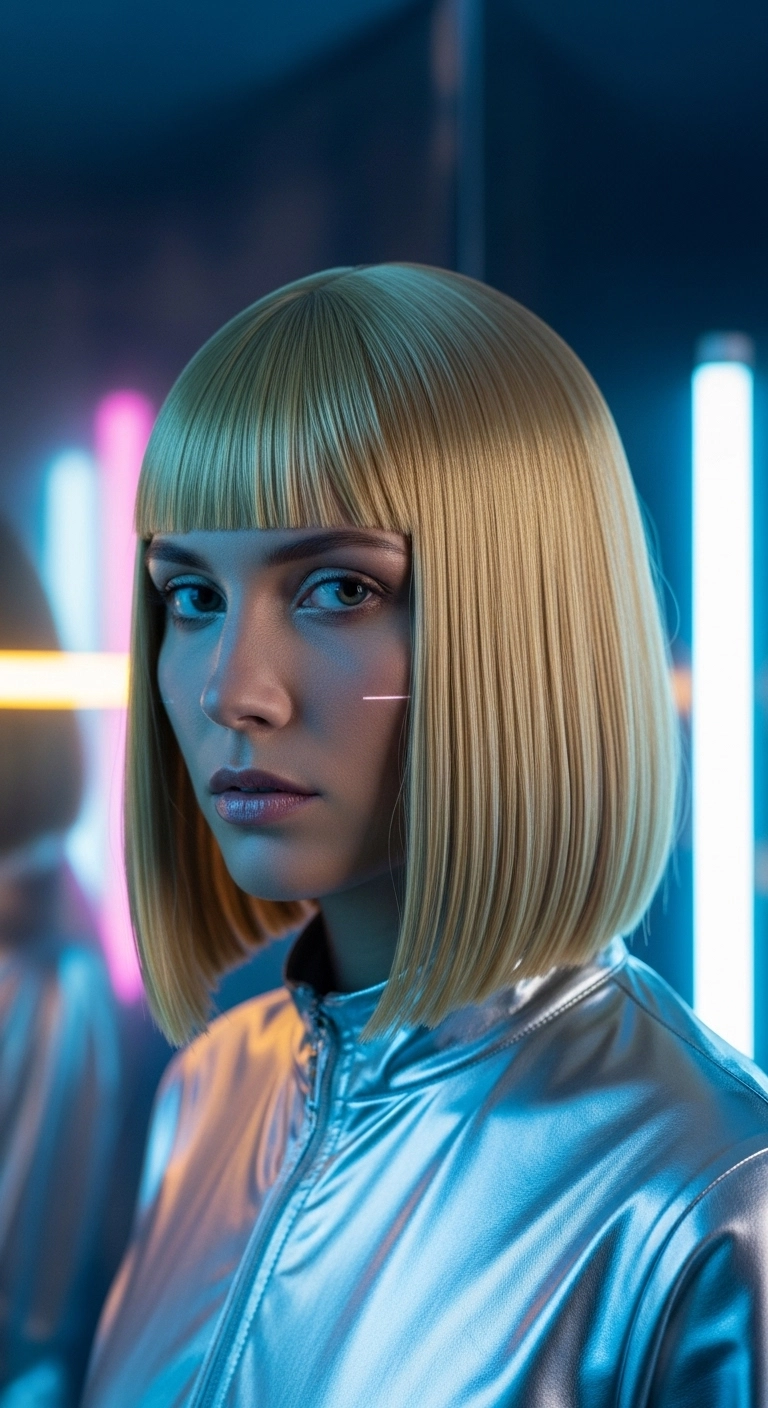
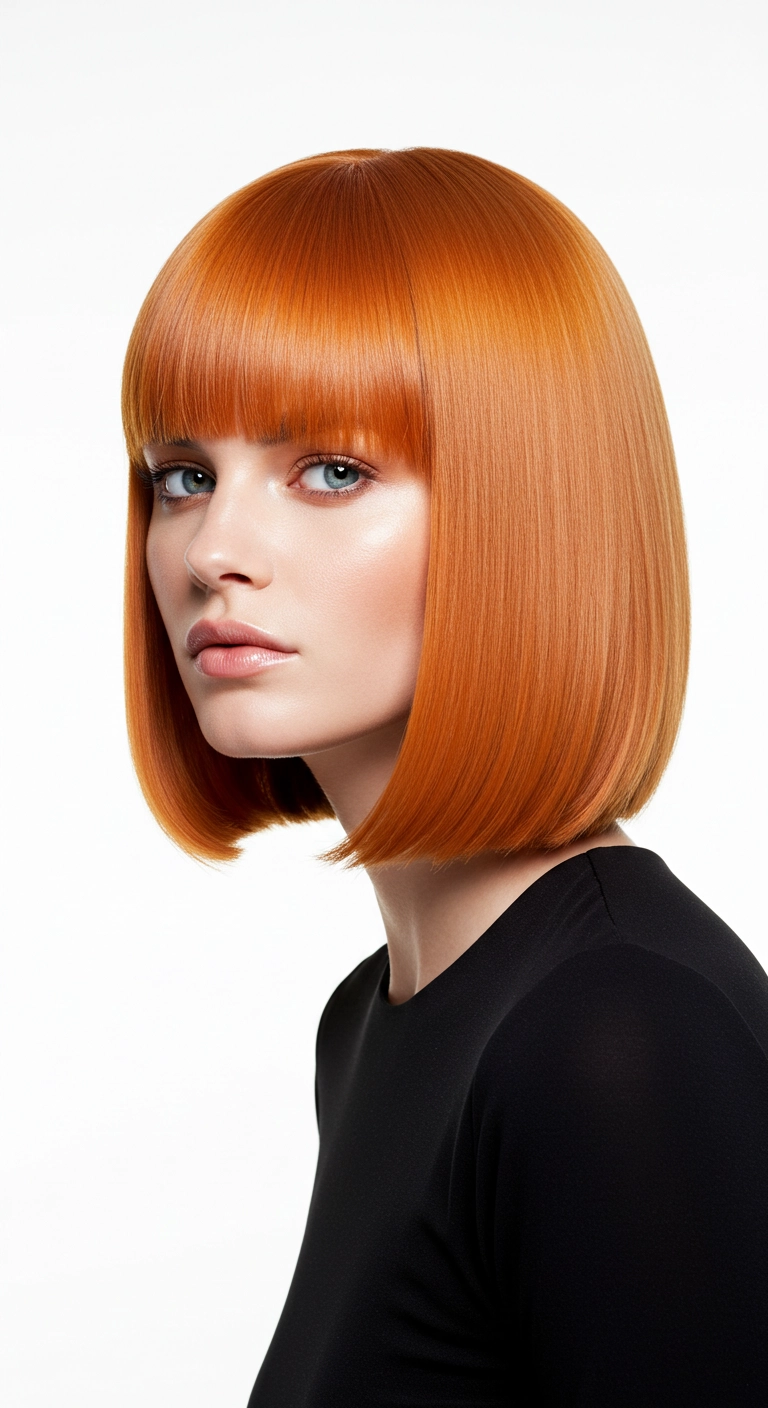
A sharp blunt bob with bangs is the ultimate statement cut. It brings an instant edge and gives off major futuristic, sleek energy that looks effortlessly cool. If you want that ultra-glossy glass hair finish, running a flat iron down in micro-sections and locking it in with a mist of shine spray makes all the difference.
How to do this
1. Start by prepping clean, damp hair with the lightweight thermal smoothing serum listed below to guard against heat damage and fight frizz.
2. Blow-dry the hair completely smooth using a concentrator nozzle and the ceramic paddle brush listed below, directing the airflow downward from roots to ends.
3. Use a fine-tooth tail comb to cleanly section off the fringe right across the brow line, keeping the perimeter precise and blunt.
4. Take small, paper-thin sections around the rest of the head and glide through each section with the titanium flat iron listed below at a steady, controlled pace to achieve a pin-straight glass finish.
5. Slightly curve the ends just barely inward to hug the jawline smoothly rather than flaring outwards.
6. Finish the entire style by misting the high-gloss shine spray listed below across the lengths for a sleek, futuristic mirror sheen.