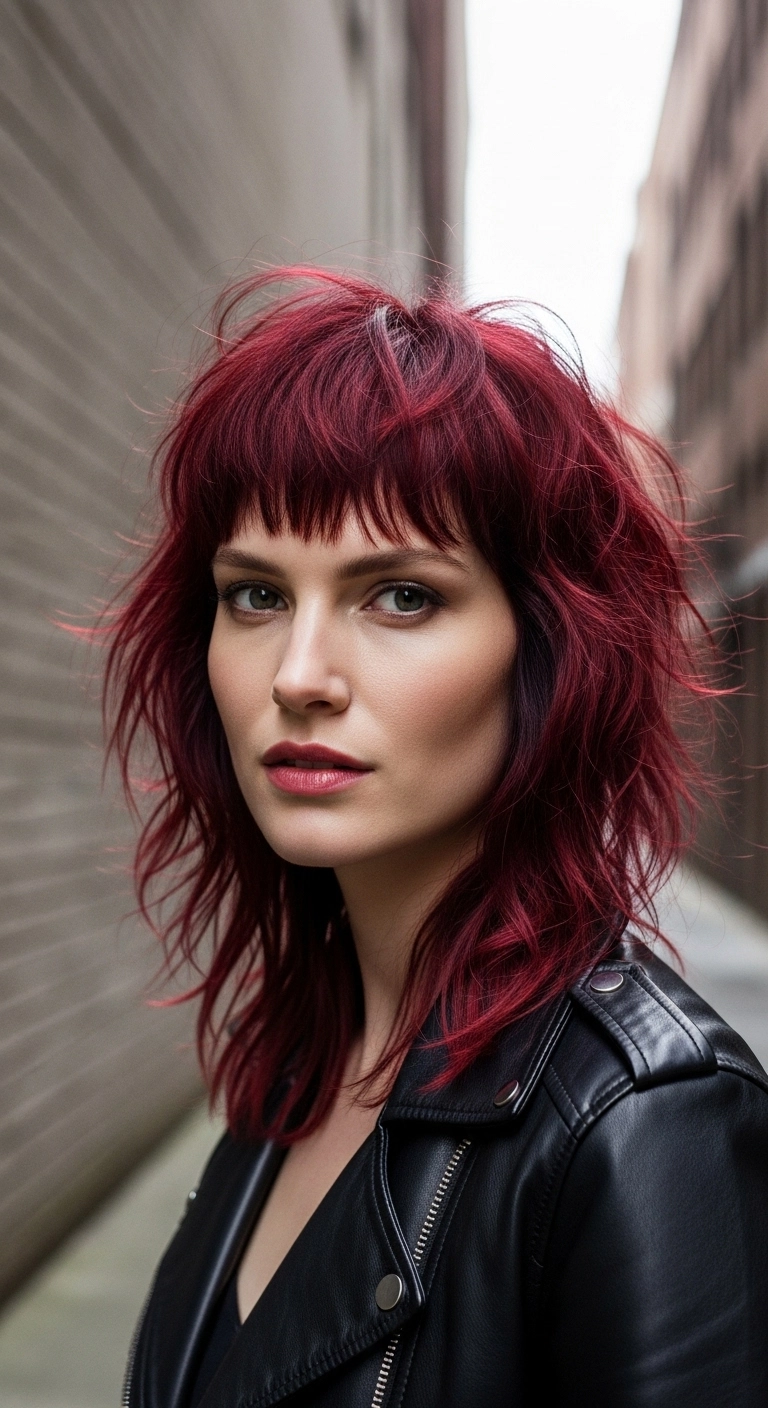
I'm totally obsessed with this edgy red shag because it brings instant rock-and-roll attitude without needing a ton of styling time. You can literally roll out of bed, spray in some texture spray, shake your fingers through it, and walk out looking effortlessly cool. The vibrant ruby tone pairs so well with a leather jacket and makes a bold statement. Definitely give this cut and color a try if you want something fun, punchy, and super low-stress to wear!
How to do this
1. Start by prepping freshly washed, damp hair with a lightweight leave-in conditioner and a pump of the texturizing styling mousse listed below to give your layers natural grit and body.
2. Rough dry your hair upside down with a blow dryer until it is about 80% dry to create maximum root lift and messy volume at the crown.
3. Use a small round brush or your fingers while pointing the airflow down onto the choppy bangs to keep them piecey, textured, and slightly separated above your brows.
4. Take random 1-inch sections through the mid-lengths and create subtle, alternating bends using the flat iron styler listed below, leaving the ends straight and feathery for that quintessential lived-in shag look.
5. Once styled, generously mist all over with the dry texturizing spray listed below, shaking your roots out with your fingers to break up the layers.
6. Emulsify a dime-sized amount of the matte styling wax listed below between your fingertips and pinch the tips of your bangs and face-framing strands to define the razored ends.
7. Keep your vivid crimson tone vibrant between salon visits by washing once a week with the red color depositing shampoo listed below.
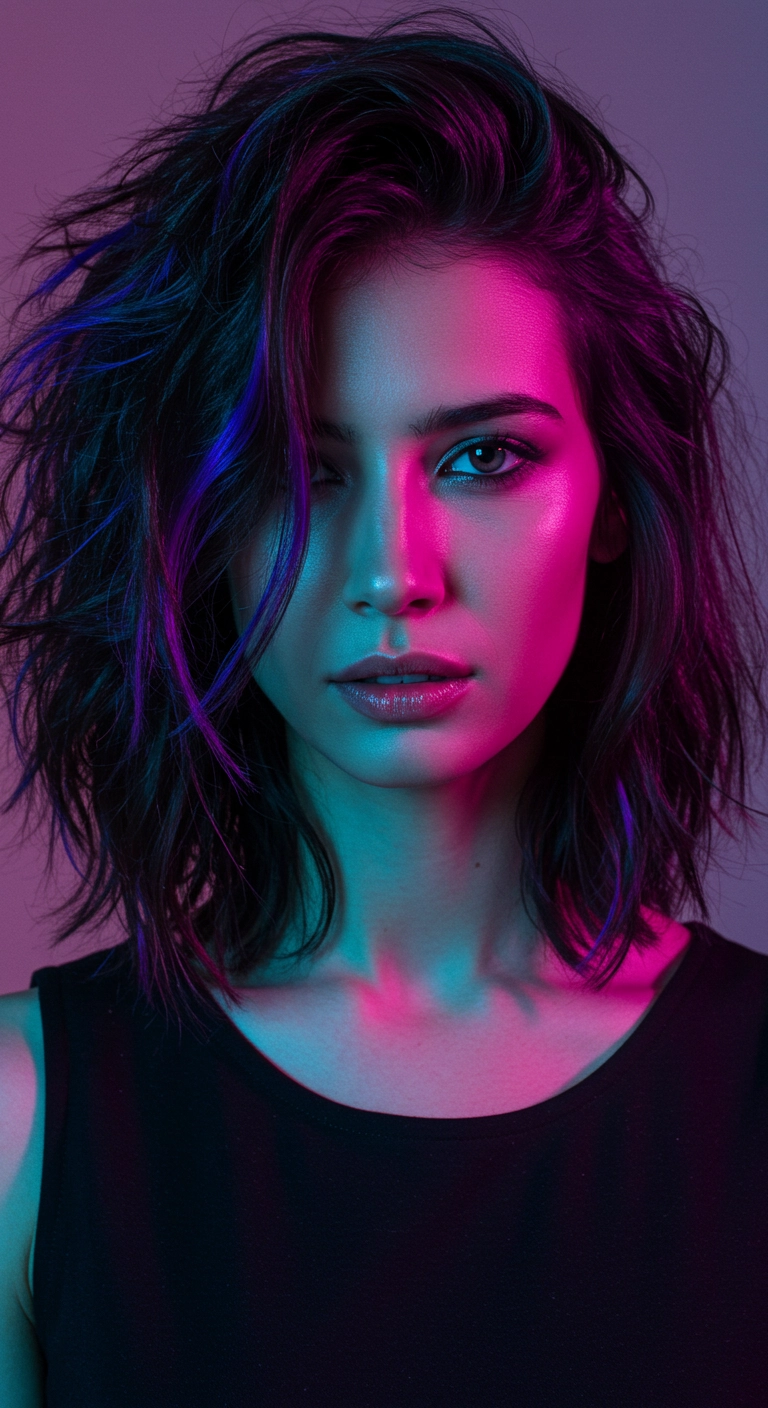
Are you totally obsessed with moody, effortless texture like I am? I added this choppy, lived-in lob to the collection because it serves pure futuristic edge without trying too hard! The deep side flip gives instant instant drama, and those hidden electric violet ribbons weave through dark strands so beautifully when the light hits. You can style it super messy and undone for a night out or smooth it slightly for everyday chic. It's truly the ultimate cool-girl cut to elevate your look!
How to do this
1. Start by prepping damp hair with a volumizing styling mousse from roots to ends to build body and grip.
2. Blow-dry upside down or using a round ceramic brush, lifting at the roots to maximize natural volume on one side for that deep side flip.
3. Lighten targeted thin ribbons around the face and mid-layers using a gentle lightening cream developer kit, then tone and deposit vivid electric violet and cobalt direct dyes.
4. Take random 1-inch to 2-inch vertical sections and create irregular, loose bends with a 1-inch flat iron or curling wand, leaving the very ends straight for that effortless, undone edge.
5. Mist a generous amount of the texturizing volume spray listed below throughout the mid-lengths and roots, flipping your head over to shake out the waves.
6. Define the choppy ends and piecey face-framing tendrils using a pea-sized amount of the matte styling wax paste listed below.
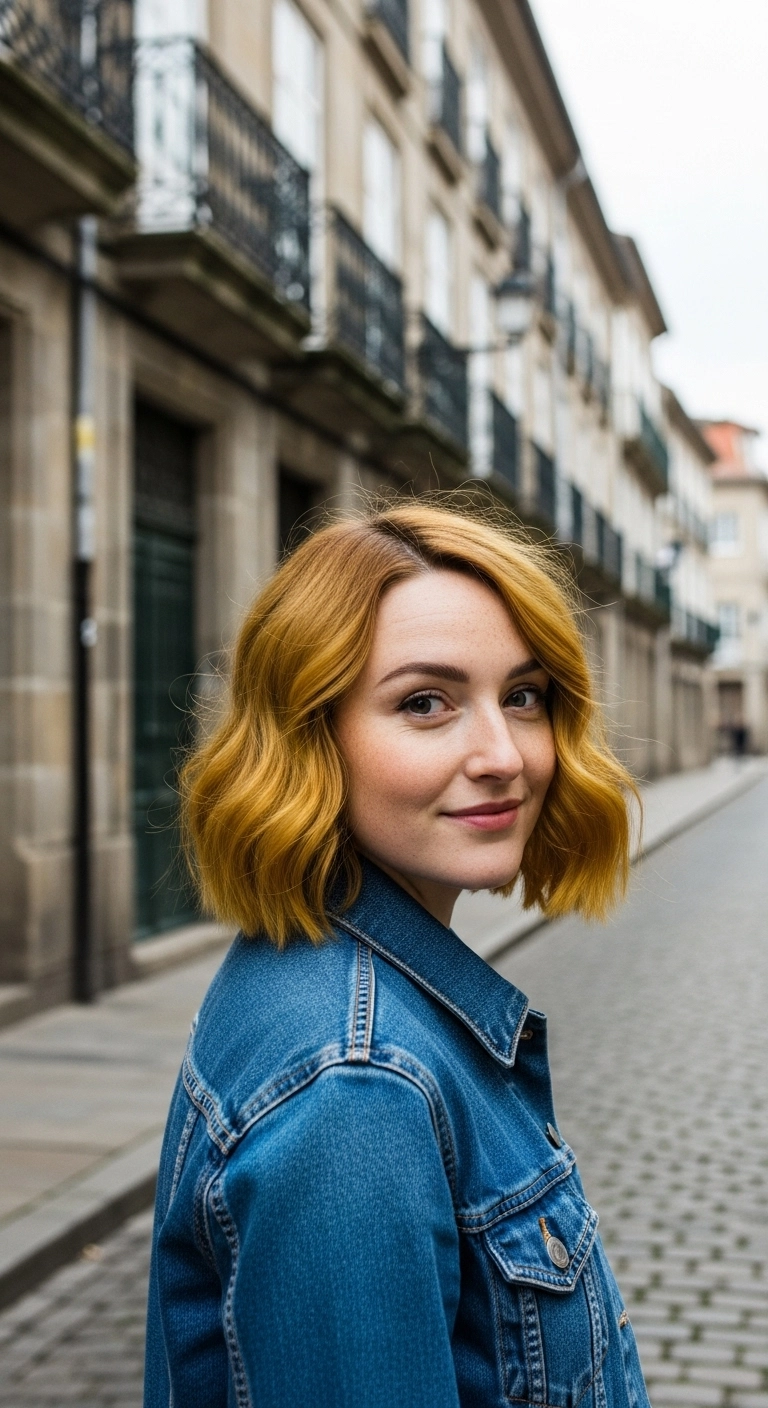
Can we just talk about how stunning warm golden tones look on a blunt cut?! I’m completely obsessed with this golden ginger lob because it’s the ultimate cool-girl look that still feels totally wearable and fresh. The relaxed S-waves give it that effortless, European street style flair without looking overly styled, and the blunt bottom edge keeps the hair looking super thick and healthy. Whether you pair it with a cozy oversized knit or a classic denim jacket like this, it’s bound to turn heads all season long!
How to do this
1. Start by washing and towel-drying your hair, then apply a dime-sized amount of the lightweight heat protectant cream listed below throughout your mid-lengths and ends.
2. Blow dry using a paddle brush or rough-dry with your fingers, lifting gently at the roots to maintain natural body without too much stiffness.
3. Create a soft off-center or side part to give the crown a casual, effortless sweep.
4. Take vertical 1.5-inch sections and use the 1.25-inch curling iron listed below to create subtle, undulating bends rather than tight ringlets, alternating direction and leaving the very ends straight for a modern blunt finish.
5. Let the bends cool completely, then mist hair generously with the dry texturizing spray listed below to add grit, separation, and airy volume.
6. Gently rake through the waves with your fingers or the wide-tooth detangling comb listed below to soften the pattern.
7. Finish the style by smoothing a tiny drop of the lightweight hair styling oil listed below through the tips for shine and frizz control.
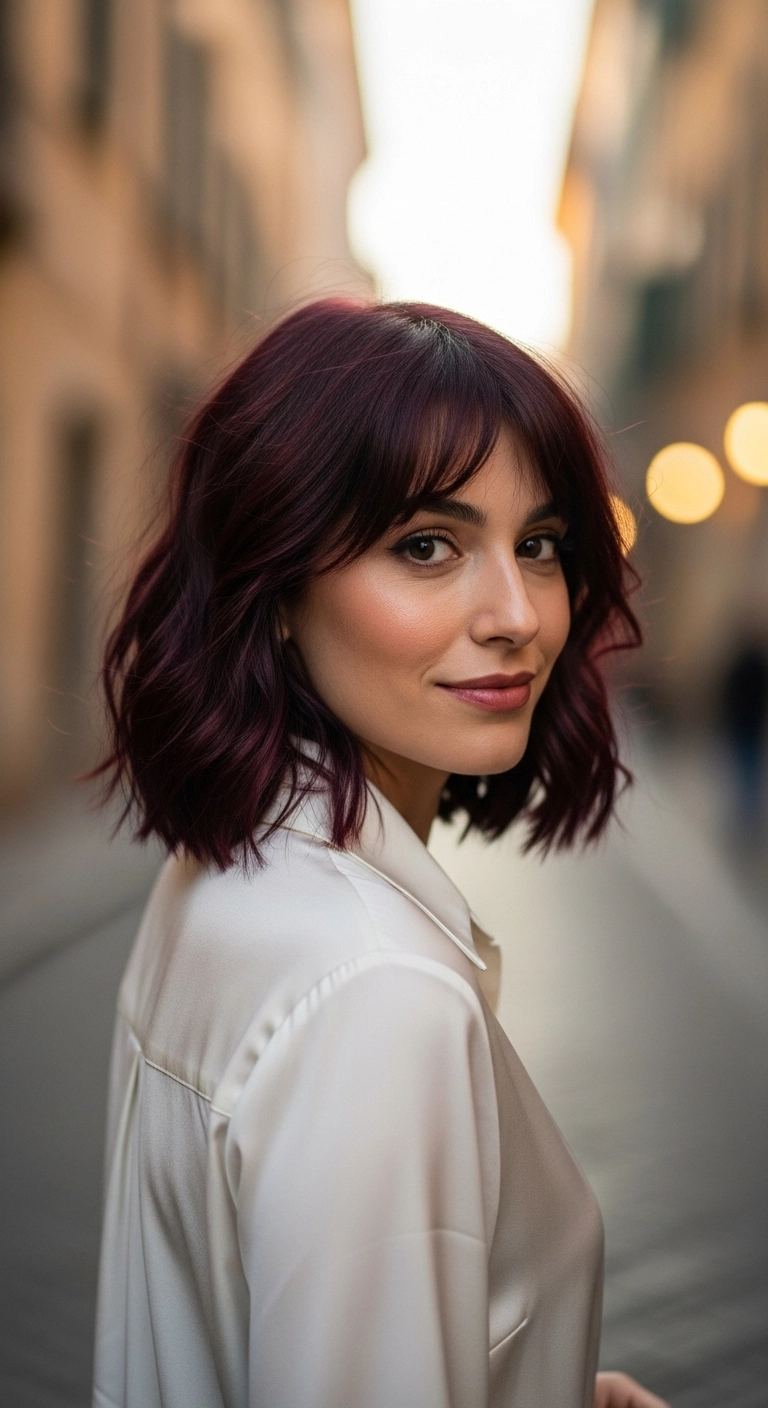
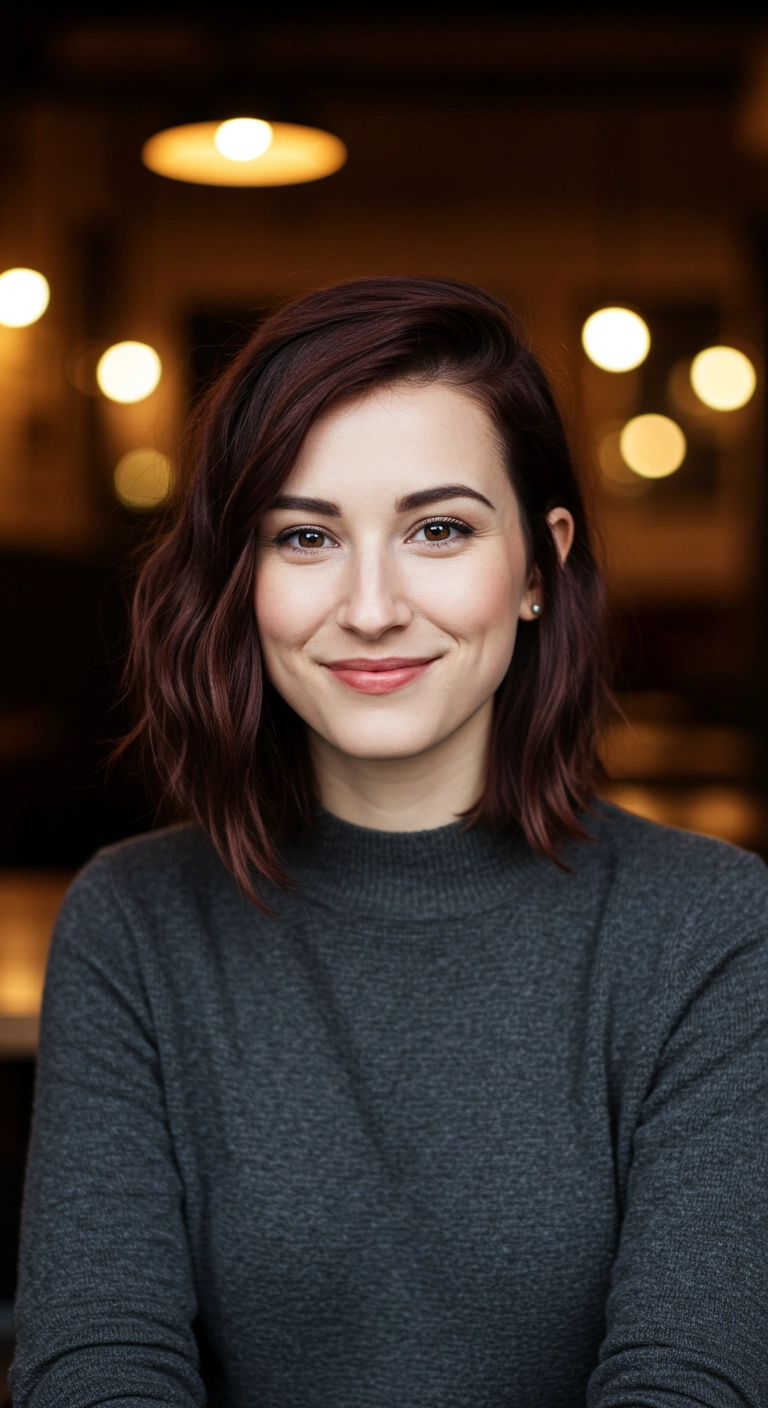
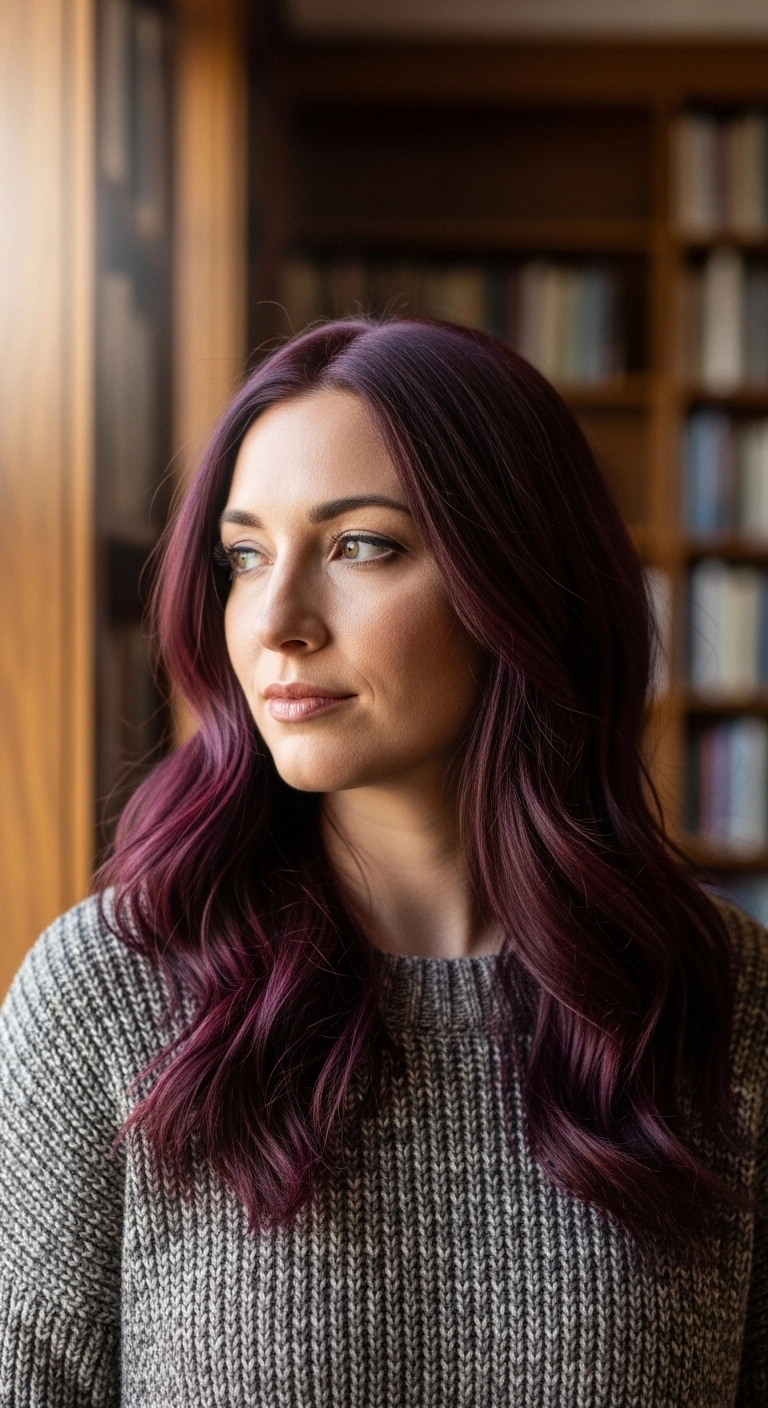
This rich burgundy wavy lob is so effortlessly chic and flattering, which makes it my absolute go-to for coffee dates or city strolls when you want to look put together without trying too hard – I wore this cut on my last vacation and got endless compliments!
How to do this
1. Start by prepping freshly washed, towel-dried hair with a lightweight styling mousse and the heat protectant spray listed below to shield strands from hot styling tools.
2. Blow dry the bangs using a small round ceramic brush, rolling them forward and slightly upward, then parting them in the center so they fall softly into curtain-style bottleneck bangs.
3. Rough-dry the rest of the hair with a paddle brush or diffuser until completely dry, lifting at the roots to ensure natural, airy body.
4. Take random 1- to 2-inch vertical sections of hair and wrap them loosely around a 1.25-inch curling iron, leaving the last inch of the ends out to maintain that modern, relaxed blunt finish.
5. Alternate the curl direction between clockwise and counter-clockwise away from and towards the face to create dynamic, lived-in texture.
6. Once the curls have cooled, break them apart gently with your fingers or a wide-tooth detangling comb.
7. Spray the dry texturizing spray listed below through the mid-lengths and roots to add volume and piecey separation.
8. Finish off with a light mist of flexible hold hairspray and a tiny dab of hair shine serum on the ends for a rich, glossy burgundy glow.
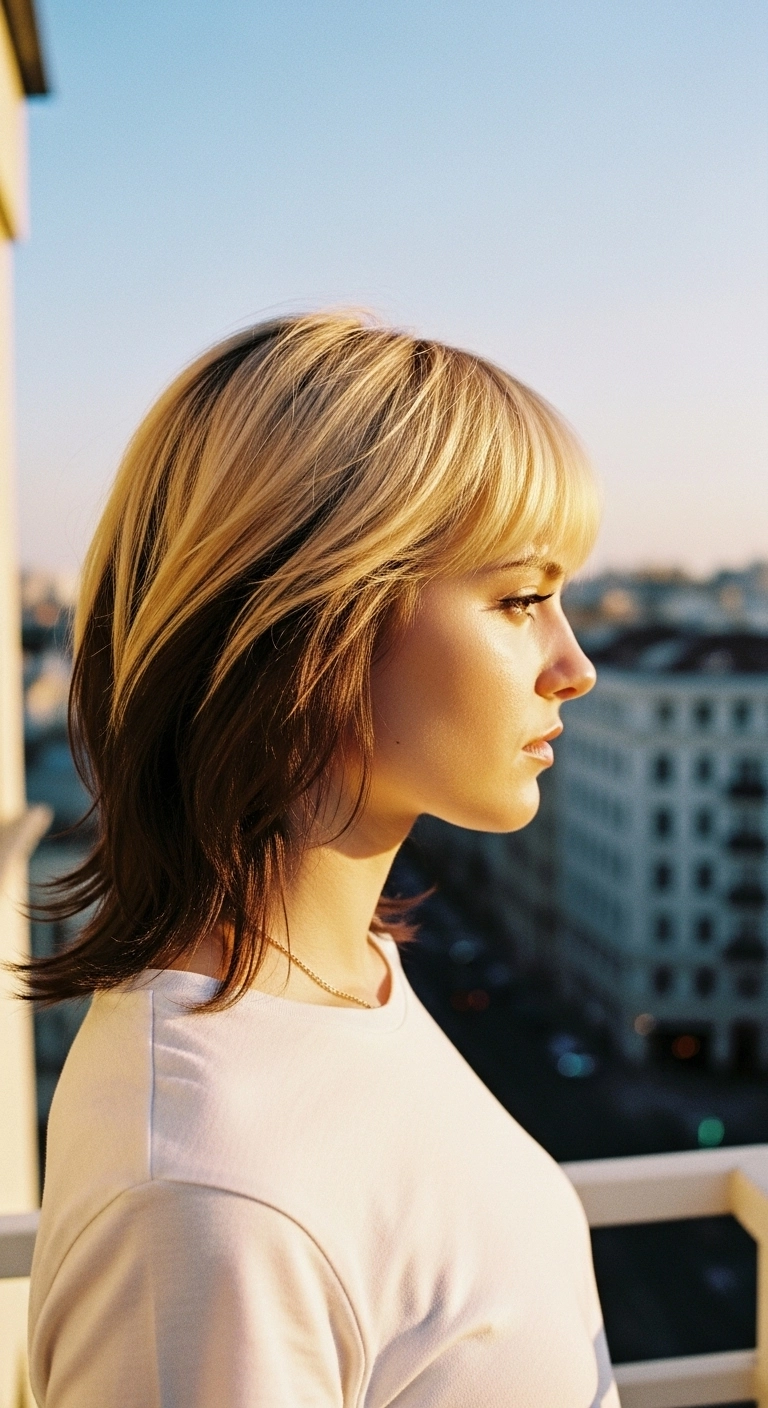
Are you completely obsessed with the 90s and early 2000s revival like I am?! This two-tone lob is giving the ultimate cool-girl nostalgia vibes with that bold blonde top canopy sitting over a moody brunette underlayer. The soft eyebrow-grazing bangs frame the eyes so beautifully, while those playful flipped-out ends add just the right amount of retro bounce. You can wear it sleek and straight or flip the ends even higher with a round brush for extra drama. It's edgy, fun, and totally effortless for everyday wear!
How to do this
1. Start by sectioning the hair horizontally from ear to ear, separating the top canopy from the underside nape area for the color placement.
2. Lighten the entire top canopy and fringe using the hair bleach lightening powder and developer listed below, while applying a rich brunette gloss to the underneath section.
3. Cut the perimeter to hit just above the shoulders, adding soft feathered layers throughout the crown and razor-cutting the ends to allow them to flick easily.
4. Cut a soft, brow-skimming fringe with subtle piecey texture across the forehead.
5. Prep towel-dried hair by applying a generous amount of the thermal blowout heat protectant spray listed below from mid-lengths to ends.
6. Blow-dry the fringe forward and smooth using a mini round brush, gently curving under at the tips.
7. Using the medium ceramic round brush listed below, blow-dry the lengths by rolling the ends outward and upward to create that signature playful flip.
8. Mist the ends with the flexible hold hairspray listed below and finish with a drop of smoothing hair serum to keep the two-tone colors ultra-glossy and frizz-free.
Products Used
Professional Bleach Powder and Developer Kit
hair bleach lightening powder and 20 volume developer
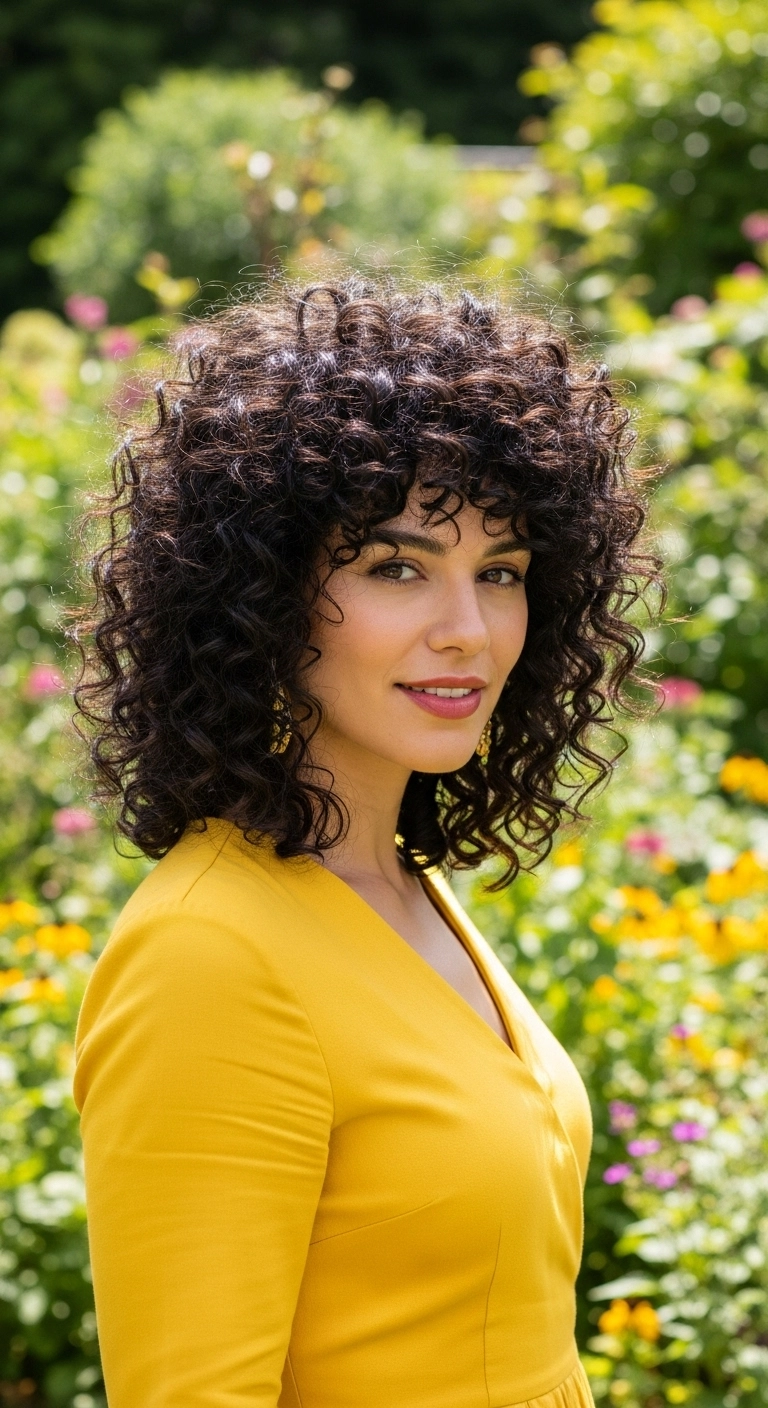
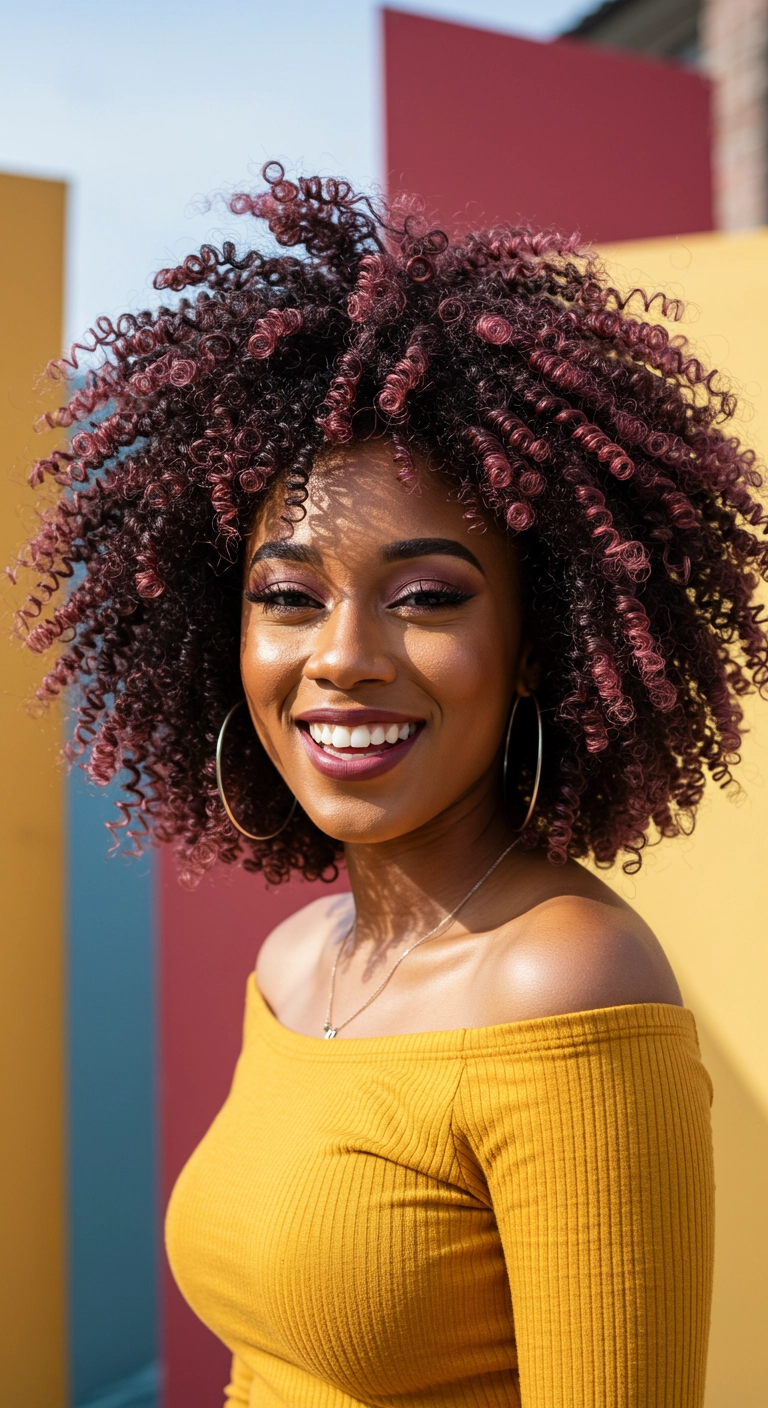
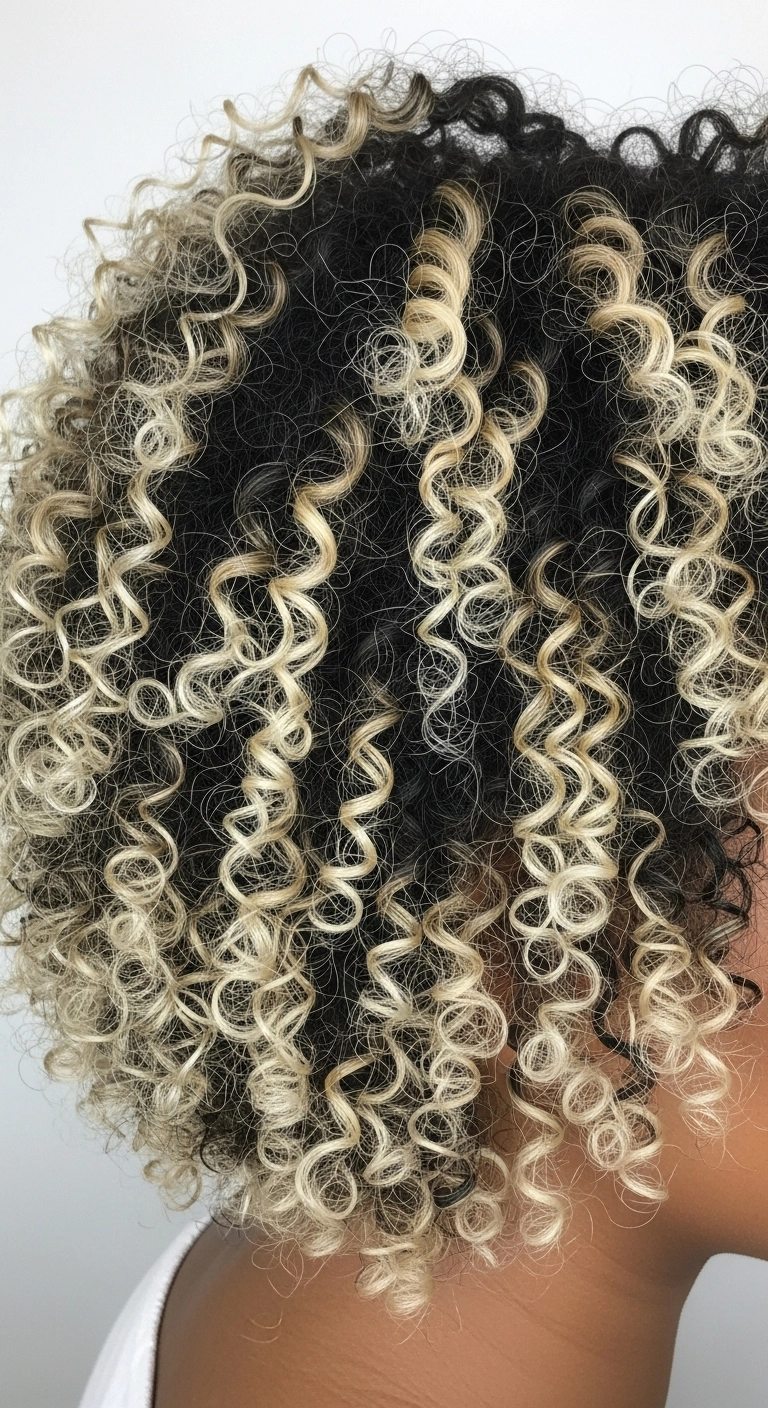
I’m absolutely in love with this curly shag because it embraces full, natural bounce without feeling high maintenance! The soft, layered shape gives your ringlets so much natural lift, and the curly bangs frame your face in the most flattering, effortless way. It's totally versatile whether you’re running errands in a casual top or dressing up for dinner in a bright outfit. Definitely give this curly cut a try if you want to let your natural texture shine!
How to do this
1. Start on freshly washed, soaking wet hair to maximize curl clumping and minimize frizz.
2. Apply a generous amount of curl defining leave-in conditioner using the leave-in conditioner listed below evenly through sections from roots to ends.
3. Rake through and scrunch in a medium-hold curl defining cream or gel using the curl defining styling cream listed below to lock in the ringlets and promote bounce.
4. Shape and finger-coil the curly bangs forward onto the forehead to ensure they dry with soft, rounded definition.
5. Gently cup and dry the hair using a blow dryer with a deep bowl diffuser using the collapsible diffuser attachment listed below on low heat and medium speed, scrunching upward toward the scalp to build massive volume.
6. Once the curls are 100% dry, scrunch out any crunch using a few drops of lightweight nourishing hair oil using the anti-frizz hair oil listed below to add glossy shine and soft touchability.
7. Fluff the roots with a wide-tooth comb or your fingers to expand the rounded shag silhouette and amplify fullness.
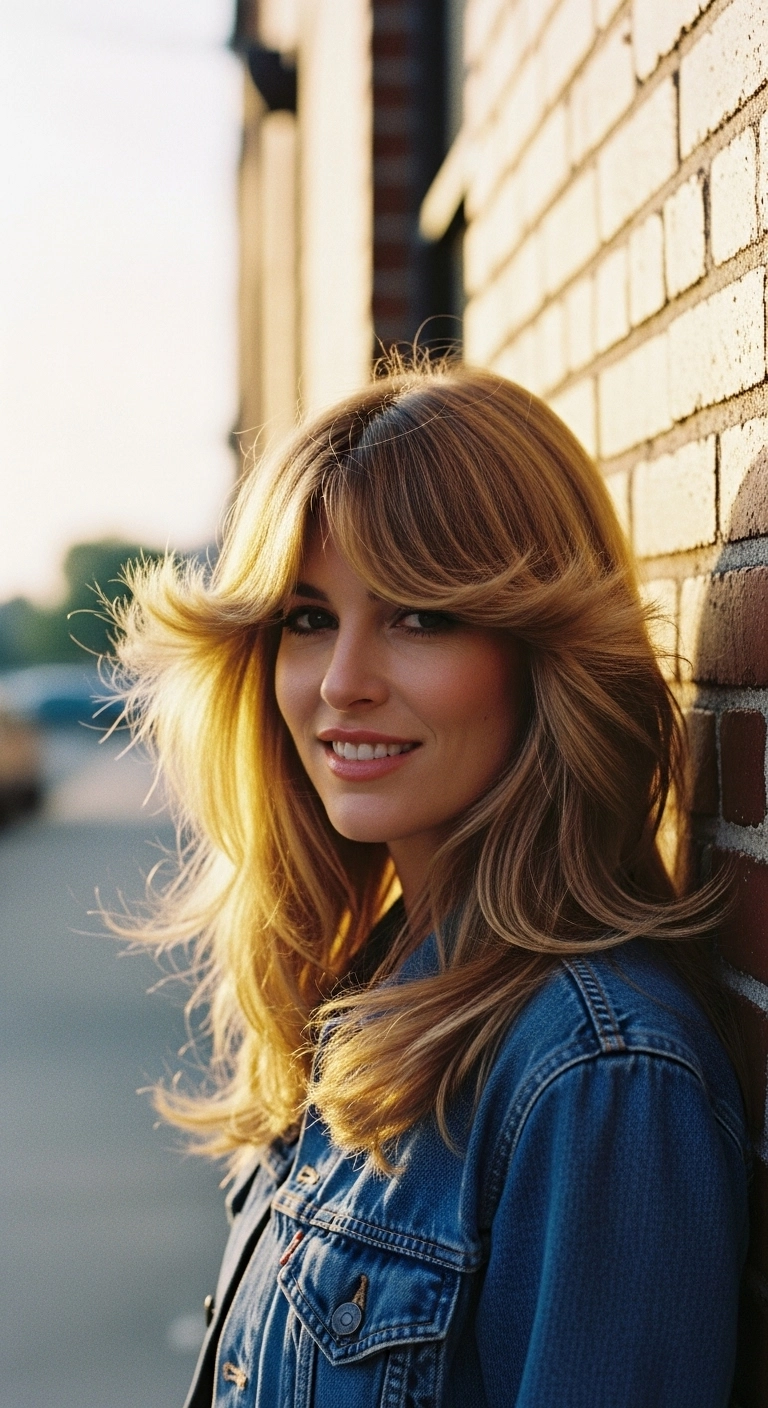
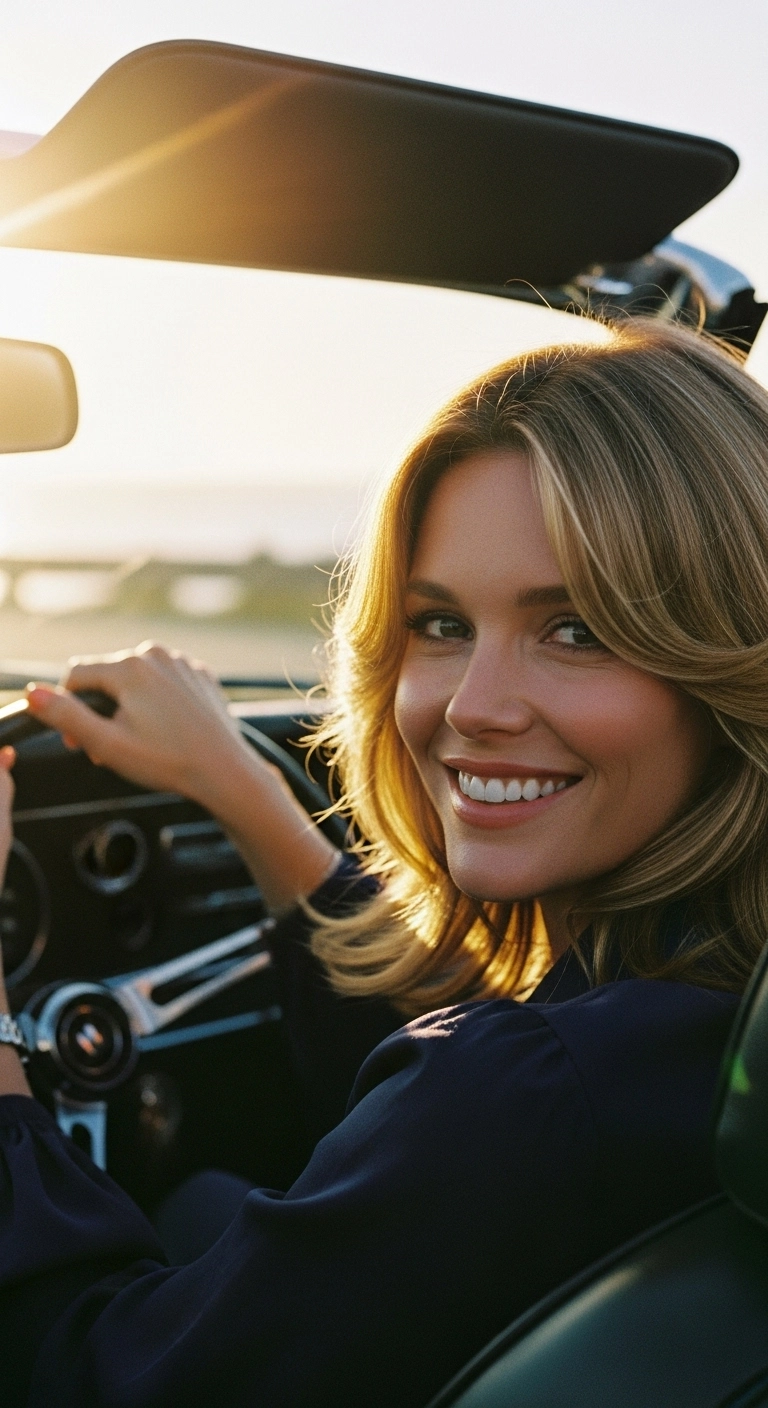
This feathered 70s throwback blowout is seriously everything and gives the most gorgeous face-framing flip ever! I love how dramatic the winged curtain bangs are and how airy and bouncy it makes thick hair feel. If you are obsessed with vintage Charlie's Angels vibes, you totally need to try this look!
How to do this
1. Start on freshly washed, damp hair and prep from roots to ends using the volumizing root lift spray listed below to get that signature 70s lift.
2. Apply a dime-sized amount of the heat protectant blowout cream listed below to protect the hair and add smooth shine before blow-drying.
3. Rough dry your hair until it is about 80% dry, flipping your head upside down occasionally to boost root volume.
4. Section hair into horizontal tiers and use the large ceramic round brush listed below, rolling sections away from the face and directing the airflow backward.
5. For the curtain bangs, blow dry the roots forward and then roll the ends backward and outward to create that iconic Farrah Fawcett winged flare.
6. While warm, roll the crown and bang sections onto the jumbo self-grip velcro rollers listed below and allow them to fully cool to set the bounce.
7. Remove rollers gently, shake hair out with your fingers, and mist all over with the flexible hold finishing hairspray listed below to lock in the winged texture without stiffness.
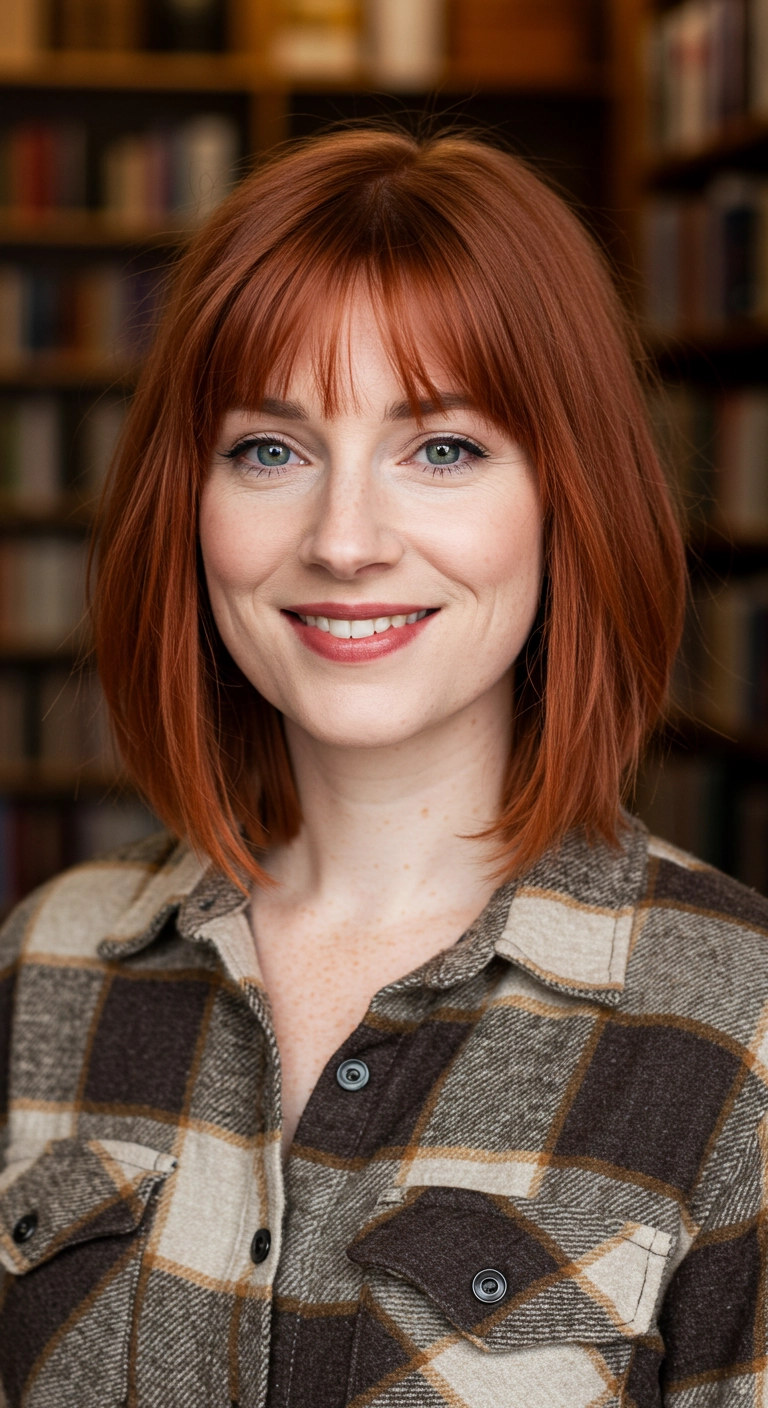
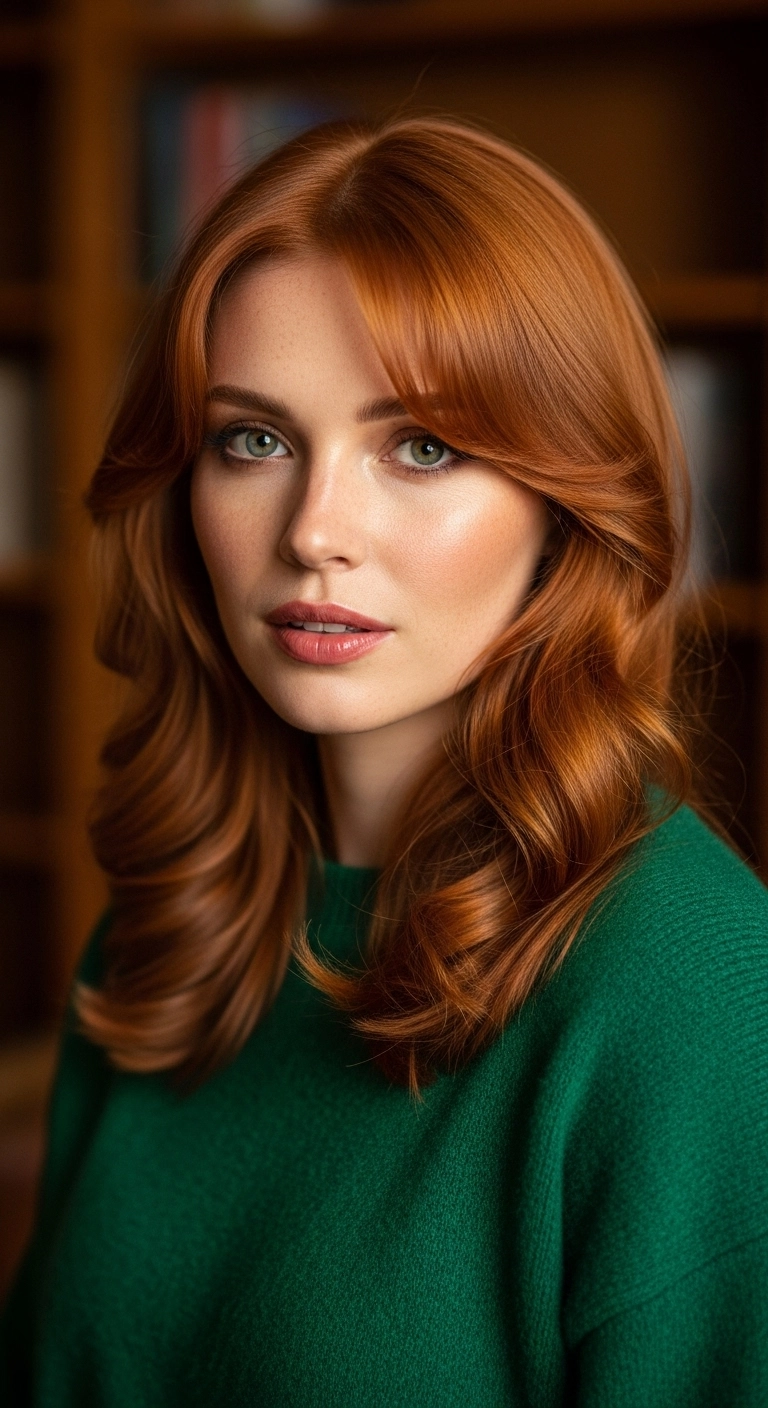
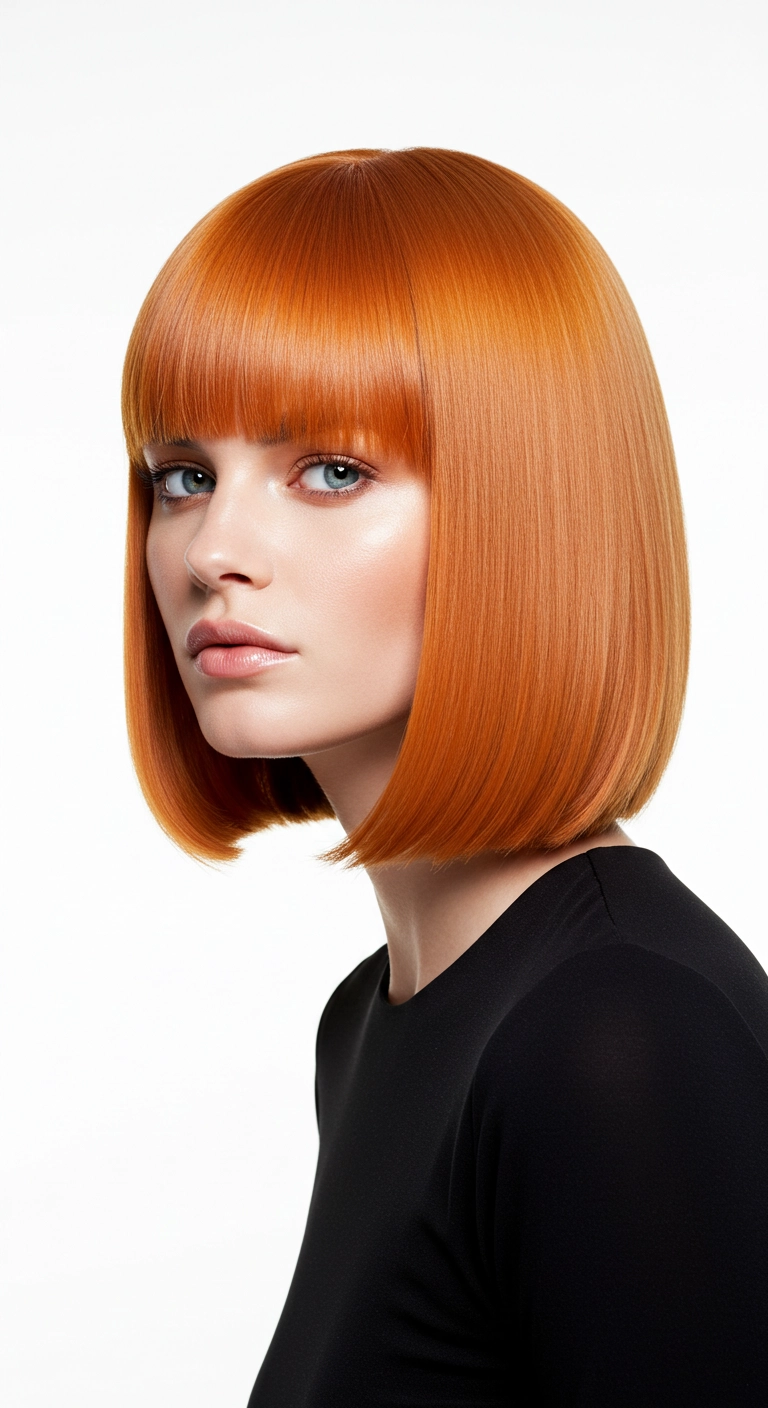
I'm totally obsessed with this rich copper collarbone cut! The wispy fringe is super flattering and gives off major cozy autumn vibes, especially paired with a textured lob. It’s so easy to style in the mornings with just a quick blowout, and you can tuck it behind your ears for an instant chic look!
How to do this
1. Start by prepping damp, freshly washed hair with a lightweight blow-dry heat protectant lotion to shield strands and add slip.
2. Blow-dry the bangs first using a small round boar bristle brush, directing the airflow downward and gently curving the ends under to achieve that soft, wispy look.
3. Section off the rest of your hair and blow-dry using a medium ceramic round brush, lifting at the roots for natural volume and smoothing down to the collarbone.
4. For a slight bevel and bend at the tips, roll the brush inward gently as each section cools to frame the jawline nicely.
5. Mist a light dry texturizing spray through the mid-lengths and shake out with your fingers to give it that effortless, lived-in texture.
6. Finish off with a tiny drop of lightweight hair oil rubbed between your palms and smoothed over the ends to lock in that vibrant copper shine.
This hairstyle is what I like to call the classic copper salon blowout. You start by blow drying the hair with a big round brush to get tons of volume at the roots. Sweep the curtain bangs back away from your face so they frame your cheekbones nicely, and curl the ends under into soft, bouncy waves that rest right on the shoulders.
How to do this
1. Start by washing hair and applying a volumizing mousse and the heat protectant spray listed below to damp hair.
2. Blow dry using the ceramic round brush listed below, lifting at the roots to build volume through the crown.
3. Focus on the curtain fringe by rolling them forward and slightly upward with the round brush, then sweeping them back away from the face to create that signature swoop.
4. Use the large barrel curling iron listed below to wrap 2-inch vertical sections away from your face to create soft, structured curls.
5. Allow the curls to completely cool before gently brushing through them using the wide-tooth detangling comb listed below.
6. Finish the look by misting with the lightweight shine and flexible hold hairspray listed below to lock in the bounce and glossy finish.
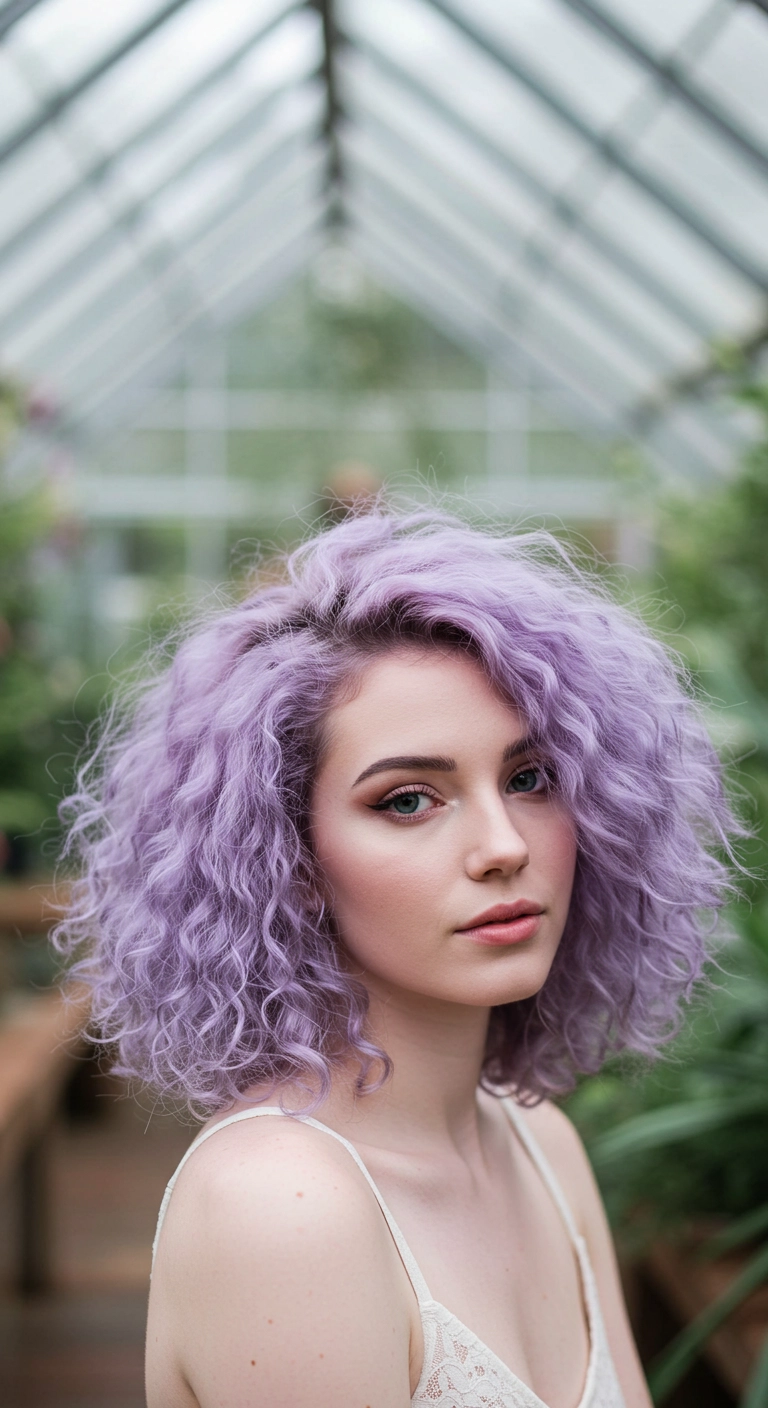
I know going pastel can feel like a total commitment, but honestly, looking at these dreamy lavender curls makes every single salon hour completely worth it! The deep side sweep gives so much natural body, and if you’ve been looking for a sign to lean into fairytale hair, this is it!
How to do this
1. Start by prepping your freshly washed, damp curls using the leave-in curl defining cream listed below to lock in hydration and fight frizz.
2. Gently rake a quarter-sized amount of the lightweight styling gel listed below from mid-lengths to ends, using prayer hands to distribute evenly.
3. Flip your head upside down and scrunch upward towards the scalp using a microfiber towel to encourage natural ringlets and curl clumping.
4. Attach the universal hair diffuser nozzle listed below to your blow dryer, setting it to low speed and medium heat, gently cupping sections until your curls are 80-90% dry.
5. Flip hair upright, create a deep dramatic side part with your fingers to build maximum crown volume, and let it fully air-dry.
6. Once totally dry, break the gel cast by scrunching a couple of drops of the lightweight shine hair oil listed below through the mid-lengths and ends for soft, touchable bounce.
7. Mist with the color-depositing purple toning spray listed below whenever your pastel lilac tone needs a fresh, vibrant boost between salon visits.
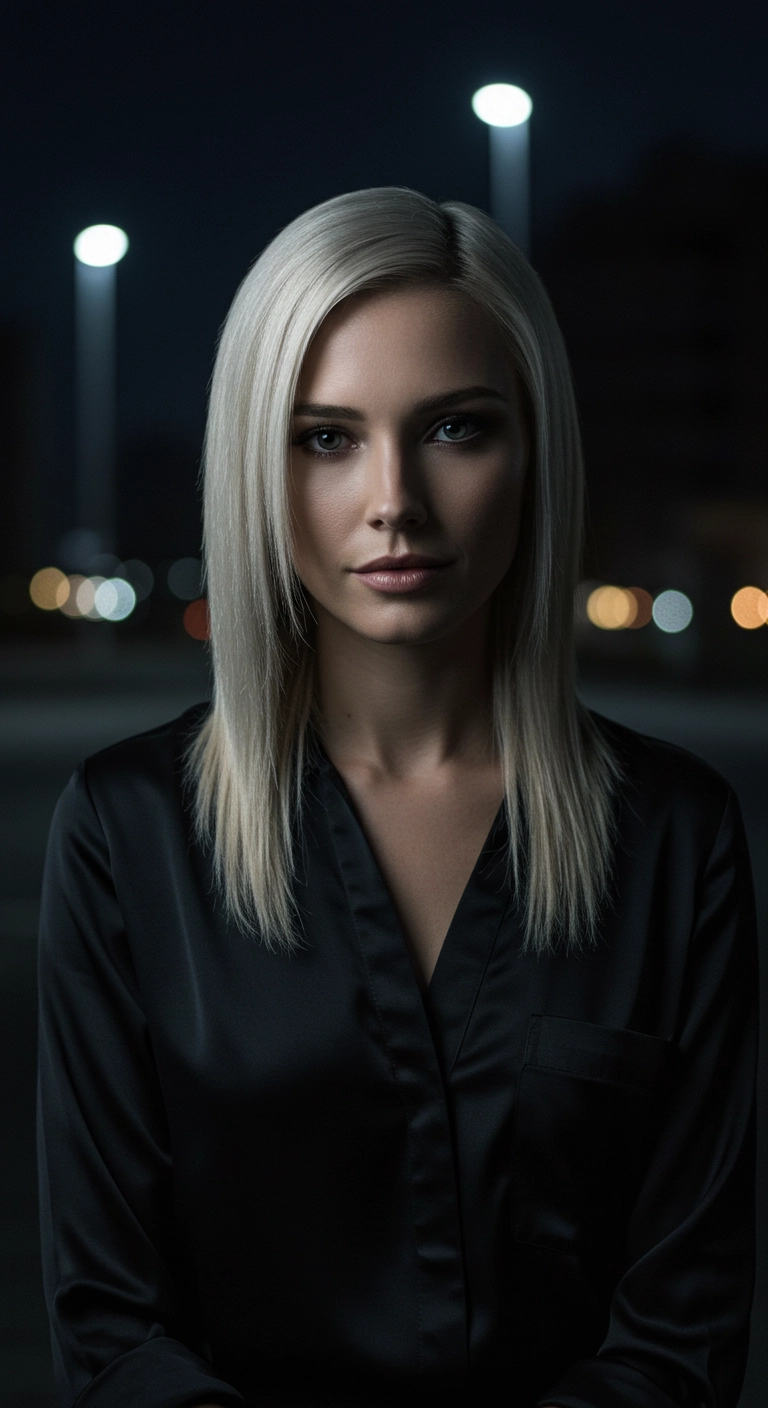
I'm seriously in love with this hairstyle. It's this super sleek, icy platinum long bob cut with delicate face-framing layers that just falls so effortlessly. I think this look is incredible for a chic night out, a date night, or even an elevated everyday professional vibe at the office. It's clean, modern, and makes such an understated bold statement.
How to do this
1. Start on freshly washed hair and apply a smoothing leave-in primer using the thermal heat protectant spray listed below to shield strands and minimize frizz.
2. Create a clean, off-center side part while the hair is damp, gently guiding the heavier side to sweep across the forehead.
3. Blow dry sections smooth using a large ceramic round brush listed below, directing the airflow downward from roots to ends for maximum gloss and smoothness.
4. Take small vertical subsections and pass over them with a professional flat iron listed below at moderate heat, slightly beveling the ends inward around the collarbone and face.
5. Dispense a pea-sized drop of the lightweight finishing hair oil listed below between your palms and smooth it over the mid-lengths and ends for that mirror-like, glossy platinum sheen.
6. Finish with a light mist of the flexible hold hairspray listed below to keep the sleek silhouette secure without any stiffness.
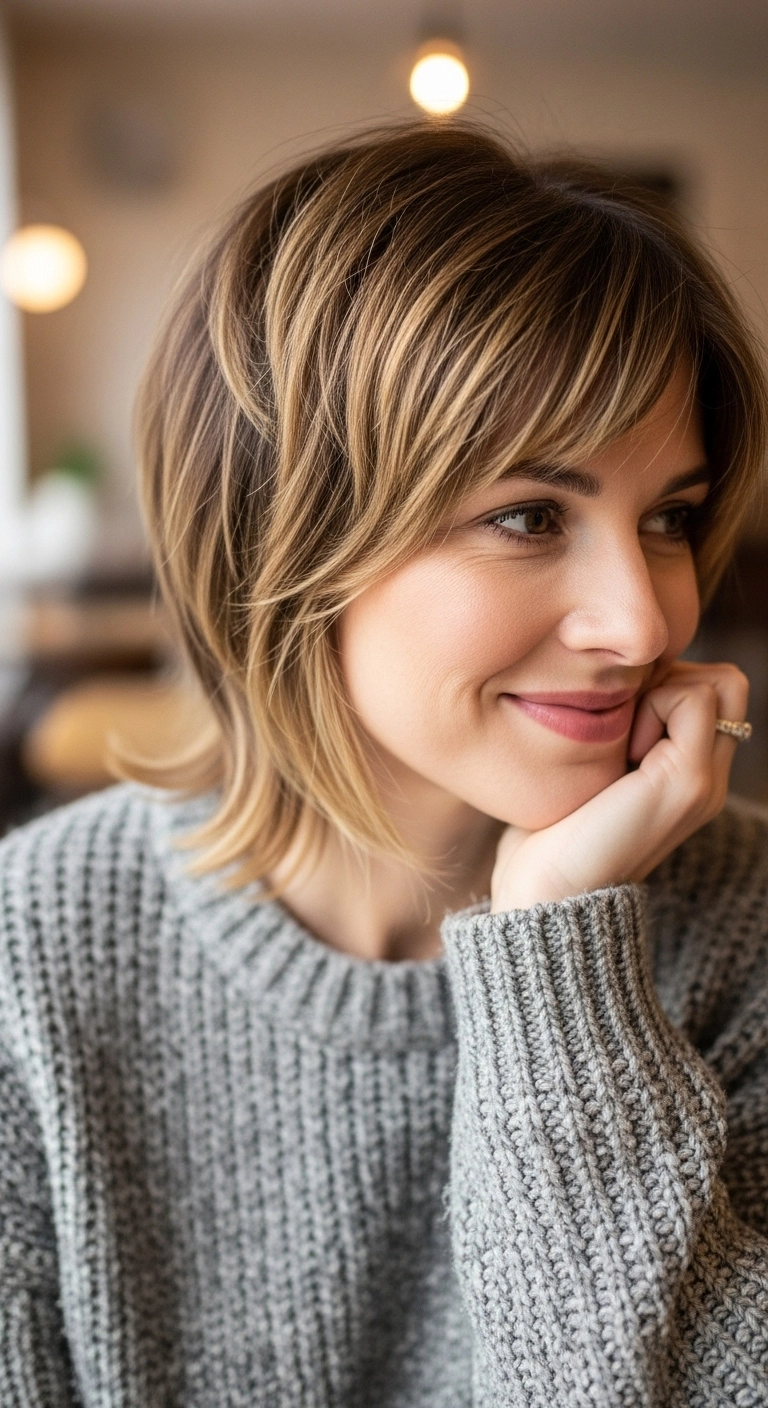
I love how effortless and chic a feathered bob looks, especially when it has that subtle outward flip at the ends! The soft, side-swept layers do an amazing job framing the cheekbones and jawline, making it super flattering on almost every face shape. Adding warm golden highlights over a light brown base gives it so much depth and makes styling it with a simple round brush look like a million bucks.
How to do this
1. Start with towel-dried hair and apply a quarter-sized amount of the lightweight volumizing mousse listed below from roots to ends for lift and movement.
2. Mist your strands thoroughly using the thermal heat protectant spray listed below to shield your hair during heat styling.
3. Using a medium ceramic round brush and blow dryer, lift sections upward at the crown to build body, rolling the brush through the mid-lengths.
4. When blow-drying the lower nape sections, roll the brush upward and outward to create that flirty, flicked-out edge.
5. Sweep the fringe forward and slightly to the side with the round brush, blowing dry on low speed to set a soft, wispy curtain effect.
6. Work a pea-sized dab of the pliable texturizing paste listed below between your palms and gently piece out the ends and face-framing layers.
7. Finish the style with an all-over mist of the flexible hold hairspray listed below to keep the movement natural without feeling stiff.
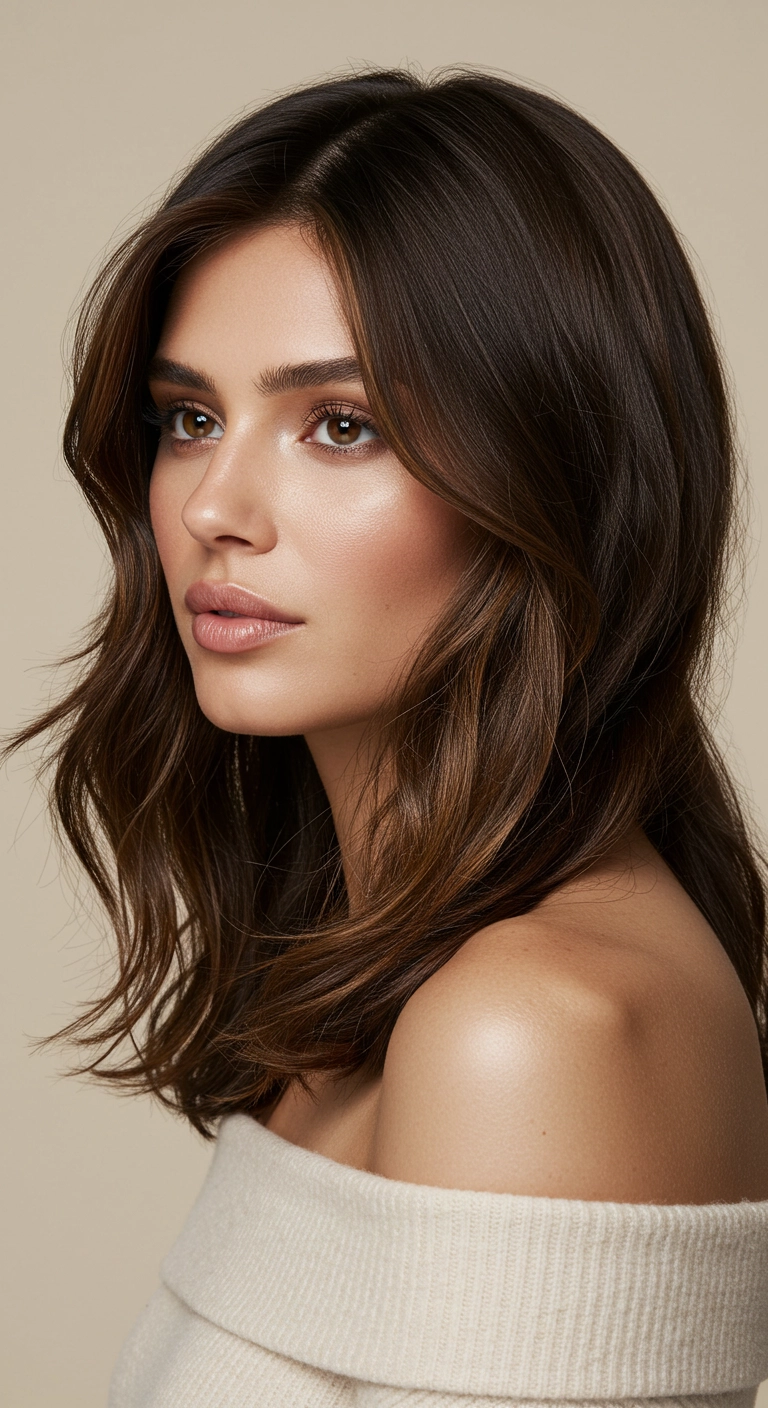
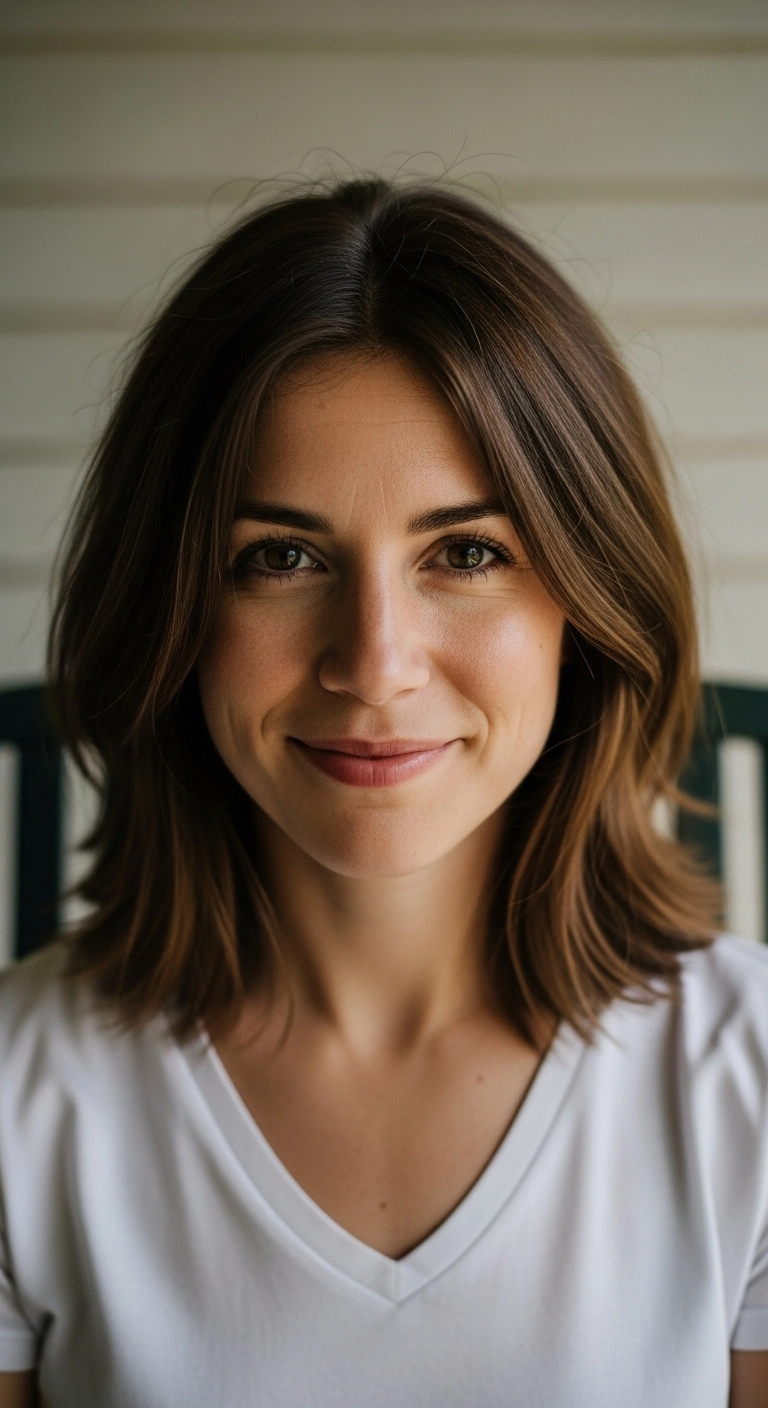
I fell in love with this style because it effortlessly blends classic elegance with everyday ease. It’s that perfect 'expensive brunette' vibe that looks like you barely tried, yet your hair catches the light in all the best ways. The soft face-framing layers instantly lift your features, and it holds up wonderfully whether you're heading to the office or out for an evening cocktail. If you’re looking to refresh your shoulder-length cut with subtle dimensional babylights and breezy movement, this is definitely the look to try!
How to do this
1. Start by prepping clean, damp hair with a lightweight heat protectant spray with argan oil listed below to safeguard your hair from thermal styling.
2. Apply a dollop of volumizing styling mousse listed below throughout the roots and mid-lengths to give your blowout body and hold.
3. Blow-dry using a ceramic round brush listed below, lifting upward at the roots and rolling outward around the face to shape the soft curtain layers.
4. Take a large barrel curling wand listed below and wrap vertical 1.5-inch sections away from the face, leaving the last inch of the ends uncurled for a modern, relaxed finish.
5. Allow the waves to cool completely, then gently rake through them with a wide-tooth detangling comb listed below to soften the bends.
6. Finish with a spritz of flexible hold texturizing hairspray listed below to give effortless separation and all-day movement.
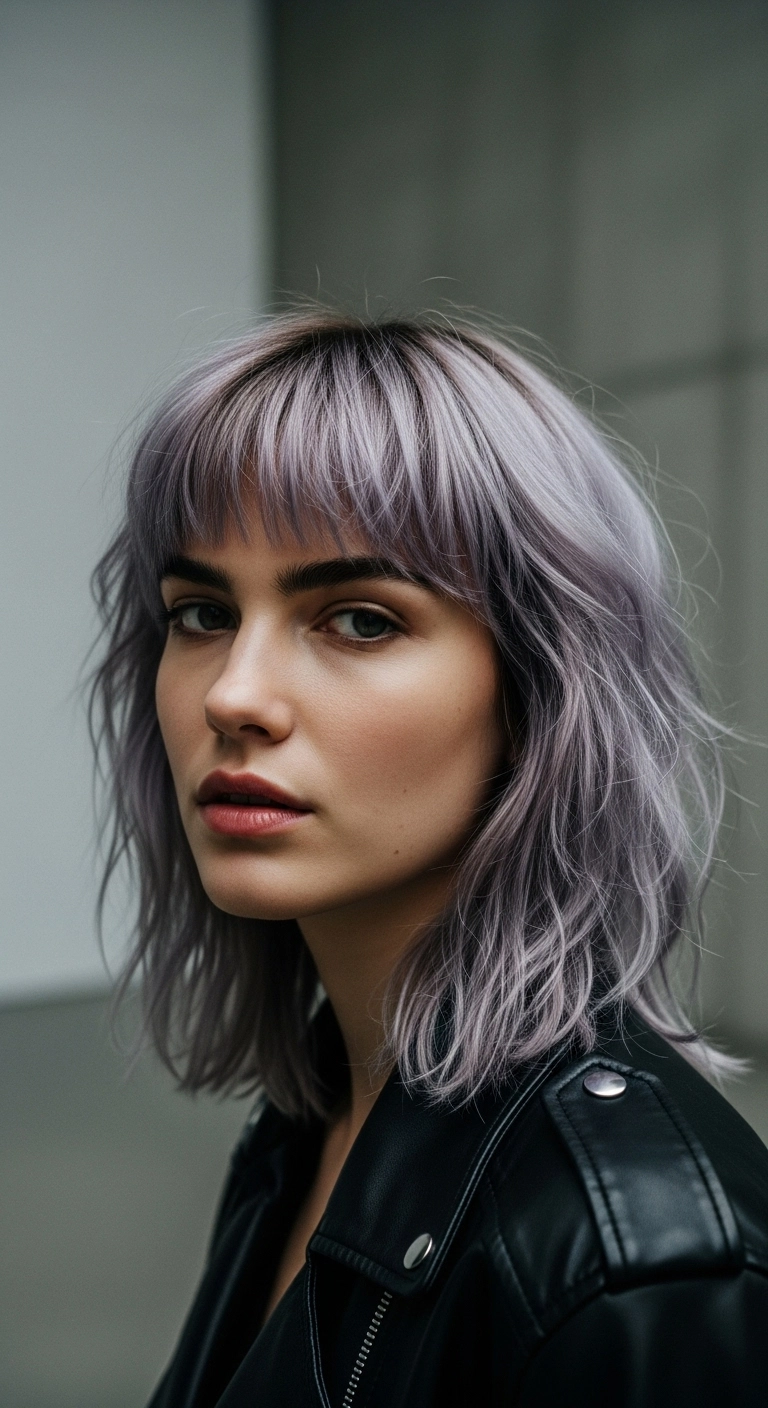
I think a textured shag lob paired with a soft, smoky pastel tone is the ultimate effortless cool-girl statement. The gentle shadow root keeps the high-lift lavender color grounded, while the piecey bangs frame the face perfectly. You can wear this blown out smooth for a sleek finish or scrunch in some texture spray for that perfectly undone leather jacket look!
How to do this
1. Start by prepping damp, towel-dried hair with a lightweight styling mousse using the volumizing mousse listed below to give the cut lift and separation.
2. Blow-dry the bangs straight down with a small flat paddle brush using the flat styling paddle brush listed below, sweeping them side to side gently to keep them soft and wispy without puffing up.
3. Rough-dry the remaining lengths using your fingers or a diffuser attachment to encourage your natural texture and soft bends.
4. Take random 1-inch sections of hair and lightly wrap them around a wide barrel wand using the 1.25-inch ceramic curling wand listed below, leaving the ends completely straight for that effortless, undone vibe.
5. Mist a generous amount of texturizing spray through the mid-lengths and ends using the dry texturizing finishing spray listed below, shaking out the waves with your fingers.
6. To keep the cool smoky lilac shade from turning brassy between salon visits, wash weekly with a violet-tinted cleanser using the purple toning shampoo listed below.
Nothing screams effortless cool like a lived-in icy lob! I'm completely obsessed with how these soft curtain bangs frame the cheekbones while the piecey blonde waves keep the whole vibe relaxed and chic.
How to do this
1. Start by washing hair with the purple toning shampoo listed below to keep that icy platinum tone looking crisp and bright without any yellow undertones.
2. On damp hair, mist throughout with the heat protectant spray listed below to shield your lightened strands from thermal damage.
3. Apply a golf-ball sized dollop of the volumizing mousse listed below through the roots and mid-lengths to give lift and airy body.
4. Blow dry using a large ceramic round brush, lifting up at the crown for volume and rolling the face-framing curtain bangs outward and away from the face.
5. Use a 1.25-inch curling iron or wand to add soft, loose bends to mid-lengths, making sure to leave the ends straight for that lived-in lob vibe.
6. Finish by misting the dry texturizing spray listed below generously from mid-shaft to ends and shaking it out with your fingers, sealing the tips with a drop of the lightweight hair oil listed below.
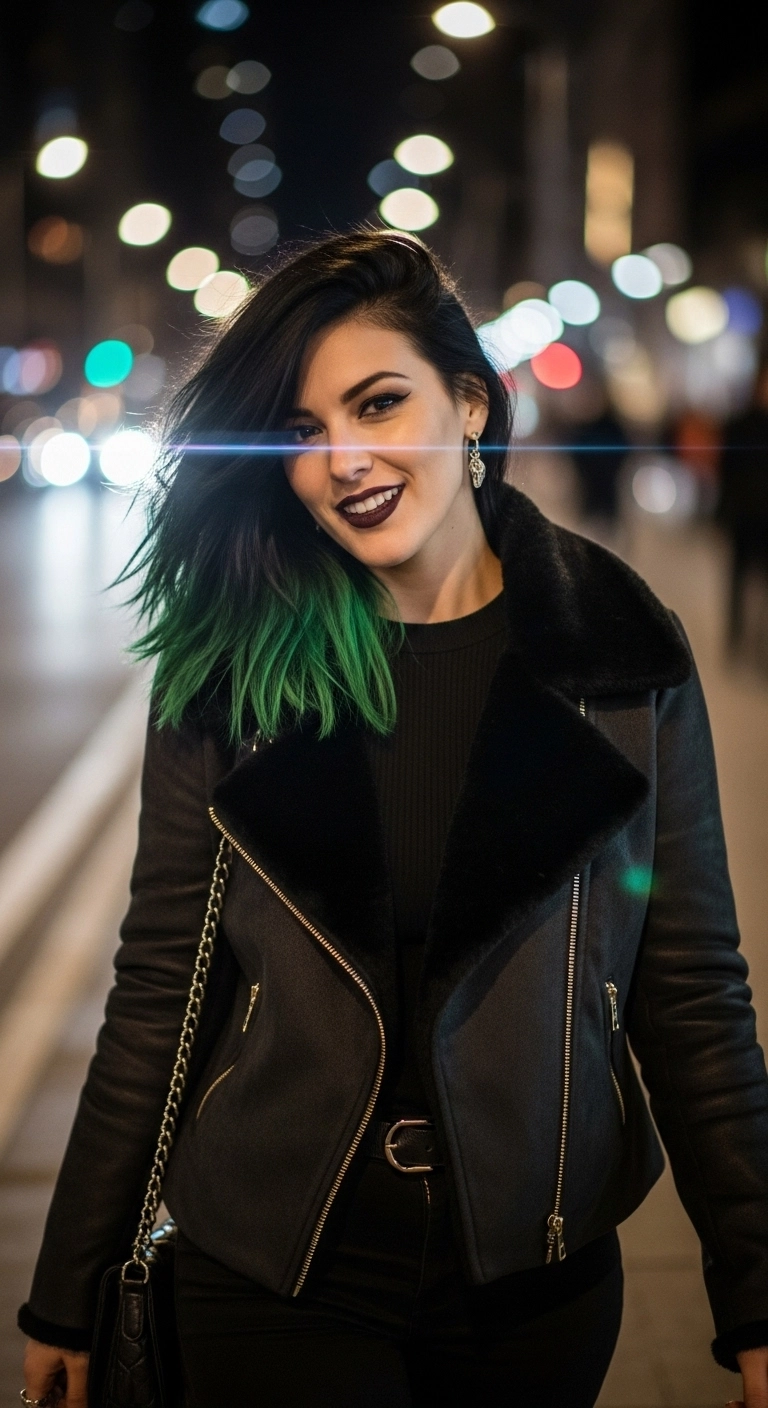
I fell in love with this punchy color combo when I was looking for a fun way to spice up dark hair without committing to an all-over bleach job. The vibrant emerald green dip-dye on the ends creates such a gorgeous contrast against the deep black roots! It gives off that perfect effortless grunge vibe with a deep side sweep. If you want a cool-girl pop of vivid color with low-commitment roots, you definitely have to give this style a try!
How to do this
1. Start by prepping damp hair with the lightweight volumizing mousse listed below, working it from roots to ends for lift and grip.
2. Blow dry the hair using the ceramic round brush listed below, focusing on lifting at the roots to establish a deep, dramatic side part.
3. Once dry, mist with the heat protectant spray listed below to shield colored strands from heat damage.
4. Take random sections and lightly bend them with a 1.25-inch flat iron or curling wand to create loose, piecey, undone texture rather than polished curls.
5. Rub a small amount of the matte styling wax listed below between your palms and piece out the emerald green ends to emphasize the choppy cut.
6. Finish with a generous spritz of the texturizing finishing spray listed below throughout the roots and mid-lengths for lasting volume and that effortless, lived-in edge.
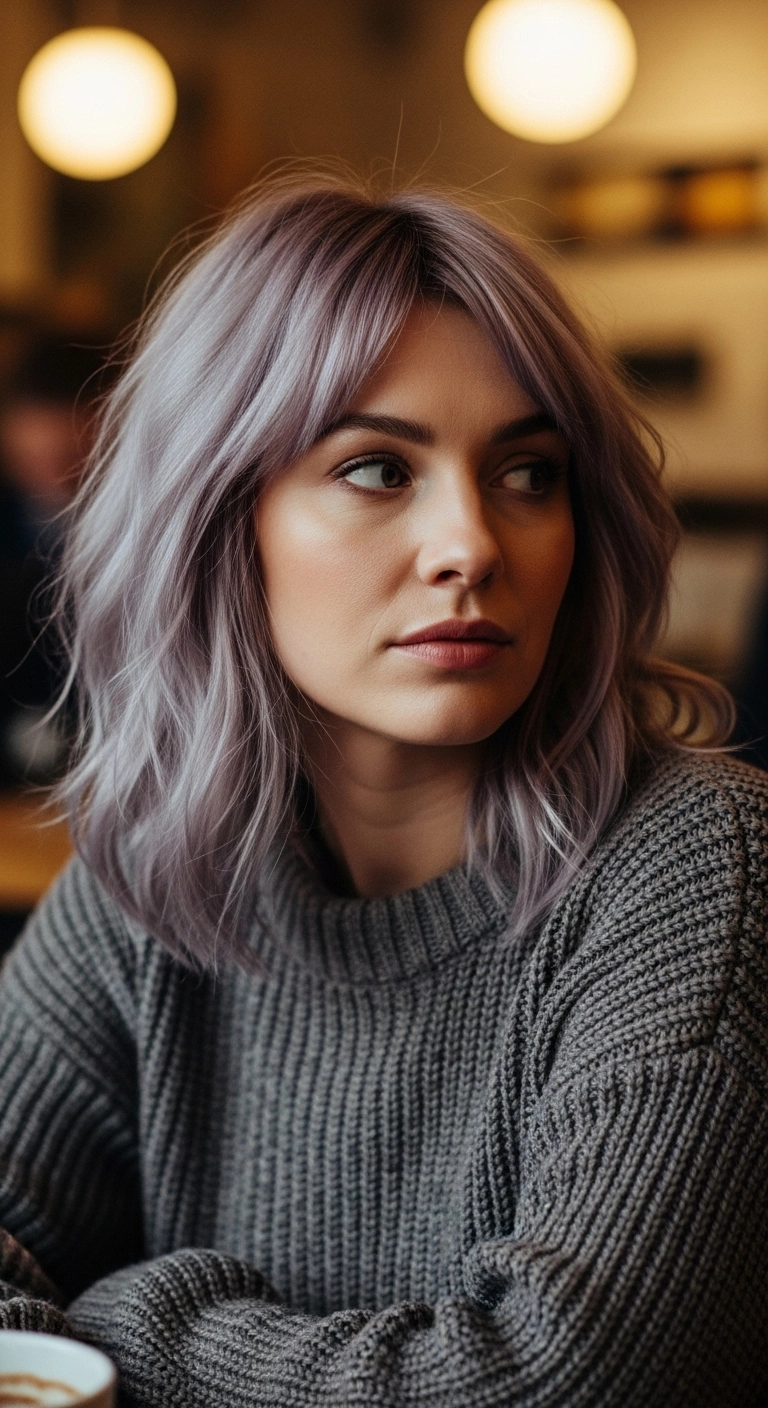
Are you completely obsessed with soft, muted pastel tones like I am? I just had to share this smoky lilac textured lob because it is the ultimate effortlessly cool style, don’t you think?! The soft shadow root makes maintenance so much easier when growing it out, while those wispy curtain bangs frame the face in the most flattering way. You can rock this super sleek and straight, or add these easy, undone waves for that cozy coffee shop aesthetic. It's chic, a little bit edgy, and guaranteed to turn heads wherever you go!
How to do this
1. Start by prepping damp, freshly washed hair with the leave-in heat protectant spray listed below to shield strands and keep pastel tones vibrant.
2. Apply a golf-ball sized dollop of the volumizing mousse listed below through the roots and mid-lengths to give your lob plenty of natural body and movement.
3. Blow-dry using a medium ceramic round brush, lifting at the roots for volume and directing the curtain bangs forward and away from the face.
4. Take random 1.5-inch vertical sections and wrap them loosely around the 1.25-inch curling wand listed below, alternating directions and leaving the bottom inch out for an effortless, modern bend.
5. Allow the hair to cool completely, then gently rake through the waves with your fingers or a wide-tooth comb to break up the pattern.
6. Mist generously with the dry texturizing spray listed below at the roots and through the lengths to create piecy definition and that lived-in, cool-girl grit.
7. Finish by smoothing a tiny drop of the lightweight hair serum listed below through the tips for a glossy, frizz-free finish.
This textured lob is absolute perfection if you want something effortless, chic, and super versatile! The rich wine-burgundy tone adds so much depth and warmth, especially paired with those relaxed bends. It's ridiculously easy to style in the morning and tucking one side behind the ear gives it that instant cool-girl finish!
How to do this
1. Start on freshly washed, damp hair and prep with the heat protectant spray listed below to shield strands from hot styling tools.
2. Blow dry using a paddle brush and nozzle attachment, lifting at the roots with your fingers to create natural body and a deep side part.
3. Once completely dry, take 1- to 2-inch vertical sections of hair and loosely wrap them around the 1.25-inch curling iron listed below, making sure to leave the last inch of the ends out for that effortless, relaxed vibe.
4. Let the curls cool for a couple of minutes, then gently run your fingers through your hair using the wide-tooth comb listed below to soften the waves into relaxed bends.
5. Spray the dry texturizing spray listed below through the mid-lengths and ends while shaking out the hair for volume and separated texture.
6. Tuck one side behind your ear and mist all over with the flexible hold hairspray listed below to keep the movement locked in all day.
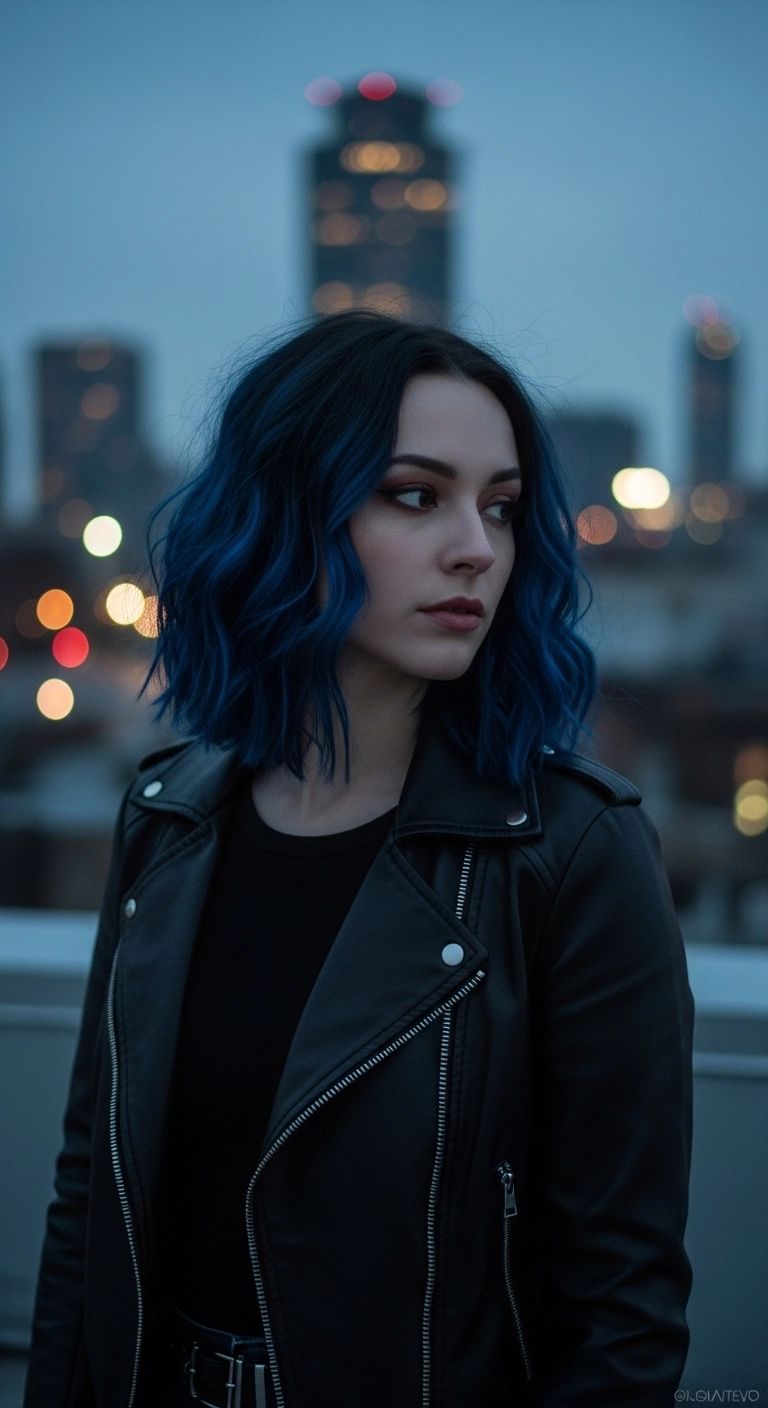
OK, if you’re looking to bring some serious edge into your style, this deep midnight blue lob is it! Keeping a natural shadow root makes vivid colors so much easier to grow out, and paired with undone bends, it totally gives that effortlessly cool rock-and-roll vibe.
How to do this
1. Start by prepping clean, damp hair by applying a dime-sized amount of the heat protectant cream listed below throughout your mid-lengths and ends to shield pre-lightened vivid hair from damage.
2. Blow-dry the hair completely smooth with a round brush, maintaining volume at the roots while keeping the natural density intact.
3. Divide your hair horizontally into three manageable sections and clip the top away.
4. Take one-inch vertical subsections and wrap them loosely around a medium barrel curling iron or styling wand, leaving about an inch of the ends out for that effortless, modern undone finish.
5. Alternate the direction of your curls—curling one piece away from the face and the next toward it—to give the texture plenty of body without clustering together.
6. Once the entire head has cooled, flip your head upside down and generously mist the dry texturizing spray listed below through the roots and mid-lengths to break up the wave pattern.
7. Flip upright and smooth out any flyaways around the center part, finishing with a couple of drops of the lightweight shine hair oil listed below pressed into the blue tips to keep the color glossy and hydrated.
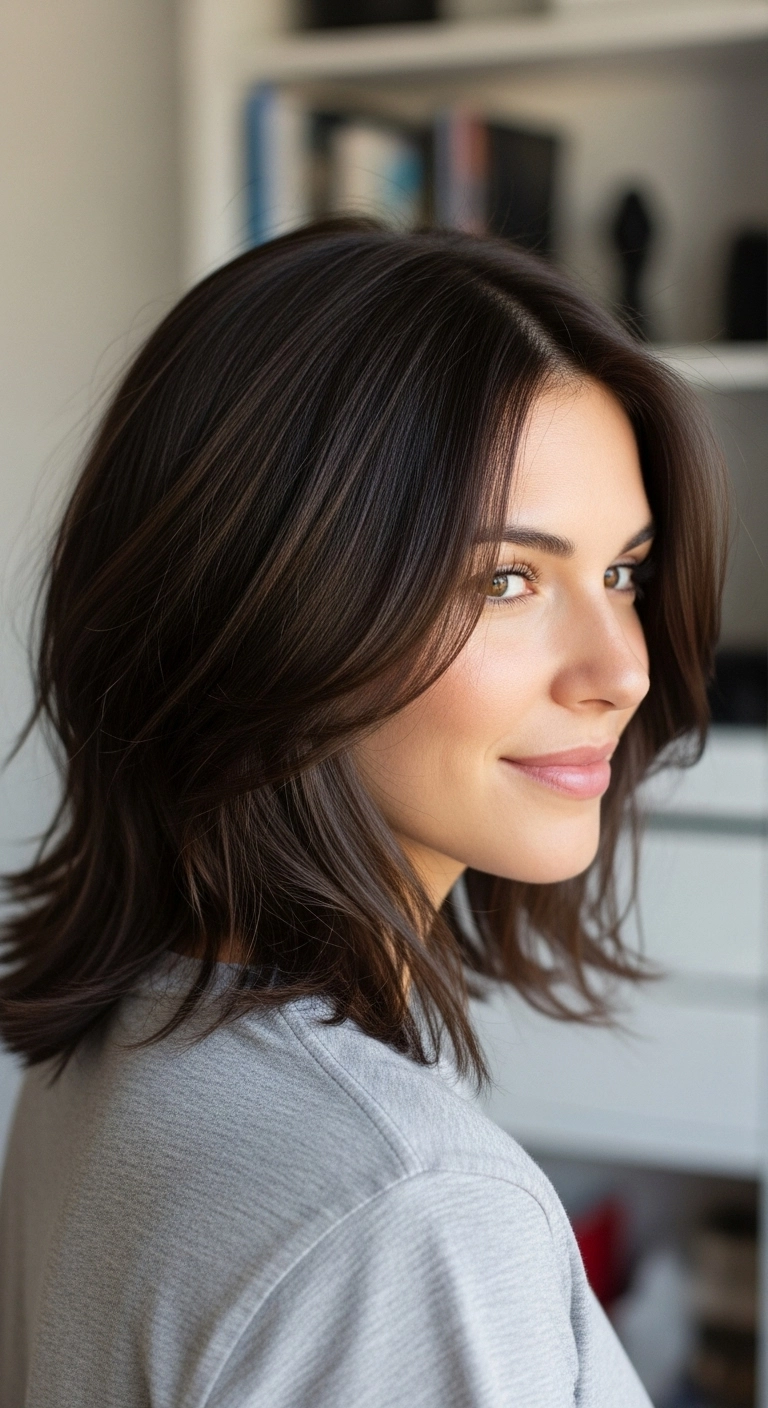
If you're looking for that effortless, 'I woke up like this' chic vibe, this gorgeous chocolate lob is it! The soft curtain layers frame the cheekbones so effortlessly, and that subtle flip at the ends gives it just the right touch of movement. It's universally flattering, super breezy to style, and seriously timeless!
How to do this
1. Start with freshly washed, towel-dried hair and apply a lightweight smoothing blowout cream along with the heat protectant spray listed below to prep the strands.
2. Part your hair down the center and rough-dry until it's about 80% dry, keeping the airflow moving downwards to keep the cuticle flat.
3. Section your hair into manageable tiers using styling sectioning clips, starting from the nape of your neck and working your way up.
4. Take a medium ceramic round brush and blow-dry each section smooth, wrapping the ends under slightly around the brush to create that bouncy, soft bend.
5. When you reach the front face-framing curtain bangs, roll them back and away from your face with the round brush, blowing warm air directly onto the roots to lift them before setting with a cool shot of air.
6. Once fully dry, mist a light amount of the texturizing spray listed below through the mid-lengths and shake out gently with your fingers for that effortless, lived-in flick.
7. Finish by rubbing a single drop of the lightweight hair serum listed below between your palms and smoothing it lightly over the flyaways and ends for a glossy, healthy finish.
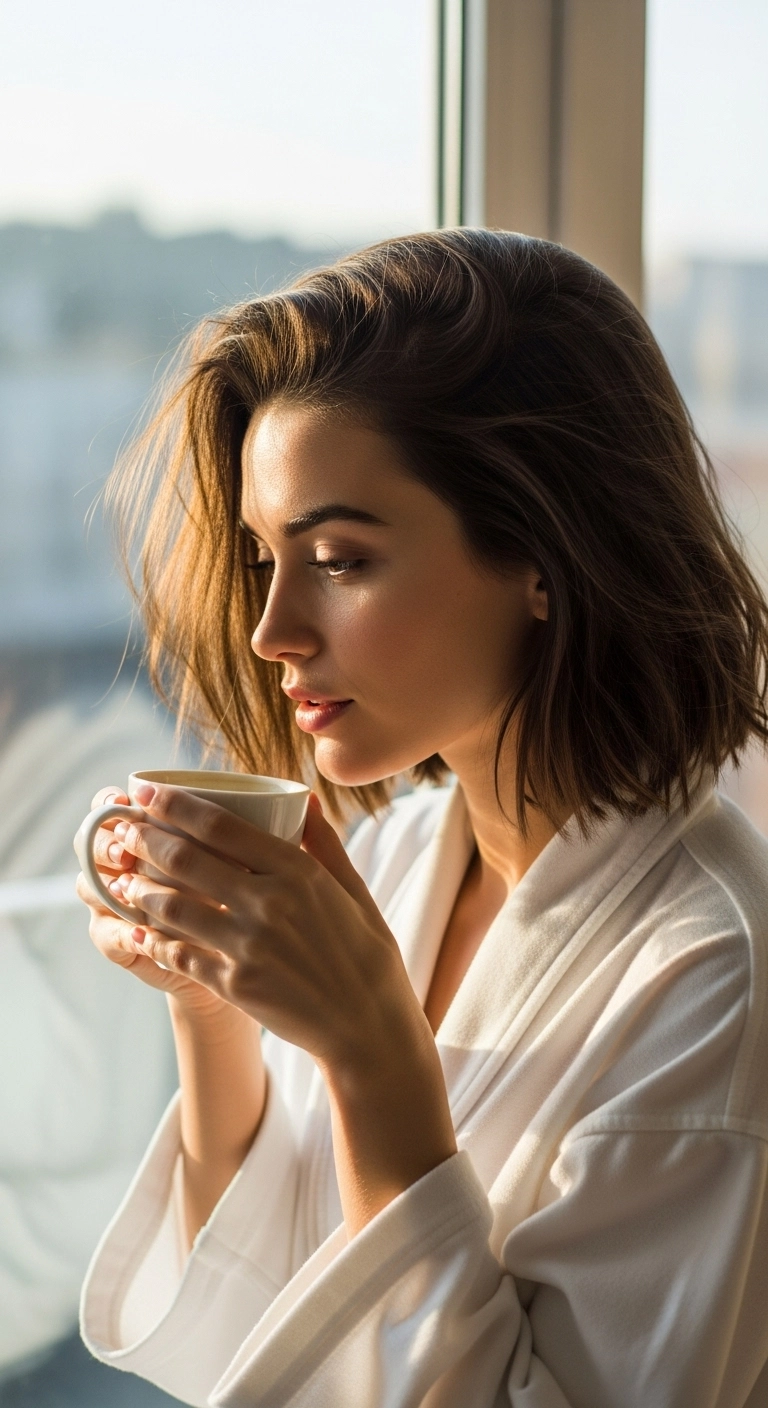
A collarbone lob like this is pretty much the ultimate sweet spot if you want something fresh without sacrificing styling options. I love how the soft layers flick right around the shoulders and frame the cheekbones so naturally. It gives that polished, "I just naturally woke up with gorgeous hair" vibe that works whether you're working from home in a tee or heading out for dinner.
How to do this
1. Start on damp, freshly washed hair and apply a quarter-sized amount of the lightweight heat protectant smoothing lotion listed below evenly from mid-lengths to ends.
2. Establish a neat center part using a fine-tooth tail comb, then section hair horizontally into manageable working quadrants.
3. Blow dry using a medium ceramic round brush listed below, lifting at the roots for gentle volume and rolling the brush outward at the ends to create a soft, bouncy flick.
4. For the front face-framing sections, roll the hair up and back away from the face with the round brush to encourage that signature curtain shape around the cheekbones.
5. Once fully dry, spray a light mist of the flexible hold texturizing spray listed below through the roots and mid-lengths to give movement without stiffness.
6. Finish off by rubbing two drops of the nourishing hair finishing oil listed below between your palms and smoothing over any flyaways for a glossy, healthy sheen.
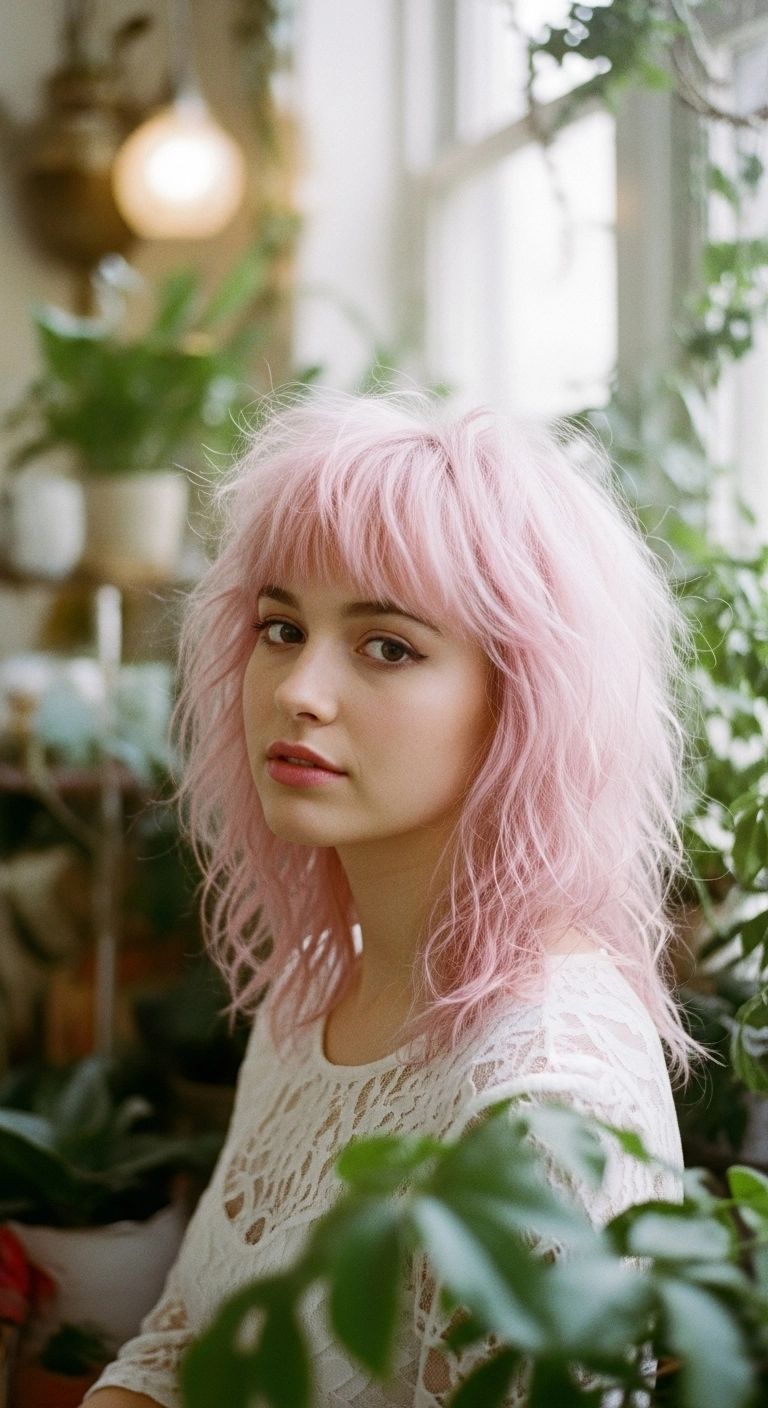
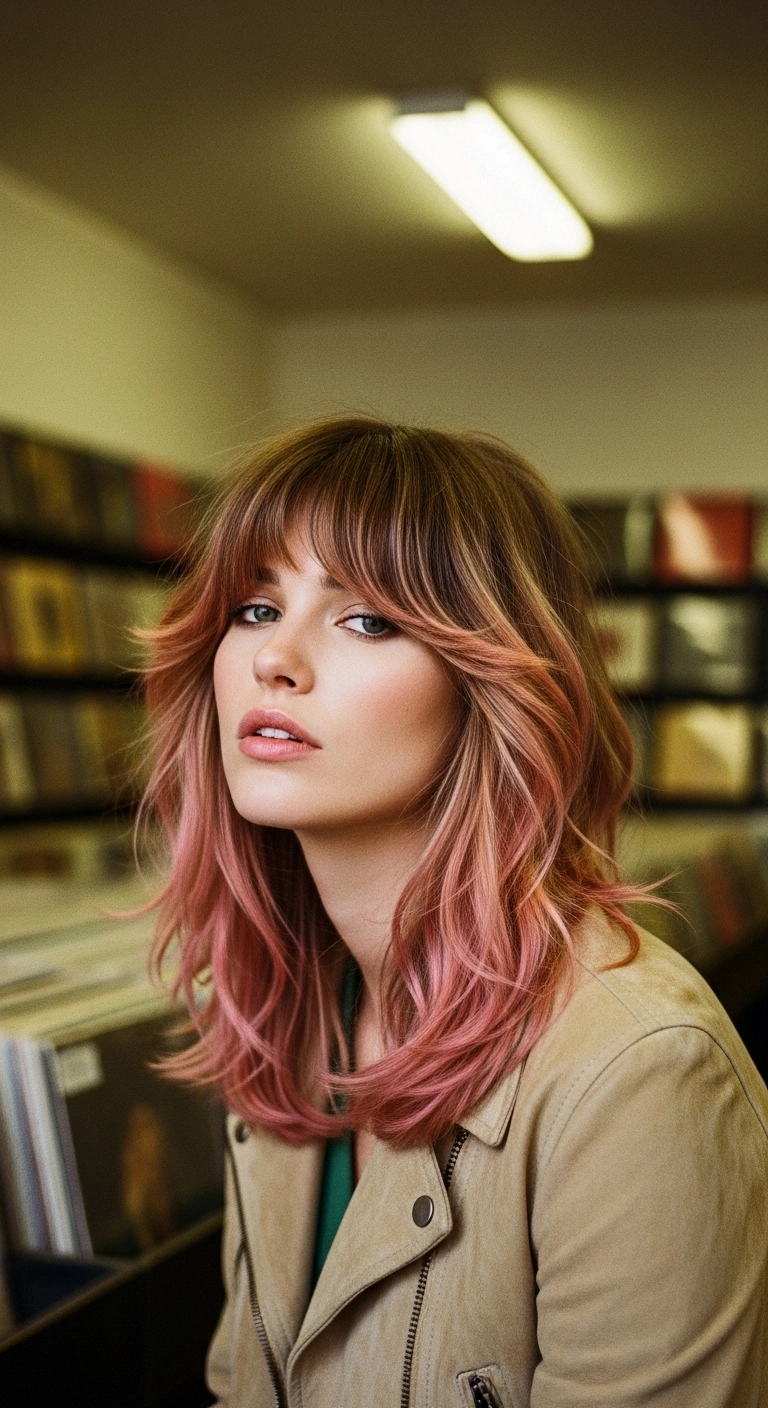
Oh, a fluffy pastel pink wolf shag, how gorgeous is this! The messy layers with that soft fringe give the ultimate dreamy fairy-grunge vibe. I am seriously obsessed! Would you ever dare to rock baby pink hair?
How to do this
1. Start by bleaching the hair evenly to a clean, pale level 10 blonde, then apply an all-over pastel baby pink semi-permanent dye using the color depositing pink hair mask listed below.
2. Cut the perimeter into a collarbone-grazing lob, then cut heavily textured, disconnected short layers throughout the crown and sides to establish a true shaggy silhouette.
3. Cut an eye-skimming, wispy textured fringe with feathering scissors to maintain lightness and movement around the eyes.
4. Apply a lightweight texturizing sea salt spray into towel-dried hair, then rough-dry with a diffuser attachment to coax out natural piecey waves.
5. Use a mini flat iron to add random, subtle bends and slight flicked-out ends to random exterior pieces.
6. Finish by misting the dry texturizing spray listed below through the crown and roots, gently shaking the hair with your fingers for effortless, undone volume.
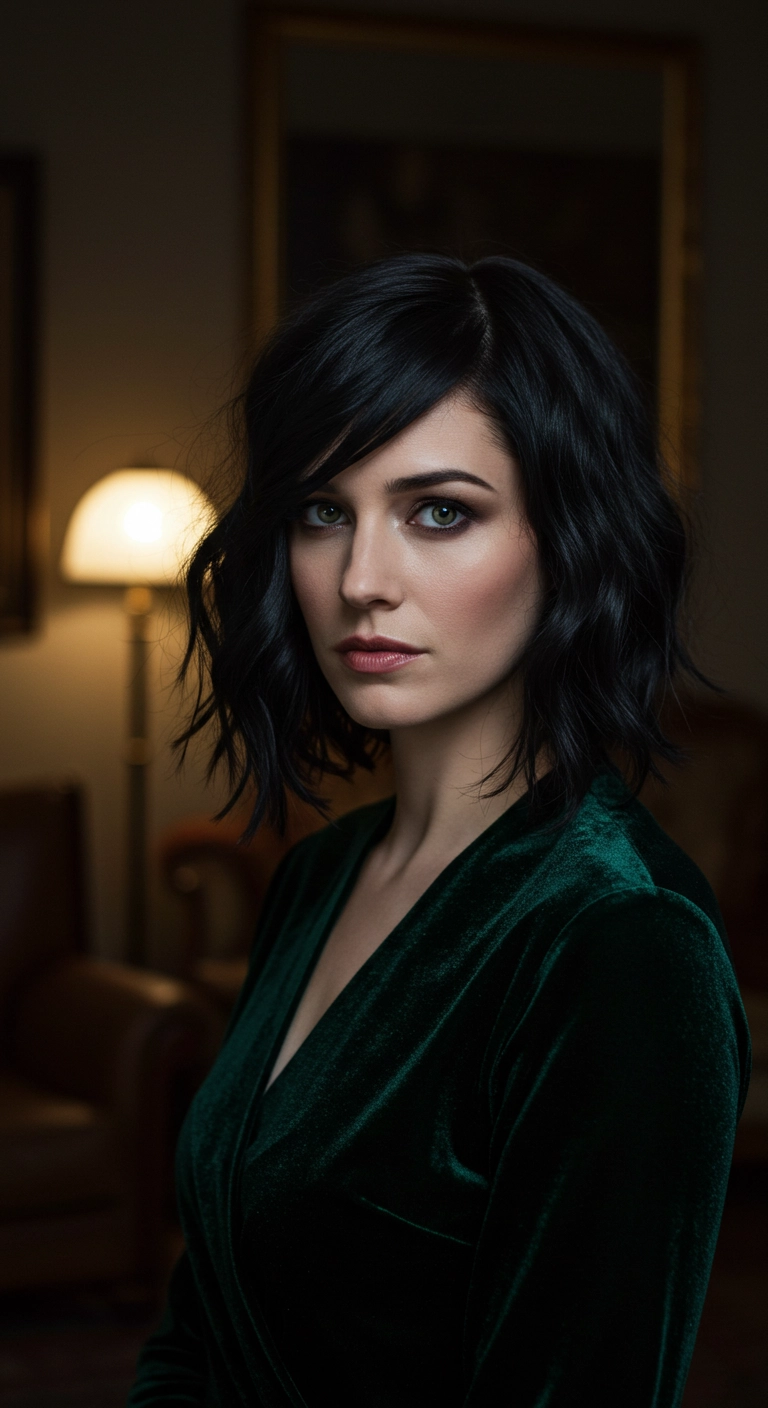
I've always loved how a classic lob instantly elevates an outfit, especially when paired with a rich, dark velvet look! For this style, I opted for relaxed S-waves rather than polished curls because it keeps the overall vibe effortlessly chic and modern. Sweeping that front section across into a deep side part frames the eyes beautifully and gives just the right amount of moody drama. It's super easy to recreate for an evening out or a holiday party, and you can add a delicate hair pin if you want to dress it up even more!
How to do this
1. Start with towel-dried hair and apply a lightweight heat protection primer using the heat protectant spray listed below to shield strands from styling damage.
2. Blow-dry hair using a medium round ceramic brush, lifting at the roots to build soft volume, and establish a deep side part sweeping over one eye.
3. Take 1- to 2-inch vertical sections and wrap them loosely around a 1.25-inch curling wand, leaving the last inch of the ends out to maintain that chic, modern blunt feel.
4. Alternate the curl directions slightly, but ensure the pieces framing your face curl outward and away from the cheekbones.
5. Once your curls have cooled down completely, mist a generous amount of the texturizing wave spray listed below all over your mid-lengths.
6. Gently shake out the waves with your fingers or a wide-tooth comb to break up the pattern into relaxed, lived-in bends.
7. Finish the look with a light mist of the flexible hold hairspray listed below to keep the side-swept shape intact throughout the night.
The textured lob with soft Birkin bangs. Such an easy, effortless classic! I love how the soft wave texture pairs with a piecey fringe to frame the face without feeling stiff or over-styled. It's totally versatile and perfect for throwing on an oversized cozy knit sweater and heading out the door.
How to do this
1. Start on freshly washed, towel-dried hair and mist all over with the heat protectant spray listed below to prep your strands.
2. Blow-dry your fringe first using a small round ceramic brush, moving the hair back and forth with low heat so your bangs fall softly right across your brow line.
3. Apply a small amount of the lightweight volumizing mousse listed below through your mid-lengths and rough dry the rest of your hair until it's completely dry.
4. Take random 1-inch sections of hair and wrap them loosely around the 1.25-inch curling iron listed below, leaving the bottom inch of hair out to keep the look effortless and modern.
5. Alternate the direction of your curls away from and towards your face to create natural texture and dimension.
6. Once all sections have cooled completely, gently run your fingers through your hair to break up the waves.
7. Finish by spritzing the dry texturizing spray listed below generously from roots to mid-lengths to give that perfect lived-in, piecey bounce.
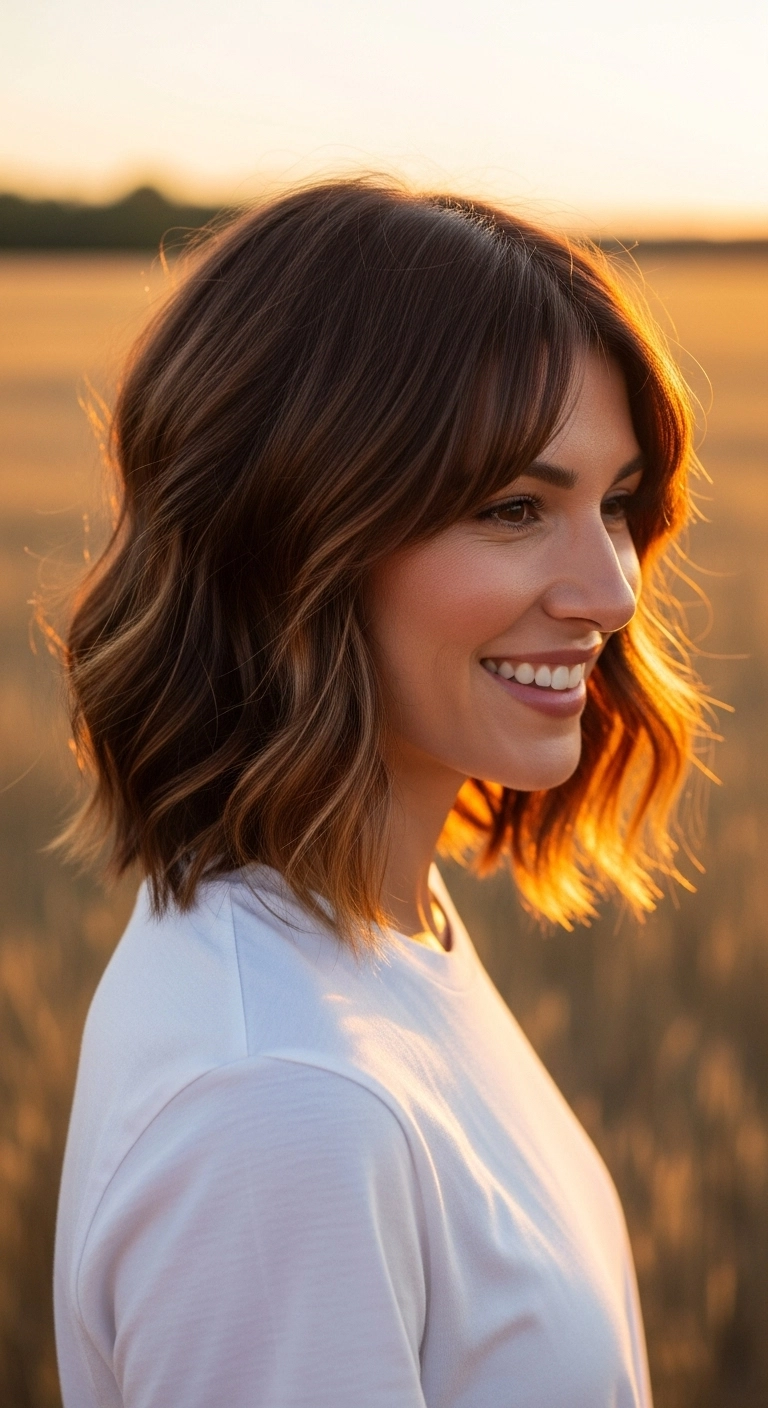
Are you thinking about chopping your hair into a chic lob but scared you’ll miss the softness? This textured collarbone-length cut paired with warm caramel balayage gives you the best of both worlds. The effortless curtain bangs highlight your cheekbones without requiring tons of styling time, making it the ultimate cool-girl haircut.
How to do this
1. Start by prepping freshly washed, damp hair with the lightweight thermal protecting mist listed below to shield strands from heat and add subtle slip.
2. Blow-dry using a round ceramic brush, lifting at the roots for volume and directing the curtain bangs forward and slightly back away from the eyes.
3. Take 1 to 1.5-inch vertical sections of hair and wrap them around the 1.25-inch curling wand listed below, leaving the bottom inch out for an effortless, modern shape.
4. Alternate the curl directions around the head to create natural, non-uniform dimension, keeping the front face-framing pieces curled gently away from your face.
5. Allow the curls to cool completely, then use the wide-tooth styling comb listed below to gently break apart the curls into relaxed, fluid S-waves.
6. Shake and spray the dry texturizing volume spray listed below throughout the mid-lengths and underneath to add gritty separation and body.
7. Finish by rubbing a dime-sized drop of the lightweight finishing hair oil listed below between your palms and smoothing over the ends to add shine and catch the light.
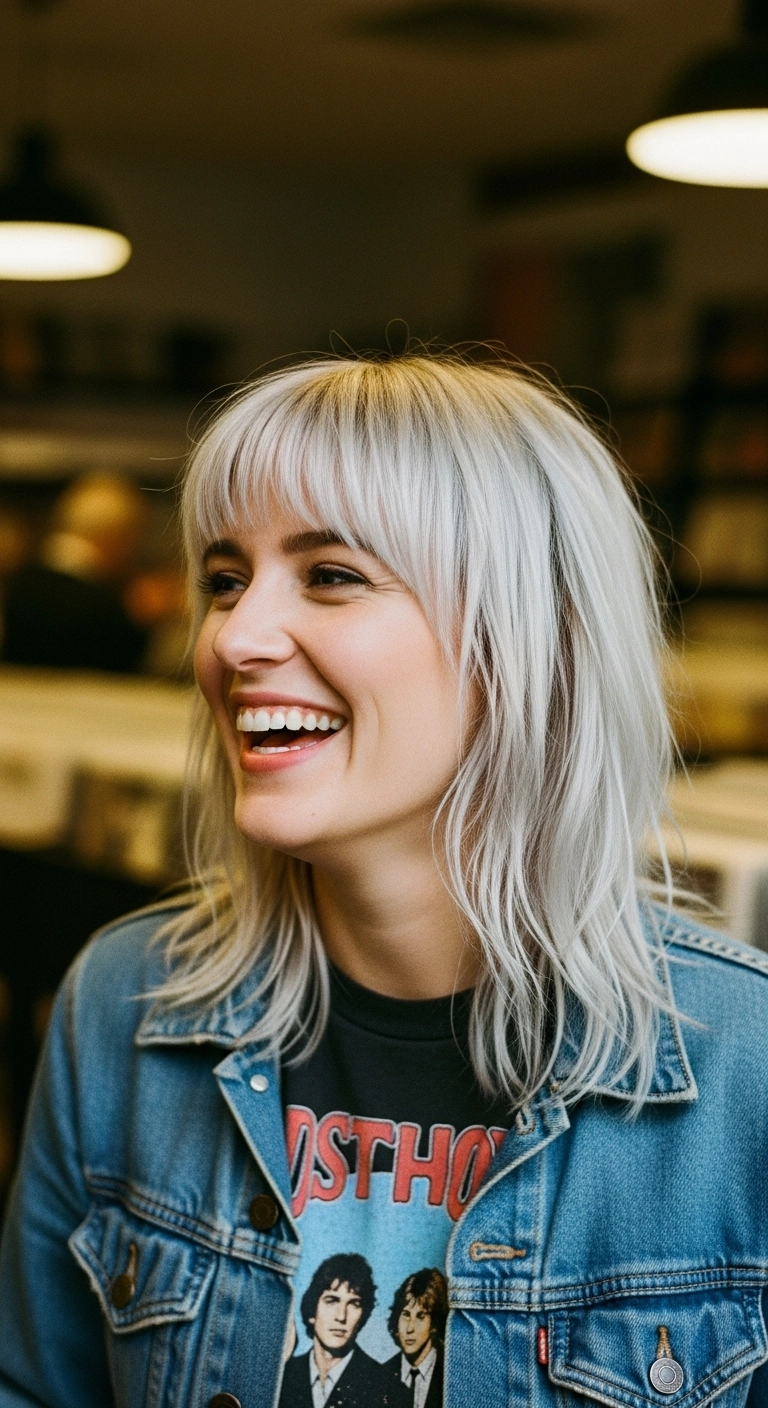
I fell in love with this style the second I decided I wanted something edgy yet effortless to wake up with. The feathered shag layers give your hair instant body without having to spend an hour with a curling iron, and the bright icy platinum gives it that quintessential rocker edge. Plus, the wispy fringe frames your eyes in the prettiest way even on days when you just want to throw the rest in a messy topknot!
How to do this
1. Start by prepping damp, freshly washed hair with a lightweight leave-in conditioner and the heat protectant spray listed below to shield bleached hair from heat styling.
2. Blow-dry the bangs first using a small paddle brush or round brush, sweeping them back and forth against the forehead to eliminate cowlicks and achieve that wispy, natural drape.
3. Rough-dry the rest of the lengths with a hair dryer and your fingers, lifting at the roots to encourage volume and natural texture.
4. Take random 1-to-2 inch vertical sections of the mid-lengths and quickly tap them with a flat iron or styling wand to create slight lived-in bends rather than uniform curls.
5. Shake your fingers through your hair to loosen up the waves and break up the separation.
6. Mist generously with the dry texturizing spray listed below through the mid-lengths and ends for that effortless, rock-and-roll fullness.
7. Finish by pinching a tiny amount of the matte styling wax listed below into the tips of your bangs and face-framing layers to give them that piecey, defined separation.
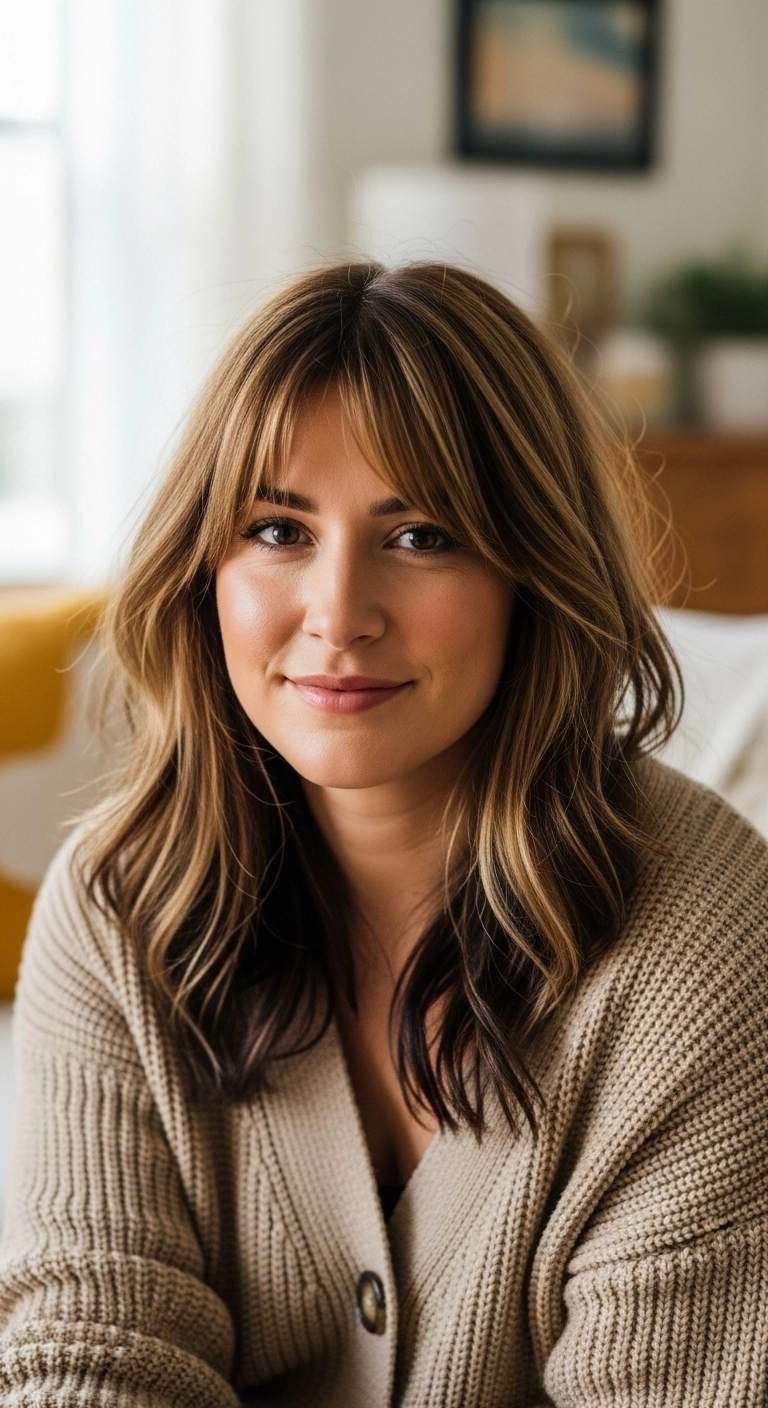
This look is honestly the holy grail of effortless chic hair! The soft bottleneck bangs frame the cheekbones so nicely, and the warm honey ribbons running through a deeper brunette base give it that dimensional, lived-in depth that grows out like an absolute dream. It's totally effortless, super flattering, and works on pretty much anyone wanting that classic cool-girl blowout vibe.
How to do this
1. Start by prepping damp, freshly washed hair with a lightweight smoothing cream and the heat protectant spray listed below to shield strands from thermal styling.
2. Rough dry your hair until it is about 80% dry, then separate out the fringe area to blow-dry first.
3. Using the ceramic round blow-dry brush listed below, roll the curtain bangs forward and under, then quickly flick them back and outward away from your face to give that relaxed, piecey bottleneck swoop.
4. Section the rest of the hair into top and bottom halves. Using a large round brush or the 1.25 inch curling iron listed below, wrap mid-length sections vertically away from the face, leaving the very ends somewhat straight for a lived-in texture.
5. Once all curls have cooled completely, gently rake through them with your fingers or a wide-tooth detangling comb to break up any structured ringlets.
6. Mist the dry texturizing spray listed below evenly through the roots and mid-lengths, gently scrunching upward to build soft, airy volume and separation.
7. Finish with a drop of the nourishing lightweight hair oil listed below rubbed into your palms and smoothed over the ends to add a glossy, healthy sheen.
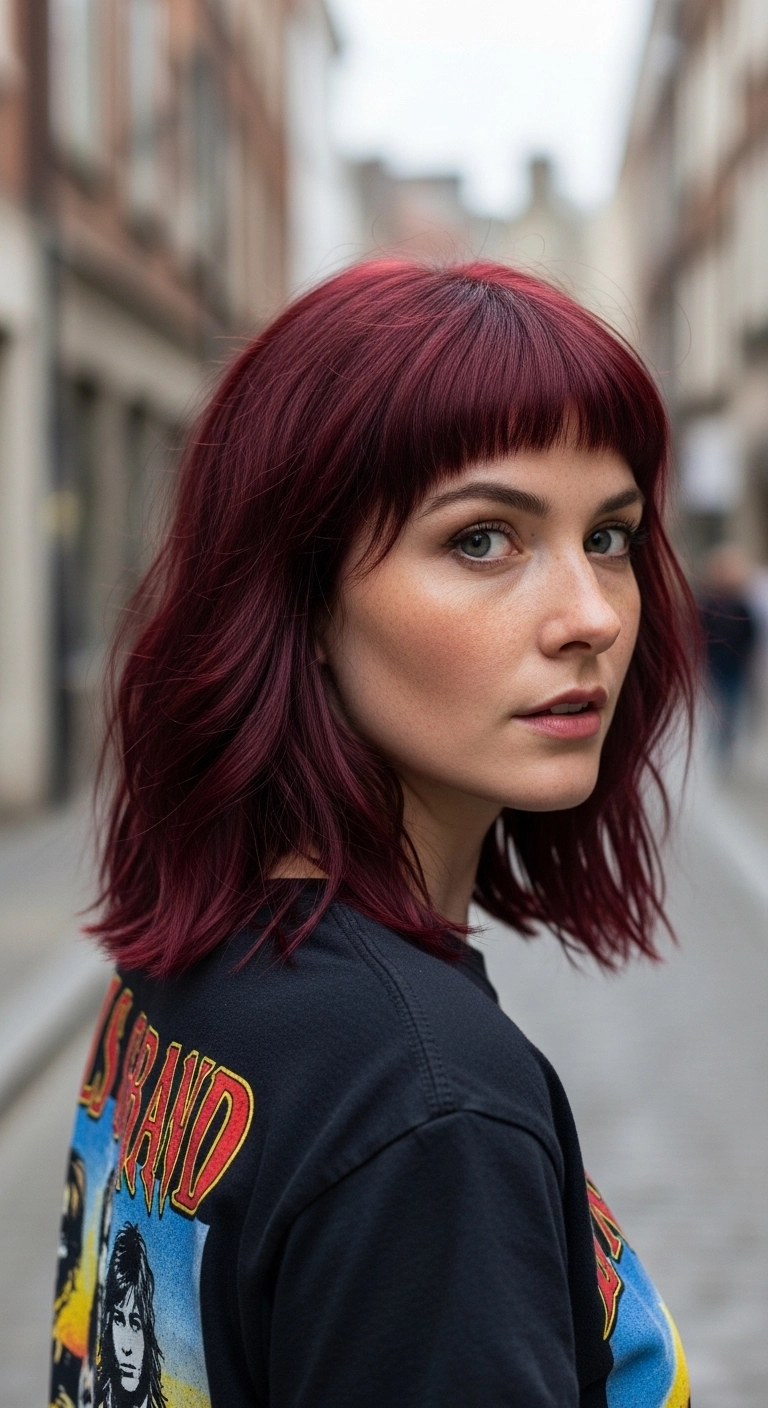
Going bold with your cut and color doesn’t have to feel intimidating! A rich wine or burgundy hue paired with a shoulder-skimming lob gives instant rocker-chic energy without needing hours of styling. The blunt micro bangs bring all the focus to your eyes and cheekbones, while loose, undone bends keep the whole look feeling casual and effortless. If you want a cool-girl statement haircut, this one is calling your name.
How to do this
1. Start by prepping your freshly washed hair with the heat protectant spray listed below to shield your strands and keep your deep red vibrant.
2. Blow dry using a paddle brush, making sure to dry the bangs straight forward and flat against your forehead with the concentrator nozzle.
3. Using a 1.25-inch curling iron or flat iron, add subtle, irregular bends through the mid-lengths, leaving the very ends straight for an edgy, lived-in texture.
4. Shake out the waves with your fingers and mist the texturizing spray listed below through the lengths to build effortless volume and separation.
5. Define the tips of your micro bangs with a tiny amount of the matte styling wax listed below to give them that cool, piecey finish.
6. Finish with a spritz of flexible hold hairspray listed below to lock your style in place all day.
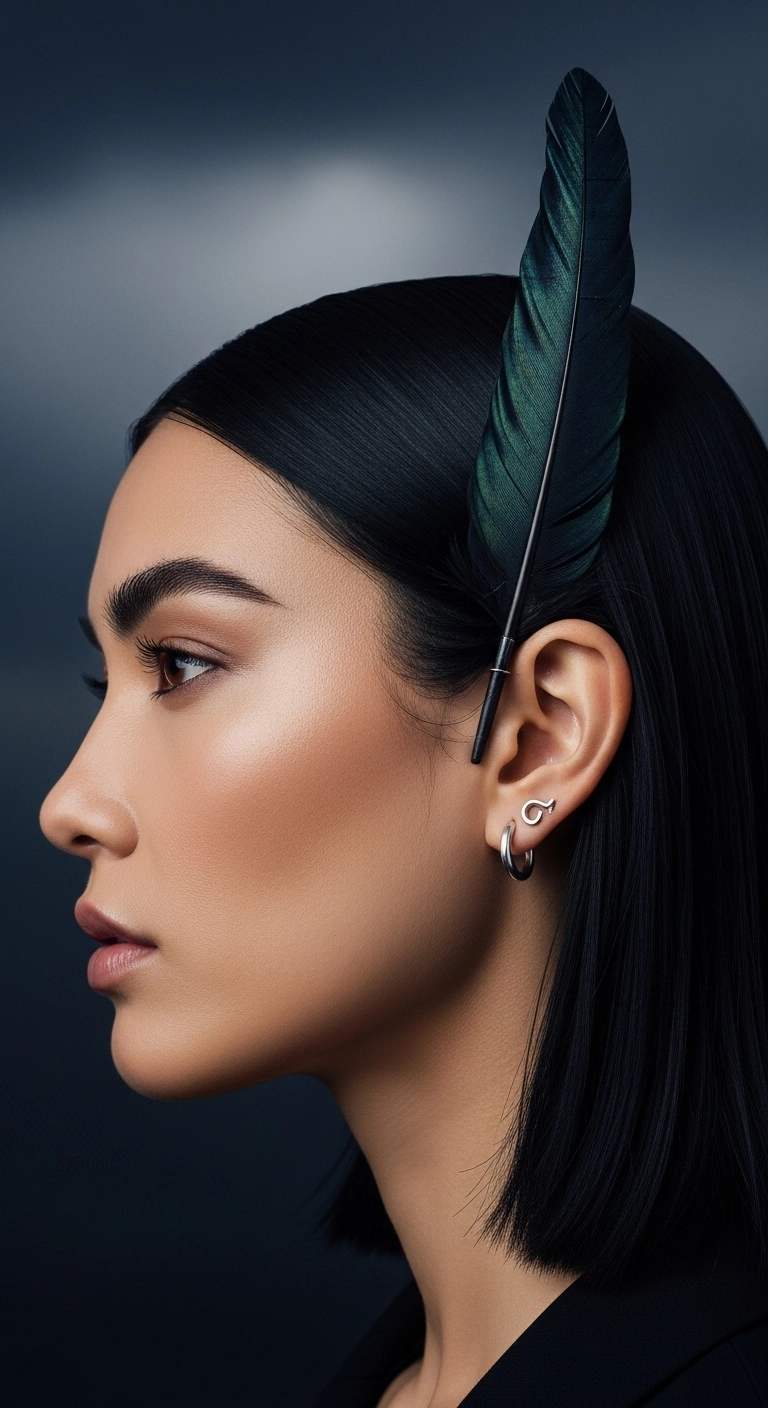
Super sleek, glass-like blunt lob tucked behind the ear with a bold emerald feather piece. Honestly, tucking your hair behind the ear is already so effortlessly chic, but adding that tall feather turns it into total high-fashion runway drama. It’s sharp, minimal, and gives off absolute boss energy without trying too hard.
How to do this
1. Start by prepping freshly washed, damp hair with a lightweight smoothing serum and the heat protectant spray listed below to shield strands from high heat.
2. Blow-dry the hair completely smooth and flat using a paddle brush and directional concentrator nozzle, directing airflow downwards along the cuticle.
3. Divide hair into small, thin horizontal sections and flat iron from roots to ends using the ceramic flat iron listed below to get that ultra-sleek, liquid-glass finish.
4. Establish a clean center or side part, comb the front section smoothly against the scalp, and tuck it neatly behind the ear.
5. Secure the tucked hair tightly with discreet bobby pins near the hairline above the ear, then slide in your decorative feather hair pin listed below so it stands upright.
6. Finish off the whole look with a generous mist of the high-shine finishing spray listed below to eliminate flyaways and lock in mirror-like reflection.
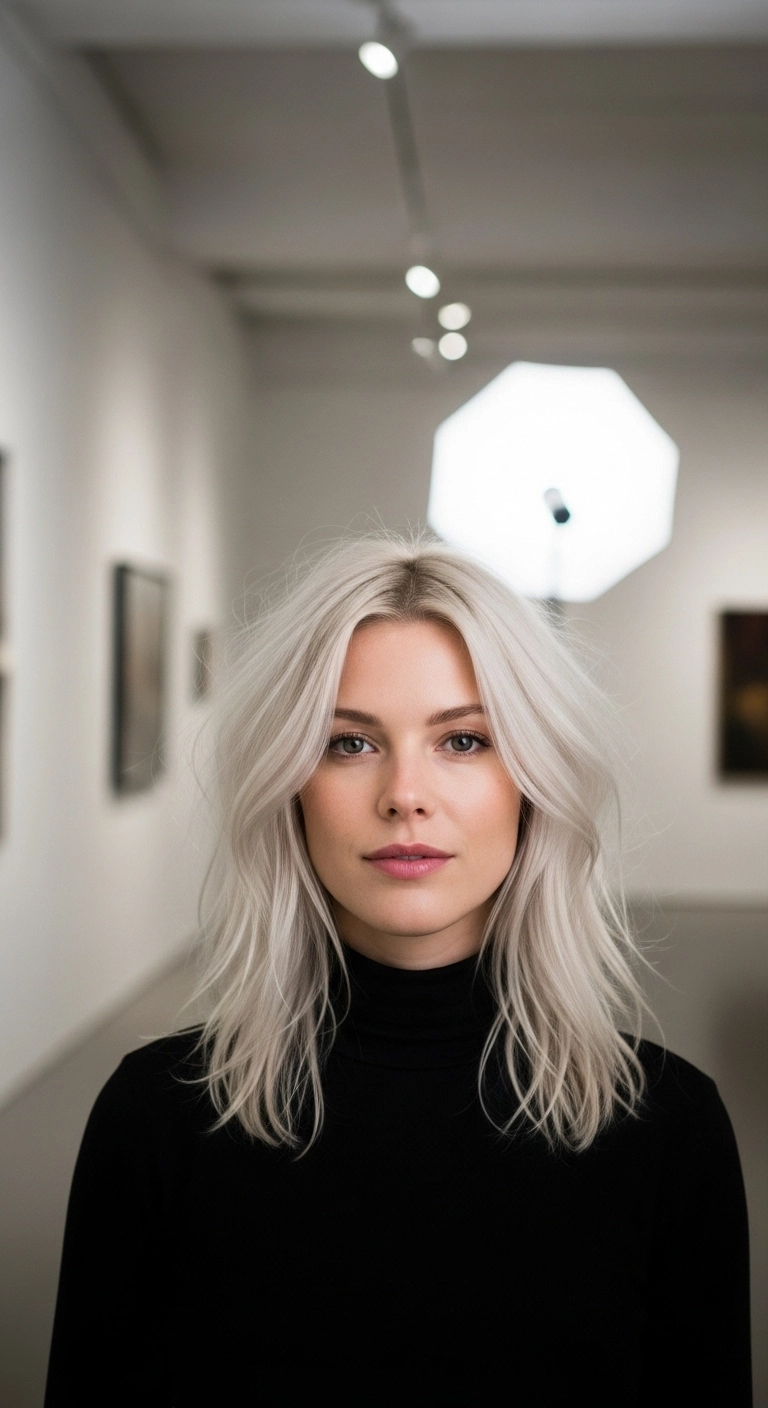
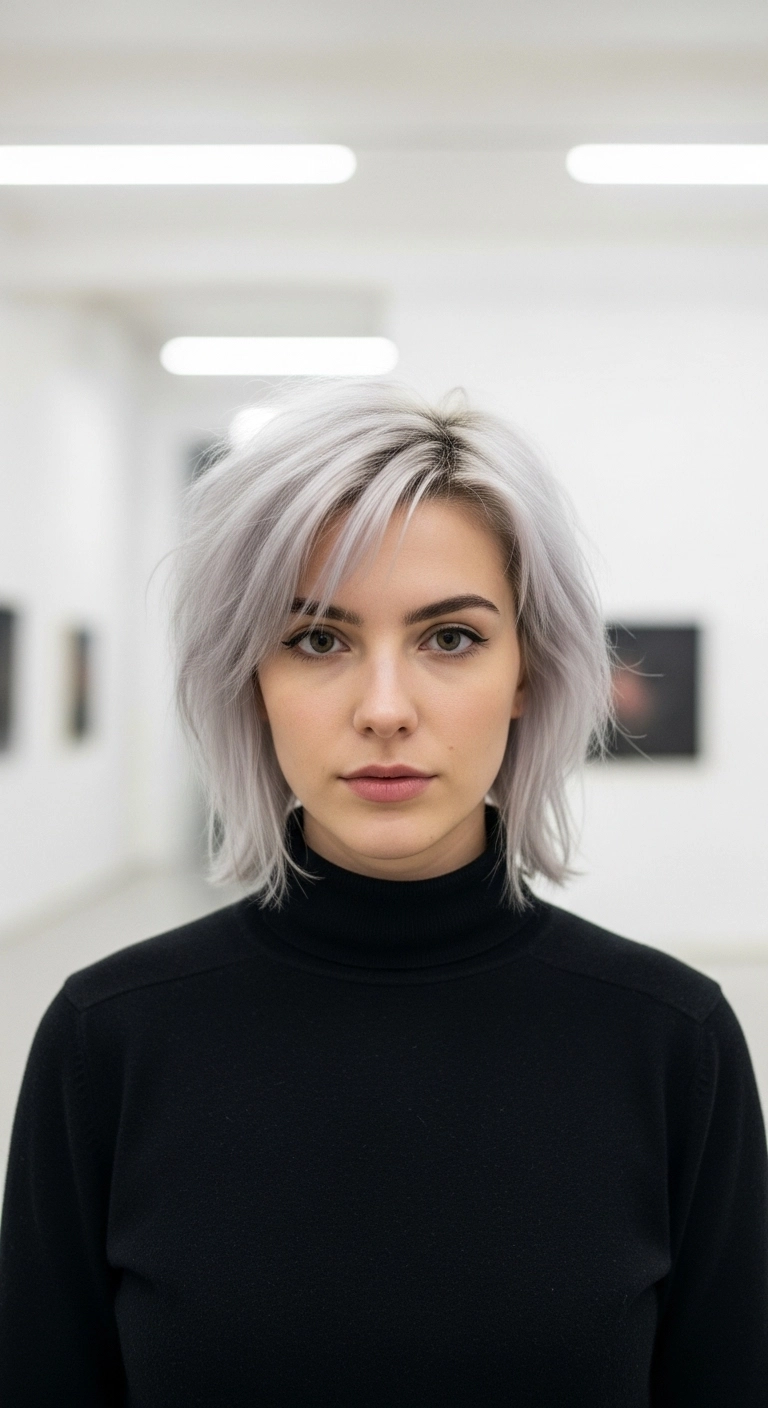
I am completely obsessed with this edgy icy silver bob! It has the most incredible feathered texture and effortless piecey bangs that frame the face like a dream. This look is stunning if you want something super modern, chic, and full of personality that pairs just as easily with a cozy turtleneck as it does on a night out.
How to do this
1. Start by bleaching the hair evenly to a clean level 10 pale yellow base, followed by a cool violet-silver toner using the purple toning shampoo and silver gloss treatment listed below to eliminate warmth.
2. Cut the hair into a textured collarbone-length lob, incorporating interior feathered layers and textured, wispy side fringe to create movement.
3. Prep damp, clean hair with a pump of the lightweight volumizing mousse listed below, focusing on the roots for lift.
4. Blow dry the hair using the ceramic round brush listed below, lifting upward at the crown and sweeping the bangs gently to the side.
5. Once fully dry, mist the roots and mid-lengths with the dry texturizing spray listed below, lightly scrunching with your fingertips to create an airy, piecey separation.
6. Finish the look by applying a pea-sized dab of the matte styling wax listed below to define the ends and keep the side-swept bangs in place.