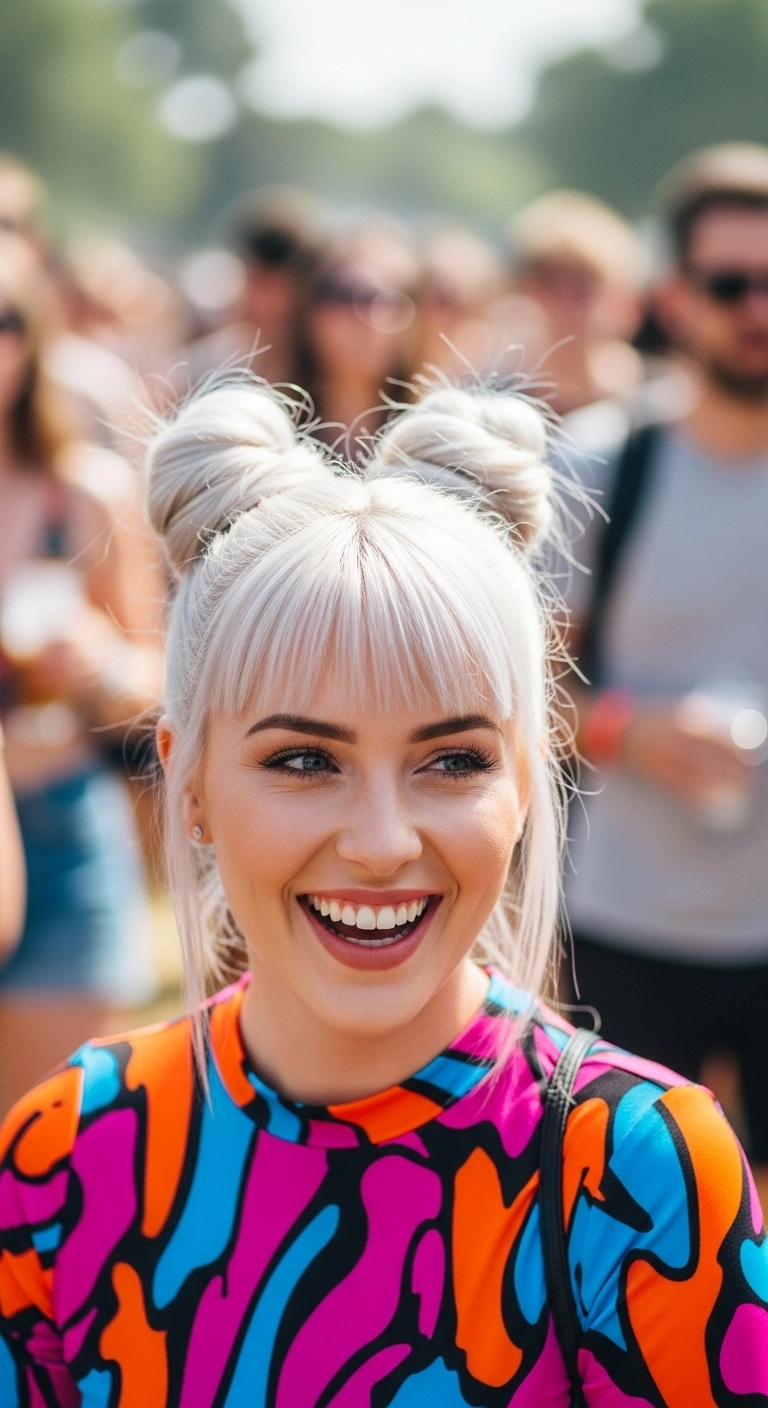
Are you heading to a summer festival or concert soon? I am totally obsessed with these adorable platinum double space buns! Combining sleek mini top knots with soft, wispy bangs and delicate face-framing pieces gives you the ultimate fun, playful vibe while keeping your hair up and out of the way all day. Whether you rock this icy blonde look with a bold colorful outfit or pair it with your favorite casual streetwear, it is such an effortlessly cute statement style!
How to do this
1. Start by parting clean, dry hair straight down the middle from your forehead back to the nape of your neck using a fine-tooth rat tail comb.
2. Separate your wispy bangs and leave two slender face-framing tendrils out on either side of your face.
3. Gather one half of your hair into a high pigtail near the crown of your head and secure it firmly with a clear elastic hair tie.
4. Twist the length of the ponytail around its base to create a round, compact space bun, then pin it down securely using bobby pins.
5. Repeat the exact same twisting and pinning steps on the opposite side to make sure your space buns sit symmetrically on top.
6. Lightly smooth and curve your bangs inward using a mini flat iron listed below to give them that soft, rounded fringe shape.
7. Finish the entire festival look by misting all over with a strong-hold setting hairspray listed below so the buns stay intact through dancing and heat.
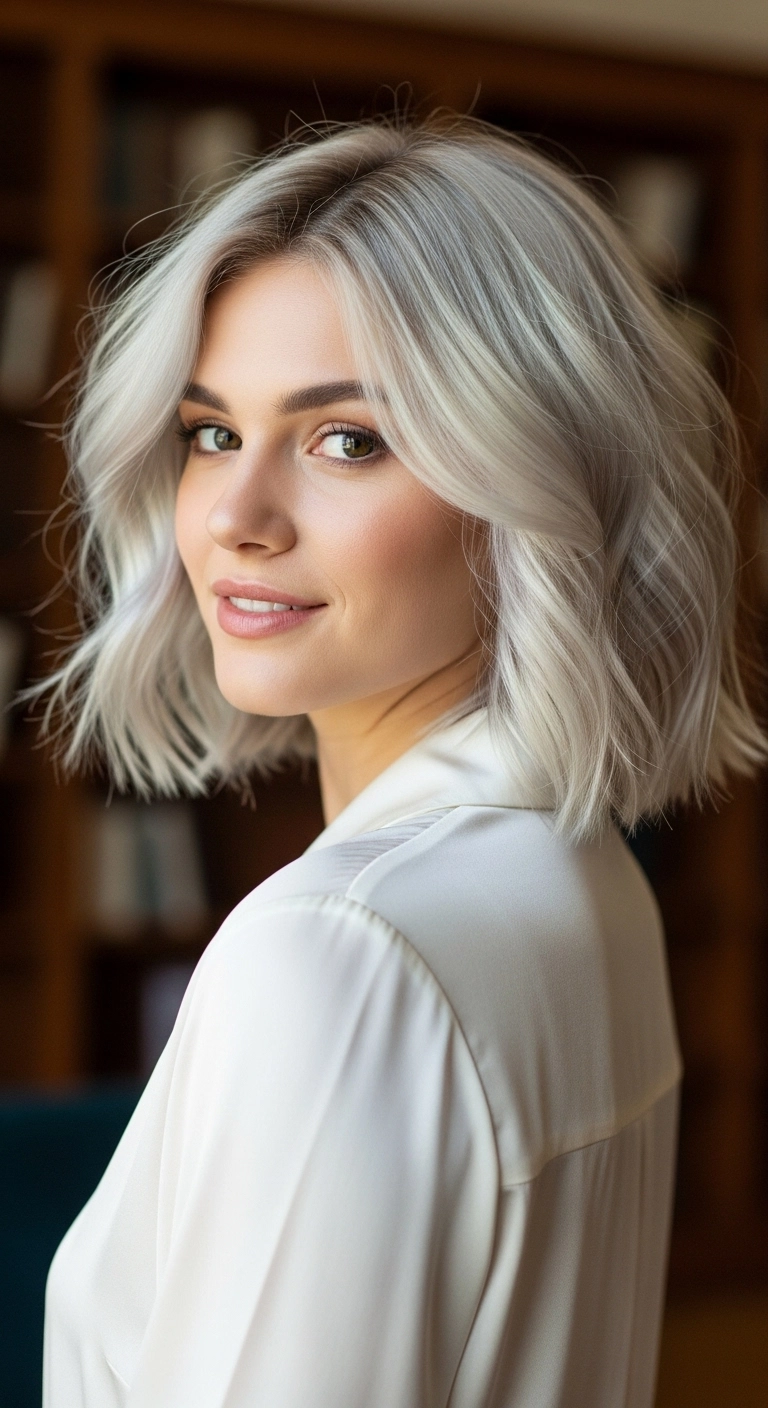
This icy platinum lob is seriously chic and so effortless! I love how the soft bends frame the face while keeping the ends blunt and modern. It gives off the coolest modern vibe and looks incredible whether you dress it up for an event or rock it everyday!
How to do this
1. Start by prepping freshly washed, damp hair with the lightweight blowout heat protectant spray listed below to shield your lightened strands.
2. Blow-dry the hair smooth using a medium ceramic round brush, lifting at the roots around the crown and parting to create natural, soft volume.
3. Once dry, take 1.5-inch vertical sections and use the 1.25-inch curling iron listed below to add a gentle bend, wrapping mid-lengths away from your face while leaving the last inch of your ends straight.
4. For the front face-framing curtain layers, curl back and away from the face to create an open, breezy wave effect.
5. Allow curls to cool completely, then gently rake through with your fingers or the wide-tooth detangling comb listed below to break them into effortless bends.
6. Mist with the dry texturizing volume spray listed below at the roots and mid-lengths to add grip and dimension.
7. Finish by smoothing a tiny drop of the lightweight hair styling oil listed below through the ends to eliminate flyaways and add a high-gloss icy shine.
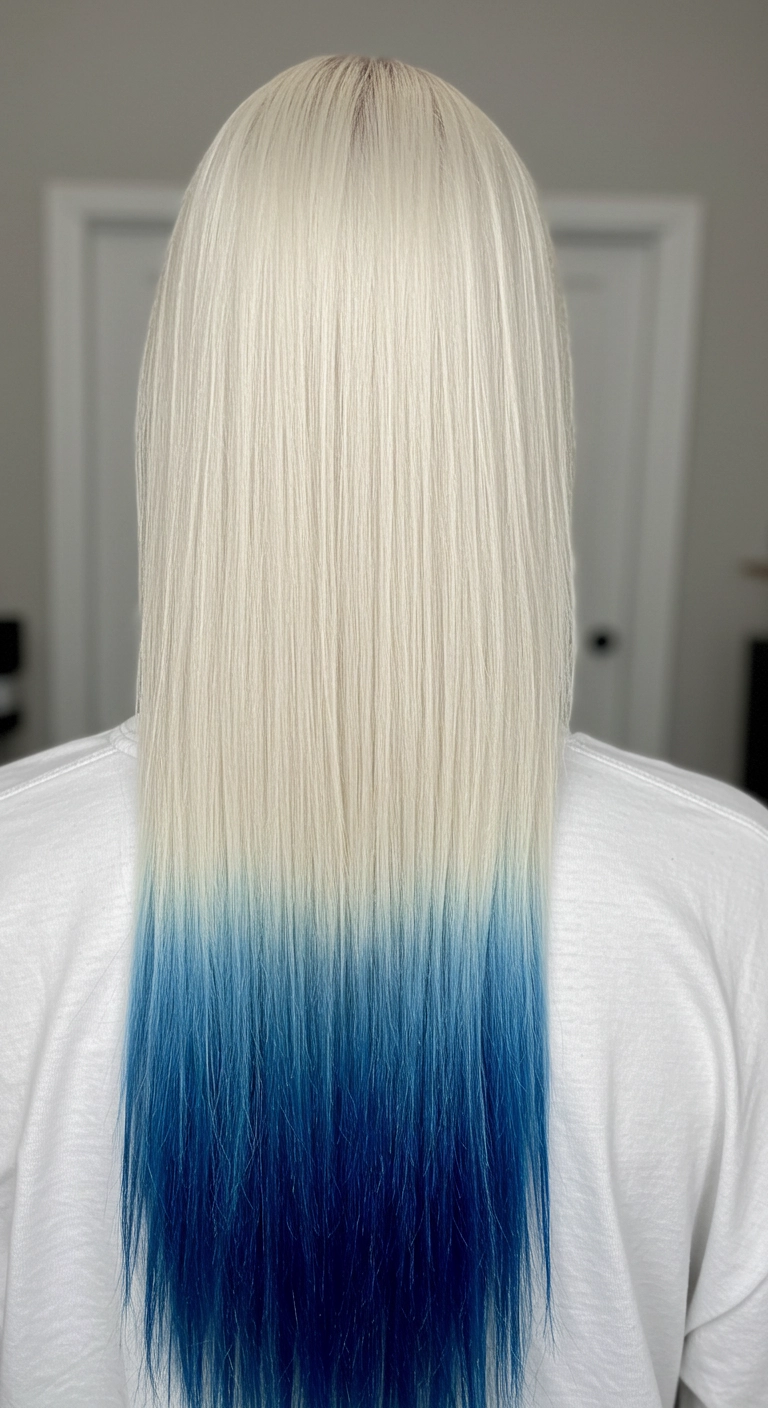
I'm totally obsessed with this bold color contrast because it gives such an effortless, cool-girl edge without committing to a full head of vibrant dye. The bright platinum paired with electric ocean blue ends looks insane pin-straight, but it’s just as gorgeous curled or pulled into a sleek high ponytail for a night out. Definitely give this dip-dye look a try if you want to turn heads!
How to do this
1. Start by prepping fully lightened level 10 platinum hair with a clarifying wash using the gentle sulfate-free clarifying shampoo listed below to remove any product buildup.
2. Section off the lower third of the hair where you want the dip dye to begin, securing the top sections neatly out of the way.
3. Apply a vibrant semi-permanent ocean blue direct dye to the ends using the hair color applicator brush listed below, feathering the brush upward to create a diffused gradient line.
4. Let the blue pigment process for 30 to 45 minutes, then rinse thoroughly with cool water to prevent color bleeding onto the icy blonde base.
5. Mist a generous layer of the heat protectant spray with argan oil listed below throughout damp hair from roots to ends.
6. Blow-dry smooth with a paddle brush, then take thin, horizontal sections and glide through with the ceramic flat iron listed below at 350°F to achieve a mirror-like, pin-straight finish.
7. Finish with a few drops of the lightweight smoothing hair serum listed below to lock down flyaways and boost high-gloss shine.
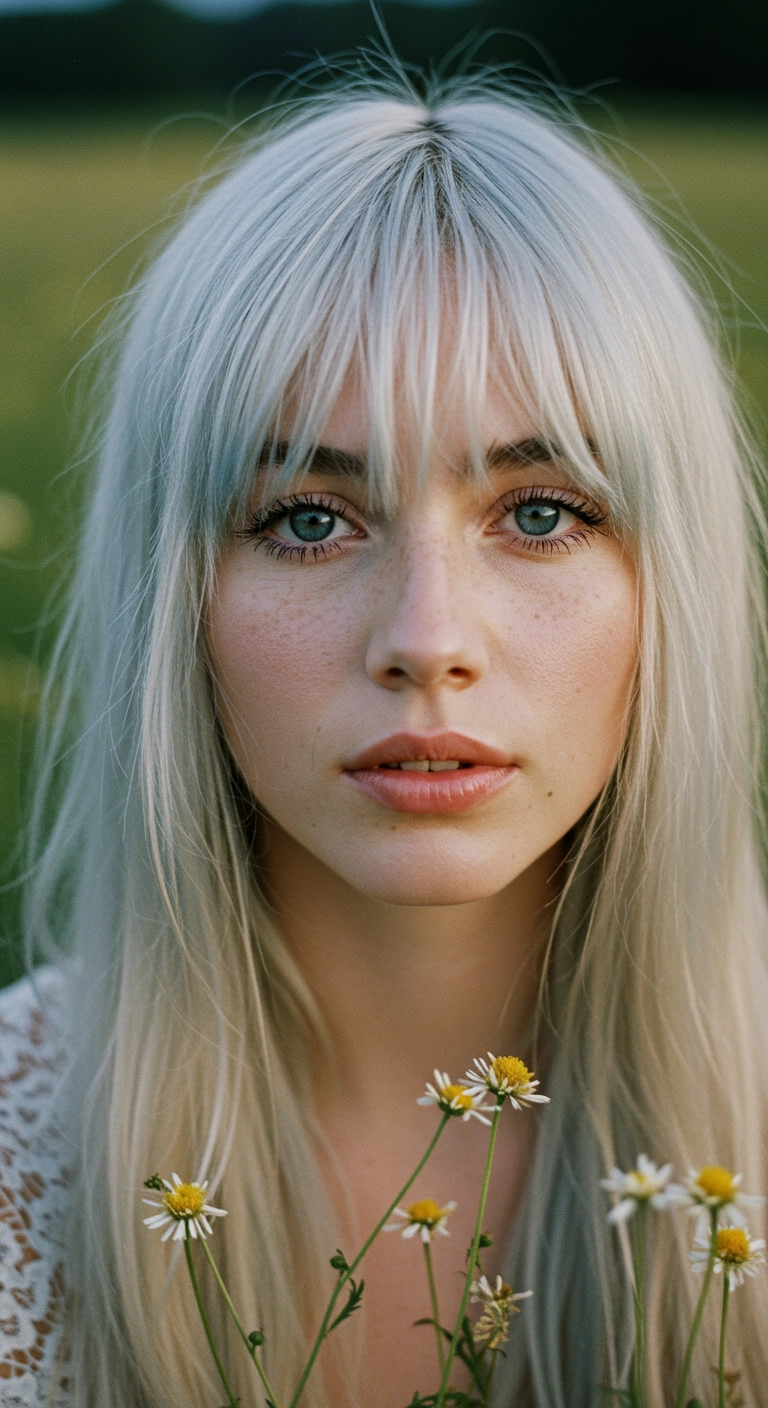
Honestly, this icy platinum blonde with delicate wispy bangs is absolute perfection. It has such an ethereal, cottagecore dream vibe! Would you ever dare to go this bright blonde?
How to do this
1. Start by gently washing and prepping your hair with the purple toning shampoo and nourishing deep conditioner listed below to keep that icy platinum blonde completely brass-free.
2. Mist damp hair lightly with the leave-in heat protectant spray listed below, paying special attention to delicate bleached ends.
3. Section out your wispy bangs and use a small round ceramic brush with your blow dryer, rolling them slightly under and gently flicking the outer edges outward for that piecey curtain effect.
4. Blow dry the rest of your hair smooth and straight using a paddle brush, directing the airflow downwards from root to tip.
5. Warm a tiny pea-sized drop of the lightweight finishing hair oil listed below between your palms and smooth over the lengths to tame flyaways and add a silky glow.
6. Finish by spraying a light spritz of the flexible hold hairspray listed below onto your fingertips and pinching the bangs into soft, separated wisps across your forehead.
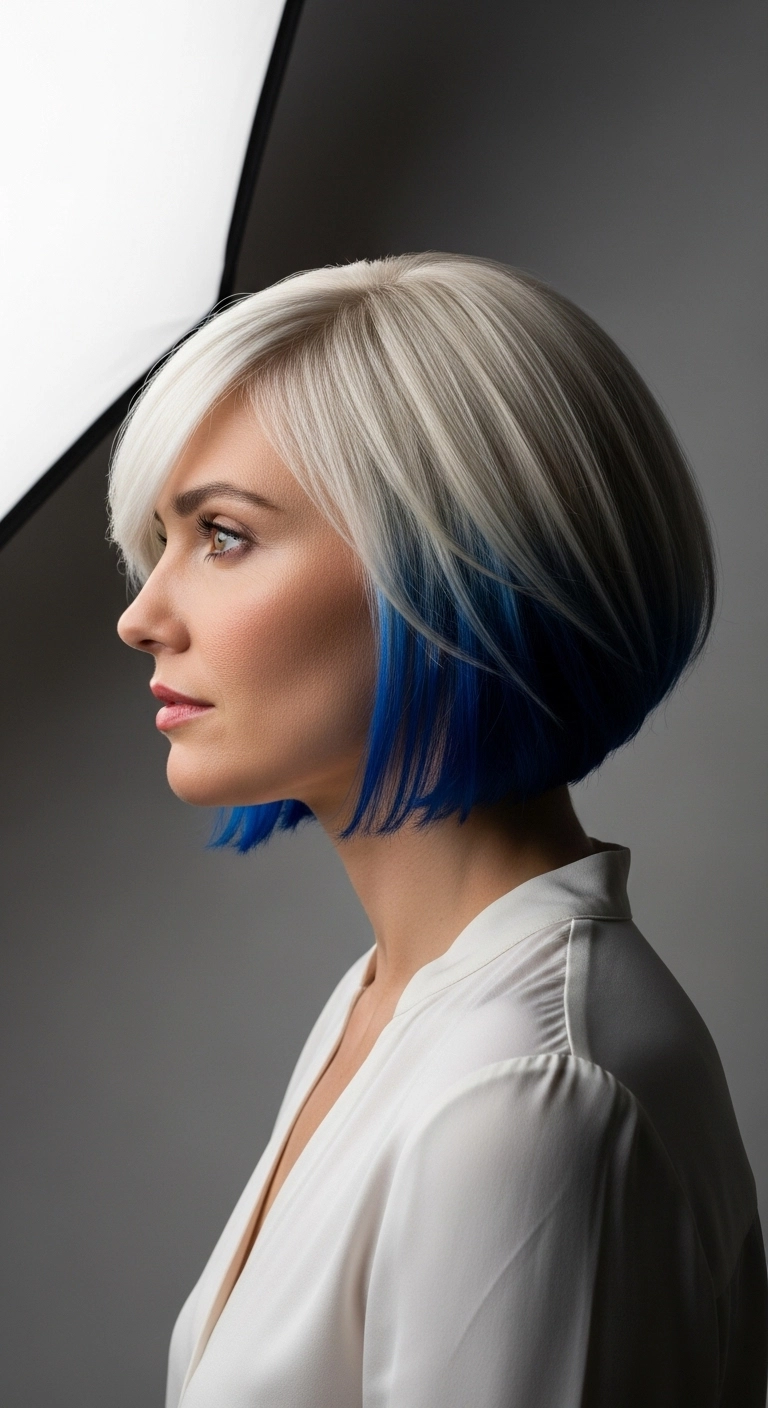
I'm obsessed with this peekaboo color combo! The icy white blonde paired with that punchy electric blue underneath is such a cool twist on a classic rounded bob. It's super sleek and modern, but still has that fun pop of edge every time your hair moves!
How to do this
1. Start by sectioning off the top canopy of the hair, clipping it securely away to isolate the underneath perimeter layer.
2. Pre-lighten the entire head to a clean level 10 platinum using the hair bleach lightening powder and developer listed below.
3. Apply a vibrant royal blue semi-permanent dye to the bottom undercut/underneath section using the semi-permanent blue hair color listed below, keeping the top section isolated.
4. Tone the top outer layer to an icy platinum blonde using the icy silver toner listed below, washing both sections separately with cold water to prevent color transfer.
5. Cut the perimeter into a crisp, slightly beveled jaw-length bob with side-swept fringe.
6. Apply a heat protectant smoothing serum and blow-dry using a medium ceramic round brush, beveling the ends gently inward under the chin.
7. Finish the sleek look with a light misting of shine spray to emphasize the sharp contrast between the icy white and vivid blue.
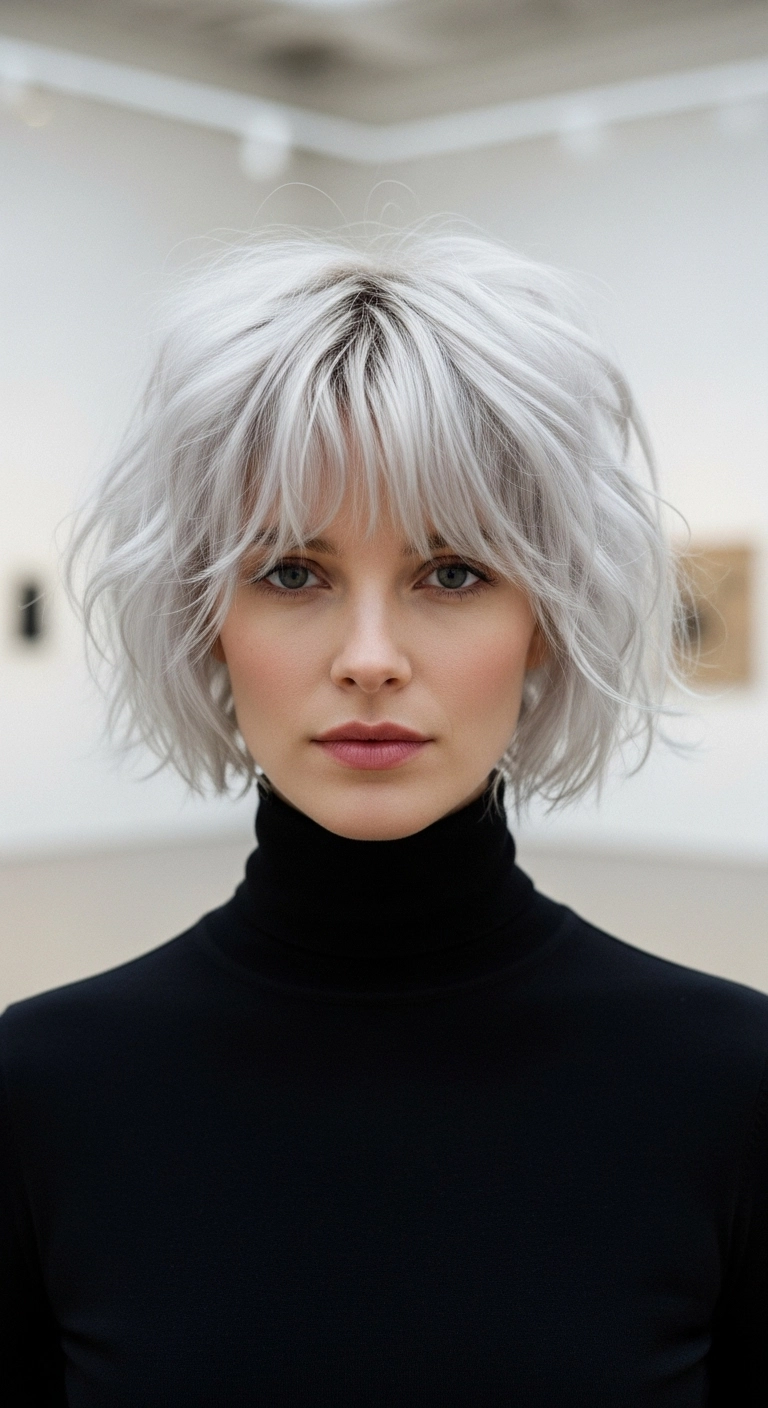
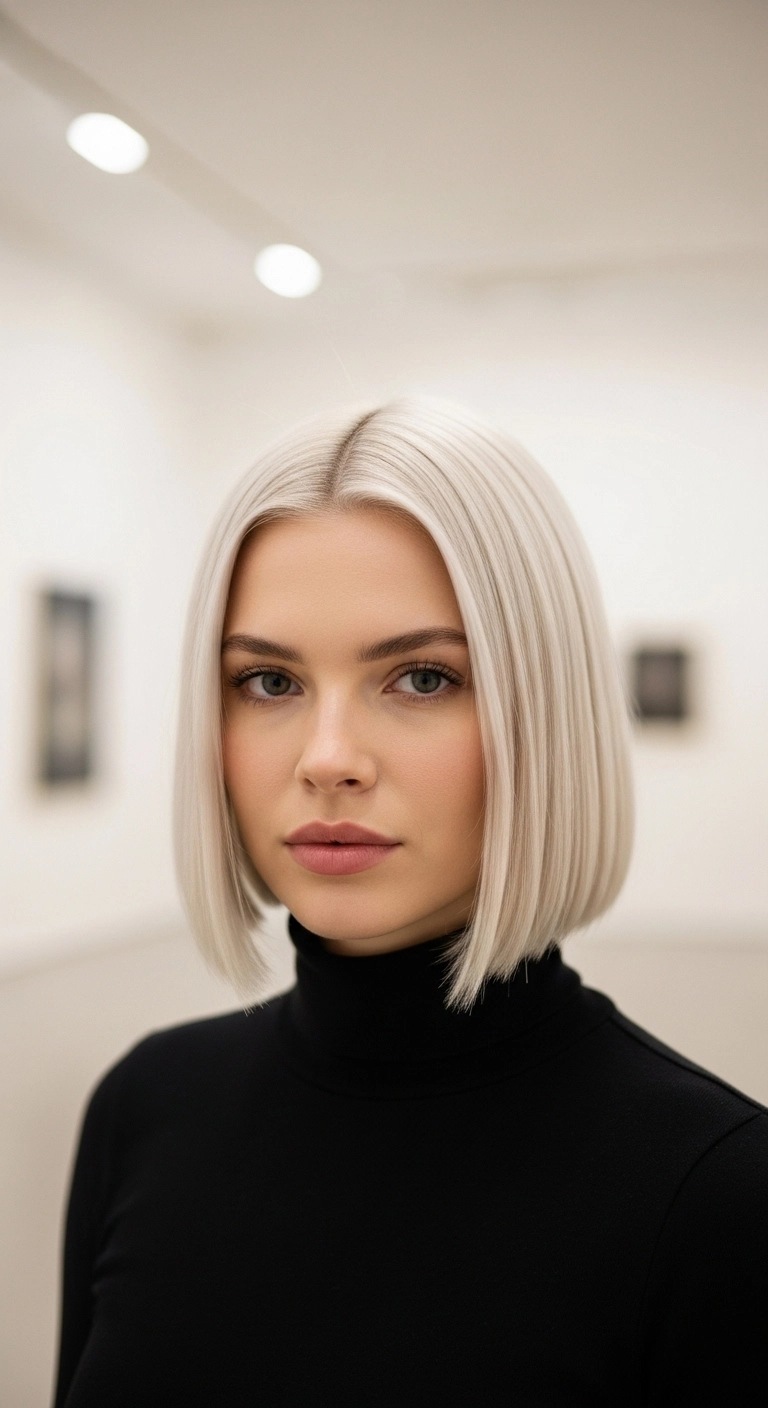
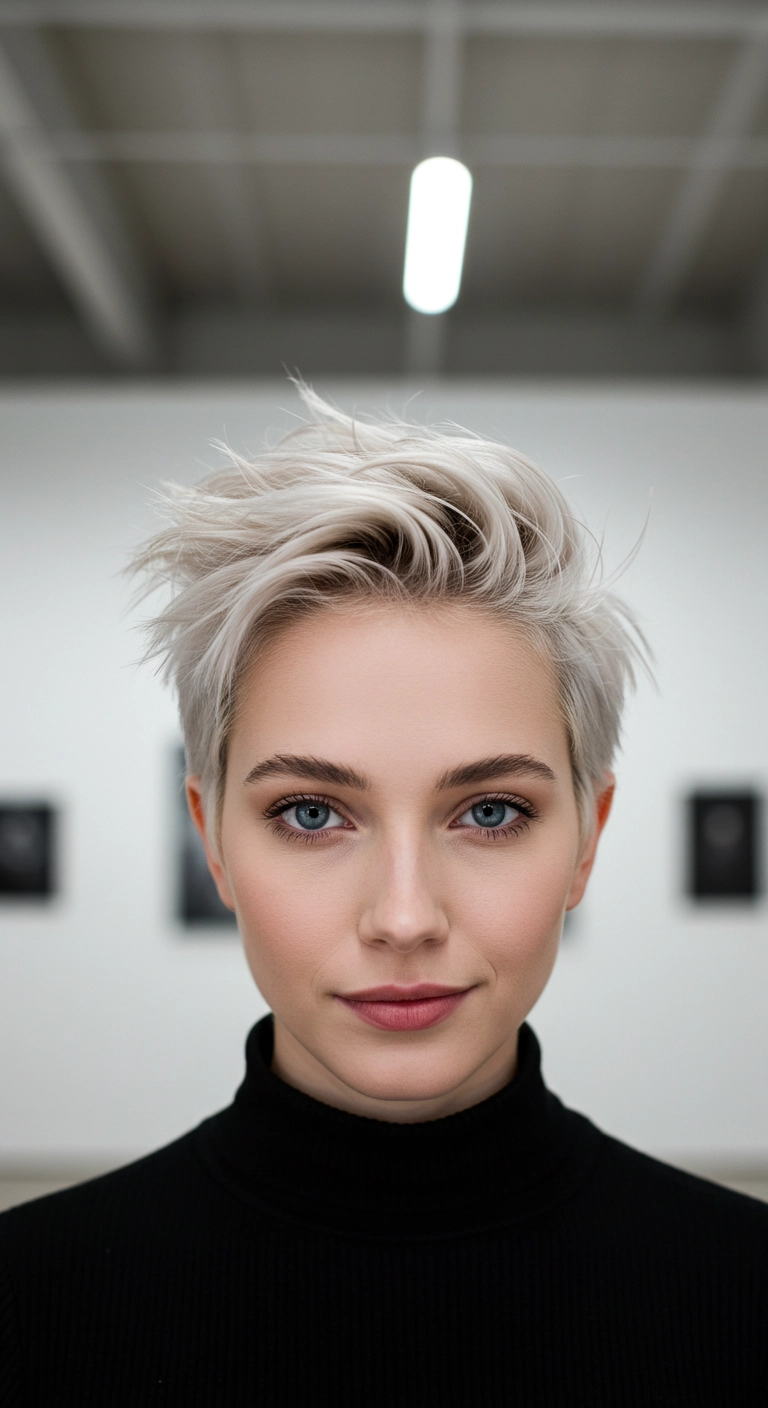
I'm honestly obsessed with this hairstyle. It takes the classic jaw-length French bob and gives it a cool, modern twist with all this piecey texture and that stunning icy platinum shade. It looks so effortlessly chic paired with a simple black turtleneck or dressed up for a night out. It really brings all the focus straight to your eyes and cheekbones, making it such a striking cut that still feels totally wearable every single day.
How to do this
1. Start by prepping damp hair with the lightweight volumizing mousse listed below to give body and grip without weighing down the short layers.
2. Rough dry your hair using your hands and a blow dryer until it is about 80% dry, lifting at the roots to encourage natural volume.
3. Use a small round brush to lightly smooth the bangs forward and outward so they separate softly across your forehead.
4. Mist the hair lightly with the thermal heat protectant spray listed below before adding any hot tool texture.
5. Take random one-inch sections and create loose, subtle bends using the flat iron listed below, alternating directions and leaving the ends straight and slightly undone.
6. Spray the dry texturizing spray listed below generously from mid-lengths to ends while shaking out the curls with your fingers for that piecey, lived-in separation.
7. Finish by rubbing a tiny dab of the matte styling paste listed below between your fingertips to define the fringe tips and keep the ends sharp and textured throughout the day.
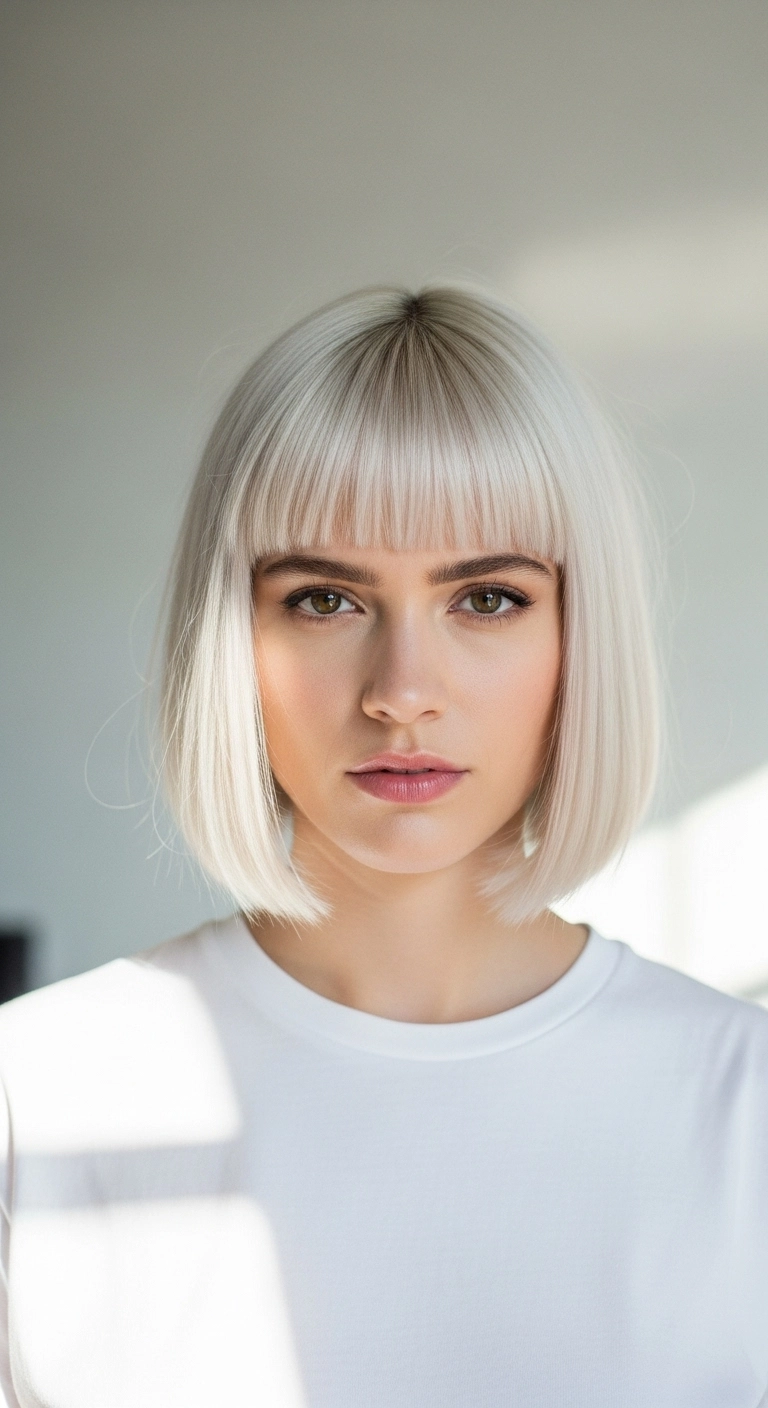
The crisp icy platinum bob with soft curtain bangs. Such a chic, modern classic! I love how the delicate face-framing fringe softens the sharpness of a chin-length cut. It gives that effortless, ultra-clean aesthetic that instantly elevates any outfit without trying too hard.
How to do this
1. Prep freshly washed, damp hair by applying a smoothing heat protectant blow-dry cream listed below from roots to ends.
2. Section out the front curtain bangs and blow-dry them forward and away from the face using the small ceramic round brush listed below to create that gentle swooping bend.
3. Divide the rest of your hair into horizontal sections and blow-dry smooth using a larger round brush, curving the ends slightly inward toward the jawline.
4. For an ultra-sleek, glassy finish, quickly pass through sections with a flat iron set on low-to-medium heat, rolling your wrist inward at the bottom.
5. Rub a tiny drop of the lightweight finishing hair serum listed below between your palms and smooth over the surface to tame any flyaways and boost platinum shine.
6. Mist lightly with the flexible hold hairspray listed below to lock the curtain fringe in place while maintaining natural movement.
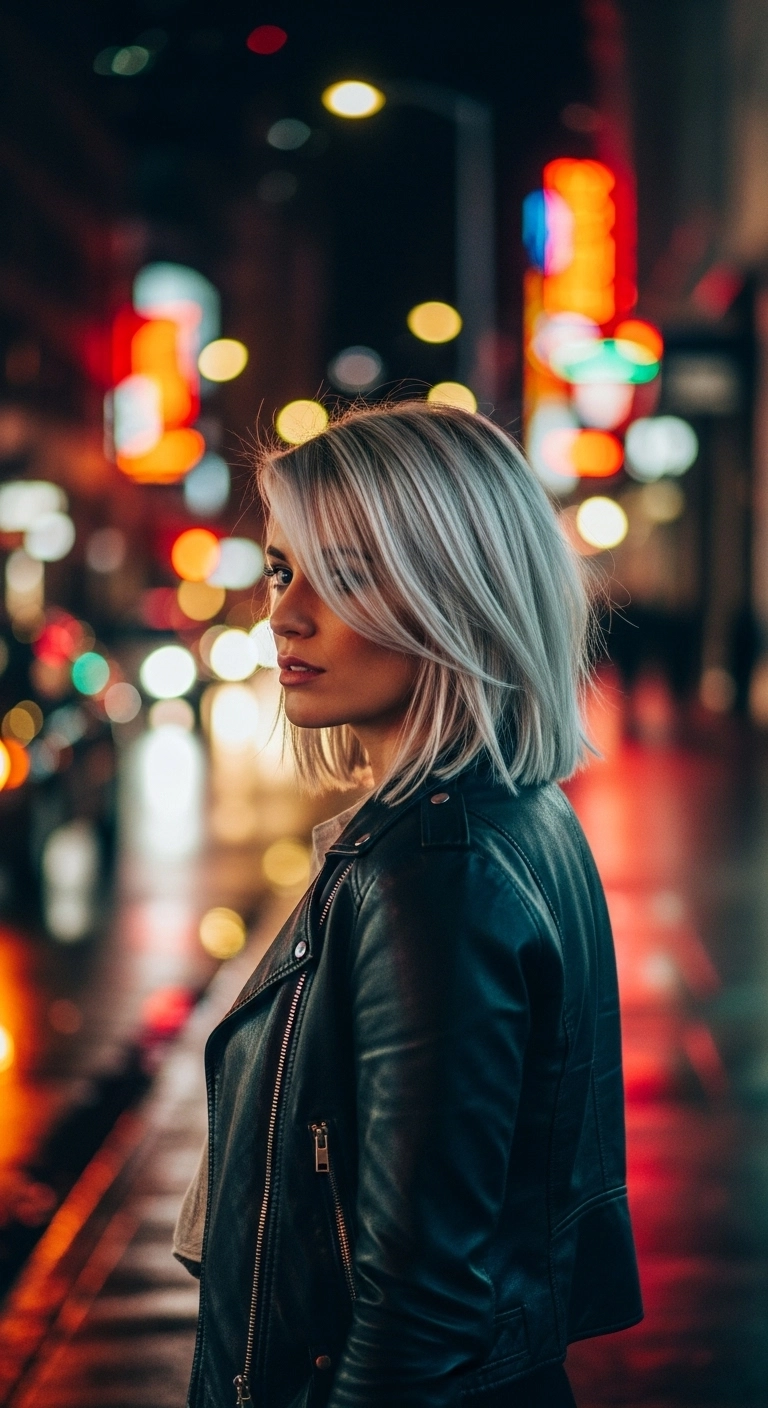
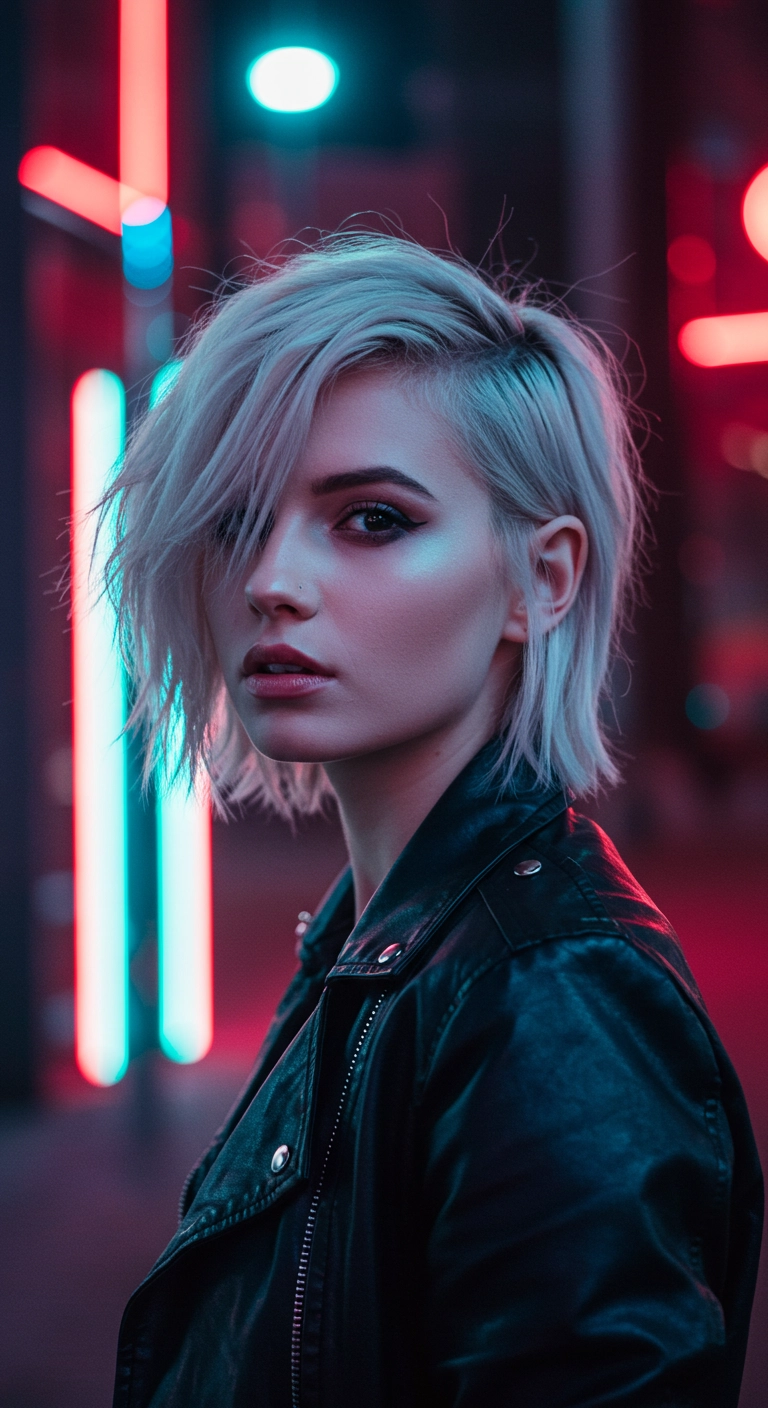
I’m completely obsessed with this edgy icy lob. It combines a clean blunt collarbone cut with soft, effortless side-swept fringe that gives off major cool-girl energy. Paired with a subtle shadow root, this style is super versatile for night outs, casual street style, or concerts, and it looks insanely chic paired with a leather jacket.
How to do this
1. Start by prepping freshly washed, damp hair with a lightweight leave-in conditioner and the thermal heat protectant spray listed below to shield your lightened blonde strands from damage.
2. Apply a dime-sized amount of smoothing blowout cream throughout the mid-lengths and ends to ensure a sleek, frizz-free foundation.
3. Using a blow dryer and a large ceramic round brush, dry the hair in horizontal sections, pulling downwards and slightly under at the ends to achieve a smooth, straight lob shape.
4. For the front fringe, blow-dry the side-swept bangs upward and off the face to the side to create that effortless sweeping curtain effect over the eyebrow.
5. Smooth over any stubborn sections with a flat iron set on low-to-medium heat, keeping the ends blunt and straight rather than heavily curled under.
6. Finish by misting the dry texturizing spray listed below through the roots and mid-lengths to give it that perfectly lived-in, edgy separation, and lock it in with a light spritz of flexible hold hairspray.
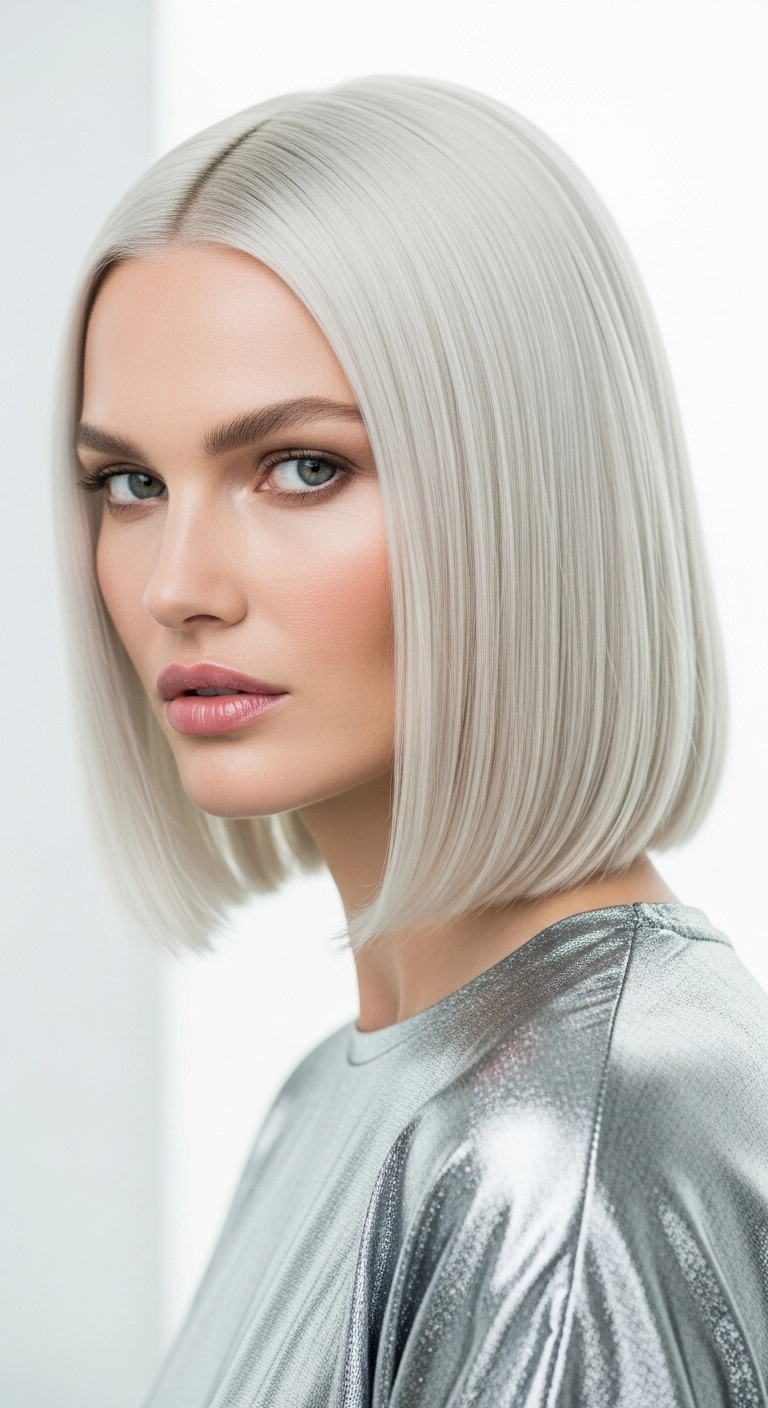
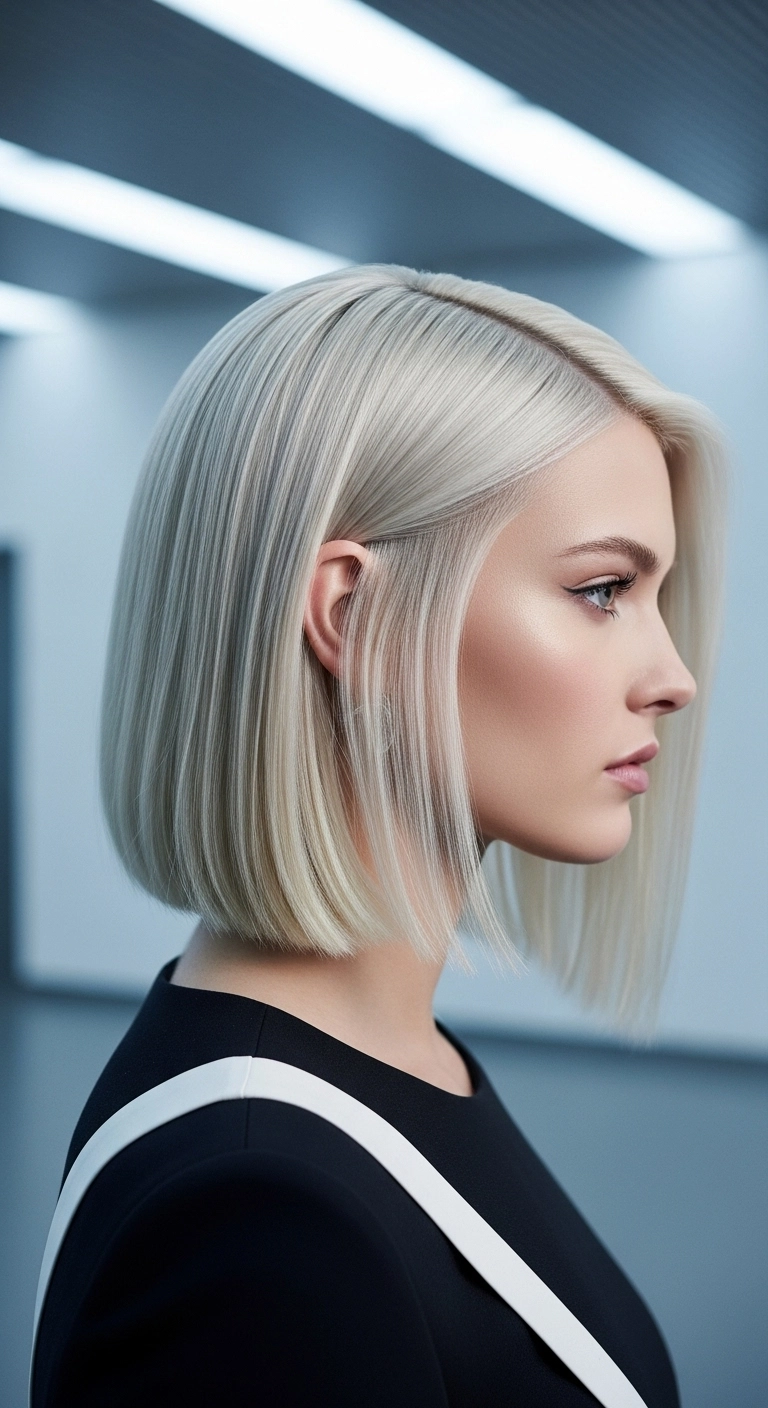
I'm absolutely obsessed with this sleek icy bob because it feels so futuristic and effortlessly chic! It's one of those power hairstyles that instantly pulls together any outfit, whether you're heading to the office in a blazer or dressing up for a wild night out. It gives your features such an incredible lift, and the shine is out of this world. Definitely give this blunt cut a try if you want a bold, statement-making chop!
How to do this
1. Start on freshly cleansed and conditioned hair, prepping damp strands with the leave-in conditioning spray listed below to add moisture before heat styling.
2. Mist hair generously with the thermal heat protectant spray listed below to safeguard delicate platinum strands against flat iron damage.
3. Use a tail comb to carve out a clean, precise center part from forehead to crown.
4. Blow-dry hair straight down using a directional nozzle and the ceramic paddle brush listed below, keeping airflow aimed downward to seal down the cuticle.
5. Clip hair into small horizontal sections and smooth each section from root to tip using the professional flat iron listed below, giving a subtle inward curve at the very tips to cup the jaw.
6. Finish off by smoothing a few drops of the lightweight shine serum listed below over the top and perimeter to eliminate flyaways and achieve that ultra-glossy glass hair finish.
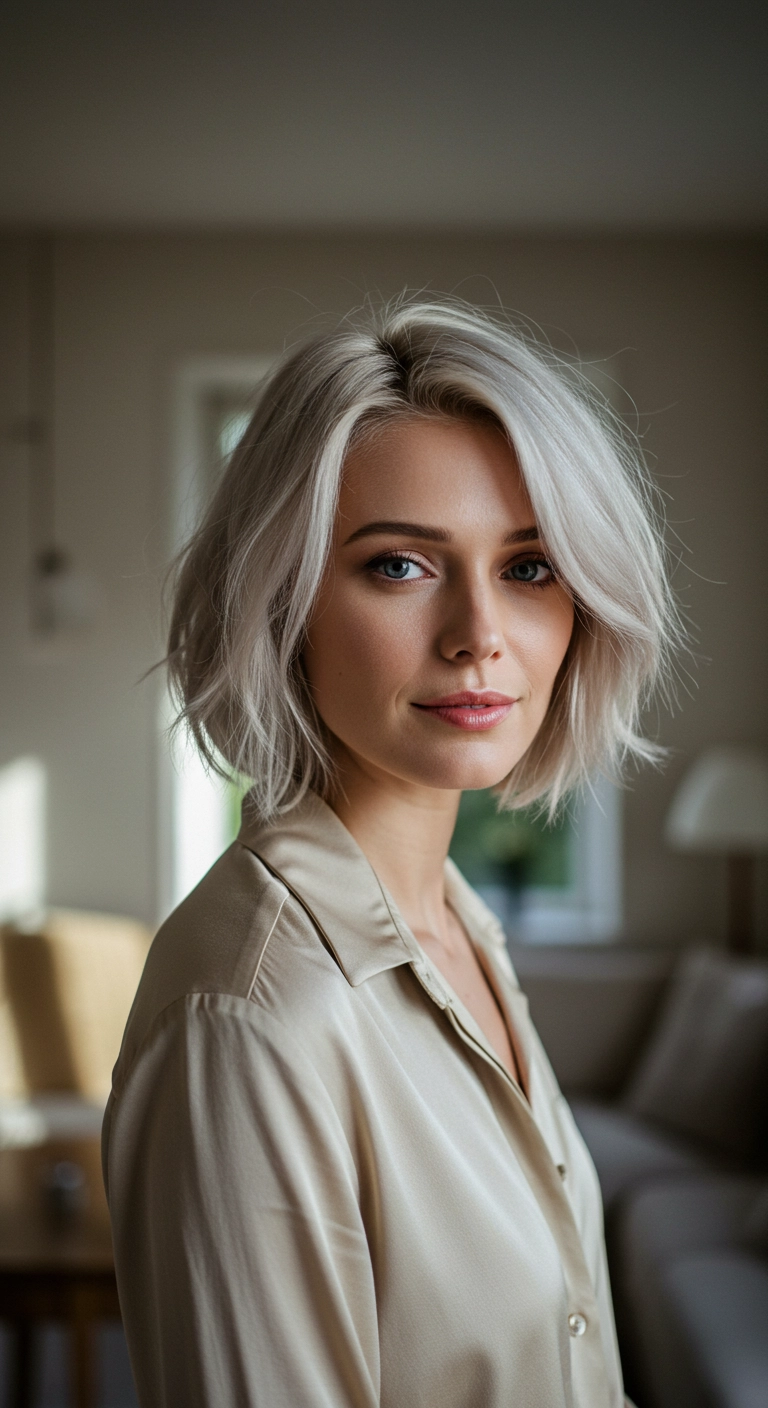
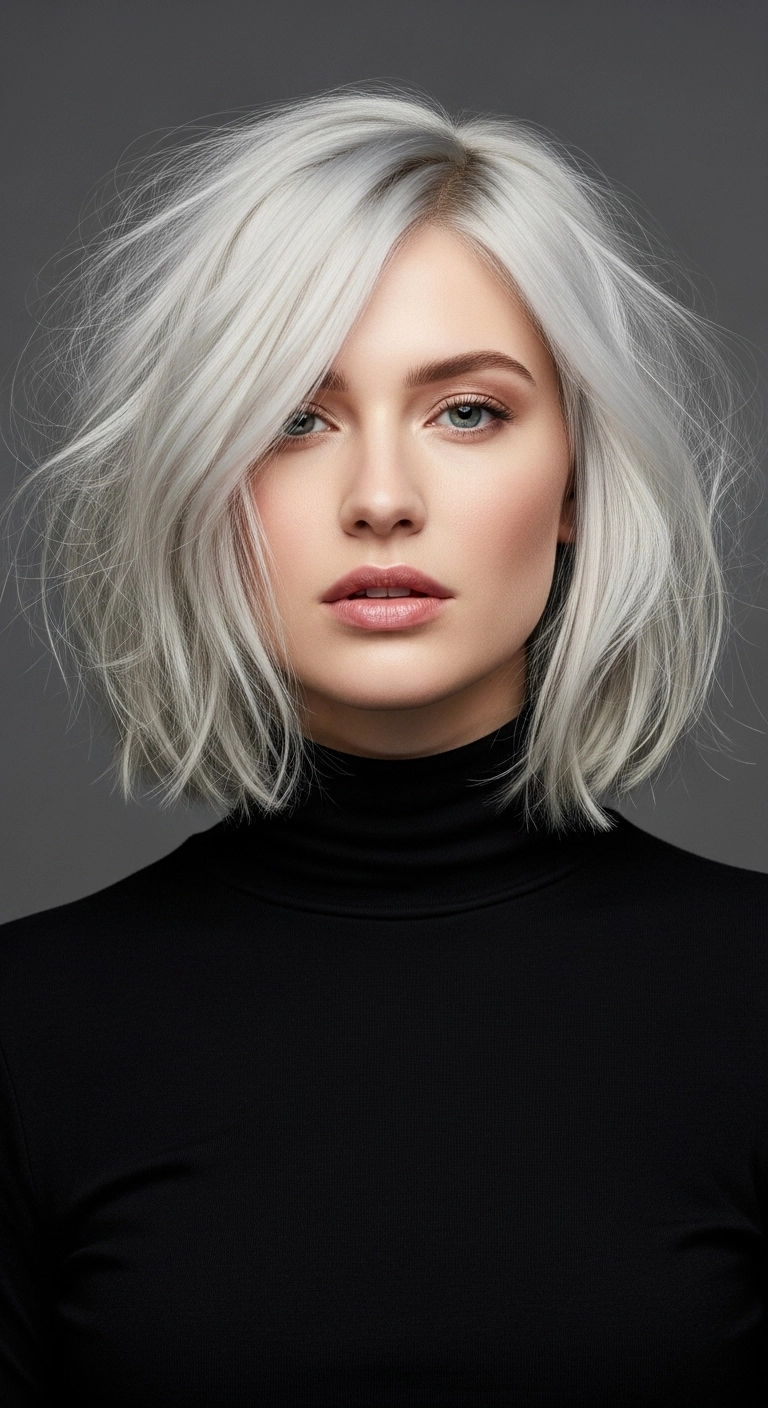
This one is effortlessly chic and gives instant cool-girl energy! The bright icy platinum color combined with an airy, piecey bob cut creates tons of natural movement without feeling stiff. All it takes is a quick round-brush blowout and a spritz of texturizing spray to look completely put-together!
How to do this
1. Start by washing hair with the purple toning shampoo listed below to keep that icy platinum shade crisp and free from any brassy tones.
2. On towel-dried hair, mist evenly with the heat protectant spray listed below to shield delicate lightened hair from hot tool damage.
3. Apply a dollop of the lightweight volumizing mousse listed below through the roots and mid-lengths to give the bob body and lift.
4. Blow dry using the ceramic round brush listed below, lifting at the roots to build volume and gently beveling the ends slightly under and outward around the face.
5. Use a flat iron or wide-barrel curling wand to add a very subtle, natural bend through the mid-lengths, keeping the ends somewhat straight for a lived-in edge.
6. Finish by spraying the dry texturizing spray listed below through the mid-lengths and shake out with your fingers for effortless, piecey separation.
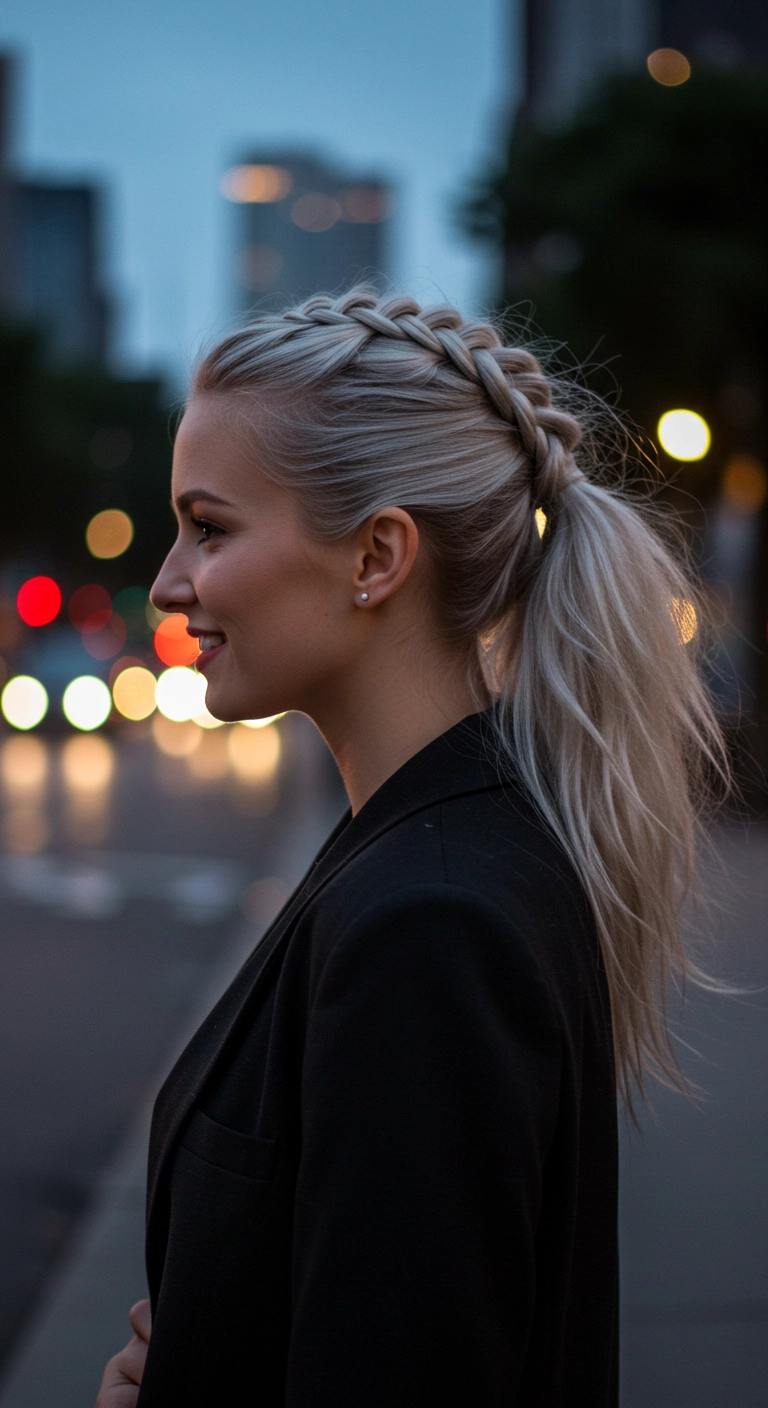
Want an everyday ponytail with some serious attitude? This mohawk Dutch braid pony looks sleek, edgy, and effortlessly cool! It gives an instant lift to your face and takes standard casual hair straight into chic street-style territory.
How to do this
1. Start by prepping your dry hair with a spritz of the texturizing spray listed below to give your strands extra grip and volume before braiding.
2. Section out the top center mohawk portion of your hair, roughly from temple to temple, leaving the sides free for now.
3. Begin a Dutch braid at your hairline by crossing the outside strands underneath the middle strand, feeding in small sections along the top crown.
4. Once you reach the back of your head (around mid-crown), gently pancake the braid stitches by lightly tugging on the edges to make it look full and dimensional.
5. Smooth both sides of your hair backward tightly against the scalp using the boar bristle styling brush listed below and merge them with the braid tail.
6. Secure everything together into a mid-height ponytail using a snag-free hair elastic.
7. Take a small piece of hair from underneath the ponytail, wrap it around the elastic band to conceal it, and pin it in place with a bobby pin.
8. Lightly backcomb the ponytail tail using the teasing brush listed below and finish with a mist of the flexible hold hairspray listed below for all-night staying power.
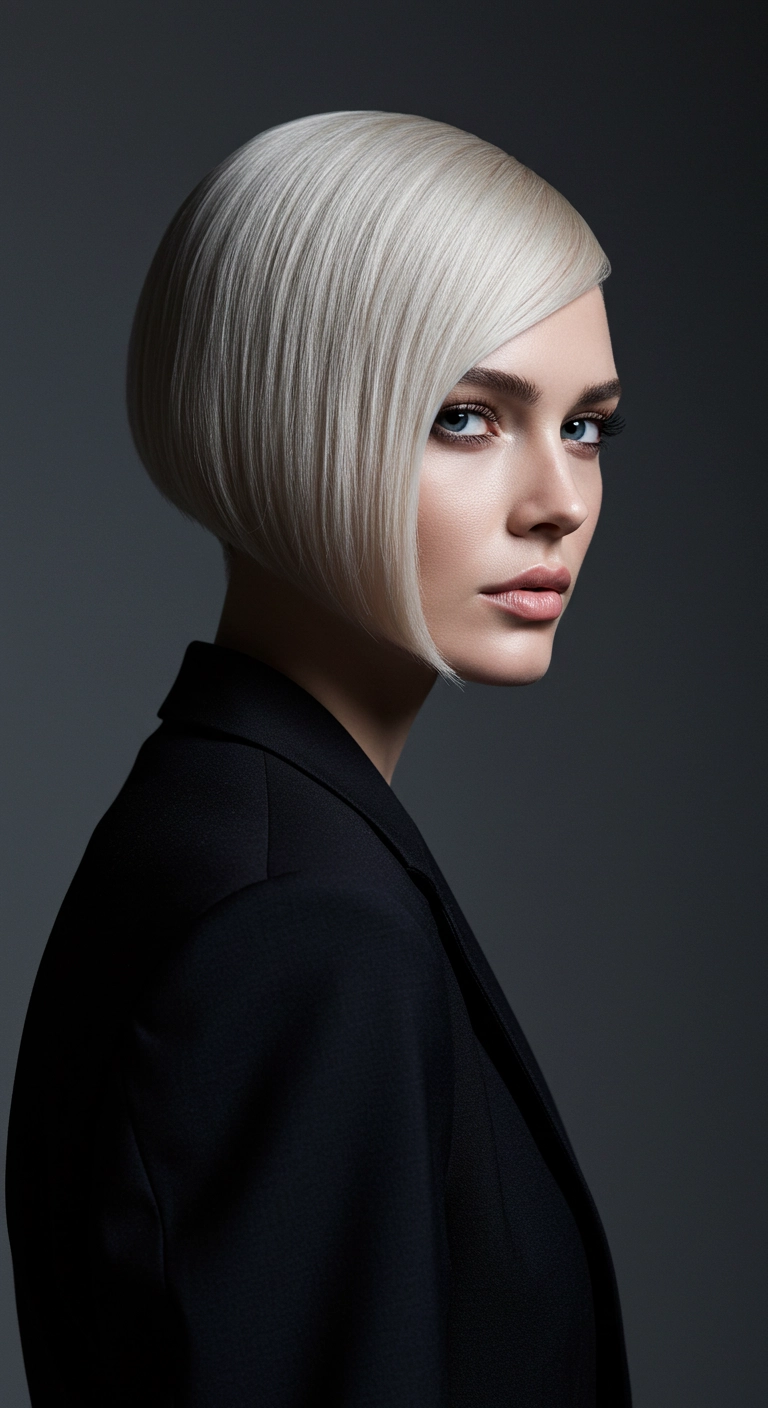
Are you ready to make a serious power statement? If you want a haircut that screams sleek, modern, and impossibly chic, this icy platinum angled bob is the move. It's sharp, elegant, and gives that instant high-fashion vibe without needing an hour of styling every morning. Who doesn't want hair that looks like liquid silver?
How to do this
1. Start by prepping freshly washed, damp hair with a thermal shielding spray using the heat protectant spray with argan oil listed below to safeguard against flat iron heat.
2. Blow-dry hair straight down using a smoothing concentrator nozzle and the ceramic ionic hair dryer listed below, brushing through with a flat paddle brush to keep the cuticle flat.
3. Section the hair cleanly into horizontal quadrants to prepare for precise straightening.
4. Glide through small, half-inch sections using the professional ceramic flat iron listed below at a steady pace, slightly beveling the ends inward at the jawline for that sharp, structured edge.
5. Gently tuck one side behind the ear while leaving the front section forward, and disperse a pea-sized amount of the weightless shine serum listed below through mid-lengths and ends for a mirror-like sheen.
6. Lock in the sleek, flyaway-free shape with a quick mist of the flexible hold hairspray listed below.
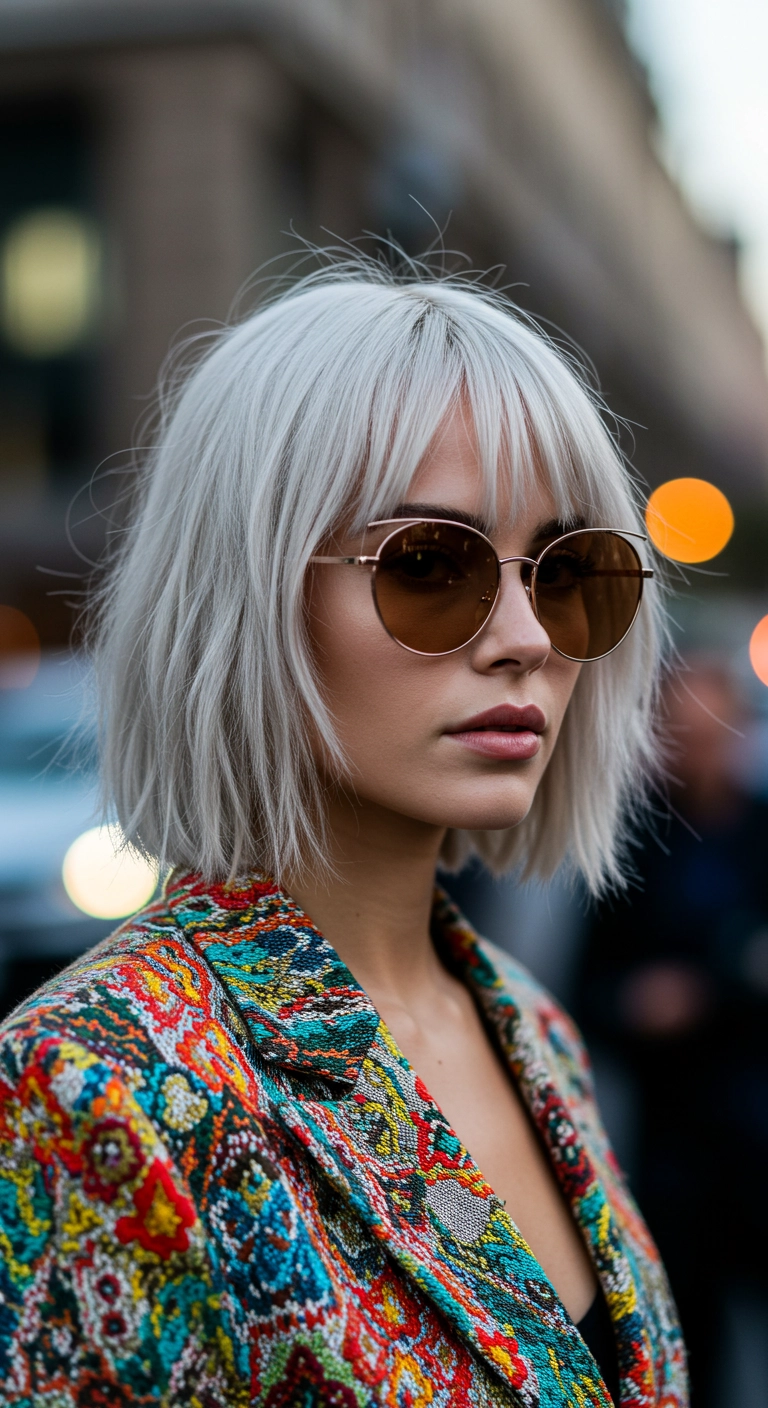
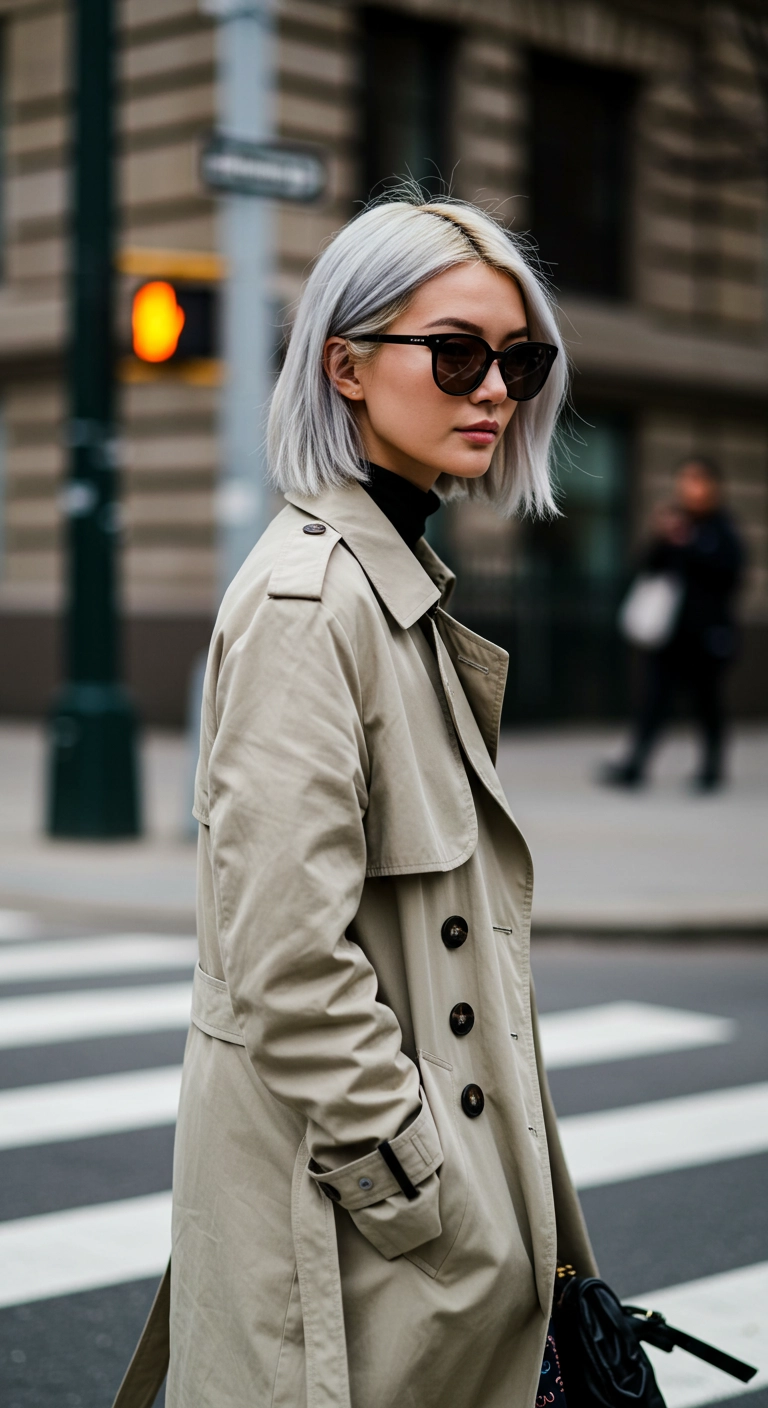
I'm totally obsessed with this cool-toned platinum bob! The wispy curtain bangs frame the face so effortlessly, and the chopped, textured ends give it that perfect street-style edge. It's chic enough for fashion week or a night out, but relaxed enough to rock with sunglasses and an everyday casual jacket. It definitely brings instant cool-girl energy to any outfit.
How to do this
1. Start by prepping damp hair with a lightweight styling mousse using the volumizing mousse listed below to give body without weighing it down.
2. Blow-dry the fringe forward using a small round ceramic brush, directing the airflow down to create a soft, piecey curtain drape over the forehead.
3. Rough-dry the rest of the hair with a paddle brush, lifting at the roots to maintain airy natural volume throughout the bob.
4. Take a flat iron through random vertical sections, gently bending your wrist slightly mid-strand to add an effortless, subtle kink rather than a pin-straight finish.
5. Shake out the lengths with your fingers and mist throughout using the dry texturizing spray listed below for that perfectly undone, lived-in separation.
6. Finish by warming a tiny dab of matte styling paste between your fingertips and lightly pinch the tips of your bangs and perimeter ends to define the blunt texture.
This sleek icy blonde lob is effortlessly cool and dramatic, making it such a statement cut for when you want an edgy yet high-fashion vibe – I styled mine for a night out in the city and got endless compliments!
How to do this
1. Start by washing your hair with the purple toning shampoo listed below to eliminate any brassiness and keep the platinum color bright and icy.
2. Towel-dry gently and prep damp strands by misting the heat protectant spray with argan oil listed below from roots to ends.
3. Apply a small amount of the smoothing blowout cream listed below to add slip, control flyaways, and create a mirror-like shine.
4. Blow-dry using a large round ceramic brush, directing the airflow downward to flatten the cuticle. For the deep side-swept bangs, roll the brush forward and slightly outward to give that distinct swooping curve across the forehead.
5. Once fully dry, take thin horizontal sections and smooth through with the flat iron listed below at a low to medium heat setting, beveling the ends slightly inward for a soft, feathered finish.
6. Finish the look by misting the lightweight flexible hold hairspray listed below over the sweeping bangs to lock them securely across the face without looking stiff.
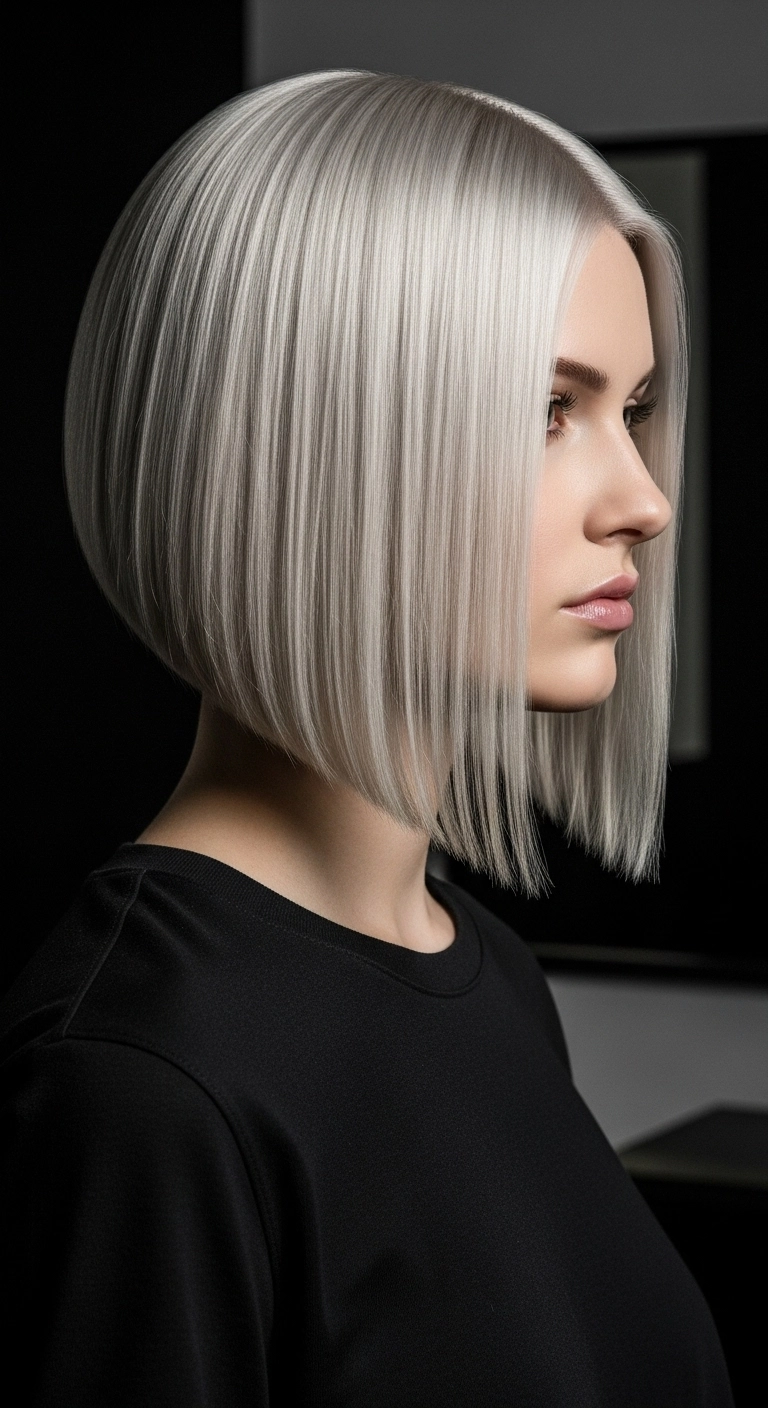
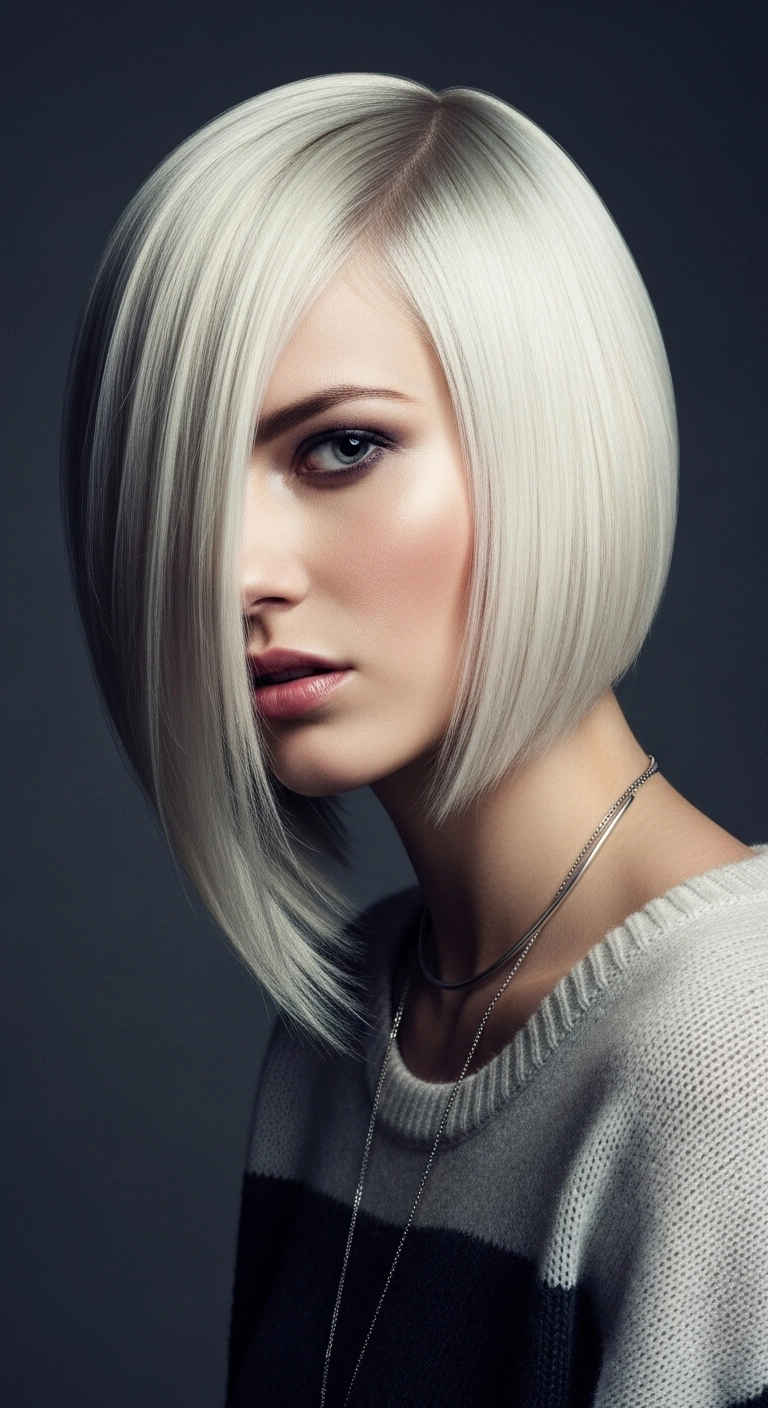
I’m completely obsessed with this cut. It’s an ultra-crisp, razor-sharp inverted A-line bob paired with the dreamiest icy platinum blonde shade. The drama of the steep angle in the front gives it so much structure and presence. It’s definitely high-maintenance to keep that tone bright and the perimeter looking this sharp, but the payoff is pure high-fashion glamour that turns heads everywhere you go.
How to do this
1. Start by prepping freshly washed, towel-dried hair with a leave-in smoothing lotion and the heat protectant spray listed below to shield strands from high heat.
2. Blow dry the hair straight in downward sections using a fine paddle brush and a nozzle attachment to align the cuticle for maximum shine.
3. Section the hair cleanly from nape to crown, working in thin horizontal slices.
4. Glide a titanium flat iron listed below through each subsection slowly at a consistent angle, beveling just slightly inward at the back to maintain the sharp inverted curve.
5. When working on the front face-framing sections, pull straight down and slightly forward to emphasize the sharp, dramatic A-line angle.
6. Finish the look by smoothing a pea-sized drop of the shine serum listed below across the surface to eliminate flyaways and give that icy glass-hair reflection.
Honestly, if you've been waiting for a sign to chop your hair into a badass rocker bob, this is 100% it! That icy platinum shade paired with razor-sharp choppy texture gives off instant cyberpunk energy. Just rough-dry, piece it out with some matte paste, tuck one side behind your ear, and you're good to conquer the night.
How to do this
1. Prep clean, towel-dried hair by misting the leave-in heat protectant spray listed below evenly from mid-lengths to ends.
2. Apply a dime-sized amount of the volumizing styling foam listed below at the crown and roots to create grit and lift.
3. Blow-dry using a small flat wrap technique with a paddle brush, directing the front top section across your forehead into a dramatic deep side part.
4. Take random 1-inch sections and lightly bend them with a slim flat iron using the ceramic styling iron listed below, flipping the ends outward and inward irregularly for that lived-in, fractured effect.
5. Warm a pea-sized dab of the matte finish styling paste listed below between your palms and piece out the choppy ends, especially around the fringe and face-framing sections.
6. Tuck the lighter side neatly behind your ear, allowing the fuller textured side to fall forward effortlessly across your eye line.
7. Lock the effortless cyberpunk texture in place with a generous spritz of the dry texturizing finishing spray listed below.
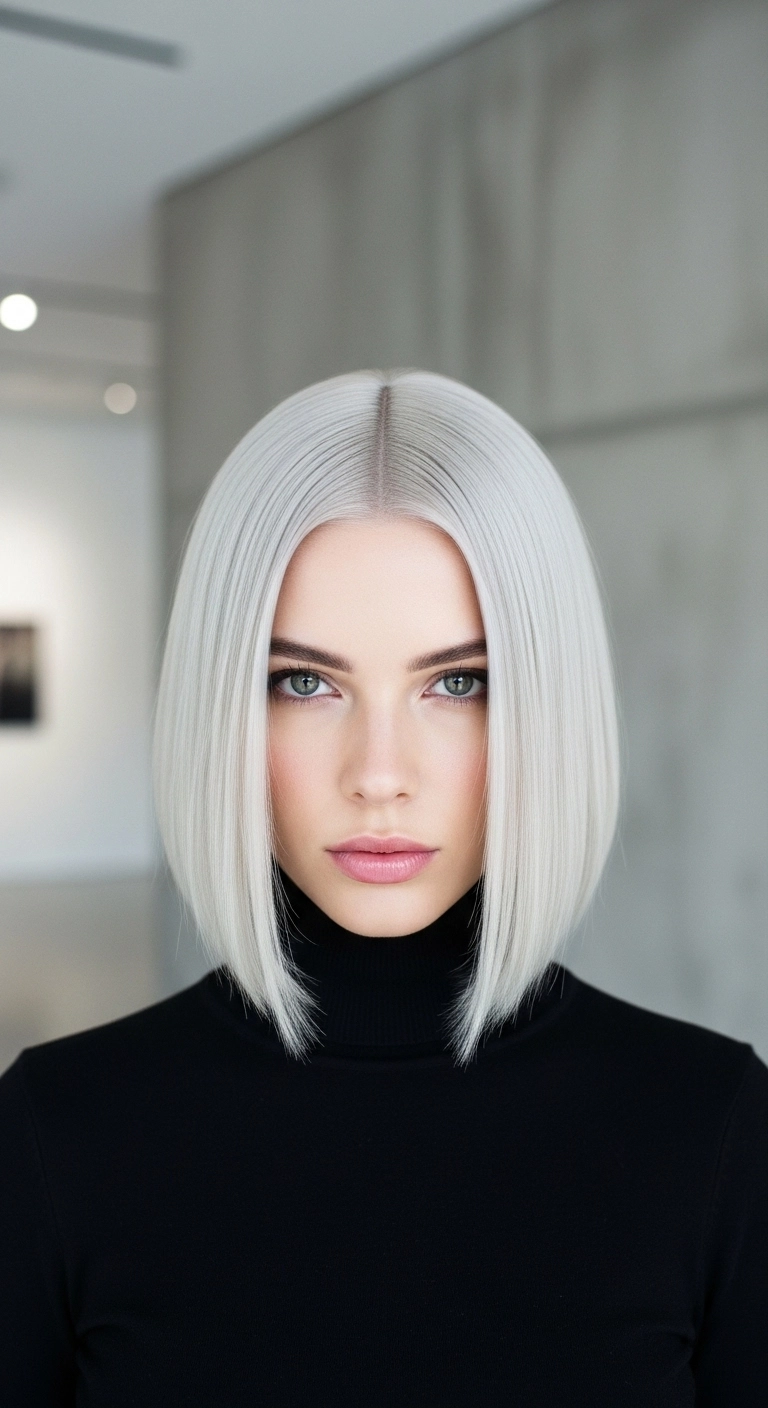
I am completely obsessed with this sleek icy platinum lob!! The razor-sharp center part and mirror-like shine give it such a futuristic, sophisticated finish. If you're going for this ultra-clean look, keeping up with regular toning and using a flat iron with a good heat protectant will make all the difference in keeping it silky and bright.
How to do this
1. Start by prepping damp, freshly washed hair with a heat-protecting smoothing serum listed below to guard your strands against high heat and seal in shine.
2. Use a precision tail comb to establish a crisp, razor-sharp center part right down the middle of your head.
3. Section hair horizontally into manageable layers and blow-dry straight down using a boar bristle round brush to smooth down any flyaways and achieve a sleek foundation.
4. Working in thin one-inch horizontal subsections, pass a ceramic flat iron from roots to ends, slightly curving inward at the very tips to cup gently around the jaw and neck.
5. Finish the look by misting a lightweight high-shine gloss spray across the lengths and smoothing with a fine-tooth comb for that mirror-like, glass-hair effect.
Are you completely obsessed with sharp, ultra-sleek bobs like I am? I just had to share this icy platinum asymmetrical bob because it is the ultimate clean-girl power move! The angled baseline is cut so razor-sharp, and that cool, crisp silver-blonde tone gives it such an effortless high-fashion edge. You can wear it tucked behind one ear like this for a super chic look, or let both sides drape forward to really show off that dramatic line. If you've been thinking about doing a bold chop, this modern classic is definitely your sign to go for it!
How to do this
1. Start by washing the hair with the purple toning shampoo listed below to keep the icy blonde bright and free of brassy tones.
2. On towel-dried hair, apply a dime-sized amount of the smoothing heat protectant serum listed below to guard against heat damage and eliminate any flyaways.
3. Blow-dry using the tourmaline flat paddle brush listed below, directing the airflow downward from roots to ends with a concentrator nozzle to achieve maximum smoothness.
4. Create a clean, deep side part directly above the arch of your eyebrow.
5. Working in thin 1-inch horizontal sections, glide the titanium flat iron listed below through the strands, slightly beveling the ends inward right at the jawline to emphasize the sharp, angled perimeter.
6. Tuck the shallow side of your hair neatly behind the ear, and mist the entire look with the high-shine flexible hairspray listed below to lock in the glass-like finish.
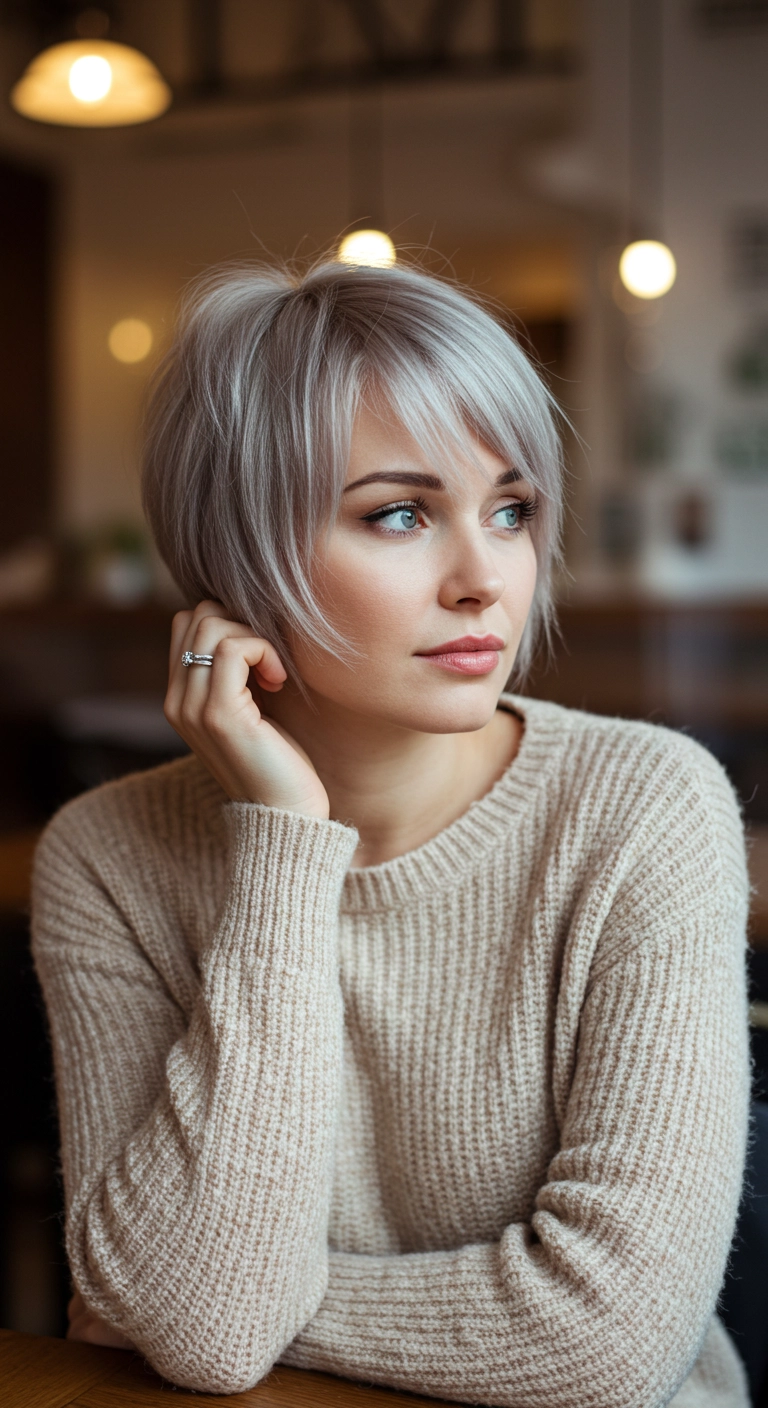
This icy bixie cut is seriously so chic and effortless! It's that perfect sweet spot between a pixie and a bob, with gorgeous sweeping fringe that accentuates cheekbones beautifully. If you love short hair with tons of movement and a striking cool blonde tone, this cut will look incredible on you!
How to do this
1. Start on freshly cleansed, towel-dried hair after prepping with the purple toning leave-in treatment listed below to neutralize any brassiness and lock in moisture.
2. Apply a dime-sized amount of the lightweight volumizing mousse listed below through the roots and mid-lengths to give the fine-to-medium strands airy lift and separation.
3. Mist the strands evenly with the thermal heat protectant spray listed below before applying any heat styling tools.
4. Using a small round ceramic brush and blow dryer with a directional concentrator nozzle, blow-dry the bangs swept across the forehead to the side, lifting slightly at the root.
5. Smooth down the back and sides following the natural curvature of the head, beveling the ends softly forward toward the cheeks.
6. Warm a tiny pinch of the matte texture styling paste listed below between your fingertips and lightly piece out the wispy ends, bangs, and face-framing sections.
7. Set the whole style with a quick, flexible spritz of the light hold finishing hairspray listed below for all-day movement that never feels stiff.
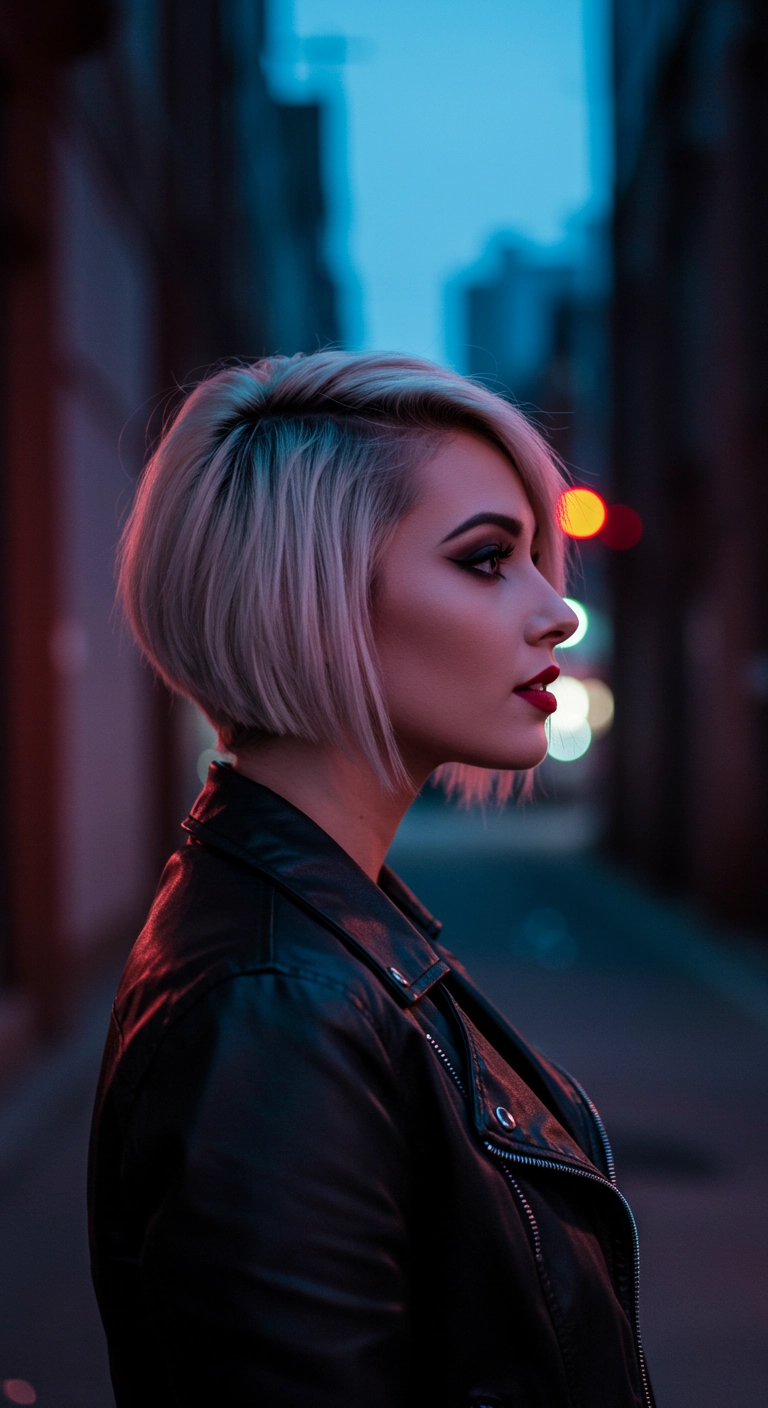
Oh, a sharp platinum bob paired with a leather jacket is truly unmatched! The icy tone and sleek, angled cut are giving pure cool-girl energy. Would you dare to chop your hair this short and go this bright?
How to do this
1. Start with cleanly washed, towel-dried hair and apply a smoothing heat protection cream using the blow dry smoothing balm listed below to prep the strands.
2. Mist lightly with a root-lifting spray at the crown and parting to ensure subtle volume.
3. Create a deep side part using a fine-tooth tail comb, directing the heavier side across the forehead.
4. Blow-dry in sections with a medium ceramic round brush using the ceramic ionic round brush listed below, turning the ends slightly under to hug the jawline and nape smoothly.
5. For a super crisp, pin-straight finish along the perimeter, pass a flat iron through fine horizontal sections at a low-to-medium heat setting using the tourmaline flat iron listed below.
6. Work a pea-sized amount of lightweight finishing serum using the anti-frizz shine serum listed below between your palms and smooth over the surface flyaways.
7. Lock in the sleek, side-swept shape with a flexible mist using the light hold finishing hairspray listed below.
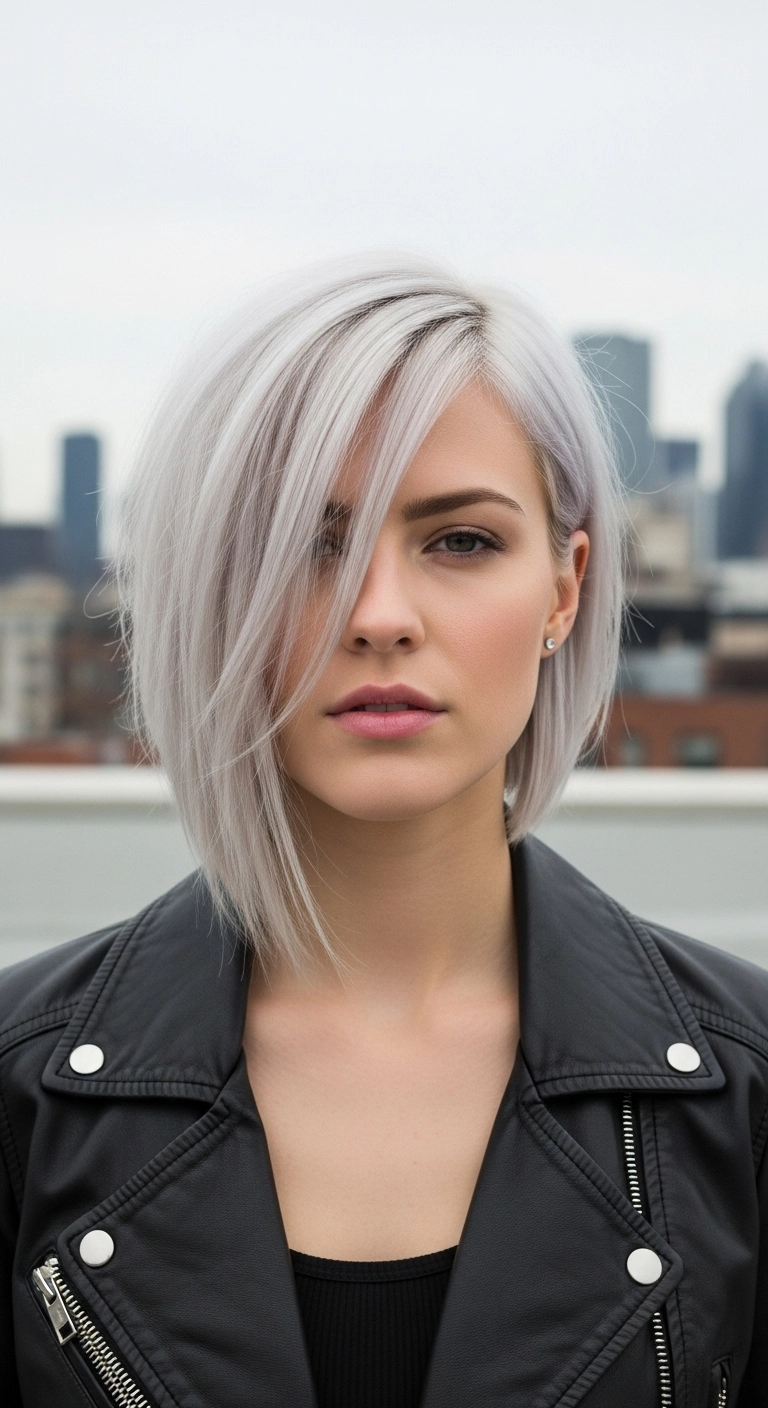
I'm totally obsessed with this edgy asymmetrical bob! The icy silver-platinum tone paired with that dramatic swoop across the eye gives it such a cool, effortless rockstar vibe. It's super sleek but still has so much attitude, especially paired with a leather jacket.
How to do this
1. Start on freshly washed hair and apply a quarter-sized amount of the smoothing blow dry cream listed below through your damp mid-lengths and ends.
2. Mist your strands evenly using the heat protectant spray listed below to shield your blonde from high heat damage.
3. Create a deep side part aligned with the arch of your eyebrow, then blow dry your hair smooth using a round ceramic brush, pulling the longer front pieces downward and slightly curving inward toward the jaw.
4. Glide through sections with the ceramic flat iron listed below at a low to medium temperature to achieve that sleek, glass-like straight finish.
5. Work a tiny pea-sized dab of the lightweight styling pomade listed below between your fingertips and lightly piece out the angled ends and the front fringe falling over the eye.
6. Finish the look with a quick spritz of the flexible hold hairspray listed below to keep that dramatic side sweep in place all day.
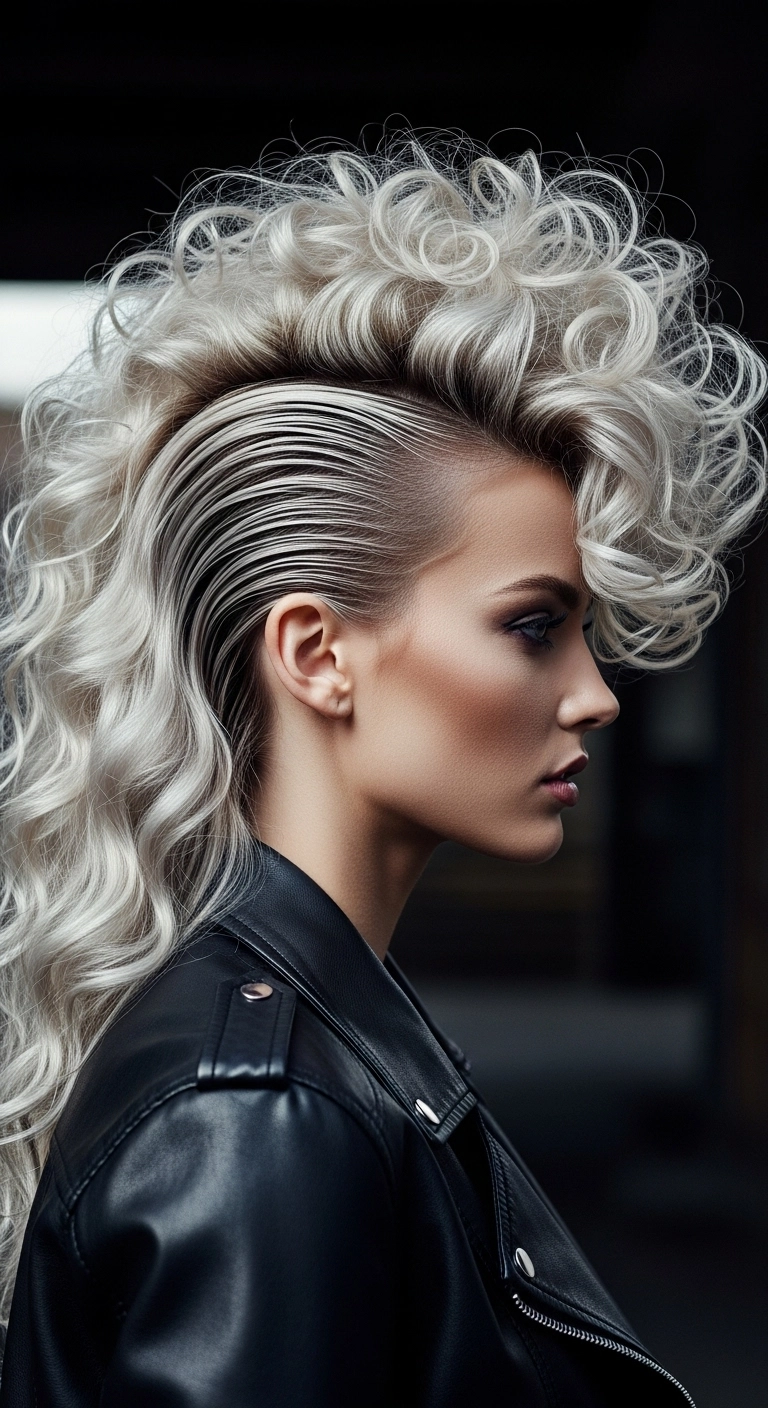
I am completely obsessed with this fierce faux hawk! The contrast between the slicked-back, glassy sides and the explosive, voluminous curls cascading over the front is pure rock-and-roll perfection. It's such a killer statement style if you want to bring bold 80s glam vibes to your next night out or concert.
How to do this
1. Start by prepping freshly washed hair with the leave-in conditioning spray listed below, making sure your blonde strands are well-hydrated before heat styling.
2. Section off the top mohawk strip running from your front hairline down to the nape, securing it out of the way with clips.
3. Apply a generous amount of the strong-hold styling gel listed below to both side sections, combing them completely flat and back behind your ears using a fine-tooth comb to create that ultra-sleek, combed-back effect.
4. Secure the sides tightly at the back with bobby pins, then release the center crest section.
5. Apply the heat protectant spray listed below all over the center mohawk hair.
6. Take small 1-inch vertical subsections along the top ridge and curl them with the 1-inch ceramic curling iron listed below, curling forward at the front to tumble over your forehead and upward through the crown for maximum lift.
7. Once all curls have cooled completely, gently pull them apart using your fingers and mist thoroughly with the texturizing volume spray listed below to achieve big, rock-inspired body.
8. Lock the entire look in place with a heavy-duty flexible hairspray so the sides stay mirror-slick while the curls stay elevated all night.
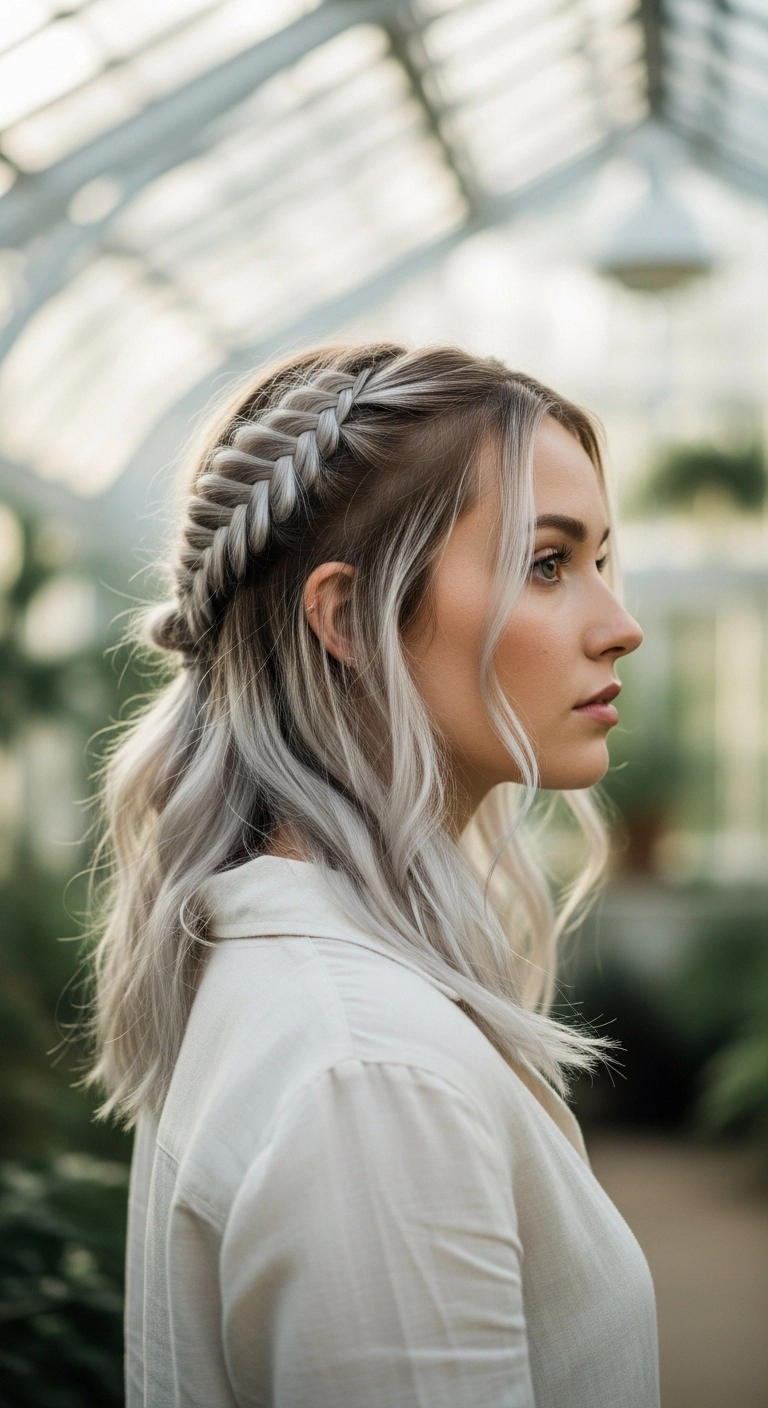
I think this half-up side braid is one of the prettiest ways to show off icy dimensional blonde tones while keeping hair off your face. By leaving soft face-framing pieces out in front, it softens your facial features and gives that dreamy, romantic boho aesthetic. You can dress this look up for a wedding or bridal party, or keep it relaxed and effortless for everyday casual wear!
How to do this
1. Start by prepping clean, dry hair with a generous mist of the heat protectant spray listed below to shield your lightened strands.
2. Add loose, lived-in texture throughout your lengths by wrapping 1-inch sections around a curling wand using the ceramic curling iron listed below, leaving the ends straight.
3. Section out soft face-framing tendrils in the front, then grab a horizontal section along the side of the crown right above the temple to begin your braid.
4. Create a dimensional Dutch braid or fishtail braid by crossing strands under and gently incorporating small sections along the upper hairline as you work toward the back of the head.
5. Secure the braid at the back of the crown with the clear elastic hair ties listed below, tucking the end neatly beneath the rest of your hair with bobby pins.
6. Gently pinch and pull the edges of each braid loop (pancaking) to give it full, fluffy volume and an effortless boho look.
7. Finish by spritzing the hair with the flexible hold finishing spray listed below to tame flyaways while keeping movement soft and touchable.
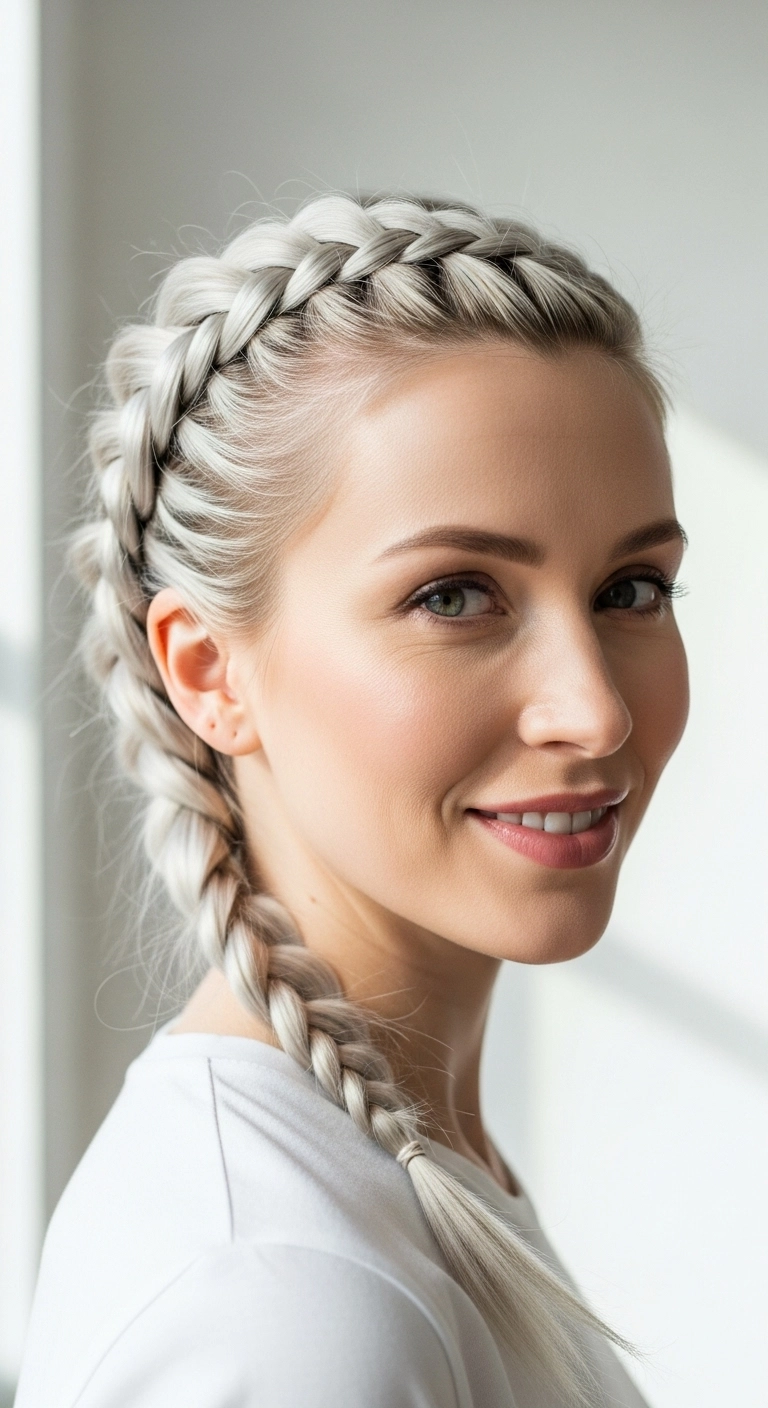
This braid is my absolute favorite whenever I want my hair completely out of my face without sacrificing style – it kept my hair perfectly secured all day during a long outdoor hike!
How to do this
1. Start by detangling dry hair completely using the wide-tooth detangling comb listed below.
2. Apply a small amount of the lightweight hair styling cream listed below to smooth down any flyaways and give your hair clean grip.
3. Create a deep side parting and section out a front piece near the temple to begin your Dutch braid, splitting it into three equal subsections.
4. Cross the outside strands under the middle strand (rather than over) to make the Dutch braid pop outward in 3D.
5. Continue braiding along the hairline and around the side of your head, smoothly incorporating small, even sections of hair into the outer strands each time.
6. Once you pass behind the ear, direct the braid over your shoulder and continue plaiting all the way down through the ends.
7. Secure the ends firmly with one of the clear mini elastic hair ties listed below.
8. Gently pinch and tug the outer edges of each braid stitch to fan them out for a slightly fuller look, then mist with the flexible hold hairspray listed below to lock it in place.
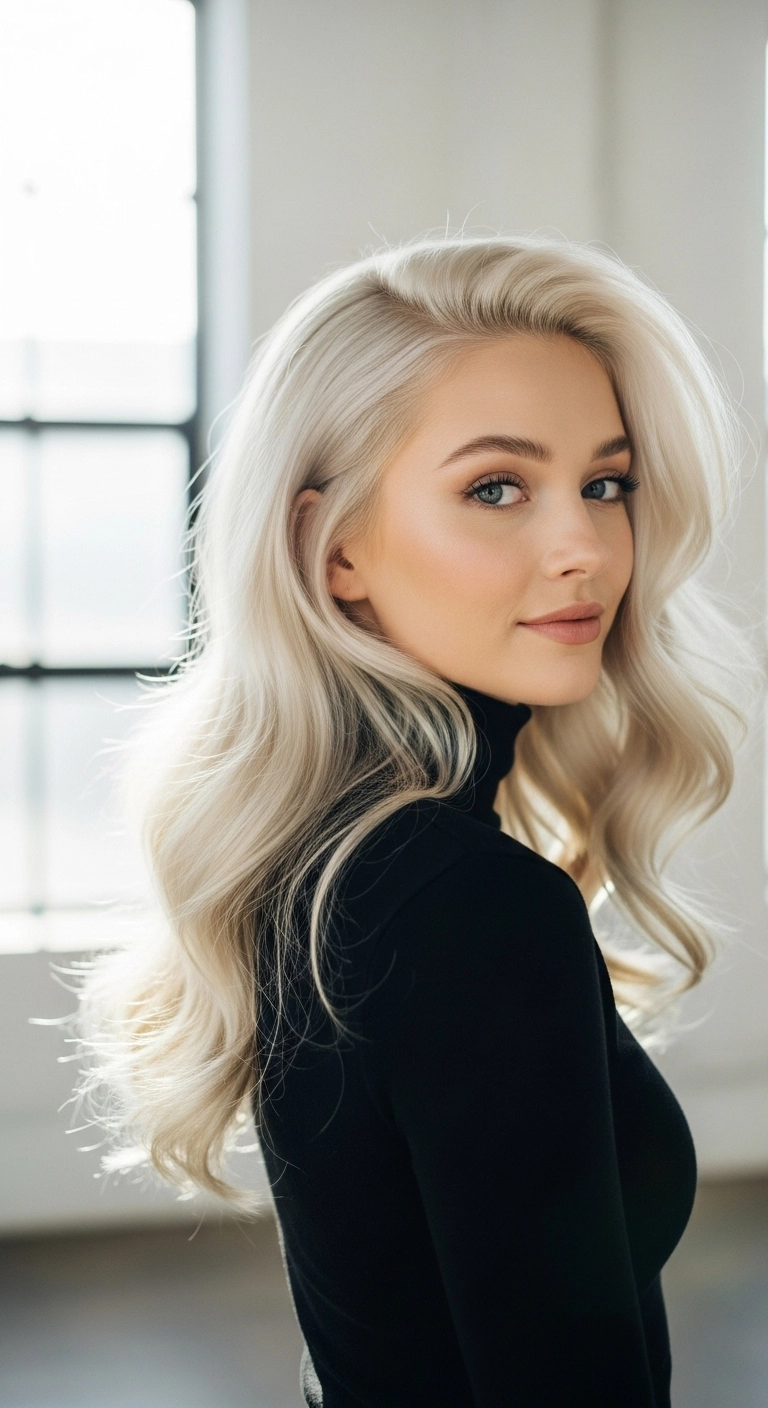
I fell in love with this dramatic side-swept blowout the second I saw it—it just screams effortless luxury and Old Hollywood glamour all in one. The ultra-light icy platinum paired with that swooping, voluminous curve around the face makes it an absolute showstopper for nights out or whenever you want to feel totally polished. It does take a little dedication with purple shampoo and round-brushing, but the gorgeous, bouncy result is 100% worth every minute!
How to do this
1. Prep clean, damp hair by applying a quarter-sized amount of the heat protectant blowout cream listed below throughout your mid-lengths and ends to lock in smoothness.
2. Mist the root volumizing spray listed below directly into your crown and side-part roots to provide maximum lift during styling.
3. Blow-dry using a round boar bristle brush, lifting upwards at the roots and rolling the ends under to create polished, airy body.
4. Create a deep side part, then take large 2-inch vertical sections and curl loosely using the large barrel ceramic curling iron listed below, curling away from the face.
5. Clip the front sweeping fringe section up into a large roller while it cools to lock in that swooping dramatic volume.
6. Release the roller, then gently brush through the curls using the cushion paddle brush listed below to soften them into lush, flowing waves.
7. Smooth a tiny drop of the lightweight finishing hair oil listed below through the ends for high-gloss shine, and set the whole look with a generous veil of flexible hold hairspray.
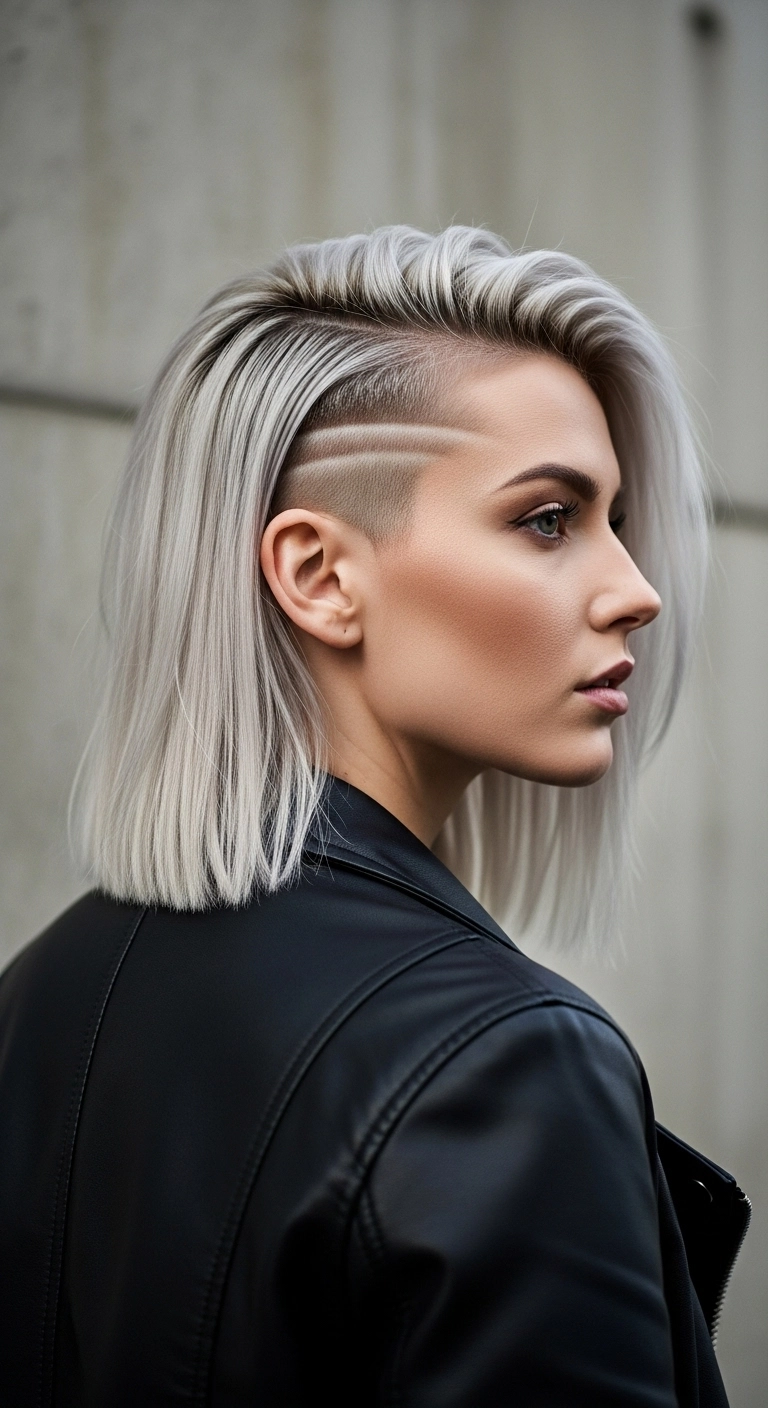
I think this is one of the boldest ways to take a classic blunt lob and completely reinvent it. Combining an ultra-clean blunt perimeter with a shaved undercut and double razor lines creates an edgy contrast that looks incredible flipped to the side. You can easily wear this parted down the middle to hide the shaved panel for work, or flip it deep to show off the geometric detail for a night out!
How to do this
1. Section off the side of the head above the ear where the undercut will sit, and clip the rest of the hair securely out of the way.
2. Buzz the undercut using hair clippers with a short guard, then carve out two crisp, parallel horizontal accent stripes using precision detailing trimmers.
3. Cut the remaining hair into a precise, blunt lob length falling just above the collarbone.
4. Lighten the main hair to a level 10 pale blonde and tone to an icy silver finish, leaving a tight shadow root at the scalp for dimension.
5. Apply a lightweight blow-dry heat protectant and smooth the hair straight with a paddle brush and blow dryer.
6. Run a flat iron through small sections to keep the blunt ends pin-straight and sleek.
7. Sweep the top hair over into a dramatic deep side part opposite the buzz, and mist with a flexible texturizing spray to keep lift and root volume intact.
Products Used
Precision Detail Hair Trimmer for Edges and Designs
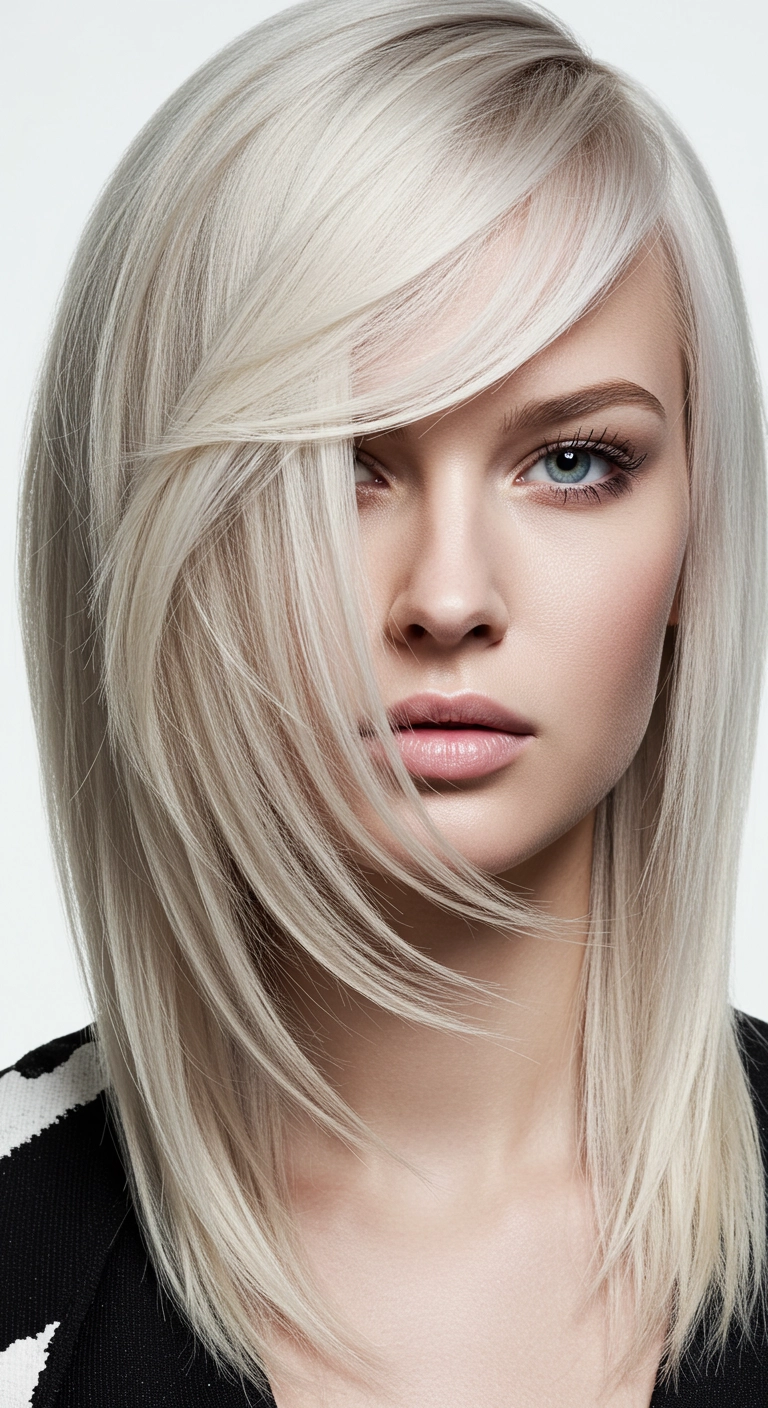
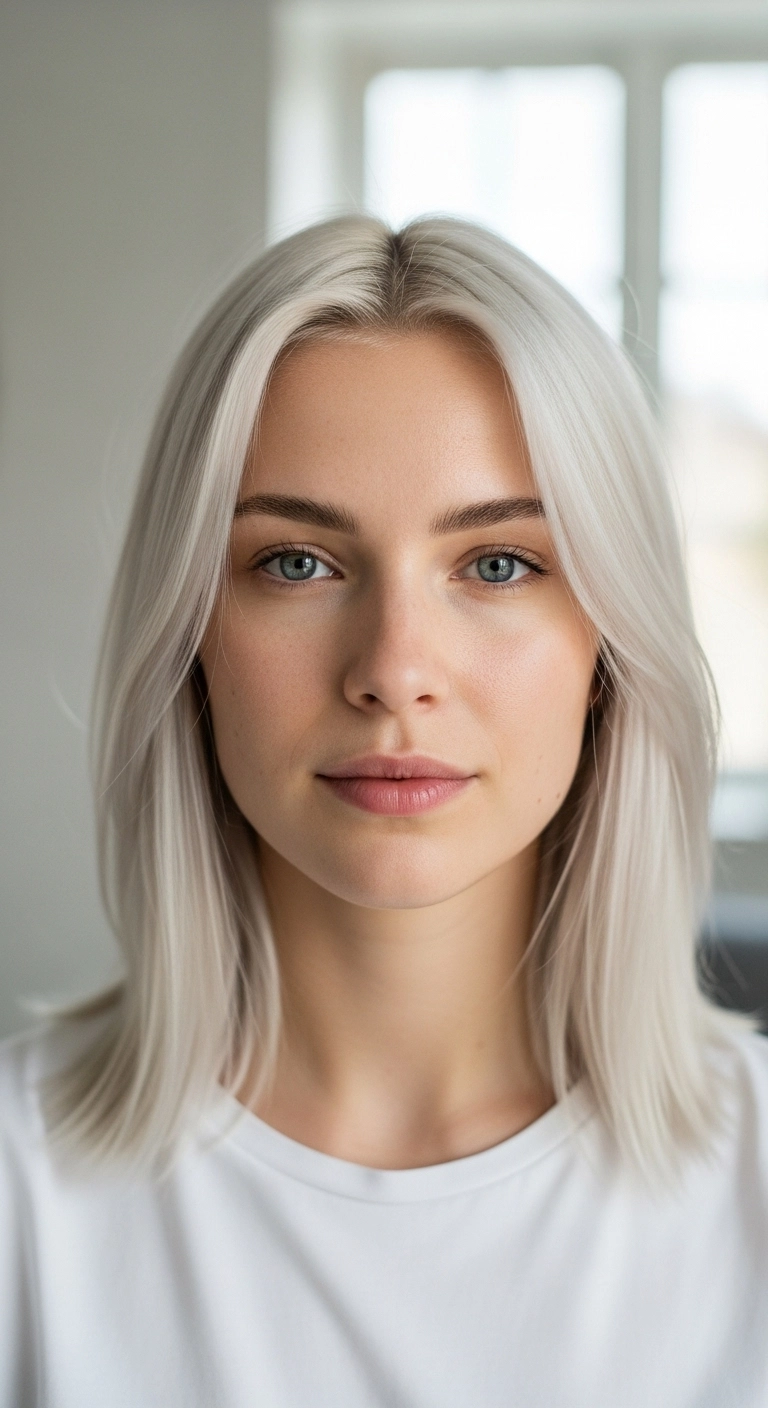
An icy platinum blonde lob is such a showstopper and never goes out of style. If you want a fresh cut that feels modern and effortless, pairing soft curtain bangs with a collarbone-grazing length gives you tons of movement without losing fullness. Make sure to keep up with your purple shampoo and bond builders to keep that color vibrant and healthy!
How to do this
1. Start by washing the hair with a gentle violet toning shampoo and moisturizing conditioner to keep the icy blonde bright and free of brass.
2. On damp, towel-dried hair, mist evenly with a thermal heat protectant spray to shield bleached strands from hot styling tools.
3. Apply a small amount of lightweight smoothing blowout cream from mid-lengths to ends using your fingers or a wide-tooth comb to detangle.
4. Section hair and blow dry using a medium ceramic round brush, focusing on lifting at the roots for natural body and smoothing the ends downward.
5. When drying the face-framing curtain pieces, roll them back and away from your face with the round brush to create that effortless sweep.
6. Finish by smoothing a drop of lightweight hair oil over the mid-lengths and ends for glossy shine, followed by a mist of flexible hold hairspray.
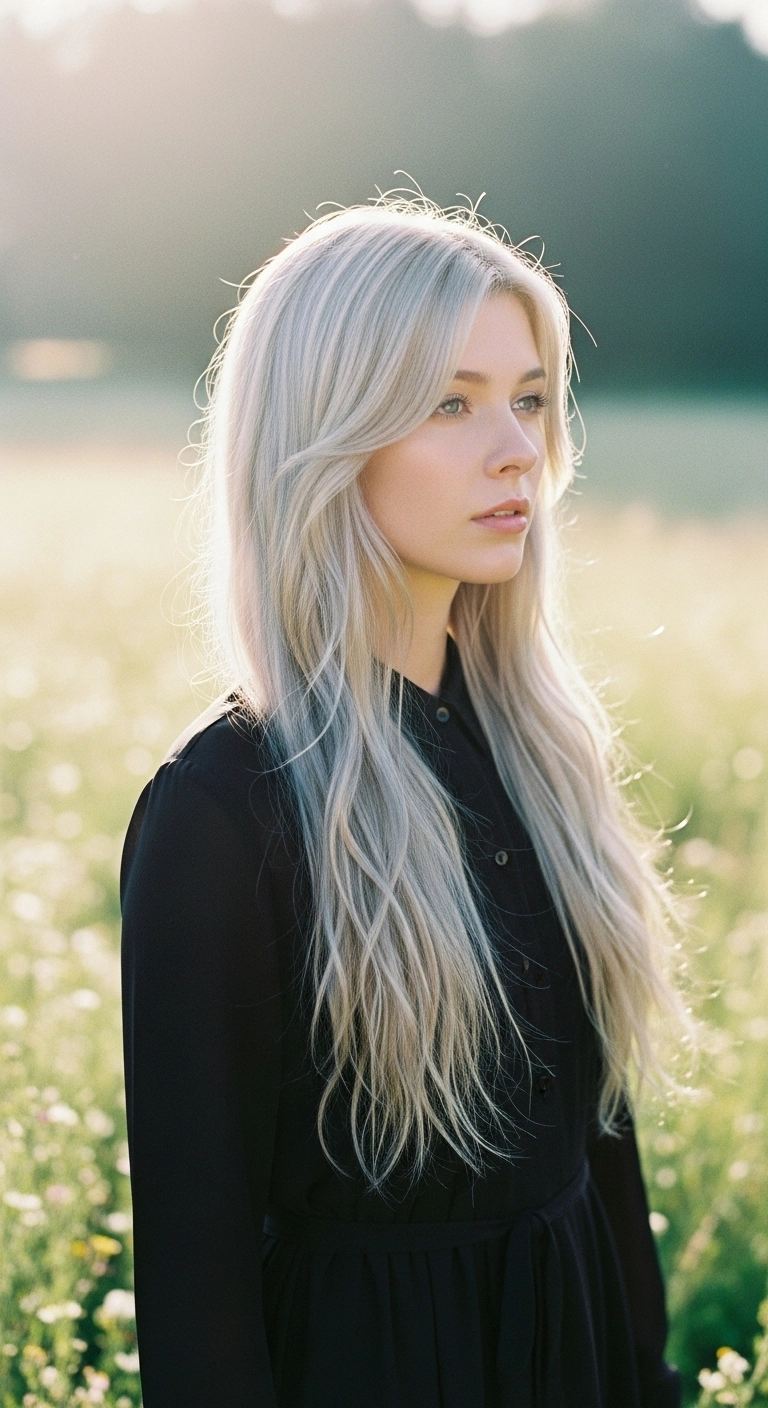
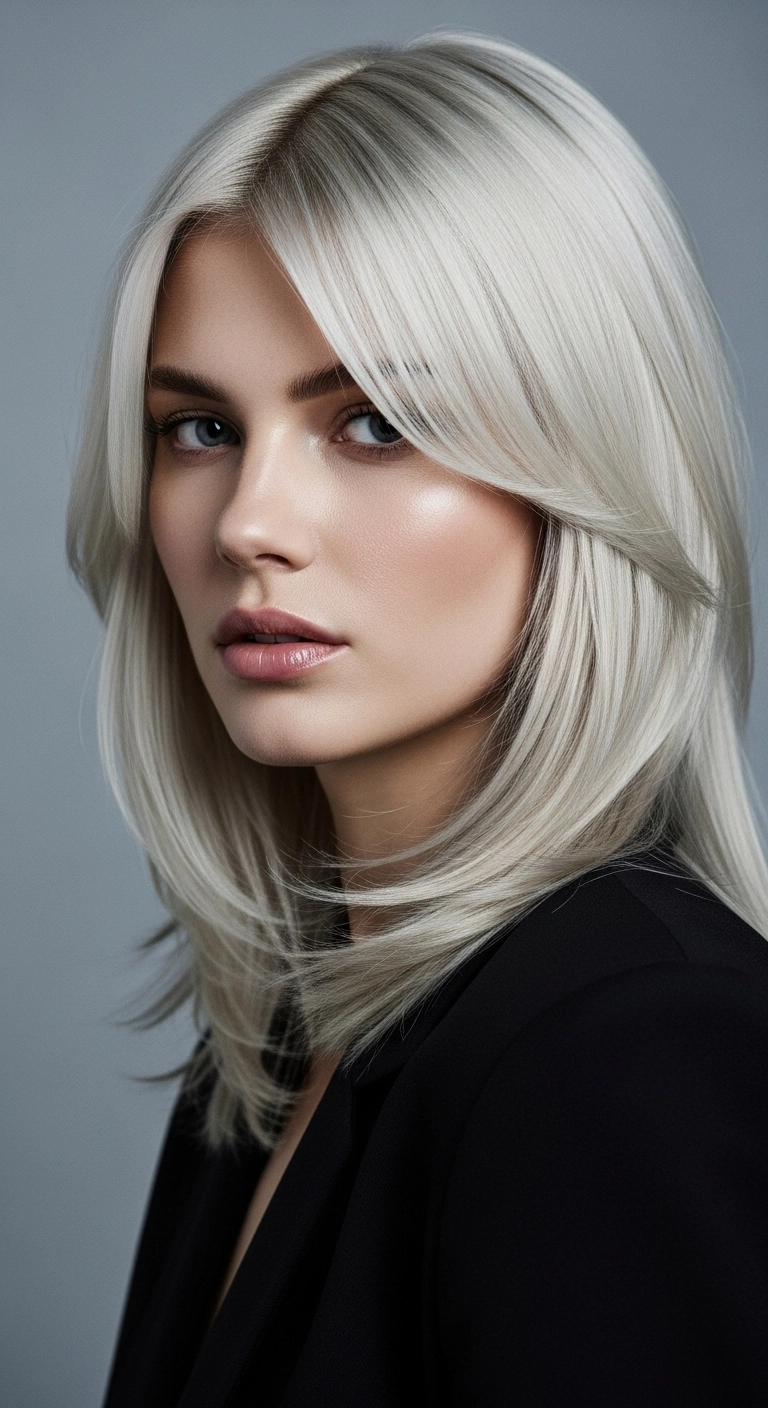
Dreaming of turning heads with pure fairy-tale hair? This icy platinum blonde combined with cascading extra-long layers and face-framing curtain bangs is pure magic. It’s light, breezy, and gives off effortless ethereal energy whether you're strolling through a field or heading out on a romantic evening date.
How to do this
1. Start by prepping clean, damp hair with the lightweight leave-in conditioner listed below to hydrate and detangle bleached strands without weighing them down.
2. Apply a dime-sized amount of the heat protectant styling serum listed below through your mid-lengths and ends to shield your pale blonde locks from thermal stress.
3. Section the curtain bangs away from the rest of the hair and rough-dry your lengths until about 85% dry using a low-to-medium heat setting.
4. Take a large ceramic round brush listed below and blow dry the face-framing curtain bangs forward, then roll them back away from the face to create that soft, swooping curtain curve.
5. Smooth down the long lengths with a paddle brush or round brush, rolling the ends ever so slightly under for a gentle, effortless fall.
6. Finish the look by misting a light coat of the flexible hold hairspray listed below over your crown and ends to tame flyaways while preserving natural, touchable movement.
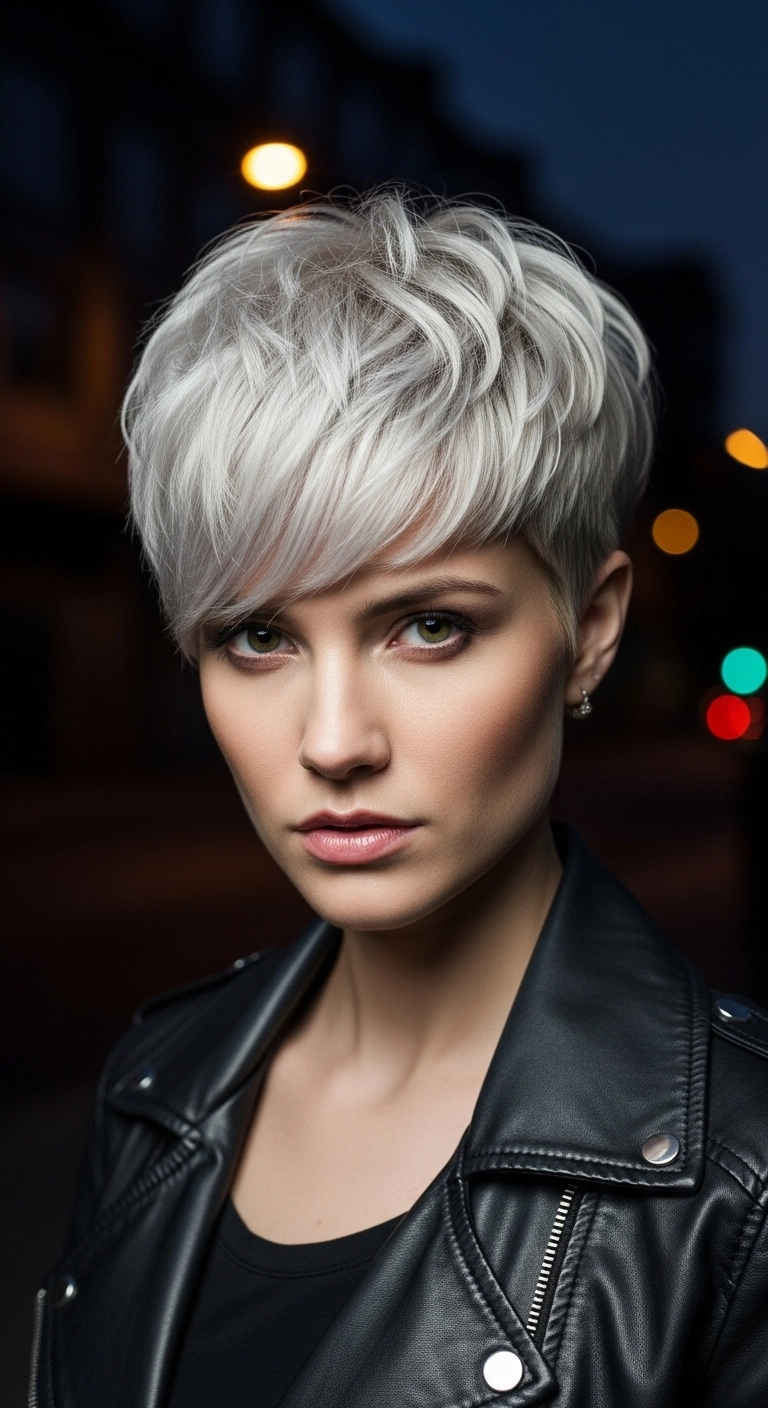
I love this ultra-chic platinum pixie cut!! The choppy top layers give it so much effortless texture and body, and the icy silver hue pairs amazingly well with a leather jacket. It's bold, super flattering on defined cheekbones, and surprisingly easy to style day-to-day.
How to do this
1. Start by washing hair with the purple toning shampoo listed below to keep that icy, bright silver-platinum tone completely free of any brassiness.
2. Towel-dry gently and apply a small dollop of the lightweight styling mousse listed below throughout the roots and mid-lengths to build volume and body.
3. Blow-dry the hair forward and slightly to the side using the small ceramic round brush listed below, lifting at the crown to get full, soft volume.
4. Once completely dry, work a nickel-sized amount of the matte texture pomade listed below between your palms and warm it up.
5. Rake your fingers forward through the crown, twisting and separating small sections along the front fringe to create that piecey, swept texture.
6. Finish off by lightly misting the flexible hold hairspray listed below to lock the shape in place while keeping natural movement.
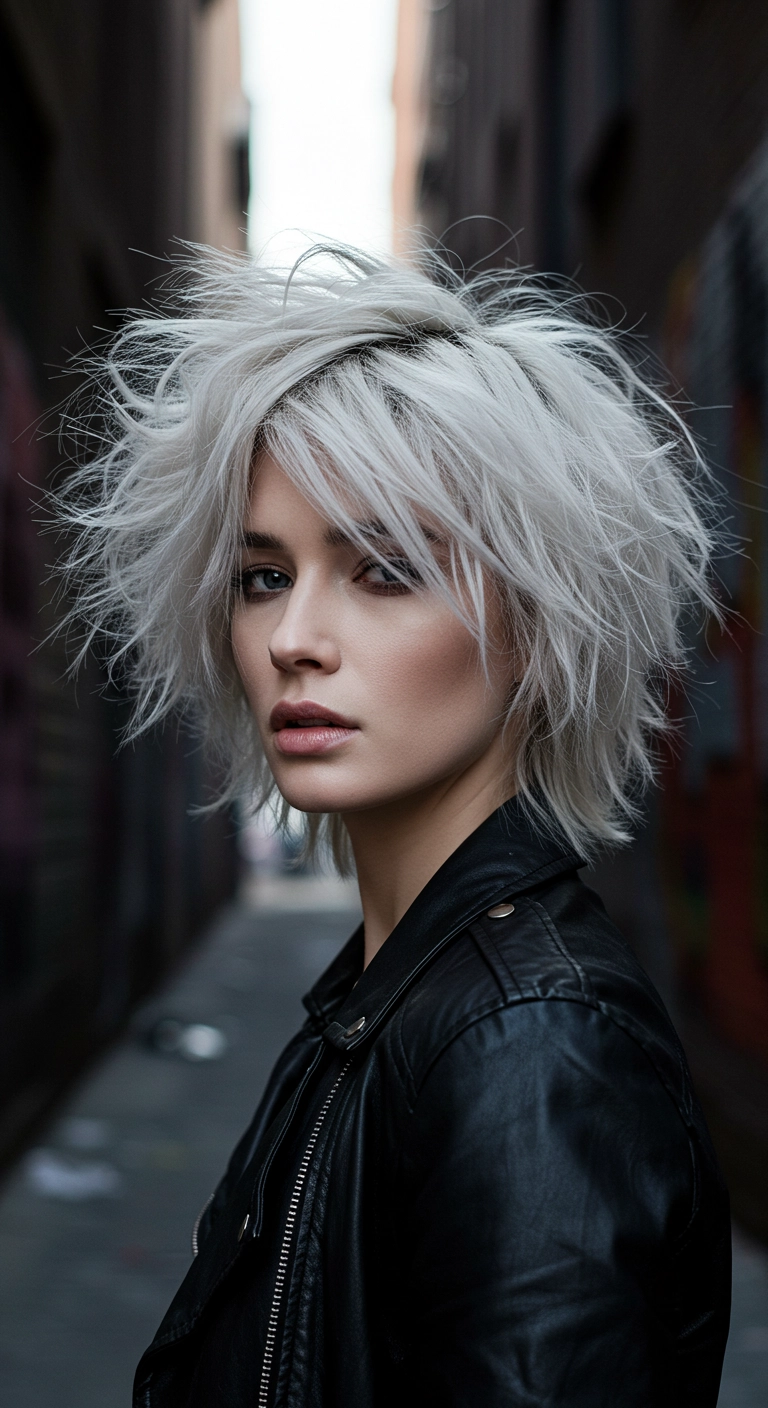
I am absolutely obsessed with this rock-and-roll platinum bixie! The piecy, shattered layers give it so much movement and attitude, while the ultra-cool white tone makes the whole style look instantly fierce. It's the perfect edgy cut if you want maximum texture with that lived-in, cool-girl energy.
How to do this
1. Start by prepping damp, towel-dried hair with a lightweight styling mousse using the volumizing hair mousse listed below to create structural lift.
2. Blow-dry upside down or use a small round brush while lifting at the roots to maximize crown height and volume.
3. Once completely dry, take small sections and lightly flick random outer pieces with a mini flat iron or styling wand to create that piecey, razor-cut texture.
4. Generously spray the roots and mid-lengths using the dry texturizing spray listed below to build effortless, gritty separation and body.
5. Warm a dime-sized amount of paste between your palms using the matte styling clay pomade listed below, then pinch and twist the ends, defining the fringe across your brow.
6. Finish with a spritz of flexible hairspray using the strong hold finishing hairspray listed below to lock the edgy shape in place all day.
Are you obsessed with that ultra-sleek, luminous blonde aesthetic? I had to include this icy platinum blowout because it gives off such effortless boss-energy while still looking totally soft and feminine! The subtle shadow root makes growing it out way more forgiving, and those cascading face-framing layers really accentuate your cheekbones and jawline in the prettiest way. You can wear it blown out sleek and beveled like this, or throw some soft loose waves through the lengths for extra dimension. Try this stunner if you're ready to make a bold, chic statement!
How to do this
1. Start by washing hair with the purple toning shampoo listed below to keep the icy blonde bright and free of brassy tones.
2. On damp, towel-dried hair, mist evenly with the heat protectant spray listed below from mid-lengths to ends.
3. Apply a golf ball-sized amount of the volumizing styling mousse listed below at the roots and through the front fringe to give the blowout body and hold.
4. Section hair and blow dry using the large ceramic round brush listed below, lifting upward at the roots for lift and rolling inward at the ends to create that soft, beveled feather effect.
5. For the curtain bangs, blow them forward over the face around the round brush, then sweep them gently back and away from the face to create that gorgeous sweeping arch.
6. Finish by smoothing a tiny drop of the lightweight hair serum listed below through the mid-lengths and ends for a mirror-like shine, then set lightly with the flexible hold hairspray listed below.
Can we take a second to appreciate how chic and stunning this icy platinum lob is?! Cutting your hair to collarbone length gives you the perfect balance of manageable length and instant style. Plus, that deep side sweep adds effortless drama and volume without needing hours of styling. It’s edgy, modern, and looks totally fierce with any outfit!
How to do this
1. Start by washing hair with the purple toning shampoo listed below to keep the icy blonde shade bright and free of brassiness.
2. On damp, towel-dried hair, mist a generous amount of the heat protectant spray listed below from roots to ends.
3. Apply a golf-ball sized dollop of the volumizing mousse listed below directly to the root area to encourage lift and fullness.
4. Blow dry using a round ceramic brush, over-directing the roots upward and flipping hair to a deep side part to build natural crown volume.
5. Use a large barrel curling wand or flat iron to add random, subtle bends through the mid-lengths, keeping the ends mostly straight for an effortless look.
6. Shake out the bends with your fingers and generously spray the dry texturizing spray listed below through the mid-lengths and roots for that airy, tousled separation.
7. Finish the style by lightly misting the flexible hold hairspray listed below to lock in the textured volume without making the hair feel stiff.
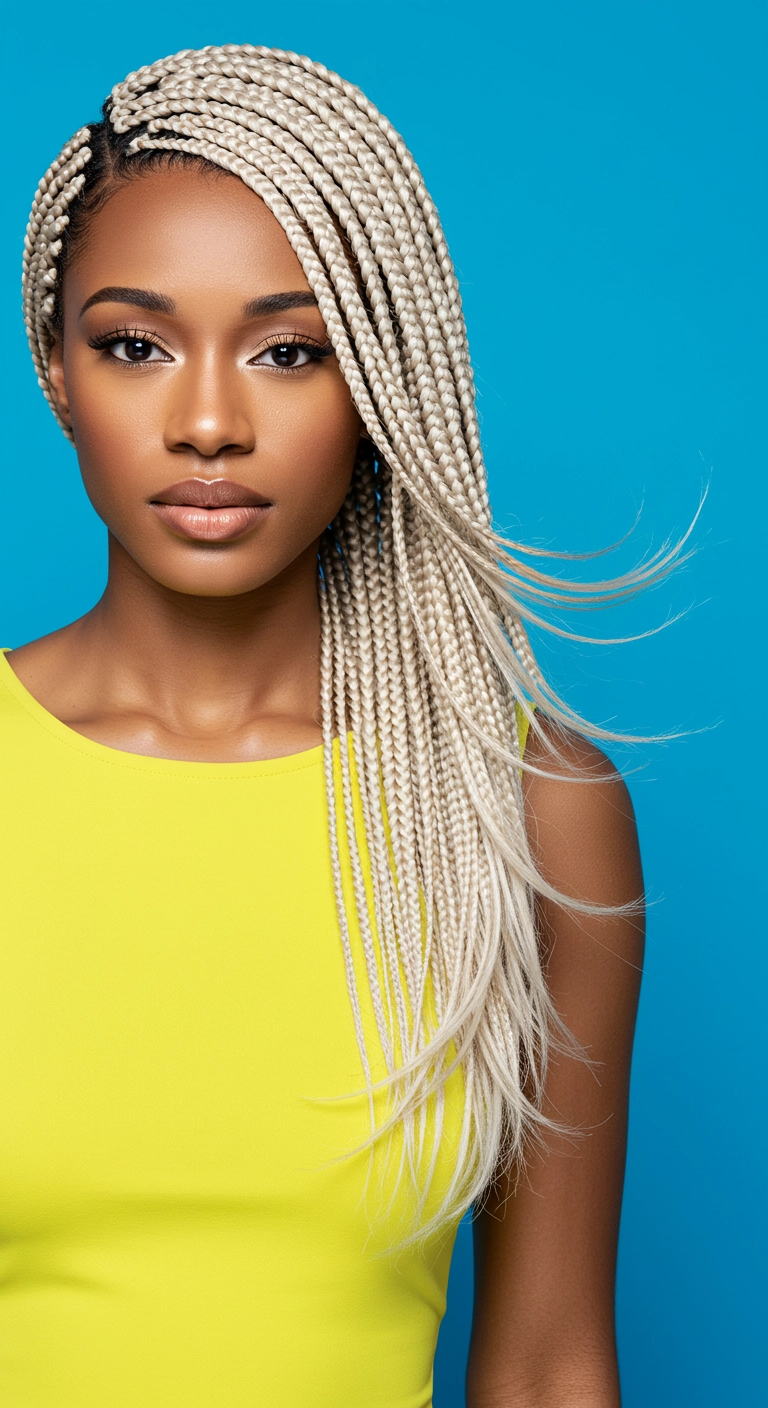
Can we talk about how stunning this high-contrast look is?! Going with an icy platinum blonde for your braids makes such an unforgettable, bold statement, especially against deeper skin tones. Sweeping them all gracefully over one shoulder gives it that effortless, high-fashion energy that turns heads everywhere.
How to do this
1. Thoroughly cleanse, deep condition, and blow-dry natural hair straight using the heat protectant spray listed below to prep for braiding.
2. Section the hair cleanly into precise, small-to-medium square grid parts using the metal tail parting comb listed below.
3. Apply a firm-hold braiding edge pomade along the parted sections to create crisp, sleek lines and eliminate flyaways.
4. Begin braiding your natural hair and feed in pre-stretched platinum blonde synthetic braiding hair listed below seamlessly near the root to create tension-free knotless plaits.
5. Continue braiding down each strand evenly all the way to the mid-chest level, leaving the very ends loose and feathered.
6. Dip the ends in hot water to set the braids and make them flexible, then smooth the baby hairs along the forehead with an edge styling brush and gel.
7. Finish by applying a nourishing scalp oil listed below to keep roots hydrated and glossy.
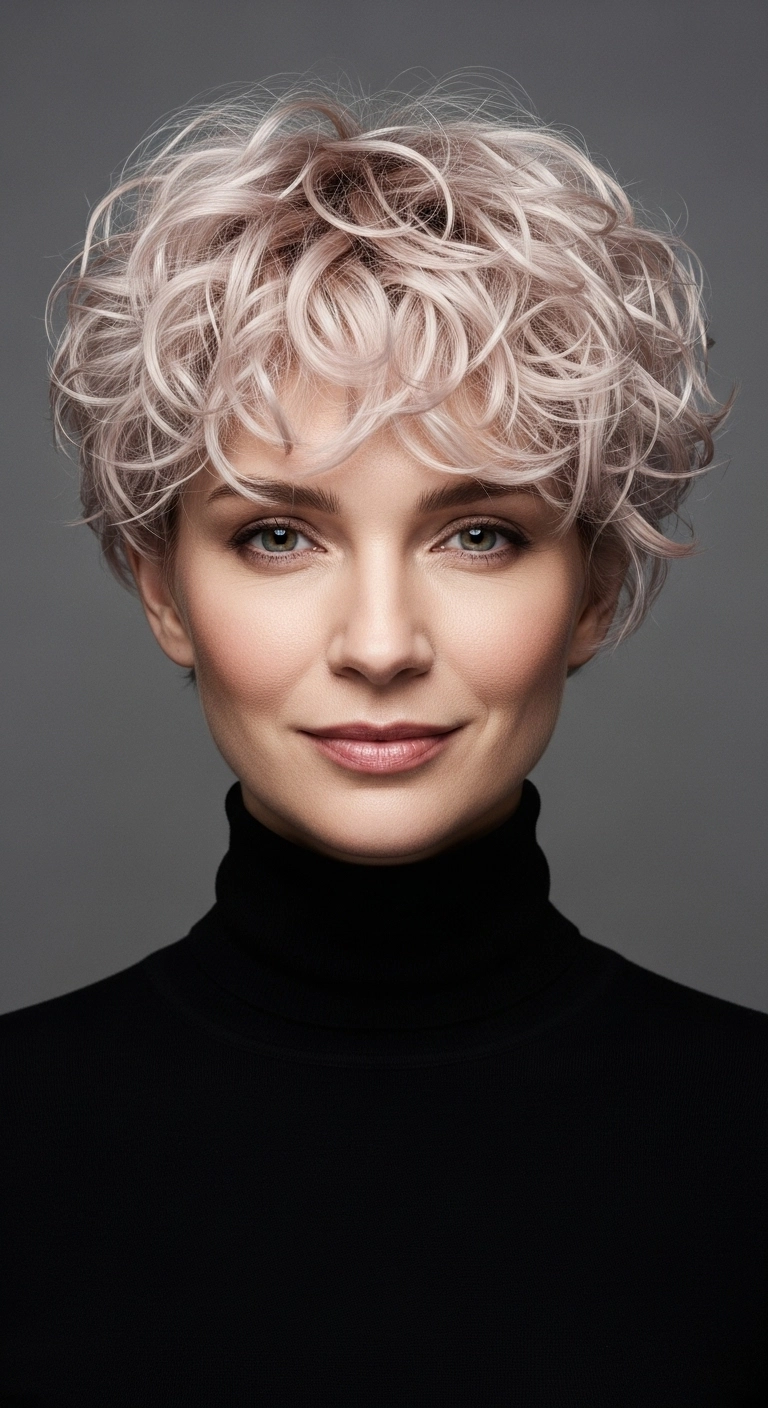
A super chic, undone curly pixie crop that feels fresh and cool. I'm obsessed with pairing soft, bouncy curls with a sharp, icy blonde tone and a subtle shadowed root. It gives off that effortlessly French, tailored vibe without feeling stiff. Honestly, if you've got natural waves or ringlets and want to chop it all off, this is the ultimate low-stress, maximum-style cut.
How to do this
1. Start with clean, damp hair after washing with a color-safe purple toning shampoo to keep the icy blonde bright and brass-free.
2. Work a quarter-sized dollop of the curl-defining mousse listed below through your damp strands from roots to ends, making sure it's evenly distributed for hold and shape.
3. Attach a diffuser to your blow dryer, flip your head slightly forward, and cup sections of curls using medium heat to build natural volume and define those 2C/3A spirals without creating frizz.
4. Once completely dry, warm a dime-sized amount of the matte styling paste listed below between your fingertips and gently piece out the curls on top, shaping them forward onto your forehead for that effortless fringe look.
5. Use a lightweight texturizing spray underneath the crown to inject a little extra root lift and airy separation.
6. Finish with a quick mist of the flexible hold hairspray listed below so your textured curls stay playful and in place all day.
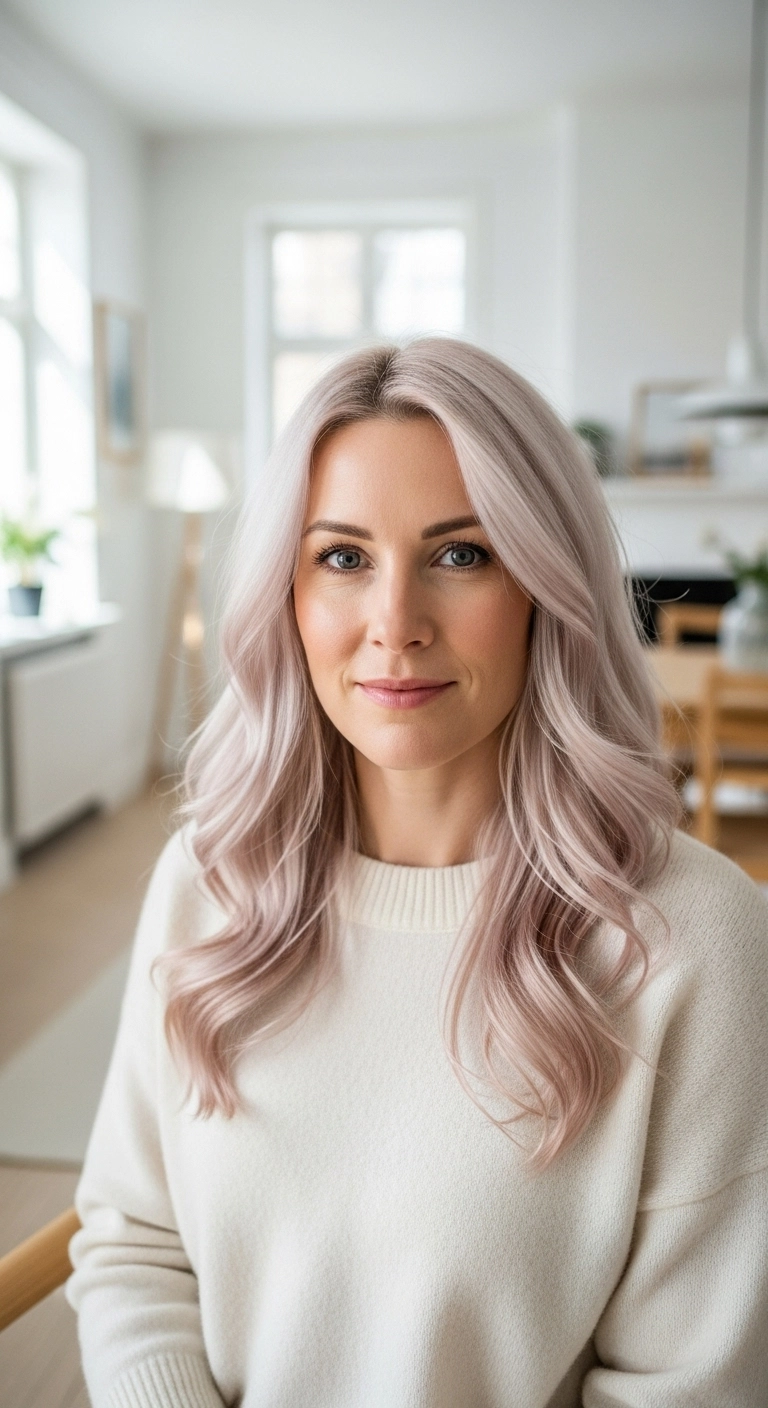
I am honestly obsessed with this tone—it sits right in that dreamy sweet spot between icy platinum and the softest touch of blush rose! Styled with gentle, loose bends that frame the cheekbones, this look gives off total effortless chic energy while looking unbelievably glossy and high-end.
How to do this
1. Start by prepping freshly washed, damp hair with a thermal shielding cream using the heat protectant spray listed below to keep your high-lift blonde healthy and shielded from heat damage.
2. Blow dry the hair smooth using a ceramic round brush and a concentrator nozzle, lifting upward at the roots along the middle part to build soft, natural volume.
3. Once completely dry, divide the hair into manageable horizontal sections starting at the nape of the neck.
4. Take a wide-barrel curling iron (around 1.25 to 1.5 inches) and curl 2-inch vertical sections away from the face, leaving the very ends slightly relaxed for a modern, fluid wave rather than a tight curl.
5. For the face-framing pieces around the cheekbones, wrap them back and away from the face to create that signature soft sweep.
6. Allow all curls to cool completely so the wave structure locks into place.
7. Gently rake through the waves with your fingers or a wide-tooth comb to blend the sections into soft ribbons.
8. Finish by smoothing down any flyaways and boosting high-shine with a couple drops of the lightweight hair styling oil listed below.
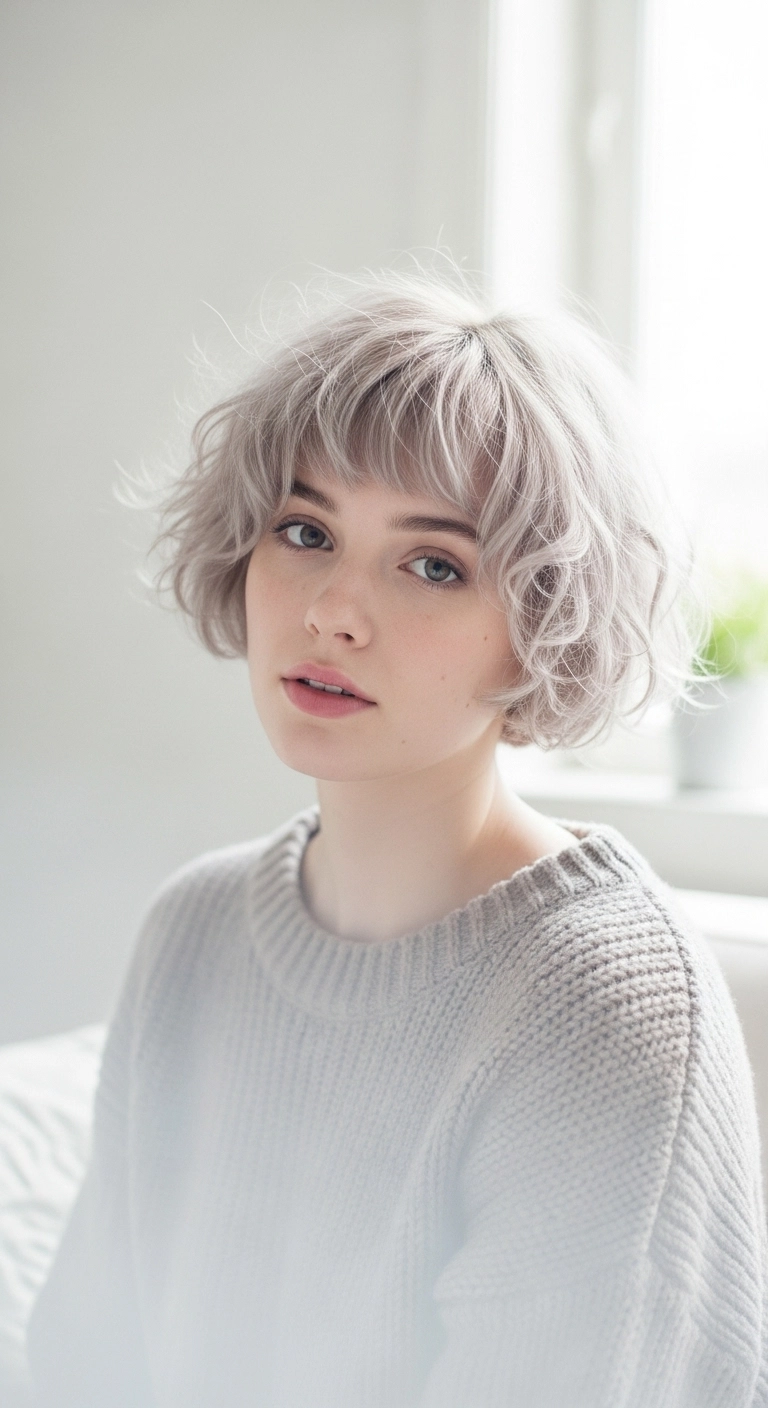
A soft, romantic French bob cut right at the chin with dreamy, lived-in waves. The cool icy platinum shade gives it a modern edge while the wispy brow-grazing bangs keep it super sweet and wearable. It has that effortless Parisian girl aesthetic that looks effortlessly styled right out of bed.
How to do this
1. Start by prepping damp hair with a lightweight styling mousse using the volumizing foam mousse listed below to give your waves body and bounce.
2. Gently blow dry your bangs forward using a small round brush, curving slightly inward at the tips so they fall naturally across the brow.
3. Diffuse the rest of the hair or let it air dry to encourage your natural wave pattern, scrunching gently upwards with your hands.
4. For extra definition on straighter pieces, wrap random 1-inch sections around a slim curling wand using the ceramic curling wand listed below, leaving the ends out for a lived-in look.
5. Mist a generous amount of dry texturizing spray using the dry texturizing spray listed below through the mid-lengths and roots to break up the curls and create that airy, undone shape.
6. Finish by piece-ing out the fringe and side tendrils with a tiny dab of styling paste using the matte finishing paste listed below.
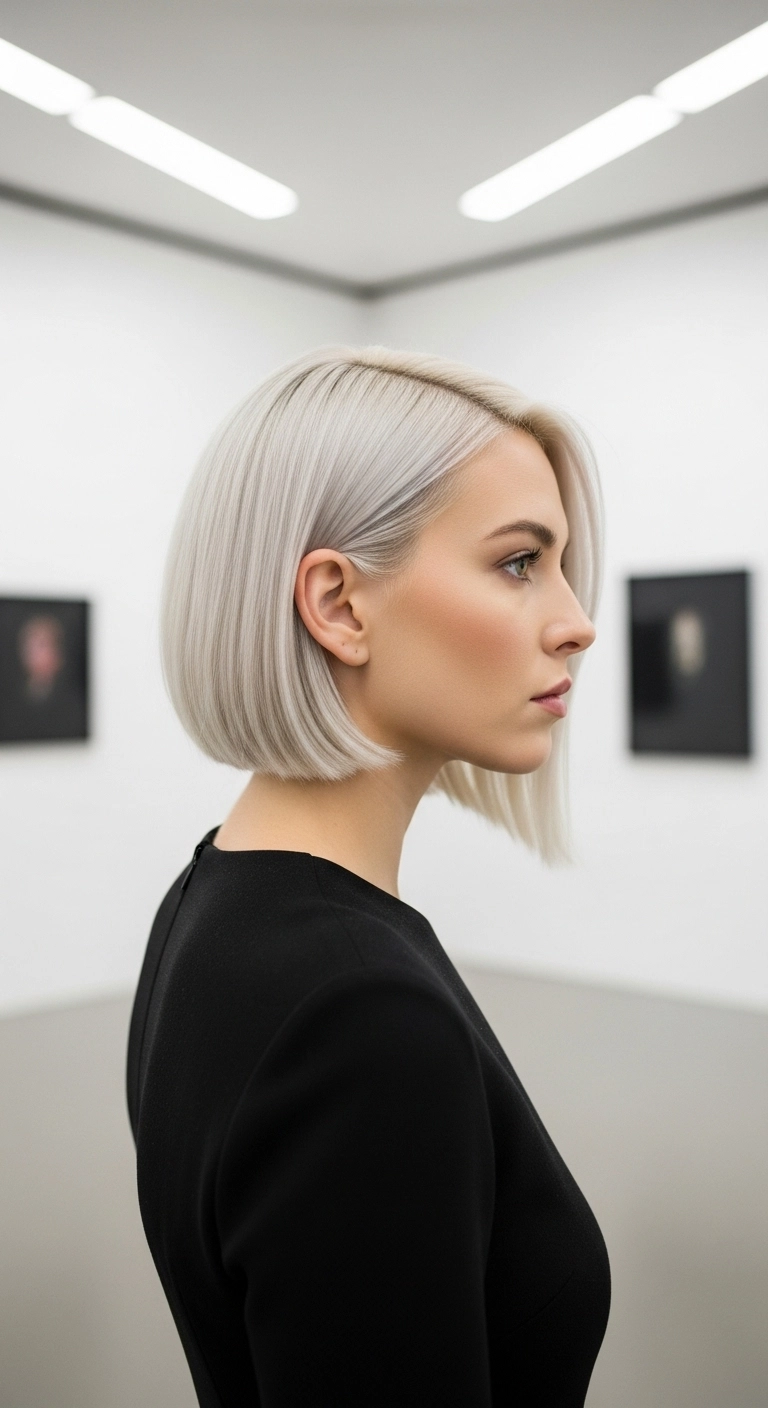
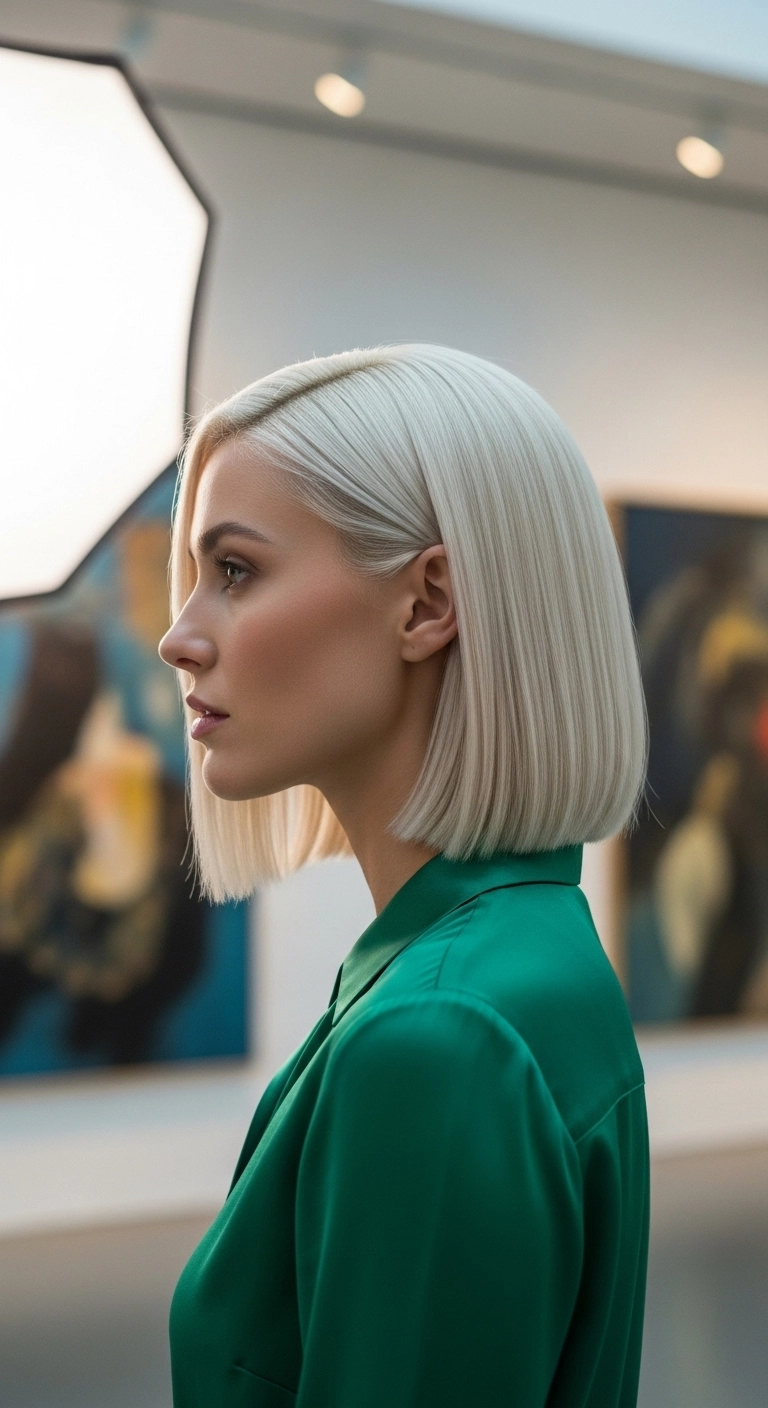
If you want a haircut that screams expensive and effortlessly modern, this is it! It’s clean, razor-sharp, and the icy platinum shade takes a classic blunt bob to a whole new level. Just straighten it bone-straight, tuck one side behind your ear, and you're immediately looking runway ready!
How to do this
1. Start by prepping damp, freshly washed hair with a lightweight smoothing cream and the thermal heat protectant spray listed below to shield your lightened strands.
2. Blow dry the hair straight down using a directional nozzle and a paddle brush, keeping tension high to smooth out any natural wave.
3. Section the hair into clean, manageable horizontal quadrants, starting from the nape of the neck up.
4. Take small half-inch subsections and pass through them with the ceramic flat iron listed below at a moderate temperature, maintaining a straight, fluid downward motion without curling the ends under.
5. Once everything is completely flat-ironed pin-straight, apply two drops of the weightless shine oil listed below into your palms and gently glide it from mid-lengths to ends.
6. Tuck one side cleanly behind the ear, ensuring all flyaways are locked in with the flexible hold hairspray listed below for that crisp, glass-hair finish.
I’m absolutely in love with this sharp icy bob because it looks effortlessly high-fashion without requiring endless morning fuss. It gives that ultra-clean, polished look that elevates literally any outfit, whether you're throwing on a cozy turtleneck or dressing up for dinner. Plus, the bright cool platinum makes such a striking statement. Definitely give this cut and shade a try if you're ready for a dramatic, chic reset!
How to do this
1. Start by washing hair with the purple toning shampoo listed below to keep that platinum shade ultra-clean and banish any brassy yellow tones.
2. Apply a dime-sized amount of smoothing blowout cream listed below to damp strands from mid-lengths to ends, combing through evenly for complete heat protection.
3. Use a tail comb to establish a crisp, razor-sharp center part right down the middle.
4. Blow-dry using a round ceramic brush listed below, directing the airflow downward along the hair cuticle and gently rolling the ends under for a sleek, rounded curve.
5. Divide hair into clean horizontal sections and glide through with the flat iron listed below at moderate heat, slightly beveling the ends inward toward the jawline.
6. Finish off by smoothing a drop of lightweight anti-frizz shine serum listed below over the surface flyaways to give that high-gloss, glass-hair finish.
This look is all about that crisp, modern energy of an icy platinum bob. It's cut right around the chin line with soft, clean edges and styled into a smooth blowout that feels completely effortless. The side-swept parting gives it just the right amount of face-framing volume while keeping everything polished and chic.
How to do this
1. Start on freshly washed, towel-dried hair and apply a quarter-sized amount of the smoothing heat protectant serum listed below throughout the mid-lengths and ends.
2. Mist lightly with the root volumizing spray listed below at the crown and along the part to ensure lift without crunchiness.
3. Section the hair horizontally, starting from the nape, and blow-dry using a medium ceramic round brush listed below, keeping the airflow directed downward for maximum shine.
4. When blow-drying the face-framing front sections, lift upward and roll slightly under to create that effortless, flattering curve around the cheekbones.
5. Create a clean, off-center side part using the fine-tooth rat tail comb listed below.
6. Run a flat iron smoothly through any unruly ends, beveling ever so slightly inward at the jawline.
7. Finish by rubbing a drop of the nourishing hair oil listed below between your palms and smoothing it lightly over the surface and tips to eliminate any flyaways.
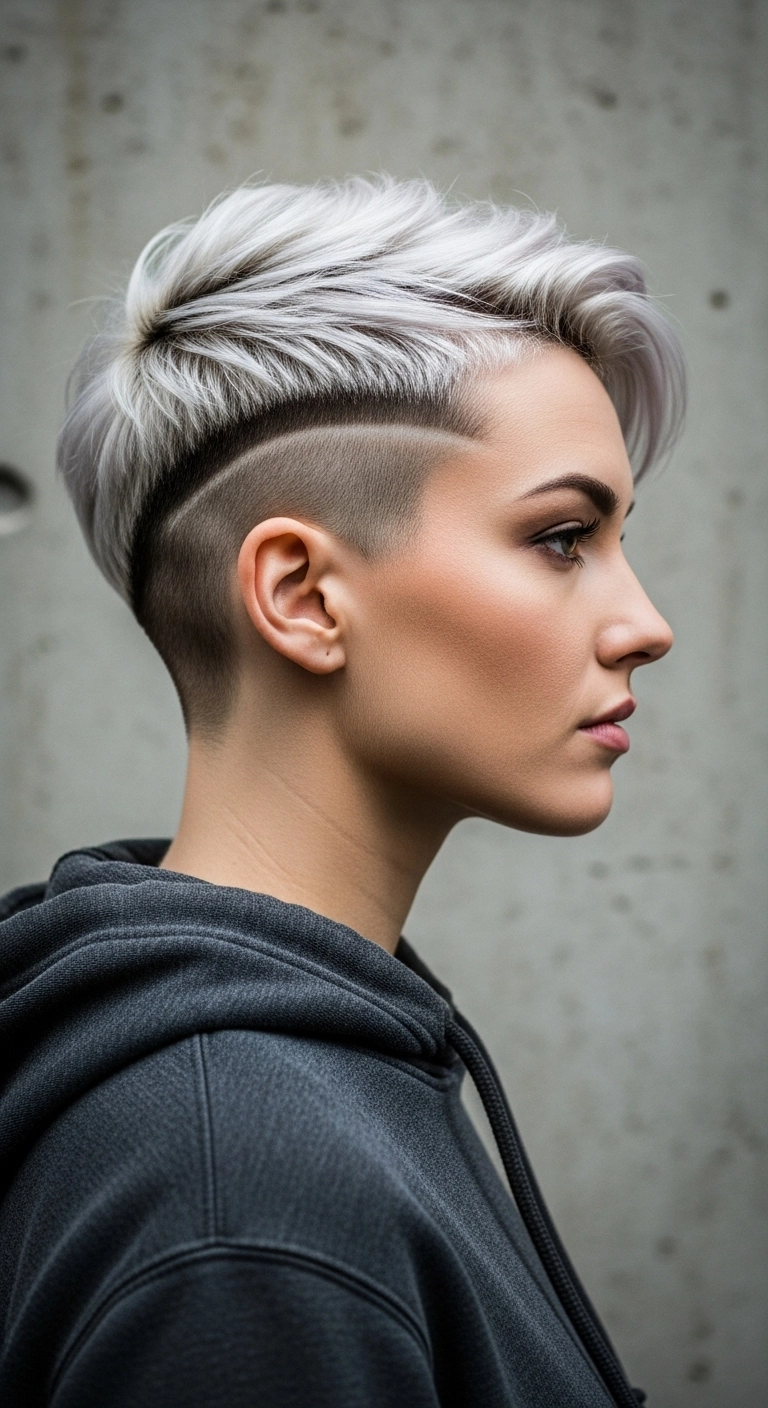
I love how a sharp disconnected undercut instantly elevates a classic pixie into something super bold and modern. The contrast between the tight, natural dark fade with that carved razor line and the fluffy, silvery platinum top makes such a striking statement. You can style the top sleek and pushed back for a sharp look, or piece it out messy and textured for that effortless streetwear feel!
How to do this
1. Start by sectioning off the top crown and fringe area, clipping it securely out of the way to prepare for the undercut.
2. Using electric hair clippers with a low guard, buzz the sides and back down to create a clean, tight fade around the nape and ears.
3. Carve in the sharp accent line right along the temple line using detail trimmers for that crisp, geometric disconnected contrast.
4. Lighten the longer top hair to a clean pale blonde using the hair bleach powder and developer listed below, then tone it to a cool silvery finish with the icy purple toning mask listed below.
5. Cut choppy, disconnected layers into the top section, keeping length concentrated through the front fringe to allow it to sweep over the forehead.
6. Blow-dry the top forward and to the side using a vented styling brush and the lightweight blow dry primer listed below to direct the airflow.
7. Finish the look by rubbing a dime-sized amount of the matte texture paste listed below between your fingers and raking it through the top to define individual pieces and lock in volume.
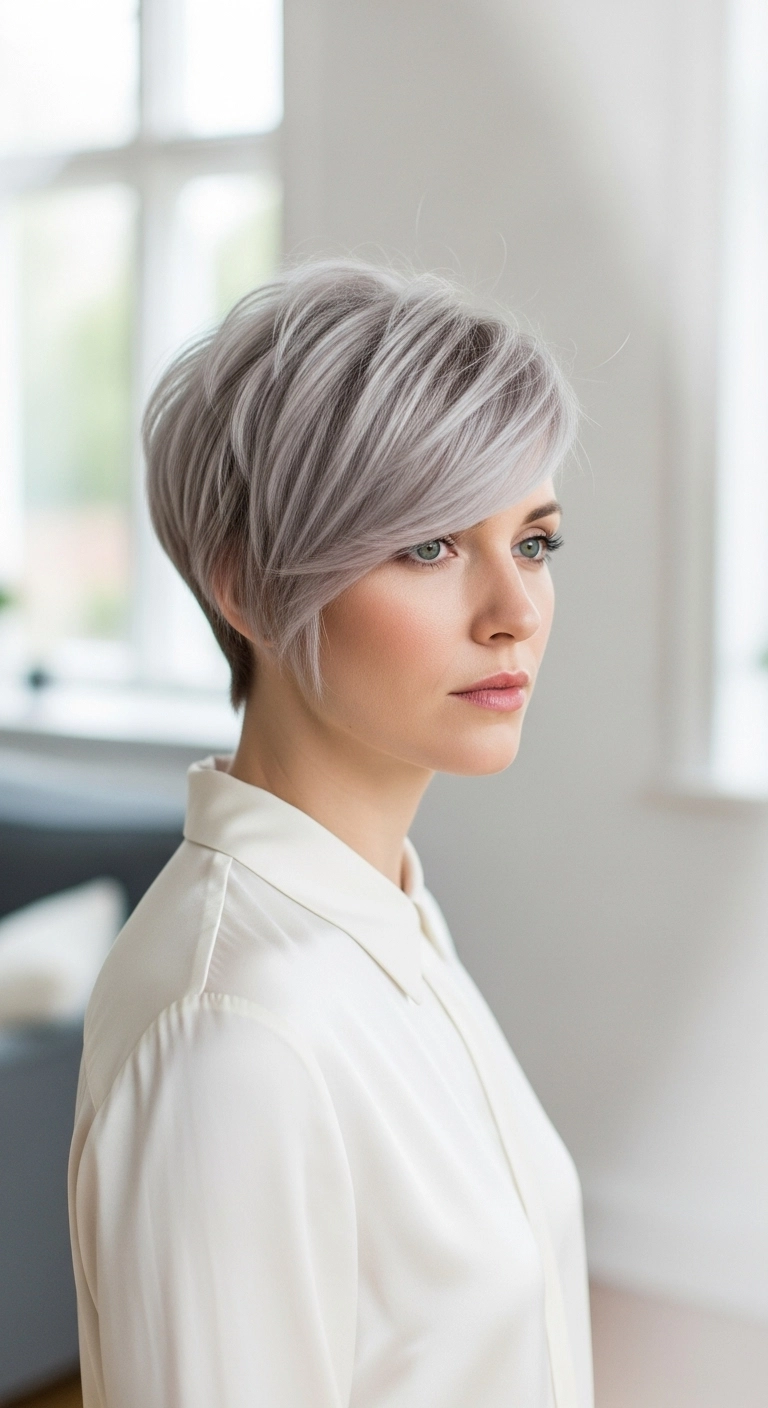
There’s nothing like rocking a sleek icy silver pixie when you want something fresh and bold! I love how the dramatic side-swept bangs frame the cheekbones while keeping the back super clean and low-maintenance.
How to do this
1. Start on freshly washed towel-dried hair by prepping with the leave-in heat protectant spray listed below to shield strands and smooth the cuticle.
2. Work a small coin-sized amount of the lightweight volumizing mousse listed below through the roots and mid-lengths to give the crown plenty of lift.
3. Using a small round ceramic brush and the ionic blow dryer listed below, blow-dry the sides and nape flat against the head while directing the longer top layers forward and across to one side.
4. Glide through the longer front pieces with the mini flat iron listed below, bending the ends gently inward toward the face to frame the cheekbone smoothly.
5. Warm a dab of the matte styling paste listed below between your fingertips and lightly pinch the tips of your bangs and crown to add touchable, piecey definition.
6. Finish with a quick veil of the flexible hold hairspray listed below to keep that sweeping shape in place without any stiffness.
Looking for a power cut that makes an immediate entrance? This icy platinum asymmetrical bob is the ultimate showstopper. With its ultra-sharp lines and sleek, glossy finish, it blends high-fashion drama with timeless sophistication. Who wouldn't want to rock that architectural perfection?
How to do this
1. Start with freshly washed hair using a purple toning system to keep that platinum shade ultra-clean and icy.
2. Apply a dime-sized amount of smoothing serum and heat protectant spray evenly through damp strands.
3. Create a clean, ultra-deep side part on your preferred side using a fine-tooth rat-tail comb.
4. Blow dry the hair smooth using a ceramic round brush and a directional nozzle, wrapping the hair around the contour of your head to create a rounded, sculptural curve.
5. Working in very thin, precise horizontal sections, glide a professional flat iron down the strands from roots to ends, gently beveling the ends inward toward the jawline.
6. Smooth down any flyaways using a lightweight finishing gloss serum or a light touch of hairspray on a fine-tooth comb for that mirror-like glass hair effect.
If you want an ultra-chic, high-fashion statement that screams effortless cool, this icy silver bob is it! The subtle dark root tap makes the bright platinum pop while giving you just enough edge. Tuck one side behind your ear and you're immediately ready to take on the city!
How to do this
1. Start by prepping freshly washed, towel-dried hair with a few pumps of the heat protectant spray listed below to shield bleached hair from heat damage.
2. Blow dry the hair straight down using a directional nozzle and the ceramic paddle brush listed below, following the brush from roots to ends for a sleek, compact finish.
3. Create a clean, defined center part using the fine-tooth tail comb listed below.
4. Take small horizontal sections and glide a flat iron through, turning your wrist ever so slightly inward at the tips so the blunt cut lays smooth and doesn't flare out.
5. Warm a tiny drop of the lightweight hair smoothing serum listed below between your palms and lightly smooth down flyaways, tucking one side behind your ear.
6. Finish with a light mist of the flexible hold hairspray listed below to maintain movement while locking in the sleek shape all day long.
The ultimate cool-girl platinum bob! I love how crisp and clean this cut feels, especially with the soft wispy fringe framing the eyes. It's bold, sleek, and instantly elevates any casual everyday look into something effortlessly high-fashion.
How to do this
1. Start by prepping damp, freshly washed hair with a lightweight smoothing cream and the heat protectant spray listed below to shield your lightened strands.
2. Section out the bangs horizontally. Using a small round boar bristle brush and your blow dryer on medium heat, blow dry the bangs straight down with a slight curve to create that airy, wispy finish.
3. Divide the remaining hair into horizontal sections starting from the nape. Blow dry using a medium ceramic round brush, beveling the ends inward towards your chin to hug the jawline.
4. Once completely dry, run a flat iron gently through the mid-lengths and ends if you need extra sleekness, maintaining the slight under-curl.
5. Warm a couple of drops of the lightweight shine hair oil listed below between your palms and smooth over the surface flyaways to give that ultra-glossy, platinum finish.
6. Mist lightly with a flexible hold hairspray to keep your fringe perfectly in place all day.
Are you thinking about making the big chop or taking your short hair into striking platinum territory?! I had to share this gorgeous textured pixie cut because it strikes the absolute perfect balance between edgy coolness and effortless elegance, don’t you think?! The tapered sides keep your neck and jawline looking super sharp, while all that airy length on top gives you endless ways to play with volume and texture. You can slick it down for a sleek night out or tousle it up like this for an effortless everyday statement!
How to do this
1. Start on freshly washed towel-dried hair after maintaining your platinum base with the purple toning shampoo listed below.
2. Apply a dime-sized amount of the lightweight volumizing mousse listed below to the roots and lengths to give the hair lift and grip.
3. Using a blow dryer with a concentrator nozzle and the small round ceramic brush listed below, lift the hair upwards and slightly back from the forehead to build generous root volume.
4. Once completely dry, warm a pea-sized amount of the matte styling paste listed below between your palms.
5. Work the paste through the top layers using your fingertips to define the piecey, feathered texture and sweep the front quiff softly over to one side.
6. Finish with a quick mist of the flexible hold hairspray listed below to lock the tousled shape in place all day.
If you really want to turn heads, this dramatic asymmetrical bob is the ultimate power move! The super sharp cut paired with that cool icy platinum gives off major high-fashion vibes, yet it stays so clean and effortless to rock every single day.
How to do this
1. Start by washing your hair with a violet toning shampoo listed below to eliminate any brassiness and lock in that pure icy white tone.
2. On damp, towel-dried hair, mist generously with the heat protectant spray listed below from roots to ends to prep for precision heat styling.
3. Apply a small coin-sized amount of smoothing blowout cream listed below throughout your hair to tame flyaways and ensure an ultra-glossy foundation.
4. Create a sharp, deep side part directly above the arch of your eyebrow using a precision tail comb.
5. Blow-dry in sections with a medium round ceramic brush, pulling the shorter side gently curved under the jaw and directing the longer side forward across the face.
6. Take thin horizontal sections and glide over each piece with the titanium flat iron listed below at medium-high heat, creating a crisp, glass-like finish with razor-sharp ends.
7. Finish the look by misting a light veil of the shine finish spray listed below across the crown and lengths to lock in that high-fashion, mirror-like luster.
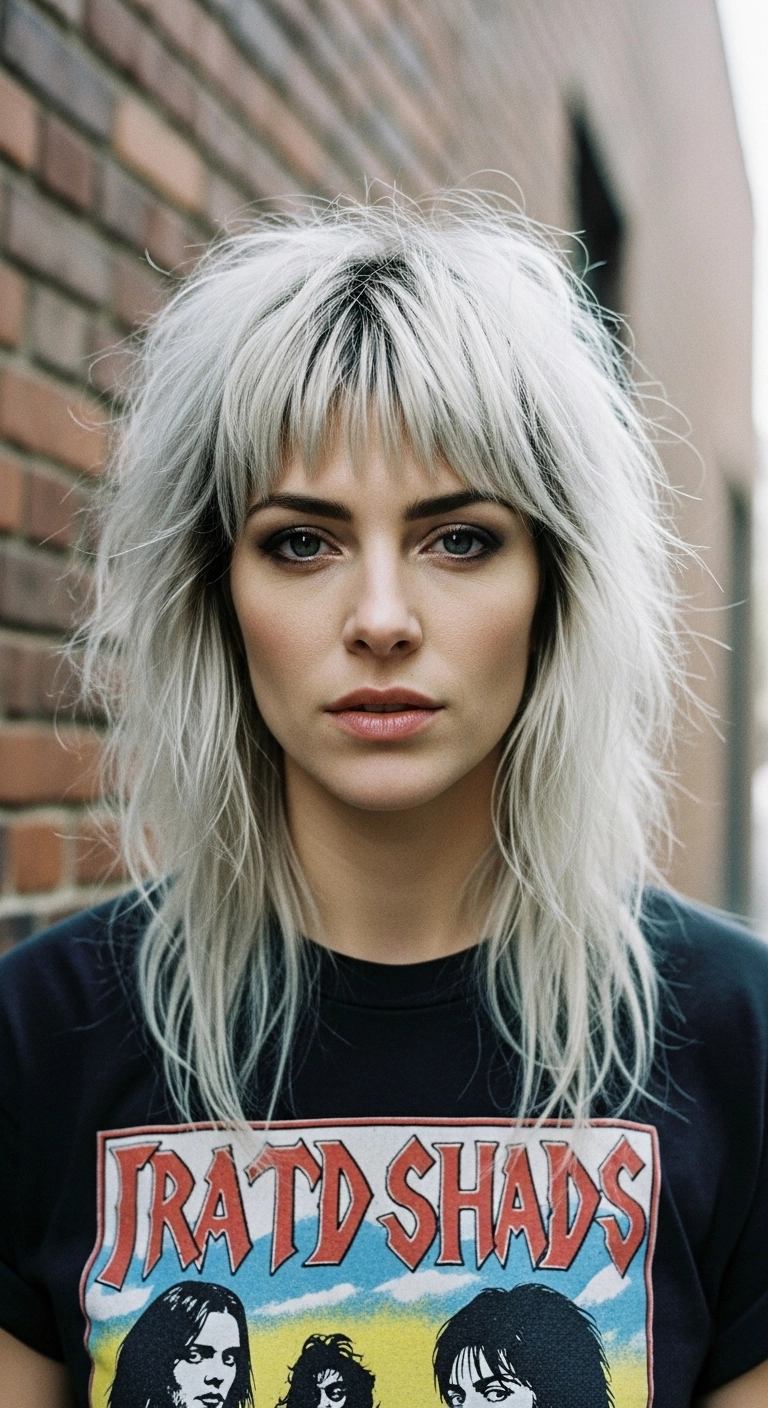
There's nothing cooler than channeling pure rockstar energy with a platinum shag! I love how the razor-cut layers give you so much effortless volume at the crown without feeling like you tried too hard.
How to do this
1. Start by washing and conditioning your hair using the purple toning shampoo and conditioner listed below to keep that platinum shade ultra-crisp and icy.
2. On towel-dried hair, apply a generous mist of the lightweight volumizing mousse listed below through the roots and crown area for lift.
3. Rough-dry your hair using a blow dryer with a concentrator nozzle, using your fingers to shake out the roots and build messy, disheveled volume at the top.
4. For the choppy fringe and face-framing layers, blow dry downwards with a small round brush just slightly beveling the ends without curling them under completely.
5. Once fully dry, spray the dry texturizing spray listed below through your mid-lengths and crown, shaking your head upside down to release gritty texture.
6. Take a pea-sized amount of the matte styling paste listed below between your fingertips and pinch the ends of the bangs and outer feathered layers to create that piecey, rock-and-roll separation.
7. Finish off with a light mist of the flexible hold hairspray listed below to keep all that voluminous, lived-in movement locked in place throughout the day.
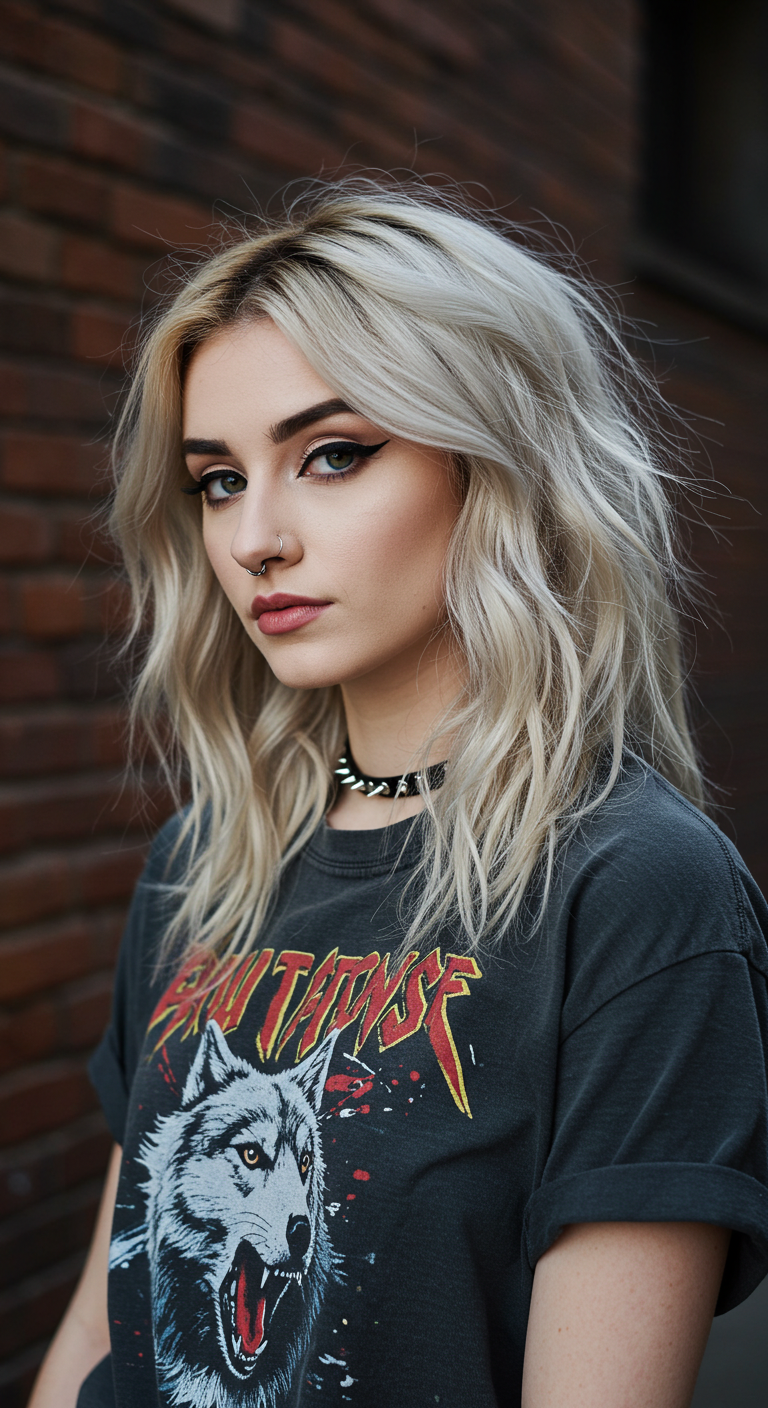
If you're craving that cool-girl, effortlessly undone look without feeling too styled, this is totally it! The icy platinum blonde pairs so well with choppy layers and relaxed, bent waves. It's chic, a little bit edgy, and gives just the right amount of messy movement for everyday life.
How to do this
1. Start by prepping towel-dried hair with a lightweight volumizing mousse to build grit and body, then blow-dry with your head upside down or using a round brush to lift at the roots.
2. Once completely dry, mist your mid-lengths and ends thoroughly using the thermal heat protectant spray listed below to shield your blonde strands.
3. Take vertical 1- to 2-inch sections and wrap them loosely around the 1.25-inch ceramic curling wand listed below, alternating directions and leaving the bottom inch out for that lived-in, blunt aesthetic.
4. For the fringe area, gently direct the curtain bangs back away from the face with the barrel on low heat to create that effortless sweeping curtain effect.
5. Shake through your waves with your fingertips, then spray a liberal dose of the dry texturizing spray listed below at the crown and mid-lengths for gritty, undone separation.
6. Finish by emulsifying a pea-sized amount of the matte styling paste listed below between your palms and pinch individual ends to define the choppy, piecey layers.
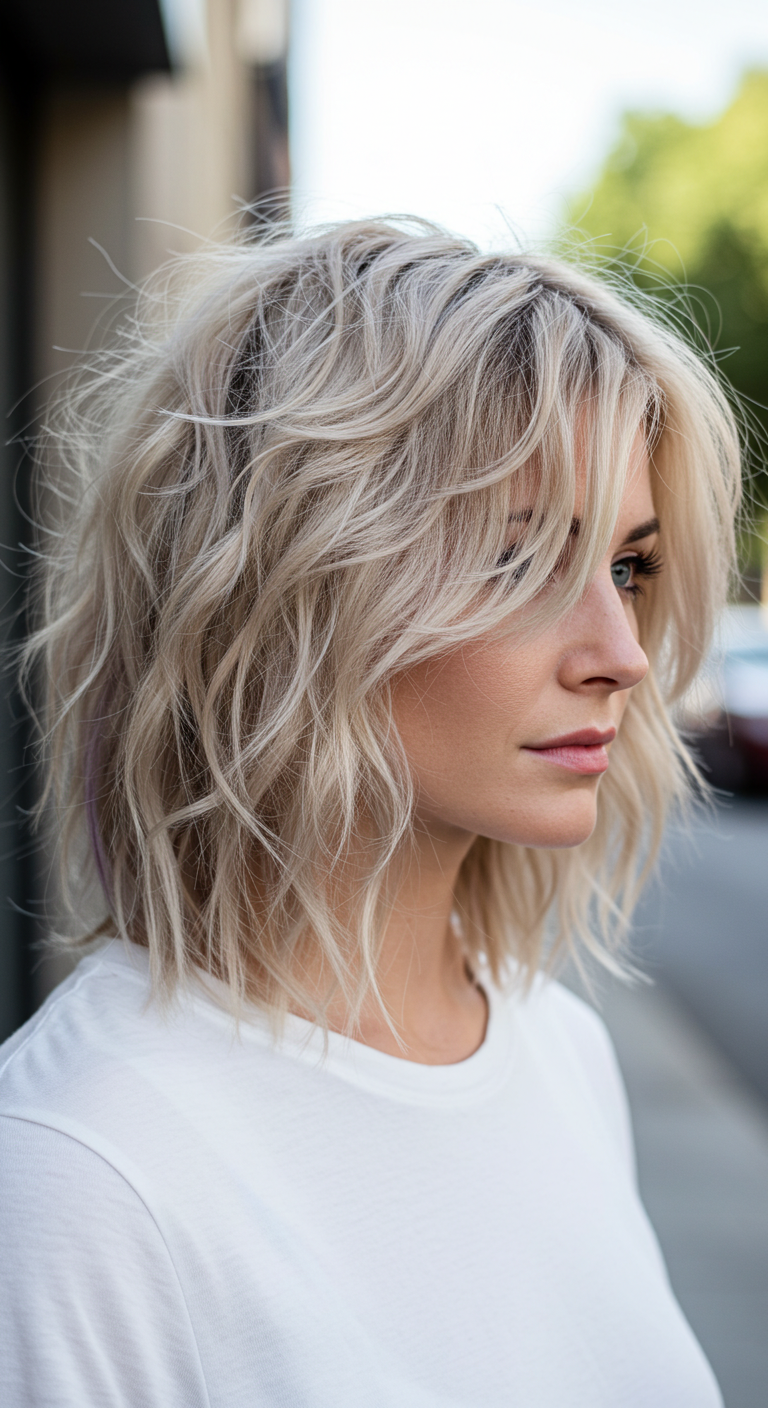
Whenever I want that cool-girl, effortlessly edgy vibe, this lived-in platinum lob is hands down my favorite look!! The soft shadow root keeps it low stress between salon appointments + texturizing the waves gives you that perfect rock-and-roll edge without trying too hard.
How to do this
1. Start by prepping clean, damp hair with the heat protectant spray listed below to shield your lightened blonde strands from thermal damage.
2. Blow dry rough using your fingers or a flat paddle brush, lifting slightly at the root area to encourage natural body and movement without over-smoothing.
3. Divide hair into manageable horizontal tiers and use the 1.25-inch curling wand listed below to create casual, lived-in S-waves—be sure to alternate directions and leave the last inch of the ends out straight for that effortlessly undone aesthetic.
4. Gently direct the front face-framing layers away from your cheekbones with the iron to open up the face.
5. Once curls have completely cooled, run your fingers through to break them up, then mist generously through the mid-lengths and roots using the dry texturizing spray listed below.
6. Finish with a drop of the lightweight hair styling oil listed below rubbed between your palms and lightly skimmed over mid-lengths to maintain healthy sheen while preserving root contrast.
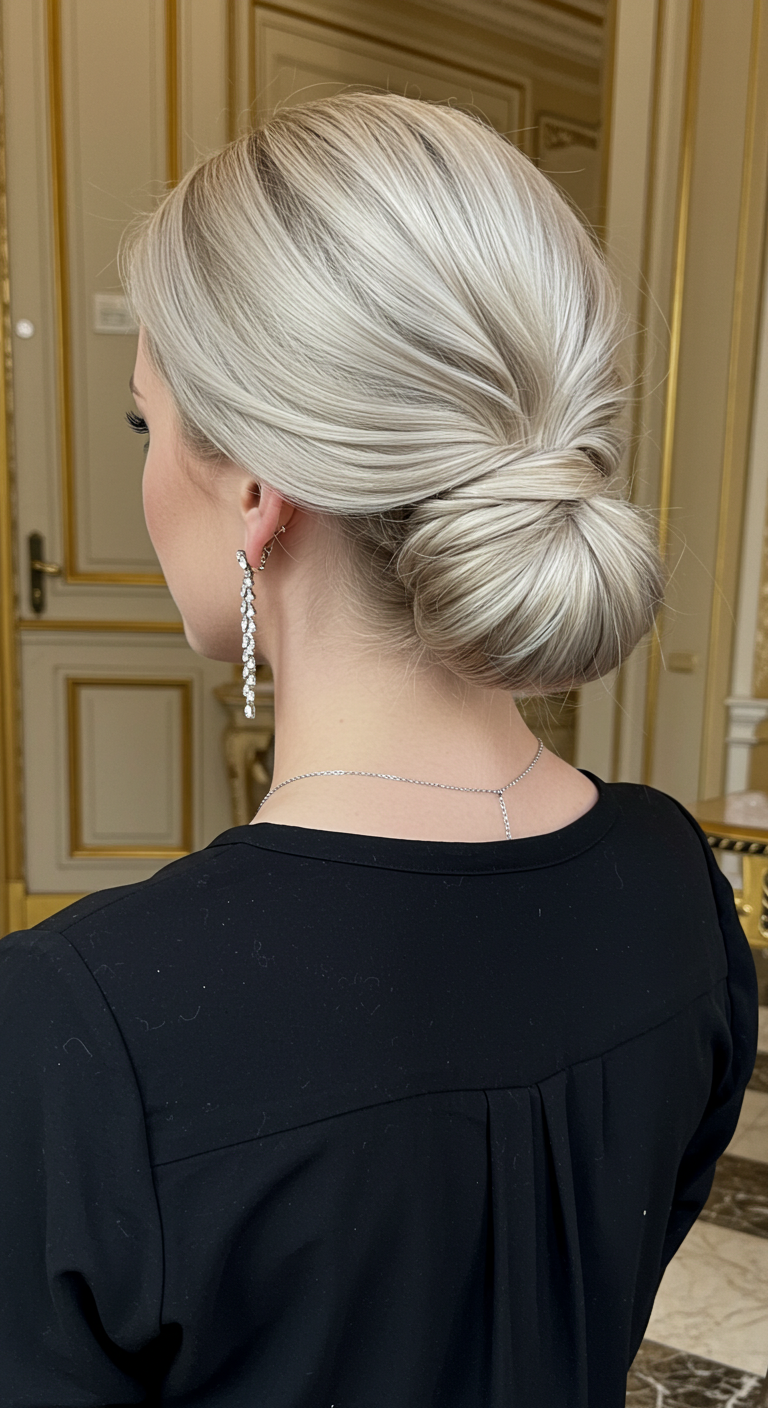
Isn’t this sleek, folded chignon the absolute epitome of bridal elegance?? It works wonderfully with medium to long hair lengths, giving you that super clean, sophisticated profile without feeling stiff. What I love most about this style is how the overlapping side pieces wrap around the bun to create effortless dimension, especially with icy platinum or highlighted hair. It’s the perfect red carpet or wedding day updo that will stay perfectly in place all night long!
How to do this
1. Prep clean, dry hair with a smoothing serum and blow-dry straight using the smoothing boar bristle paddle brush listed below to achieve maximum shine and control.
2. Section out the front side panels on both the left and right sides from behind the ears forward, clipping them away for later.
3. Gather the remaining back section into a low, neat ponytail at the nape of the neck using a snag-free elastic band.
4. Form the base of the chignon by folding and tucking the ponytail hair upward into a rounded, sleek roll, anchoring it securely against the scalp using the heavy-duty U-shaped hairpins listed below.
5. Unclip the left side panel, comb it gently across the top of the bun, and wrap the tail underneath the roll, pinning it securely out of sight.
6. Take the right side panel, lightly rake through it to create subtle textured lines, drape it diagonally over the bun to cross over the first section, and tuck the ends tightly underneath with bobby pins.
7. Finish the entire look with a fine mist of the strong hold anti-humidity hairspray listed below and gently smooth down any stray flyaways using a tail comb.