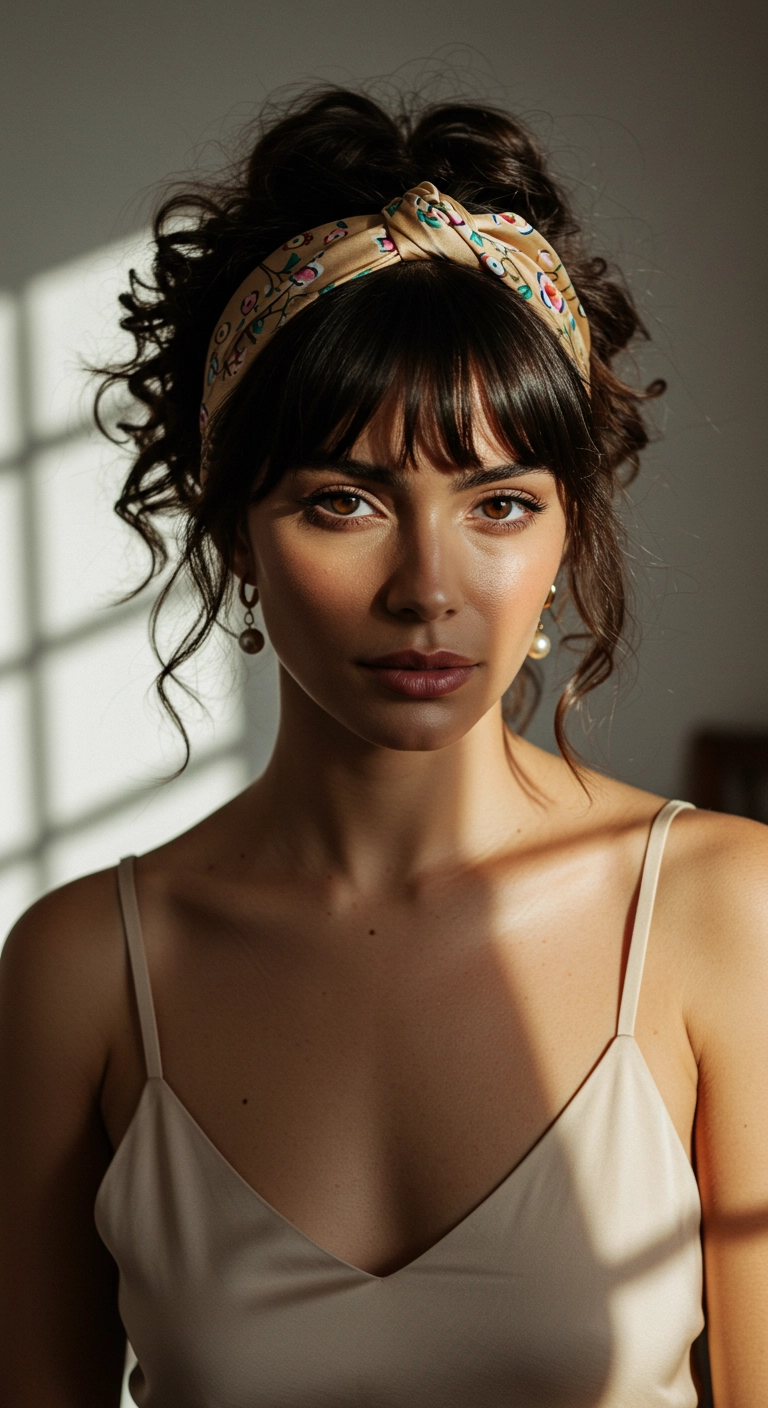
If you're having one of those days where you want to look effortlessly put-together in under five minutes, this style is your new best friend! Piling your curls into a loose high bun and popping on a cute printed knotted headband instantly transforms messy hair into pure vintage romance. Don't forget to pull out a couple of face-framing tendrils for that soft, dreamy finish!
How to do this
1. Start with naturally wavy or curled hair; if needed, use the curling wand listed below to add bouncy spiral texture through the lengths.
2. Separate your front bangs and two soft strands near your ears to frame the face.
3. Gather the remaining hair up into a loose, textured high bun at the top of your crown using the seamless hair elastics listed below, pinning sections loosely with the bobby pins listed below.
4. Slip the floral knotted headband listed below over your head, placing it right behind the fringe line to accent the updo.
5. Style your bangs straight down with a slight curve using a round brush and blow dryer, then mist everything with the flexible hold hairspray listed below for a soft, touchable hold.
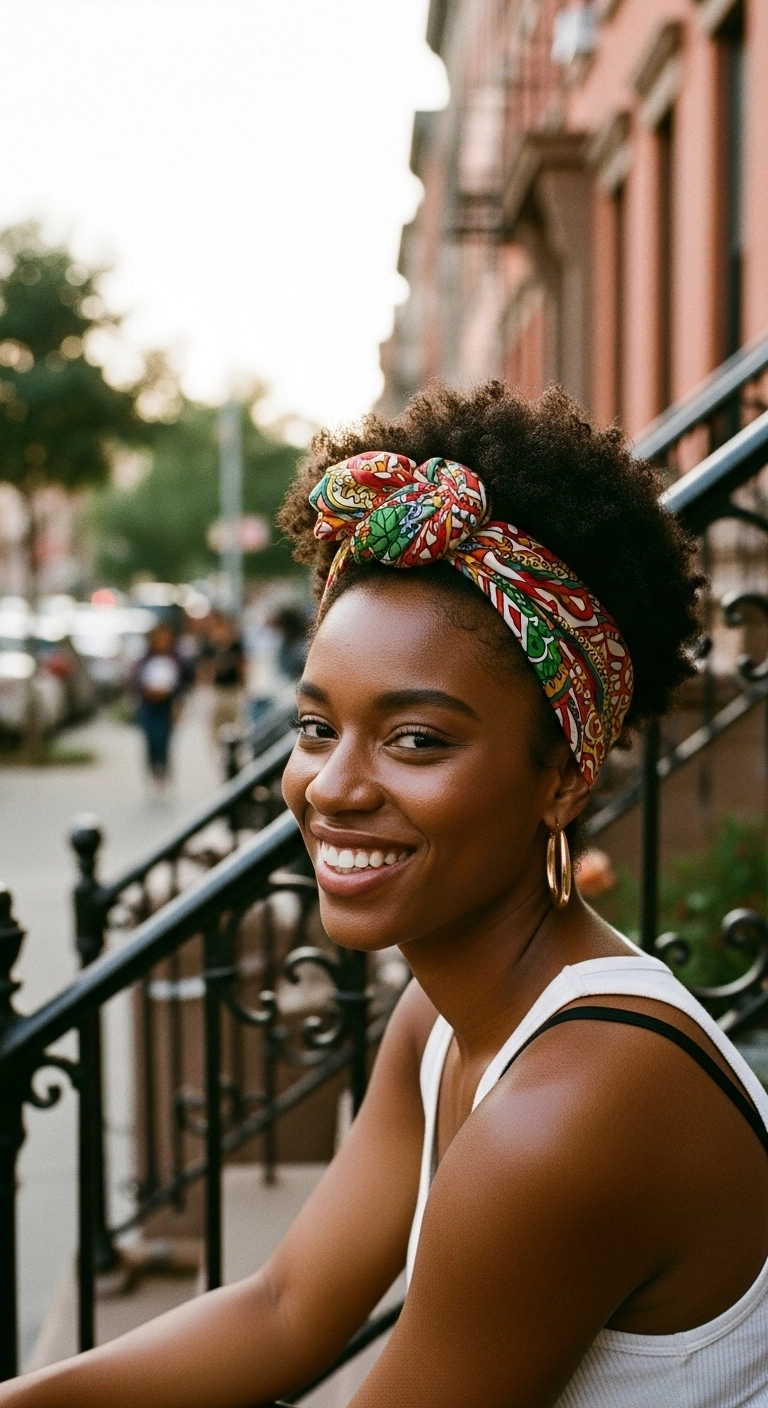
There’s nothing like throwing on a vibrant headwrap when you want an effortless, stunning summer look! I love how this colorful knot frames the face while letting your gorgeous natural coils shine with full, healthy volume.
How to do this
1. Start on freshly cleansed, damp hair and mist liberally with the hydrating leave-in conditioner mist listed below to lock in initial moisture.
2. Rake through a generous dollop of the curl defining moisture cream listed below from roots to tips, using your fingers to evenly distribute and clump your natural coils.
3. Lightly pick out the roots using the wide metal afro pick listed below to create even, rounded volume while leaving the ends defined.
4. Smooth down your hairline perimeter and edges with a dab of the edge control gel listed below and a soft edge styling brush.
5. Fold your favorite colorful printed silk head scarf listed below into a wide band, position it at the nape of your neck, bring the ends forward over your crown, and tie a firm knot or rosette right at the front hairline to frame the face.
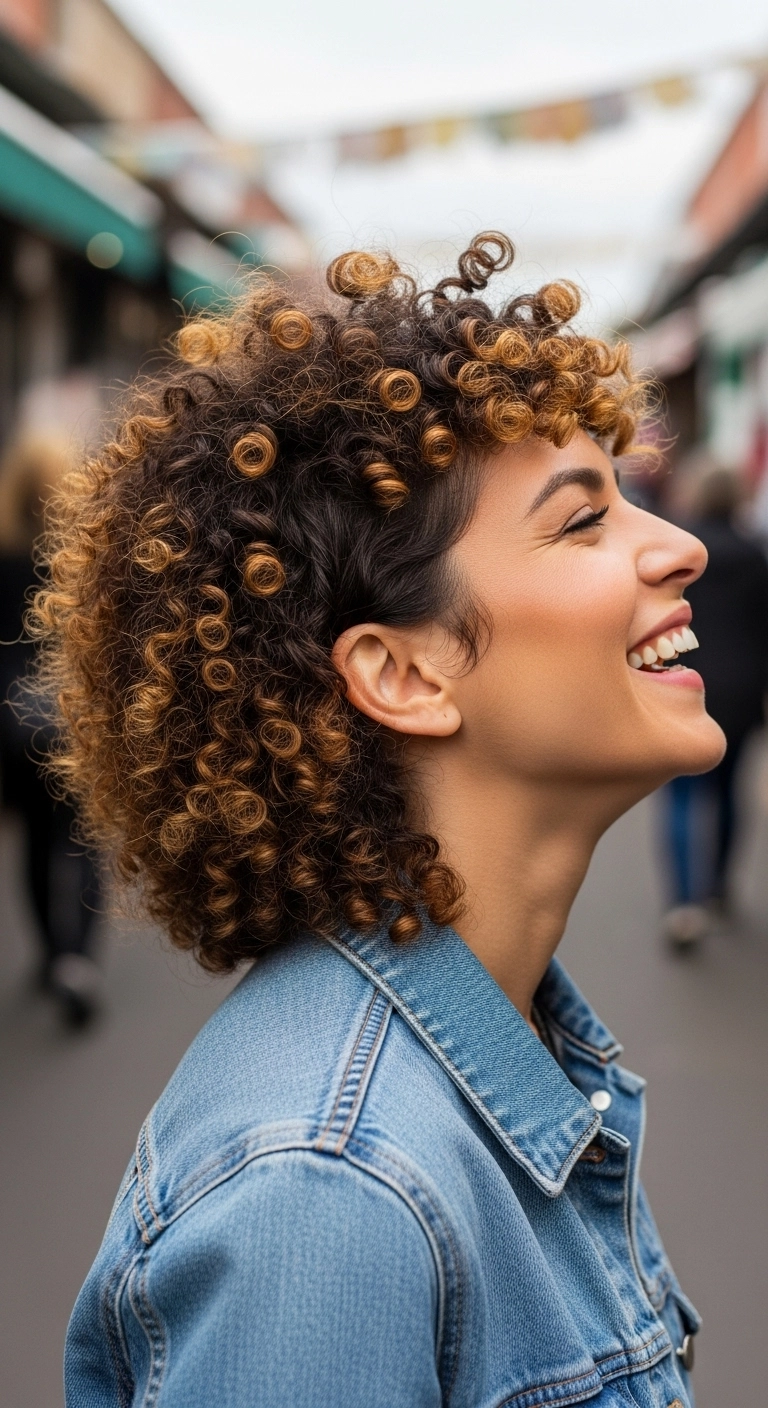
This look is the ultimate fun, rock-and-roll curly shag with a subtle mullet vibe. It's cut with lots of playful, short layers on top and around the forehead to give you full, bouncy fringe, while leaving a little extra length at the back. Honey-golden highlights are painted directly onto individual ringlets so every spiral pops with bright dimension.
How to do this
1. Start on freshly cleansed, dripping wet curls after washing with a hydrating curl shampoo and conditioner.
2. Rake a generous amount of curl defining cream through all sections from roots to tips using the curl defining styling cream listed below to lock in essential moisture.
3. Apply a firm yet flexible hold gel using the curl defining styling gel listed below using the 'praying hands' method over the lengths to seal each ringlet cluster.
4. Use your fingers to twirl and define individual curls around the crown, fringe, and temples, setting the curly mullet shape in place.
5. Attach a universal diffuser to your blow dryer using the collapsible hair diffuser attachment listed below, and dry on medium heat and low speed, cupping curls upwards without touching them directly.
6. Once the hair is 100% dry and has a slight gel cast, warm a few drops of lightweight hair oil in your palms using the lightweight jojoba hair oil listed below and gently scrunch the crunch to reveal soft, springy, dimensional ringlets.
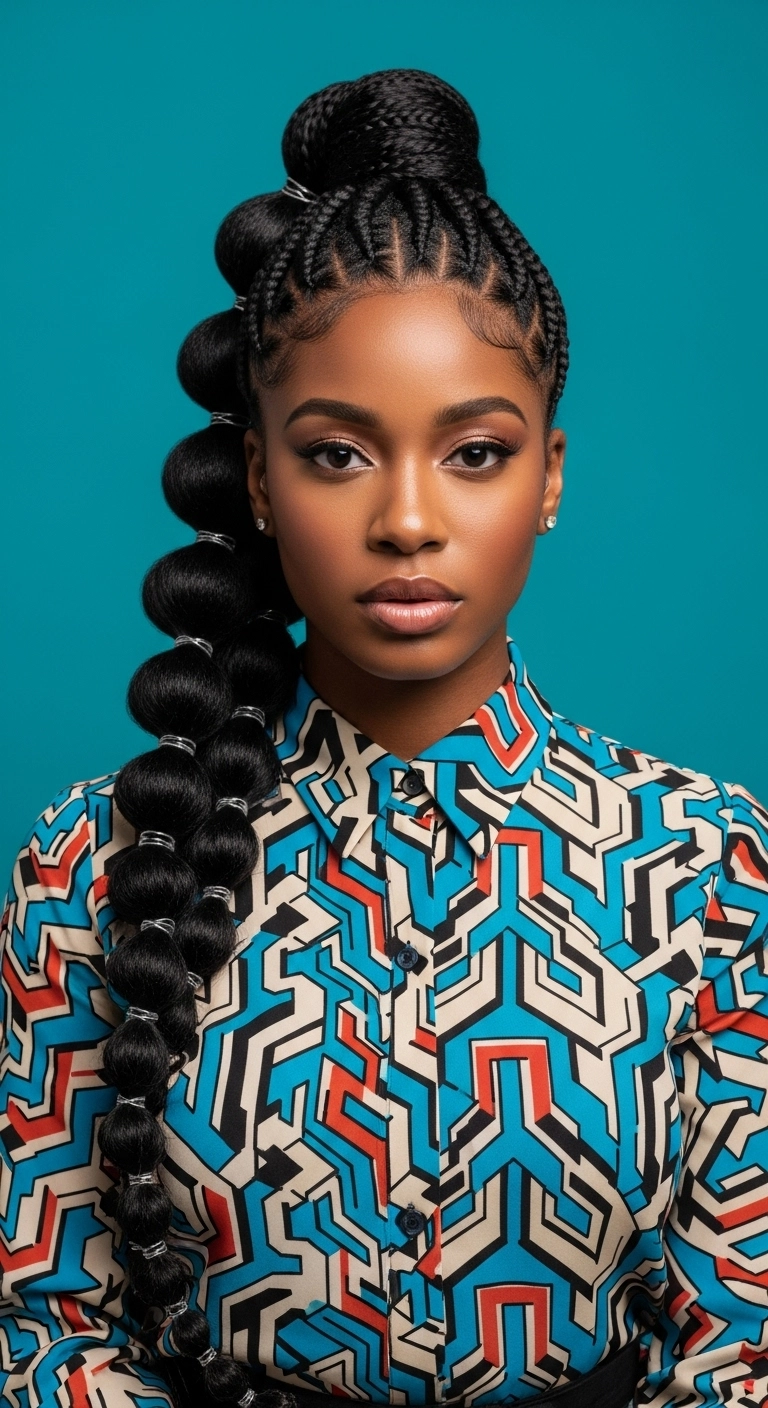
A fierce high bubble ponytail paired with razor-sharp cornrows that never goes unnoticed. I love adding the metallic silver wraps along every single bubble—it instantly elevates standard festival hair into pure runway art. It keeps your hair completely off your neck and face while giving you massive drama and length.
How to do this
1. Start on freshly washed, conditioned, and blown-out hair, detangling thoroughly.
2. Section the hair into clean, symmetrical cornrows curving upwards toward the high crown using a rat tail parting comb listed below.
3. Apply the strong hold braiding edge control gel listed below along each part to keep rows crisp and completely frizz-free as you braid them tightly up to the center apex.
4. Secure all the cornrow ends together into a firm high ponytail base with a snag-free elastic band.
5. Attach textured braiding hair extensions to create extreme fullness and length, wrapping a small strand around the base to conceal the band.
6. Create the bubble ponytail effect by placing clear elastics every two to three inches down the ponytail, teasing each pocket slightly and gently pulling it outward to make round, puffy bubbles.
7. Wrap each elastic segment with the metallic silver hair cord listed below for that chic architectural pop.
8. Lay and sculpt the delicate baby hairs around the perimeter into soft swoops using the dual-sided edge styling brush listed below and finish with a high-shine hair mist.
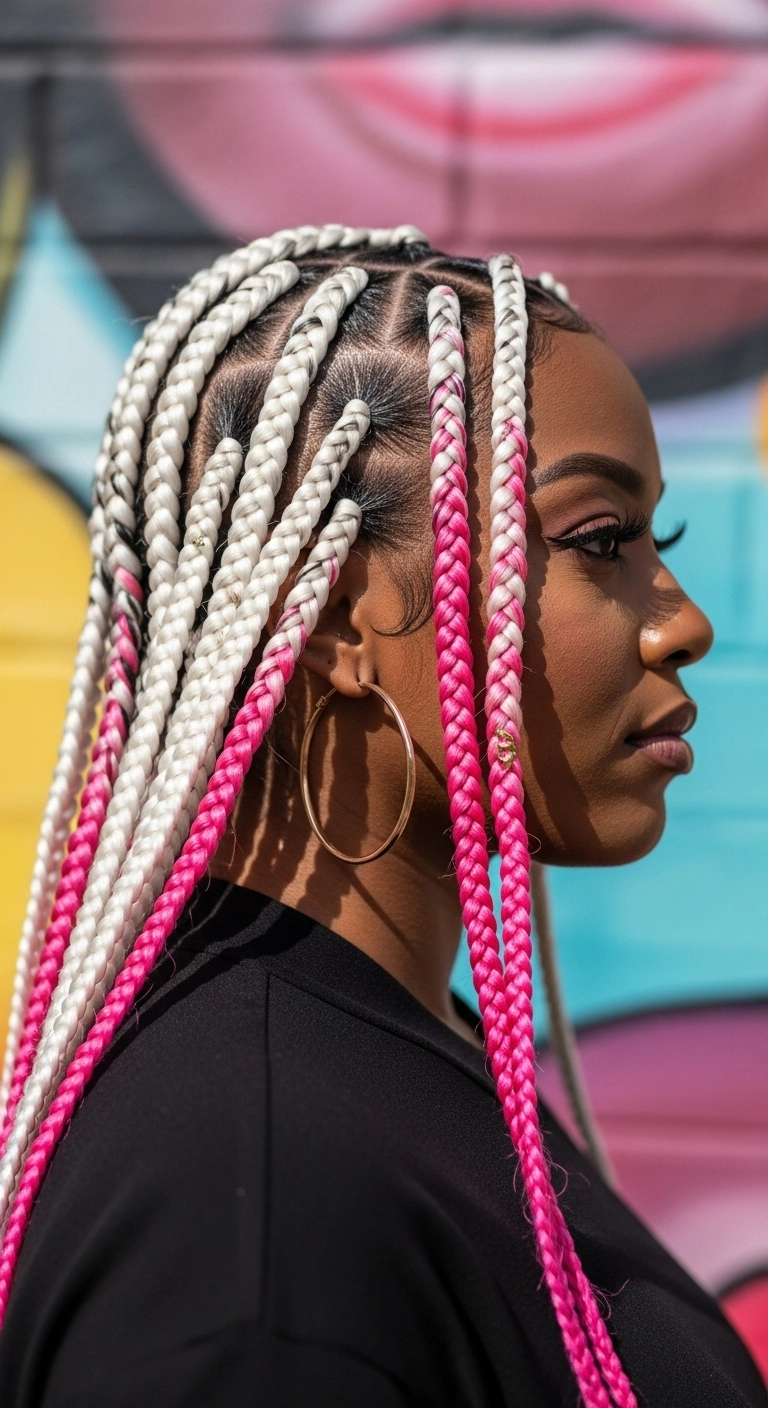
Can we just talk about how hard this color combo hits?! The crisp white feeding right into that pop of hot neon pink gives the ultimate head-turning energy. Plus, knotless means zero scalp tension and instant flexibility from day one. Perfect if you want to protect your natural curls while serving pure street-style main character vibes!
How to do this
1. Start with clean, deeply conditioned, blown-out natural hair, and map out neat, precise geometric parts across the scalp using a rat tail parting comb.
2. Apply a generous amount of braiding edge control gel to each part to keep the lines razor-sharp and the natural roots completely flat and frizz-free.
3. Begin braiding your natural hair with a three-strand technique, gradually feeding in the white braiding hair extensions using the knotless method for a seamless, tension-free start.
4. As you braid down the shaft, integrate the two-tone ombre pink braiding hair extensions so the transition from icy white to electric pink looks beautifully graduated.
5. Continue braiding all the way to the ends, ensuring uniform tension and thickness throughout each individual braid.
6. Dip the braided ends carefully into hot water to seal them securely and give the braids a flexible, lightweight flow.
7. Sculpt your baby hairs along the hairline into smooth, decorative swoops using an edge styling brush and strong-hold edge gel.
8. Mist your scalp and braids with a soothing scalp oil and braid sheen spray to lock in moisture and add high-gloss shine.
Products Used
Pre-Stretched White and Ombre Pink Braiding Hair
pre stretched white ombre pink braiding hair extensions
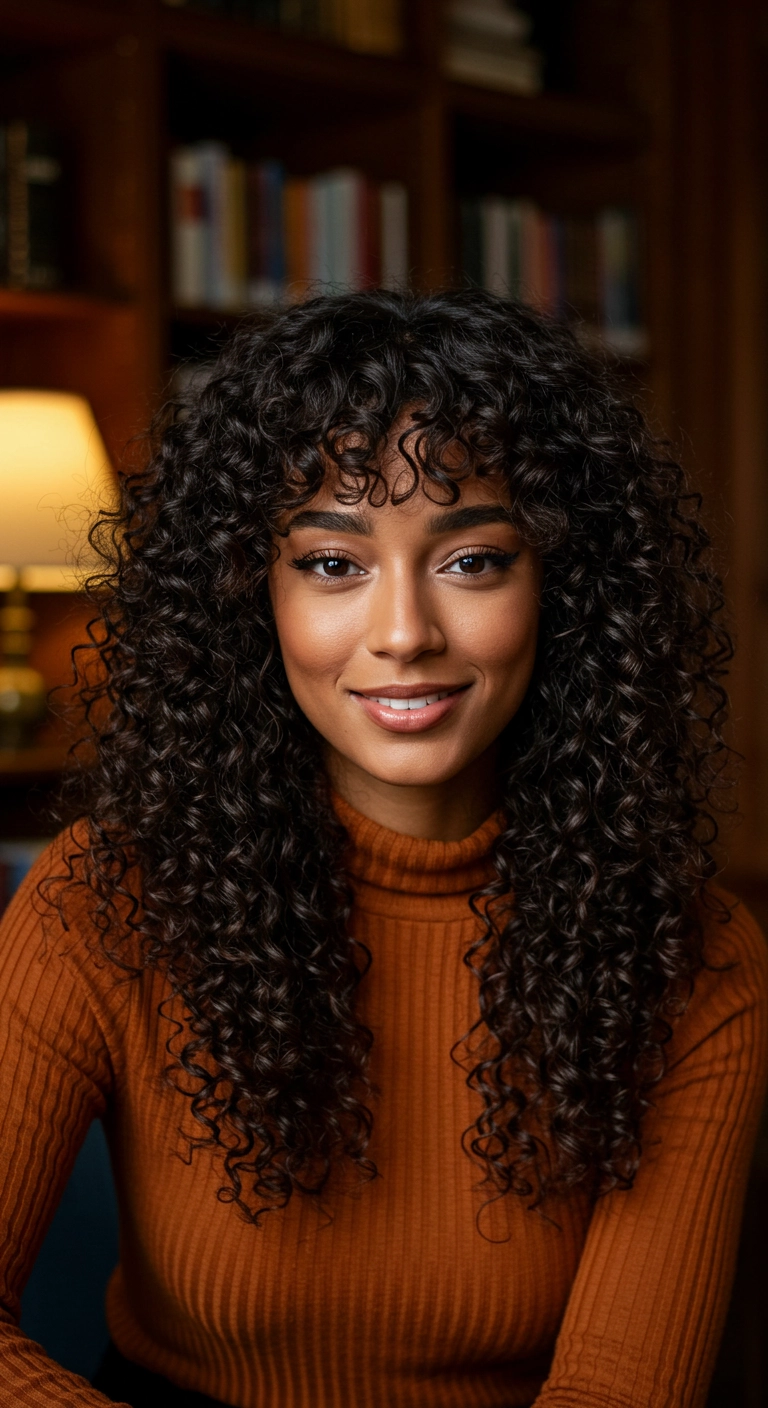
This look is all about celebrating full, natural volume and defined ringlets. It features a layered curly cut that removes excess weight from the perimeter, allowing the curls to stack beautifully into a flattering, rounded silhouette. The soft curly fringe perfectly frames the eyes, making it an effortless, chic choice for everyday wear.
How to do this
1. Start on freshly washed, soaking-wet hair after detangling thoroughly with a wide-tooth detangling comb listed below.
2. Section the hair and apply a generous amount of the hydrating curl defining cream listed below from roots to ends, using the praying-hands method to lock in moisture and eliminate frizz.
3. Apply a dollop of the curl defining gel listed below over each section, gently raking and then scrunching upward to encourage strong 3B/3C ringlet formation.
4. For the curly bangs, shape individual ringlets around your finger using a small amount of curl cream so they fall naturally across your forehead without clumping together.
5. Attach the universal collapsible curl diffuser listed below to your blow dryer, tilt your head gently from side to side, and cup the curls without touching them until your hair is roughly 85-90% dry.
6. Once fully dry, break the gel cast by scrunching upward with a couple of drops of the lightweight nourishing hair oil listed below to add brilliant shine and soft, touchable bounce.
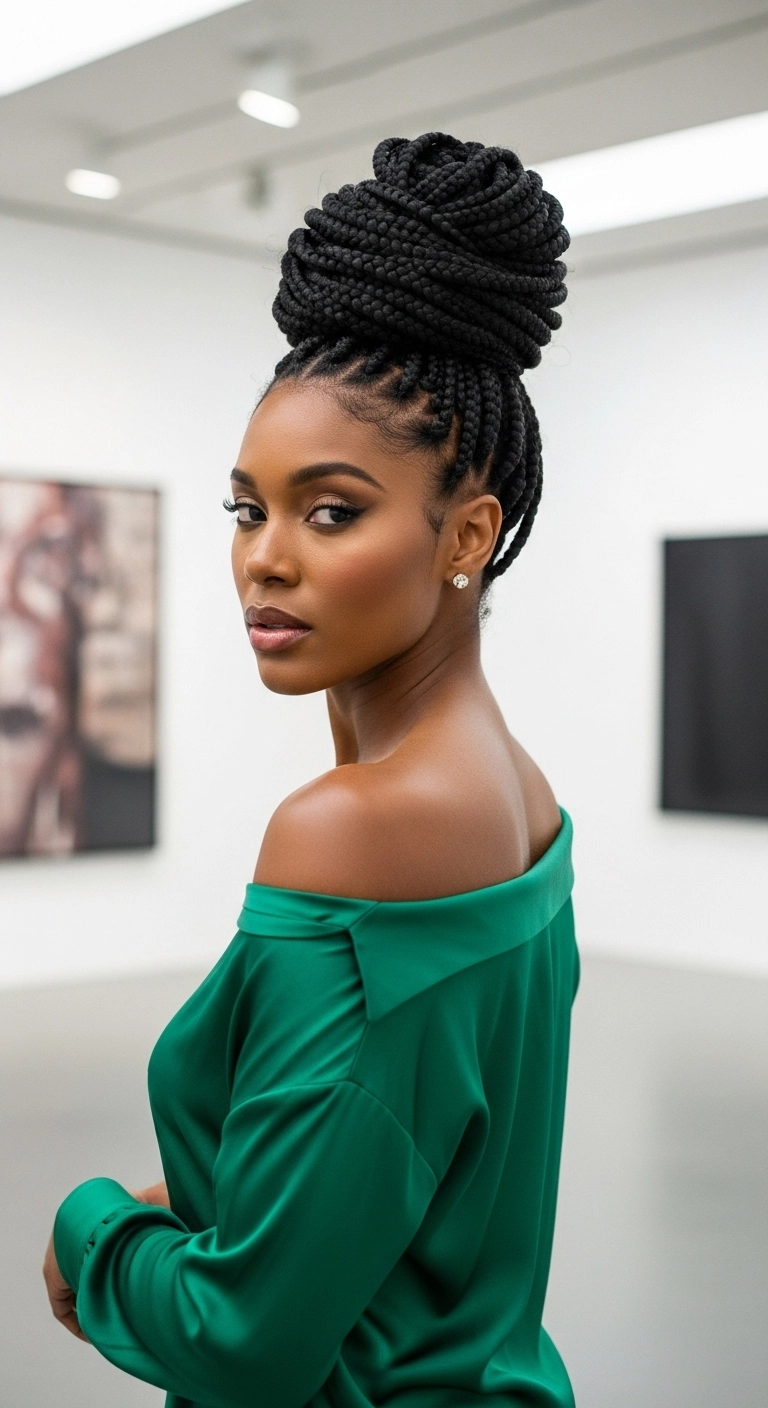
I love this braided top knot so much!! It is such an elegant, regal look that instantly elongates the neck and lets your collarbones and jewelry really shine. Wrapping individual box braids into a tall bun gives you instant drama without feeling messy or undone!
How to do this
1. Start with clean, deeply moisturized hair and install neat, medium-sized box braids using the synthetic braiding hair listed below for fullness and length.
2. Smooth down edges and along your hairline with the conditioning edge control gel listed below using a soft edge brush for a sleek, immaculate perimeter.
3. Gather all the individual braids smoothly at the crown of your head, securing them tightly with the heavy-duty snag-free hair elastic listed below.
4. Divide the ponytail of braids into two or three large sections, gently twisting and wrapping each section around the base to sculpt a tall, structured cylindrical top knot.
5. Anchor each wrapped section securely as you go using the large sturdy bobby pins listed below to ensure the high bun stays perfectly stable.
6. Finish the look by misting everything with the braid sheen and conditioning spray listed below for long-lasting, brilliant shine.
I used to think my curls always had to be pulled back into a clip when I wanted to look put-together, but letting them completely loose like this has totally converted me! Giving curly hair some subtle layers makes all the difference in keeping it from looking bottom-heavy. All I did was diffuse my ringlets with a good gel cast and then scrunch out the crunch with a little oil. It gives such a gorgeous, natural bounce that feels effortless yet so chic for everyday.
How to do this
1. Start on freshly washed, soaking wet hair to ensure your curl pattern locks in maximum moisture without frizz.
2. Section your curls and evenly rake through a nickel-sized amount of the curl defining cream listed below from roots to ends.
3. Use the wide tooth detangling comb listed below to thoroughly distribute product and form cohesive, uniform curl clumps.
4. Glaze a generous amount of the strong hold styling gel listed below over the clumps using praying hands, then gently scrunch upwards towards the scalp.
5. Attach the diffuser attachment for hair dryer listed below and dry on low heat/low speed, gently cupping sections without moving the hair too much until it is about 90% dry.
6. Once completely air-dried and a slight crunchy cast forms, smooth a few drops of the lightweight nourishing hair oil listed below between your palms and gently scrunch the cast out to reveal soft, glossy, touchable ringlets.
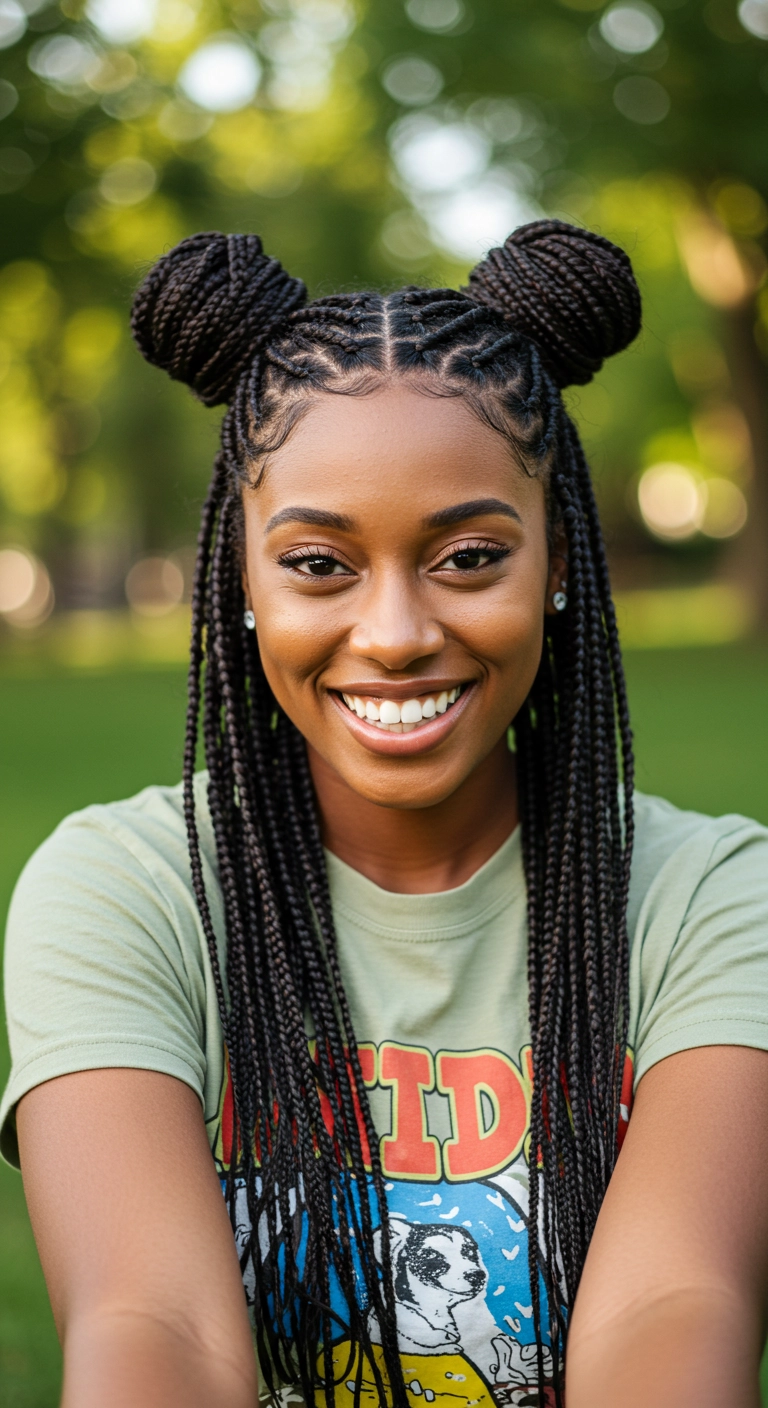
I absolutely love these half-up braided space buns! The playful vibe of the top knots mixed with classic long knotless braids is so fun and stylish. Plus, those perfectly swooped baby hairs pull the whole look together into something cute, effortless, and protective for your everyday wear.
How to do this
1. Begin with freshly washed and conditioned natural hair, blowing it out straight using the heat protectant spray listed below to prepare for neat, tension-free parting.
2. Section the hair into precise, square grid parts and install small knotless box braids using the synthetic braiding hair listed below, feeding in hair gradually for a smooth and seamless root.
3. Once the full head is braided, create a sharp center part from the forehead back to the crown to split the top section evenly.
4. Gather the top half of the braids on each side into high twin pigtails, securing them firmly at the crown using the snag-free elastic hair bands listed below.
5. Wrap each pigtail around its base into a tight, neat bun and pin it securely in place using the sturdy bobby pins listed below.
6. Apply a dab of the edge control gel listed below along your hairline, and use the double-sided edge styling brush listed below to swirl and swoop your baby hairs into elegant wave patterns.
7. Finish by spraying the braid sheen conditioning spray listed below across all braids and buns for a radiant, long-lasting shine.
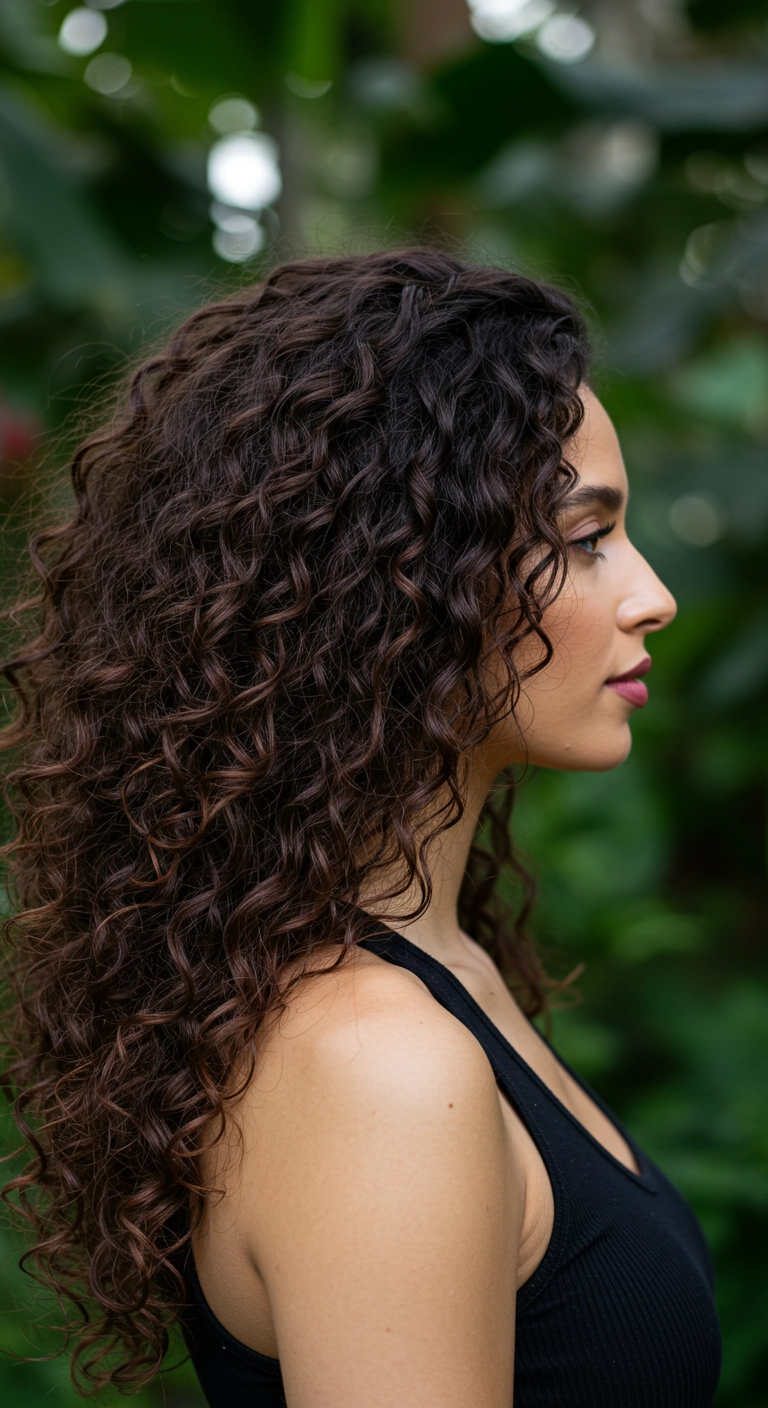
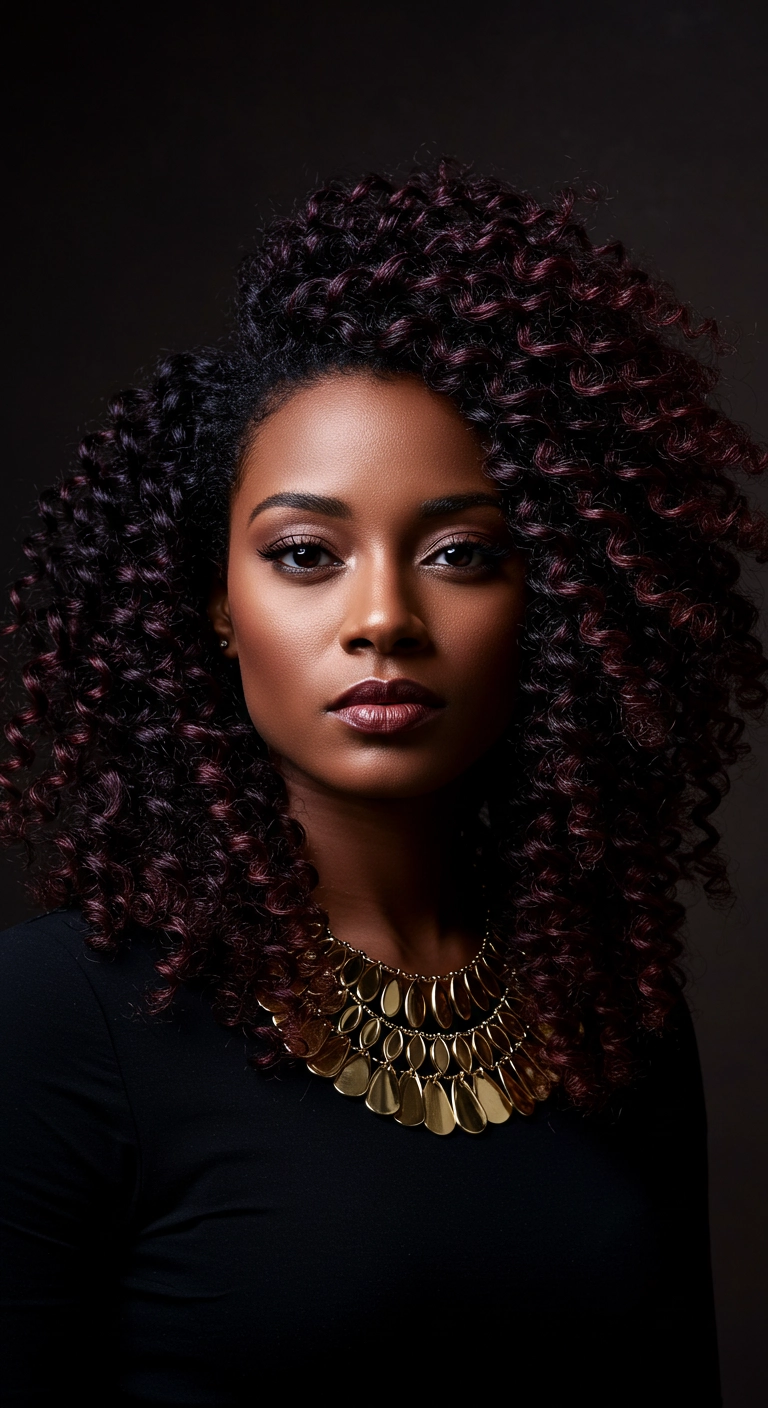
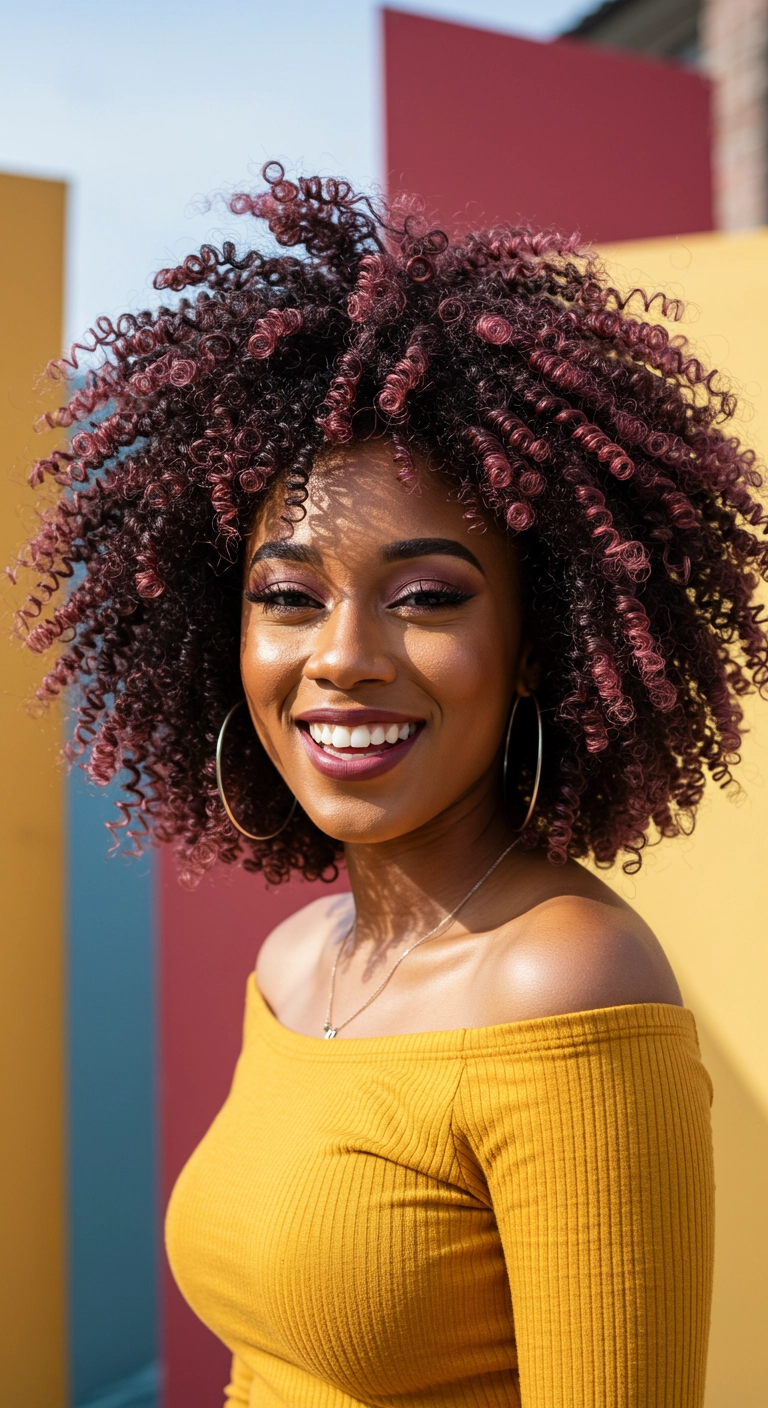
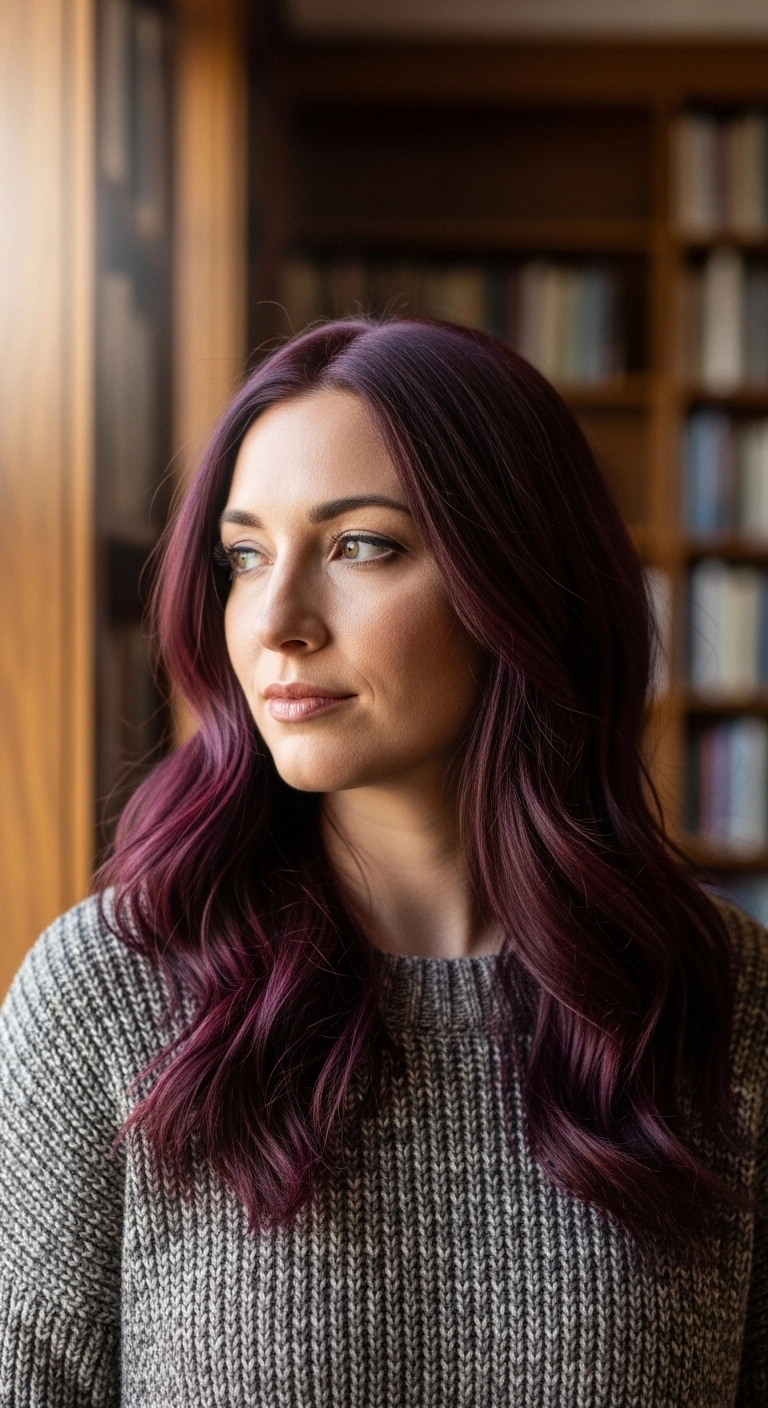
I am completely obsessed with this rich, dimensional curly look! The deep wine and burgundy tones woven into dark spiral curls catch the light so beautifully without overpowering the natural texture. It’s the ultimate way to wear full-bodied curls with effortless elegance and show-stopping definition.
How to do this
1. Start on freshly cleansed and conditioned curls that are still damp, detangling gently from ends to roots using the wide-tooth comb listed below.
2. Section the hair into manageable quadrants and apply a generous amount of the curl defining cream listed below to lock in hydration and define the natural curl pattern.
3. Work through each section in small sub-sections using the styling brush for defined ringlets listed below, brushing outwards to form distinct, clumped spiral curls.
4. Diffuse the curls using the ionic hair dryer with diffuser attachment listed below on low speed and medium heat, gently cupping the curls upward to encourage maximum volume and shrinkage.
5. Once 100% dry, gently smooth a few drops of the nourishing hair oil listed below between your palms and fluff the roots from underneath to boost crown height while adding glossy shine without frizz.
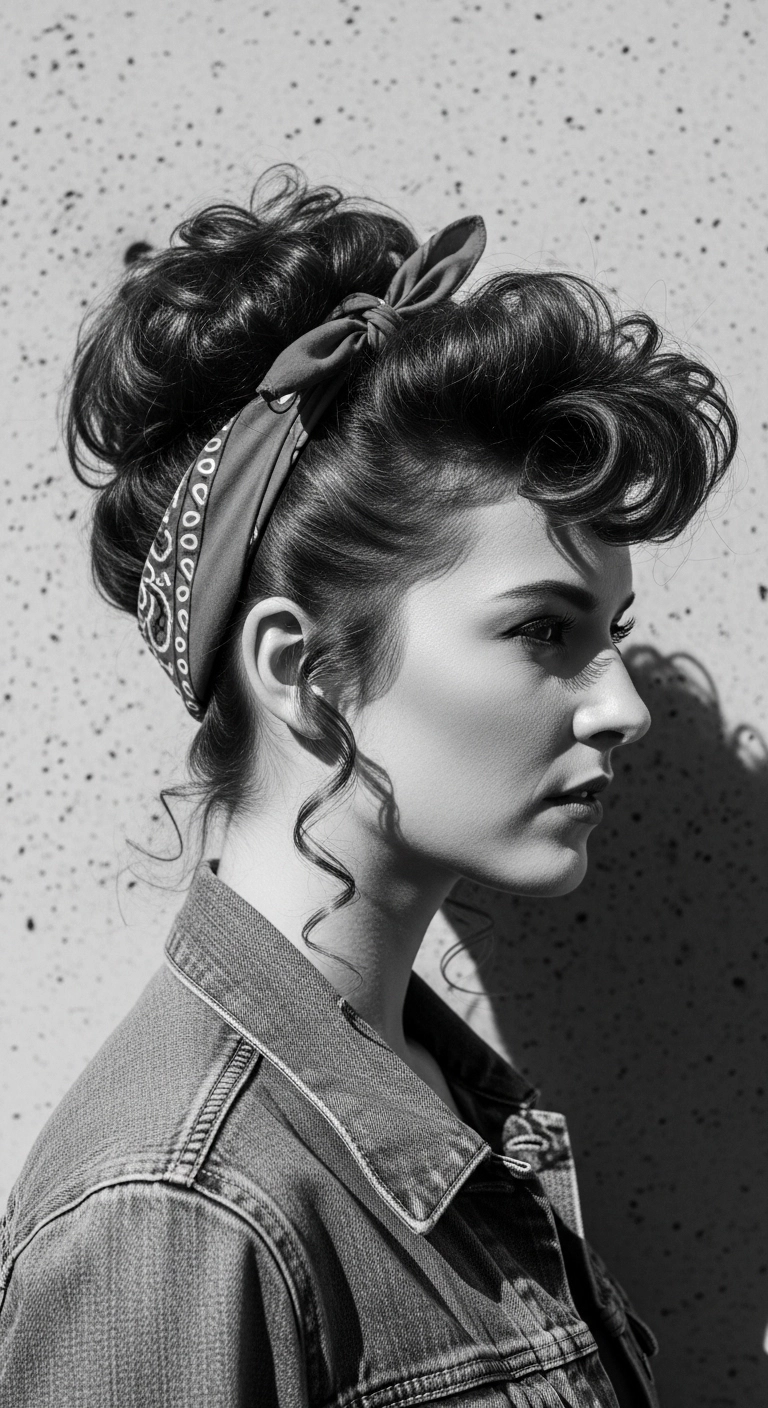
Are you totally obsessed with classic pin-up looks as much as I am? I just had to include this 1950s rockabilly bandana updo because it has so much attitude and timeless charm, don't you think?! You can roll the front into tight victory rolls like this or go with a softer curved bumper fringe, and tying a patterned scarf just brings the entire vintage outfit together effortlessly. It’s such a fun, show-stopping look to rock for a festival, photoshoot, or casual retro day out!
How to do this
1. Start with clean, dry hair and apply a generous mist of the heat protectant spray listed below from roots to ends.
2. Separate a large triangular section at the front crown for your bumper bang rolls, and clip it away.
3. Leave two small delicate strands in front of each ear for side tendrils.
4. Gather the rest of your hair into a high ponytail or loose bun on top of the crown, securing with hairpins and an elastic band.
5. Use the 1-inch curling iron listed below to curl the ponytail hair into bouncy loops, pinning them organically to create a voluminous curly top bun.
6. Take the front fringe section and curl it forward and inward toward your face using the curling wand, gently backcombing underneath for height.
7. Roll the front curl around your fingers into a sculptural hollow barrel or bumper roll, pinning securely from the inside with bobby pins so they stay hidden.
8. Curl the side wisps in front of your ears into tight, elongated spiral tendrils using the curling wand.
9. Fold the retro paisley bandana listed below into a narrow band, wrap it from the nape of your neck upward behind the front roll, and tie a cute knot right at the top.
10. Lock the entire vintage silhouette in place with a generous spray of the firm-hold styling hairspray listed below.
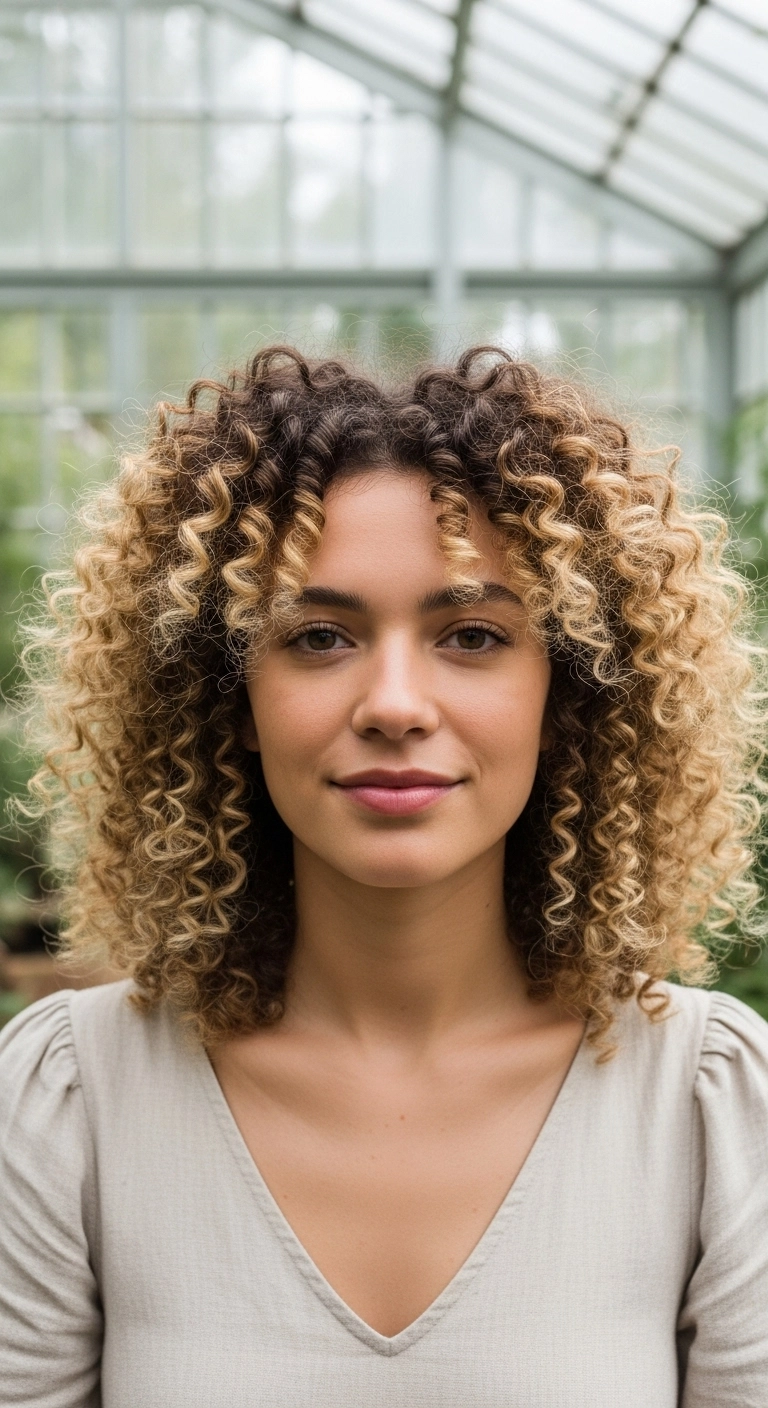
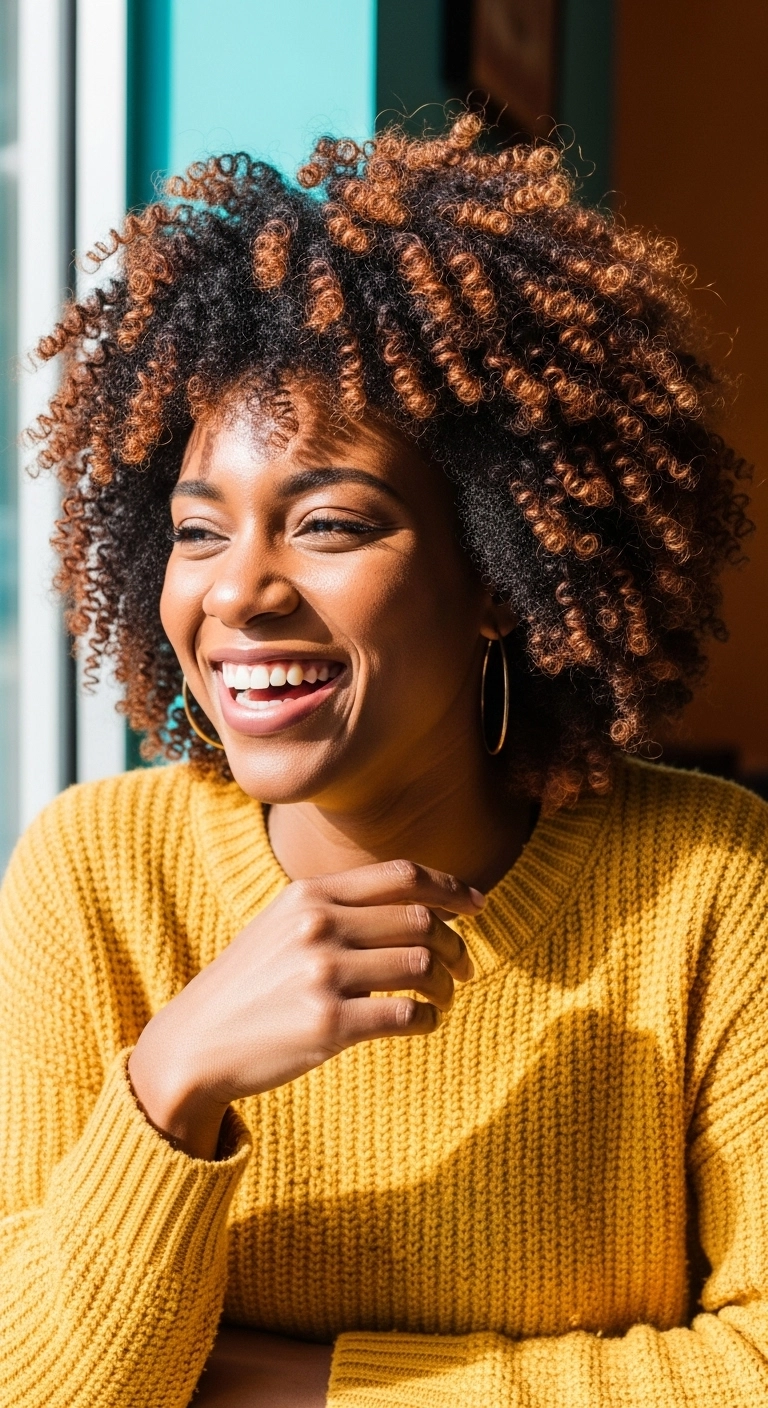
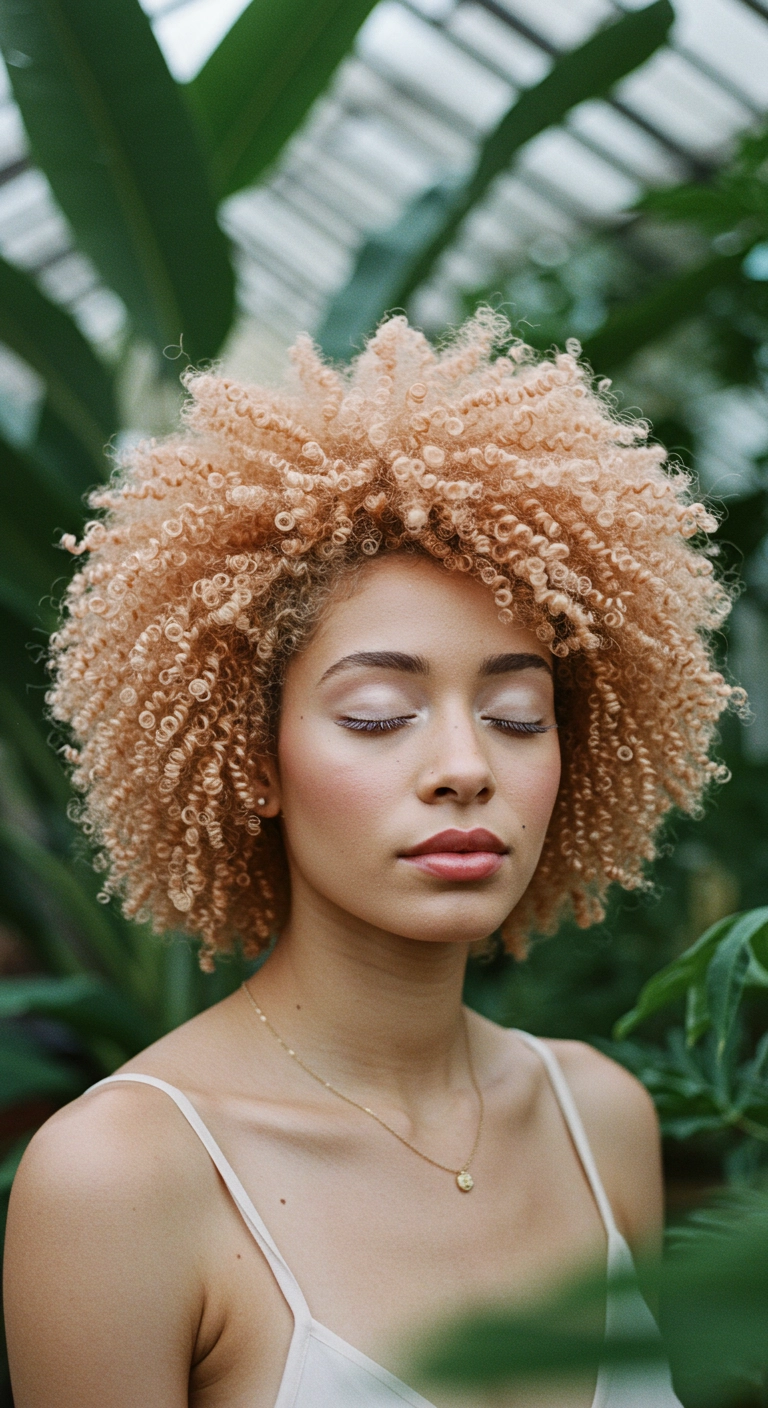
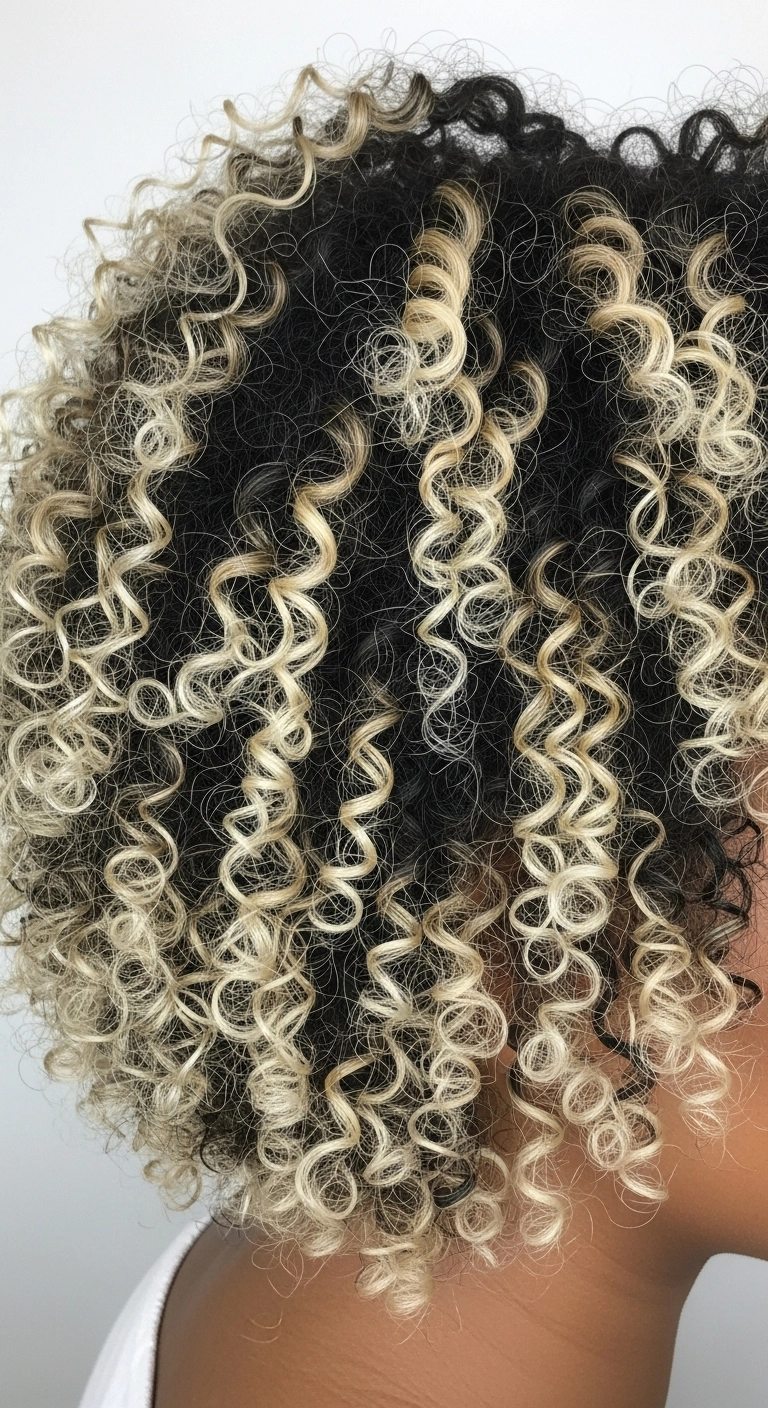
This look is all about letting your natural ringlets breathe with maximum volume and a pop of warm color. You keep your deep natural roots for low-maintenance grow-out while painting a sunny golden blonde balayage down through the lengths. The rounded layers and subtle curly face-framing pieces give it that effortless, bouncy shape that looks amazing anywhere.
How to do this
1. Start on freshly washed, soaking wet hair to ensure your spiral curl pattern has maximum moisture and definition.
2. Rake a generous amount of curl defining cream evenly through your hair using the curl defining leave-in styling cream listed below, making sure every strand is coated from mid-lengths to ends.
3. Apply a lightweight hold styling gel using the curl defining gel with flaxseed listed below over your curls using praying hands, then gently scrunch upwards to encourage springy ringlets.
4. Part your hair down the center and gently position the shorter face-framing curl pieces around your temples and forehead to frame your features naturally.
5. Attach a diffuser to your blow dryer using the universal diffuser attachment for curly hair listed below, tilting your head side to side and gently cupping the curls until hair is around 90% dry.
6. Once fully dry, break the light gel cast and boost shine by smoothing a couple drops of the lightweight nourishing hair oil listed below between your palms and gently scrunching out the crunch.
7. Fluff the roots gently with your fingertips to add instant bounce and rounded volume.
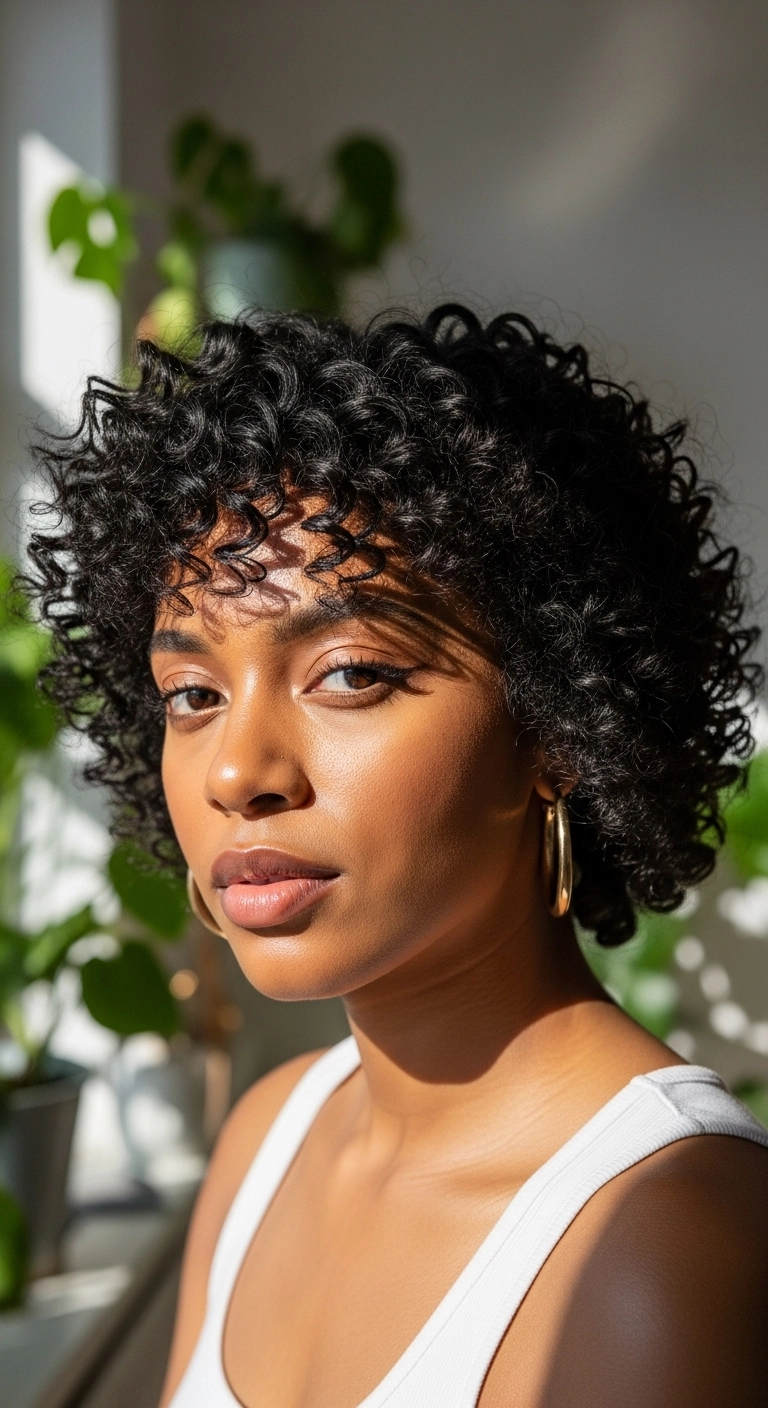
I'm completely obsessed with this rounded curly cut!! The short, springy ringlet bangs give it such an effortless, cool-girl edge while keeping your face totally open. My favorite part is how bouncy and hydrated the curls look in the sun—it's so chic and easy to rock day or night!
How to do this
1. Start on freshly cleansed, thoroughly conditioned hair that is soaking wet to maximize moisture and ringlet formation.
2. Section your curls and work in a generous dollop of the curl defining cream listed below, distributing it evenly from root to tip.
3. Use the defining curl styling brush listed below to tension-style and encourage ribbon-like definition, particularly throughout the crown and the bangs across your forehead.
4. Apply a medium layer of the alcohol-free curl defining gel listed below using praying hands to lock in definition and eliminate surface frizz.
5. Attach the universal collapsible diffuser attachment listed below to your blow dryer and dry curls on low speed, medium heat, gently cupping the ends upward without disturbing the curl clumps.
6. Once fully dry, warm a few drops of the nourishing lightweight hair oil listed below between your palms and gently scrunch out any gel cast to reveal soft, luminous, bouncy ringlets.
Products Used
Hydrating Leave-In Conditioner and Curl Defining Cream
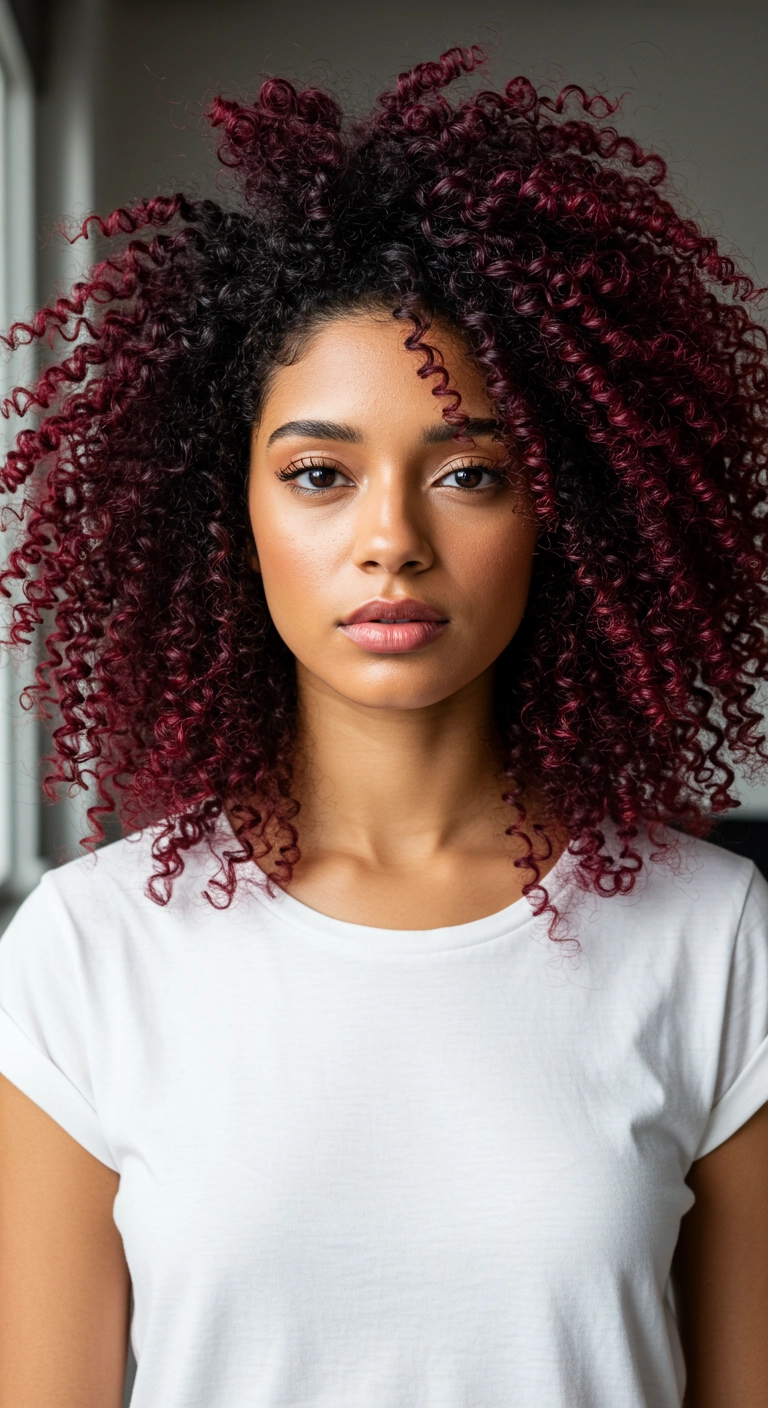
This look is all about bold color meets full-bodied natural texture. You start with a dark shadow root that seamlessly blends into a rich, juicy burgundy-wine shade across bouncy spiral ringlets. The rounded layered cut gives the crown instant height while keeping the curl clumps defined, soft, and totally touchable.
How to do this
1. Start on freshly cleansed, wet hair and apply a generous amount of the leave-in curl cream listed below to lock in base hydration.
2. Section your curls into quadrants and apply a firm-hold curl defining gel listed below using the praying hands technique, followed by gentle raking to coat every strand.
3. Use the curl defining brush listed below to clump curls together, lightly shaking each ribbon of hair to encourage springy ringlet formation.
4. Flip your head forward and diffuse your curls using the ionic hair dryer with large diffuser bowl listed below on low heat and medium airflow until hair is roughly 85% dry.
5. Once fully air-dried and a cast forms, scrunch out the crunch with a few drops of the lightweight nourishing hair oil listed below to add deep shine and reveal soft, voluminous burgundy curls.
6. Use an afro pick at the roots underneath to lift and fluff out the crown for maximum shape and round volume.
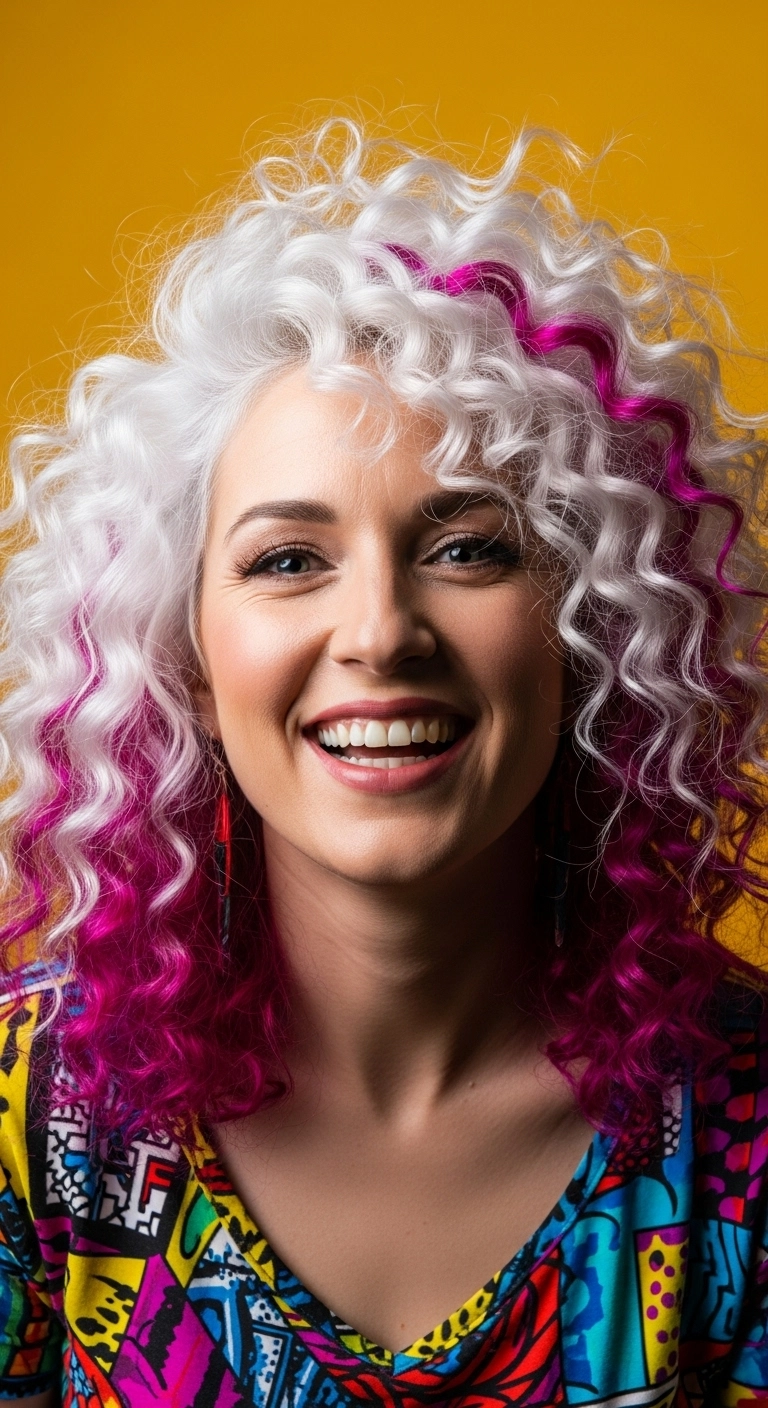
If you want to turn heads, this bold combination is everything! Taking pure white spiral curls and dipping the ends in punchy electric magenta creates that instant comic-book pop. It's vibrant, super playful, and gives your natural bounce an unforgettable rockstar twist.
How to do this
1. Start by sectioning pre-lightened platinum hair and apply a vivid magenta semi-permanent dye to the lower ends in a dip-dye fashion, plus a few select ribbon slices along the top crown.
2. On wash day, cleanse with the color-safe sulfate-free shampoo listed below to keep the icy white base clean and prevent the magenta from bleeding.
3. Apply a generous amount of the curl defining cream listed below while hair is soaking wet, raking it evenly through from mid-lengths to ends.
4. Use a curl defining brush to create uniform ribbon-like ringlets, twisting sections away from your face for perfect shape.
5. Scrunch upward with the microfiber hair towel listed below to remove excess moisture without roughing up the curl cuticles.
6. Attach the universal hair diffuser listed below to your blow dryer and dry on low speed and medium heat, gently cupping the curls to maximize volume.
7. Once 100% dry, break any slight gel cast and add brilliant shine by smoothing a few drops of the lightweight hair oil listed below over the ends.
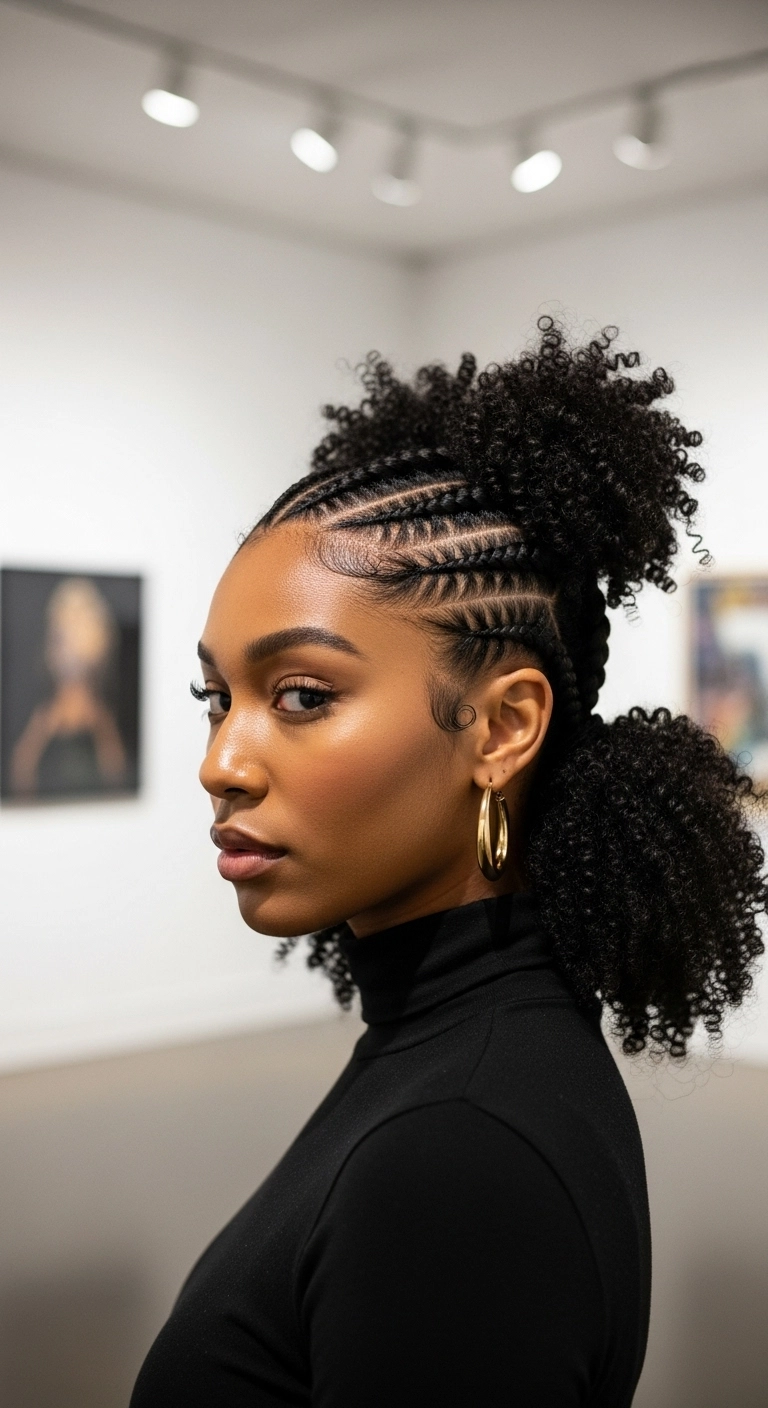
Can we talk about how stunning these tiered afro puffs are?! The contrast between the clean, sleek cornrows and the lush, bouncy cloud of coils is just chef's kiss. It's chic, regal, and the perfect statement look for natural texture!
How to do this
1. Start on freshly cleansed, conditioned, and thoroughly detangled hair, applying a leave-in conditioner to lock in moisture.
2. Section the hair horizontally into a top half and bottom half to create the two base zones for the tiered puffs.
3. Using the rat tail parting comb listed below, map out clean, precise side-to-back cornrow tracks along the side of the head, applying a touch of braiding edge control to make your parts razor-sharp.
4. Braid the side sections into clean cornrows, directing them towards the center-back where your two puffs will sit.
5. Gather the ends of the braids along with the natural hair in each section and secure them into two separate high and low ponytail bases using the snag-free elastic hair bands listed below.
6. Fluff out the natural coils using the afro pick lifting comb listed below, applying a curl defining cream to enhance the curl definition and spring of both puffs.
7. Lay and sculpt the delicate baby hairs around the forehead and temples using the dual-ended edge brush listed below and a firm-hold styling gel for an immaculate, elegant finish.
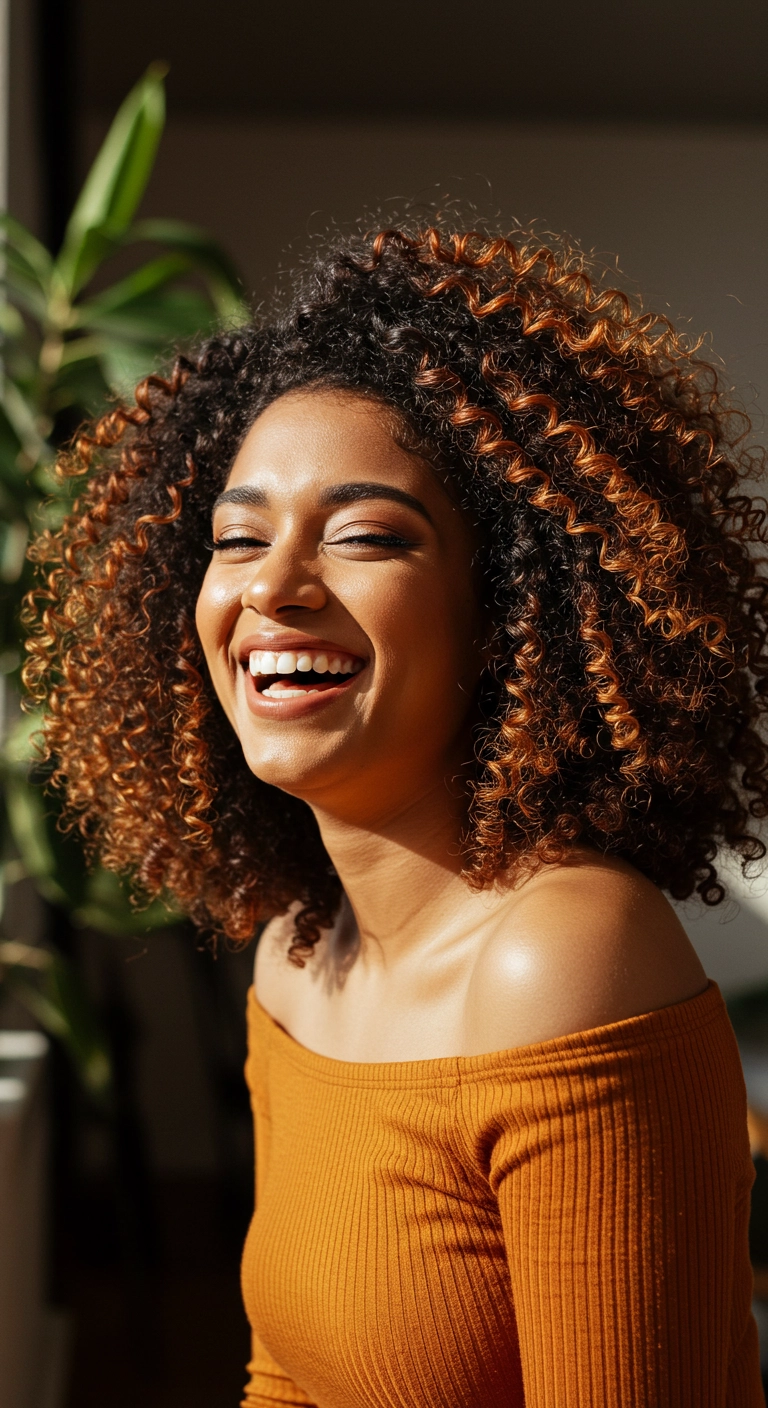
Caramel and warm copper highlights painted onto a bouncy, curly bob. I've always loved how a little sun-kissed Pintura placement makes every single ringlet pop without losing the depth of darker roots. It's effortless, full of life, and that warm golden halo just completely lights up your whole face.
How to do this
1. Start on freshly cleansed, thoroughly conditioned, and damp hair after prepping with a leave-in conditioner listed below.
2. Section your curls into workable quadrants and apply a curl defining cream listed below from roots to ends, using the praying hands method to distribute evenly.
3. Work through each section in small sub-sections, finger-coiling each ribbon of curls to create ultra-defined 3C/4A ringlets around the crown and face framing bangs.
4. Mist a lightweight curl styling gel listed below over the top to lock in moisture, enhance definition, and prevent frizz while the curls form.
5. Attach a large diffuser bowl to your blow dryer, tilt your head gently from side to side, and cup the curls upwards on low heat and low air speed until 85-90% dry.
6. Once fully dry, dispense a few drops of a nourishing hair oil listed below between your palms and gently scrunch the curls to break the gel cast, then gently pick out the roots using an afro pick listed below to amplify maximum volume and bounce.
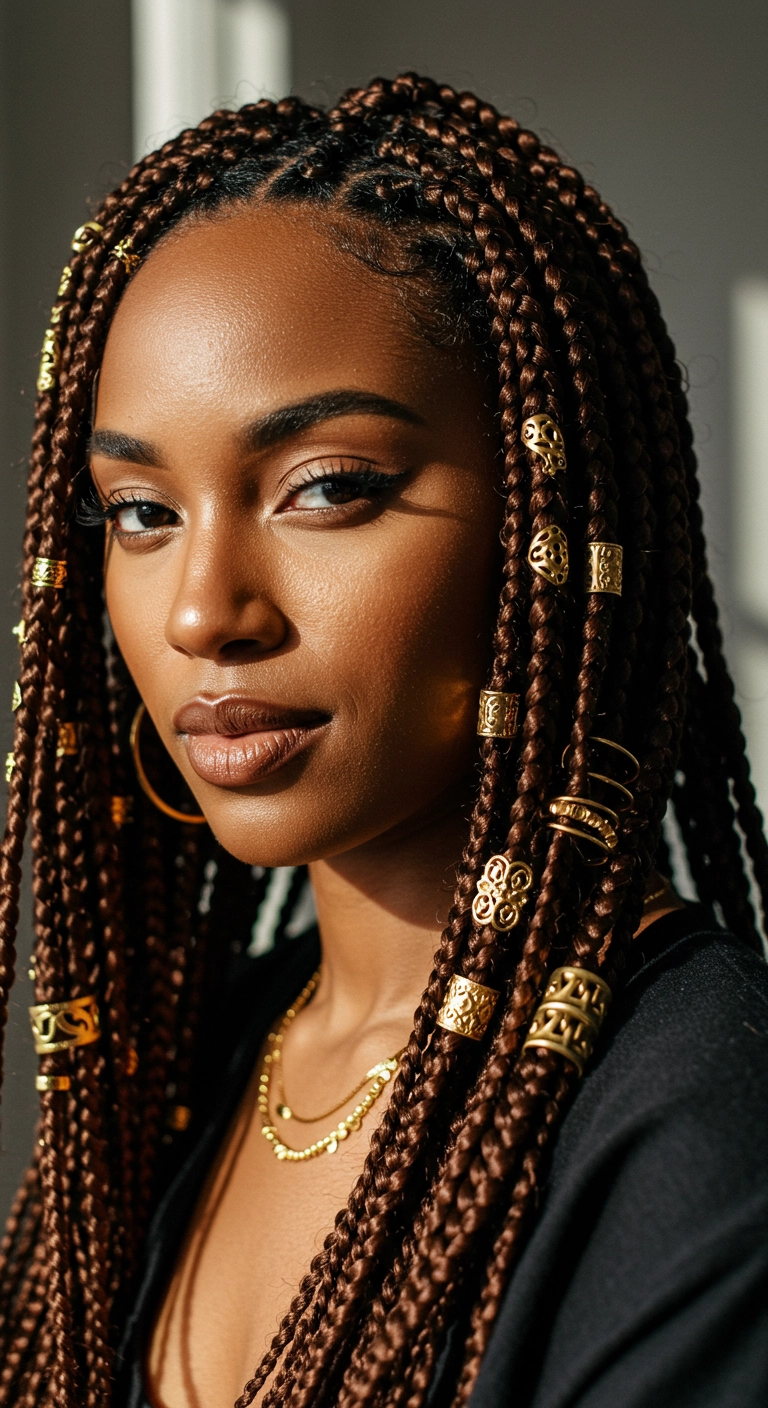
I absolutely love how rich and radiant warm chocolate box braids look, especially when you dress them up with chunky gold cuffs and filigree rings!! Scattering the gold jewelry along the front face-framing pieces instantly turns an everyday protective style into something so chic and stunning.
How to do this
1. Start by thoroughly washing, deep conditioning, and blow-drying the natural hair straight using a heat protectant spray.
2. Section the hair into clean, uniform square or rectangular grids using a rat tail comb and apply a strong-hold braiding gel to the roots for clean lines.
3. Incorporate warm chocolate brown braiding hair extensions at each base, braiding firmly and smoothly all the way down to the ends.
4. Dip the braid ends carefully in boiling hot water to seal them and give them a sleek, flexible finish.
5. Apply a lightweight scalp oil or mousse over the braids to lock in moisture and tame flyaways.
6. Finish the look by sliding intricate gold hair cuffs and wire coils onto selected face-framing braids at varied heights for an accessorized, regal vibe.
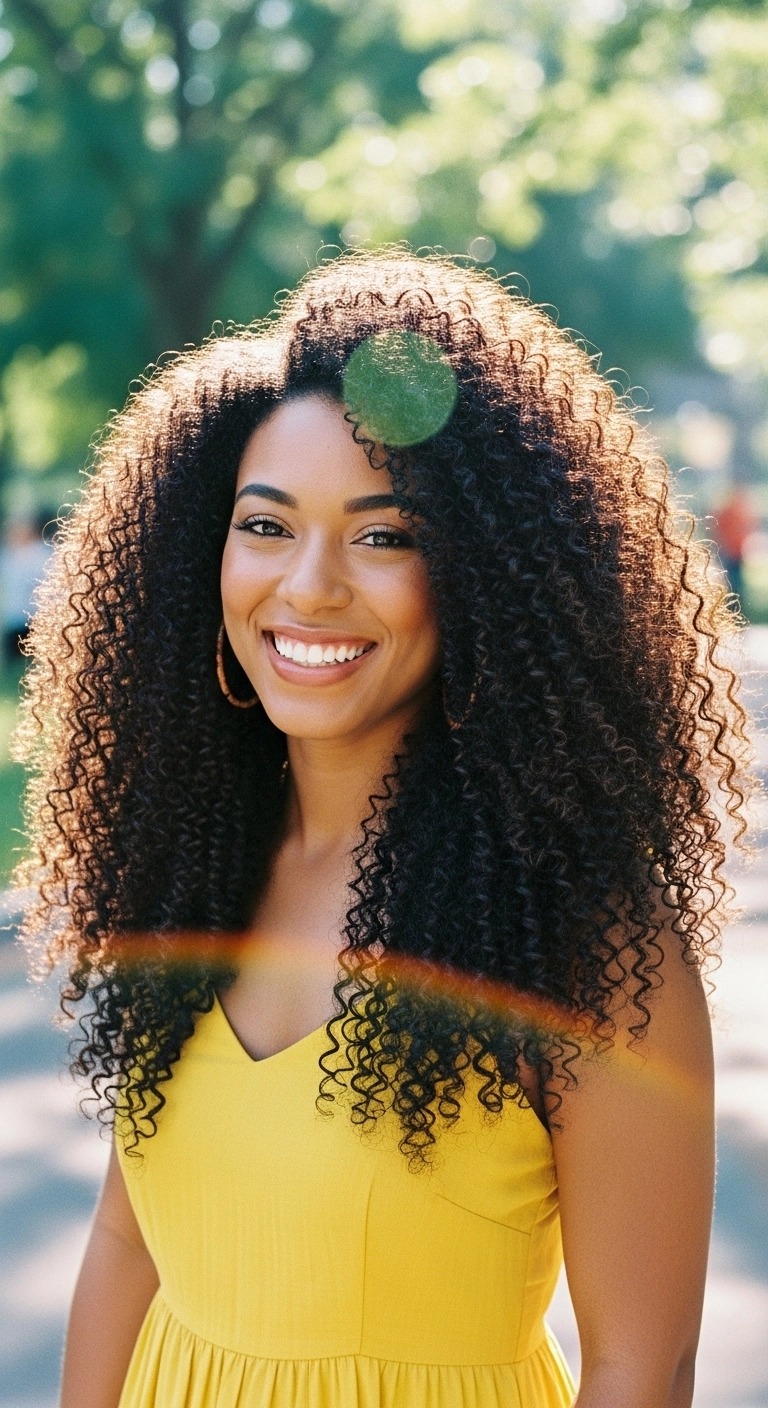
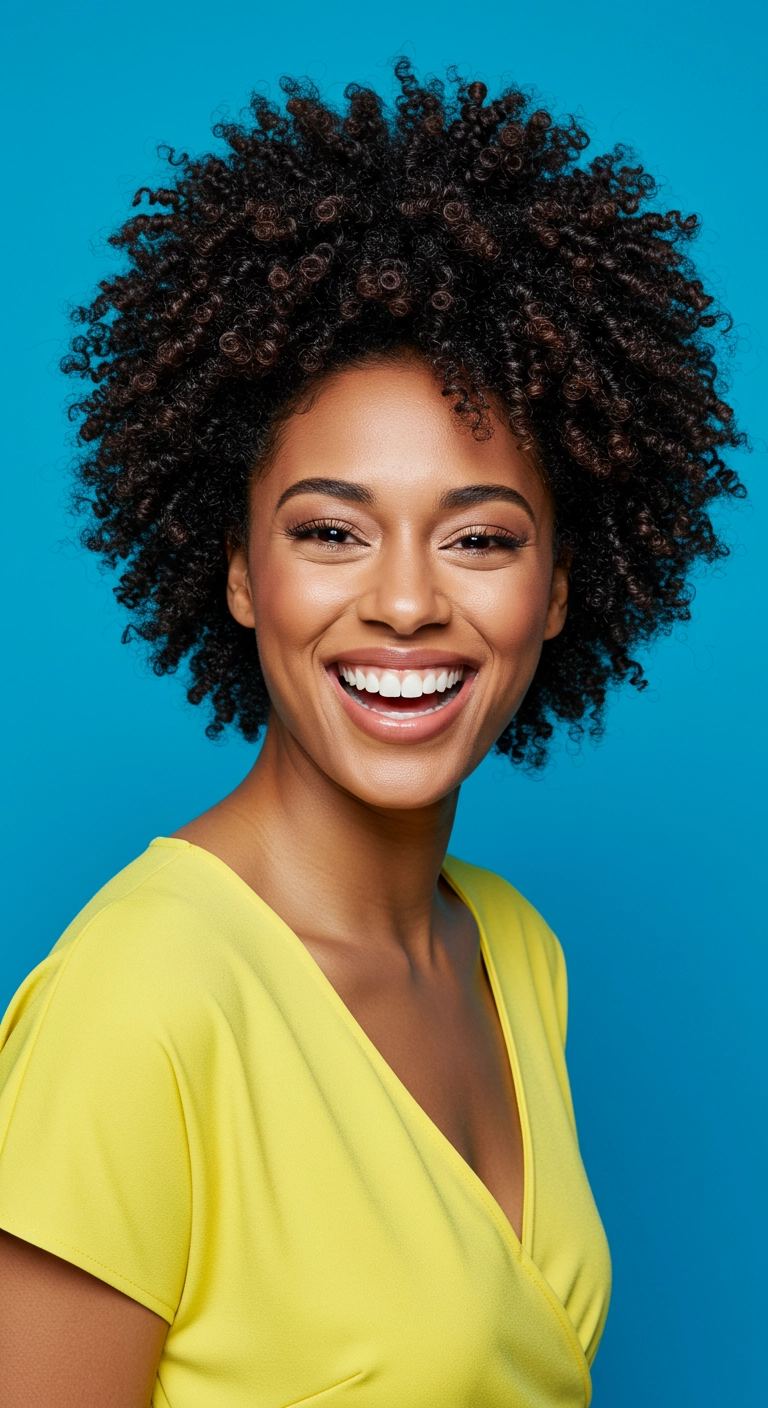
I think the absolute key to showing off tight spiral curls is getting a rounded layered cut that allows all that gorgeous natural volume to expand without feeling bottom-heavy. You get so much movement and lift around the face, and letting them dry with a soft diffuser gives you the ultimate bouncy, touchable crown!
How to do this
1. Start on freshly cleansed, wet curls by detangling gently from ends to roots using the wide-tooth detangling comb listed below.
2. Section the soaking-wet hair and apply a generous amount of the hydrating leave-in curl conditioner listed below to ensure complete moisture coverage.
3. Work the curl defining styling cream listed below through each section using the praying-hands method and raking through with your fingers for defined coil formation.
4. Glaze a small amount of the light-hold anti-frizz gel listed below over the canopy and gently scrunch upwards to encourage bounce and create a soft cast.
5. Attach the universal hair diffuser attachment listed below to your blow dryer, set it to low heat and medium airflow, and cup sections of curls until completely dry.
6. Once fully dry, break the gel cast by scrunching out the crunch with a few drops of the nourishing jojoba hair oil listed below to add radiant shine and fullness.
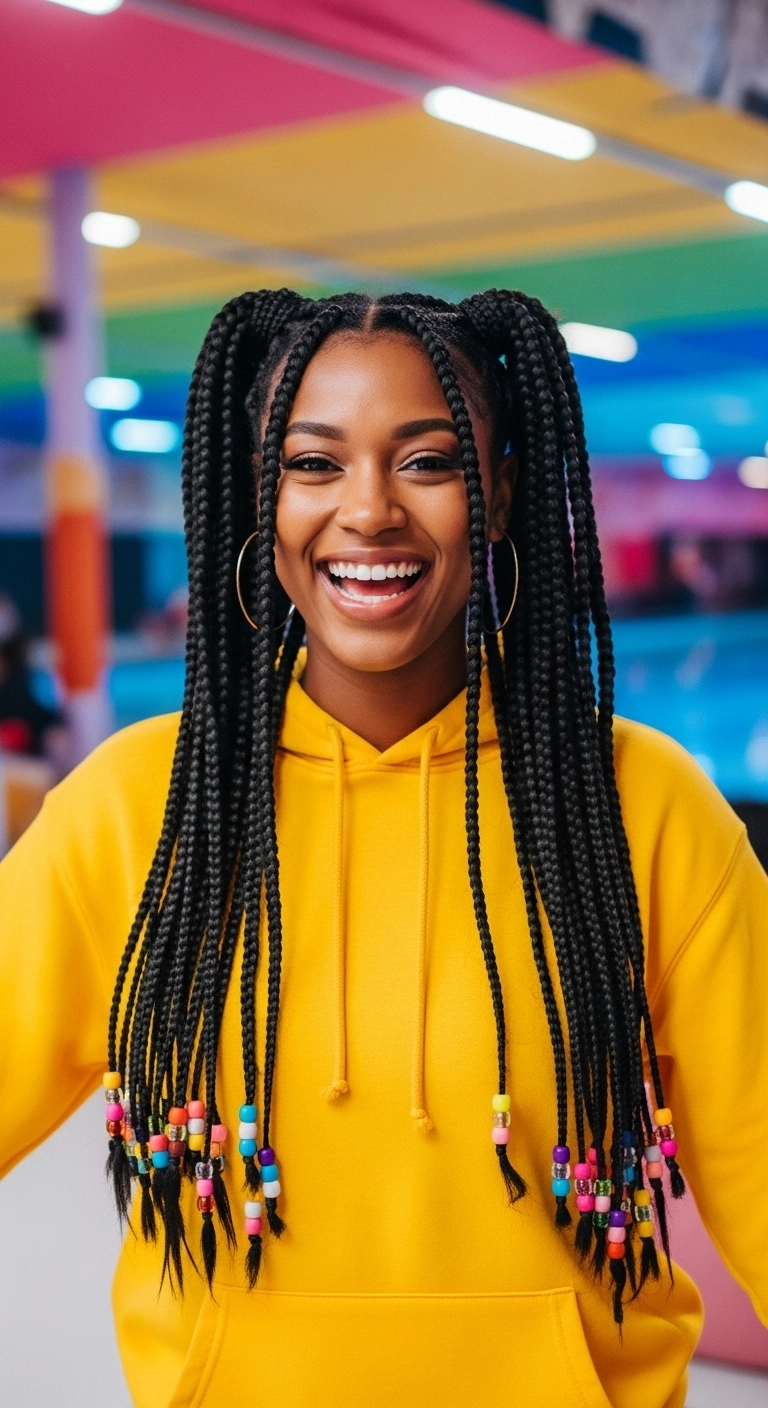
Honestly, whoever said hair beads belong in the 90s clearly hasn't seen how fun they look on high braided pigtails! I am totally obsessed with the playful, nostalgic energy here. Throwing your box braids up into two bouncy high ponytails instantly lifts your face and gives you that effortlessly cool throwback vibe.
How to do this
1. Start with clean, deeply moisturized, and blown-out hair using a leave-in conditioning spray and braid sealing cream.
2. Part the hair cleanly down the middle using a metal tail comb to create neat grid-like box sections, applying edge control gel along the parts for sharp lines.
3. Install neat, tension-free knotless box braids using the synthetic braiding hair listed below, braiding all the way down to the chest.
4. Leave out one braid on each side in the front to act as face-framing tendrils.
5. Gather the remaining braids on each side high up on the crown into two playful high pigtails, securing them tightly with snag-free elastic bands.
6. String colorful multi-colored pony beads onto the bottom of each braid using a bead threader loop tool listed below, and secure the ends with mini clear rubber bands.
7. Finish the scalp and braids with a lightweight braid sheen spray to lock in high gloss and moisture.
Can we take a second to appreciate how gorgeous warm highlights look on natural curls?! I had to include this sun-kissed copper look because the dimension it gives each spiral ringlet is just unreal. Painting warm caramel and copper tones onto individual curls makes the whole cut pop with so much depth and vibrancy. Whether you rock it big, fluffy, and full of volume like this or tuck half of it back for an easy daytime look, you're going to turn heads everywhere you go!
How to do this
1. Start by cleansing and conditioning your curls with a hydrating, sulfate-free curl wash to create a clean, moisture-rich canvas.
2. On soaking wet hair, apply a generous amount of leave-in conditioning cream using the leave-in conditioner listed below, raking it through in sections from roots to tips.
3. Coat individual curl clumps with a defining styling gel using the curl defining styling gel listed below, smoothing over strands to lock in moisture and eliminate frizz.
4. For extra definition and bounce, use your fingers to coil and twirl distinct accent curls around the crown and face-framing areas.
5. Attach a large bowl diffuser to your blow dryer using the universal curl diffuser attachment listed below, and gently hover around sections on low heat and medium airflow until hair is completely dry.
6. Once fully dry, break the gel cast by scrunching upwards with a few drops of lightweight hair oil using the nourishing hair bonding oil listed below to add glossy shine and soft movement.
7. Gently use an afro pick at the roots using the wide metal hair pick listed below to lift the base and achieve maximum, breathtaking volume without disrupting the curl definition.
Products Used
Moisturizing Leave-In Conditioning Cream for Curls
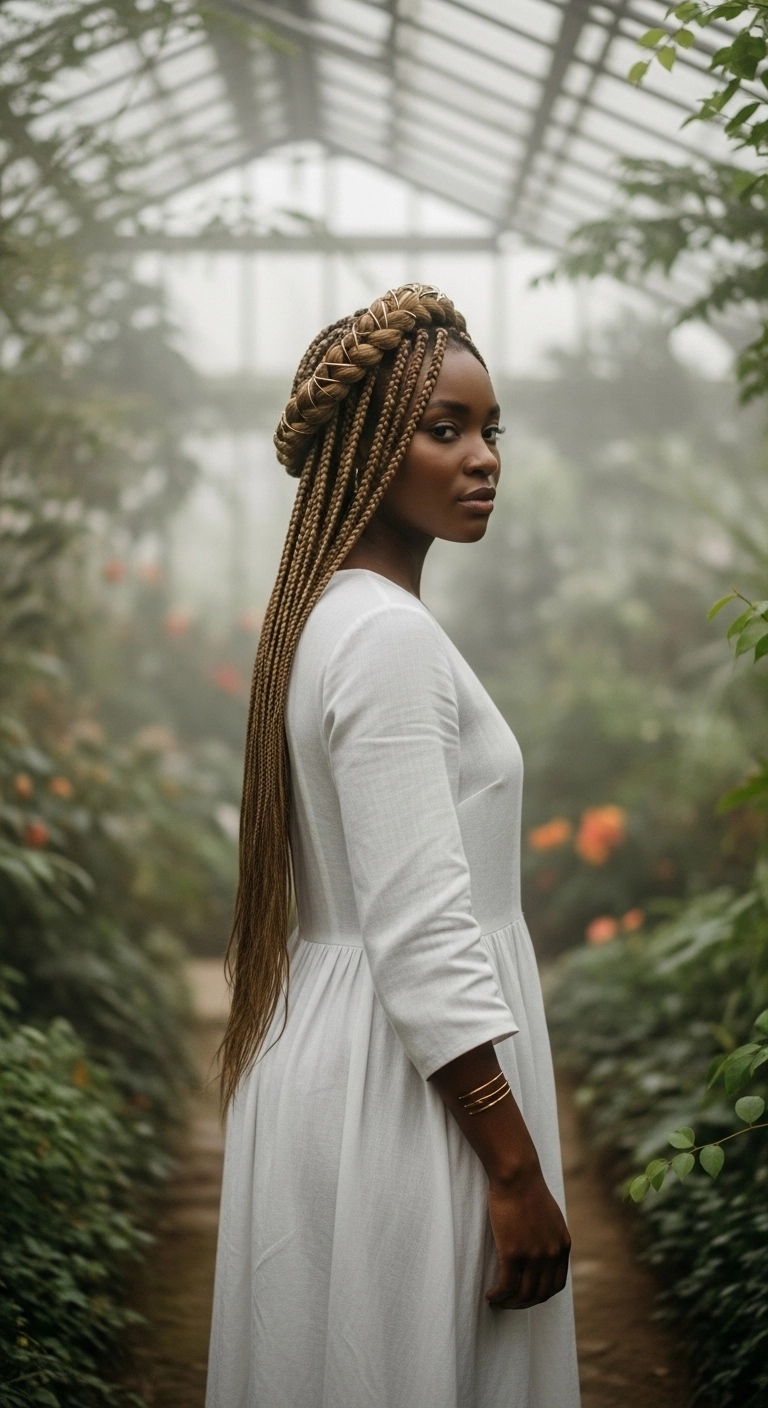
The regal braided crown paired with flowing waist-length box braids. Such a stunning and goddess-worthy look! I love how the warm honey blonde tones brighten the complexion, and adding gold wire accentuates the crown so effortlessly. It’s an ethereal protective style that feels both timeless and ready for any special celebration.
How to do this
1. Prep clean, moisturized natural hair with a rich leave-in conditioner and blow-dry straight using the heat protectant spray listed below to prepare for protective braiding.
2. Section the hair cleanly using a rat tail comb and apply the braiding edge conditioning gel listed below along the parts for ultra-crisp, neat lines.
3. Install extra-long knotless box braids using warm honey blonde pre-stretched braiding hair, feeding in extensions gradually for a lightweight, seamless feel.
4. Gather the top front section of braids and create a thick, plush halo or crown braid wrapping across the crown of the head, securing it firmly with the heavy-duty bobby pins listed below.
5. Intertwine decorative gold hair wire or cuffs through the crown braid to add an elegant, regal metallic finish.
6. Dip the ends in hot water to seal and soften the flow, then mist with the braid sheen oil spray listed below for hydration and luminous shine.
I am completely obsessed with this golden honey blonde halo shape!! The defined corkscrew ringlets give it so much effortless bounce and structure. My favorite way to wear this is picked out for maximum volume with cute curled bangs framing the forehead!
How to do this
1. Start on freshly cleansed, soaking wet hair using the sulfate-free moisturizing shampoo and rich conditioner listed below to hydrate your coils.
2. Section your curls into four quadrants and apply a generous amount of the curl defining cream listed below from roots to tips, ensuring even saturation.
3. Work in smaller half-inch subsections to finger-coil or use a defining brush to clump your tight spiral ringlets and enhance definition around the halo perimeter and bangs.
4. Glaze over your defined ringlets with the lightweight strong hold styling gel listed below to lock in the coil shape and eliminate frizz without weighing down the volume.
5. Gently diffuse using the blow dryer with diffuser attachment listed below on low heat and low airflow, hovering around the head until your curls are completely dry.
6. Once fully dry, apply a few drops of the nourishing bonding hair oil listed below to your palms and gently fluff out the roots with an afro pick to expand into a stunning, voluminous rounded silhouette.
Products Used
Sulfate-Free Moisturizing Shampoo and Conditioner Set
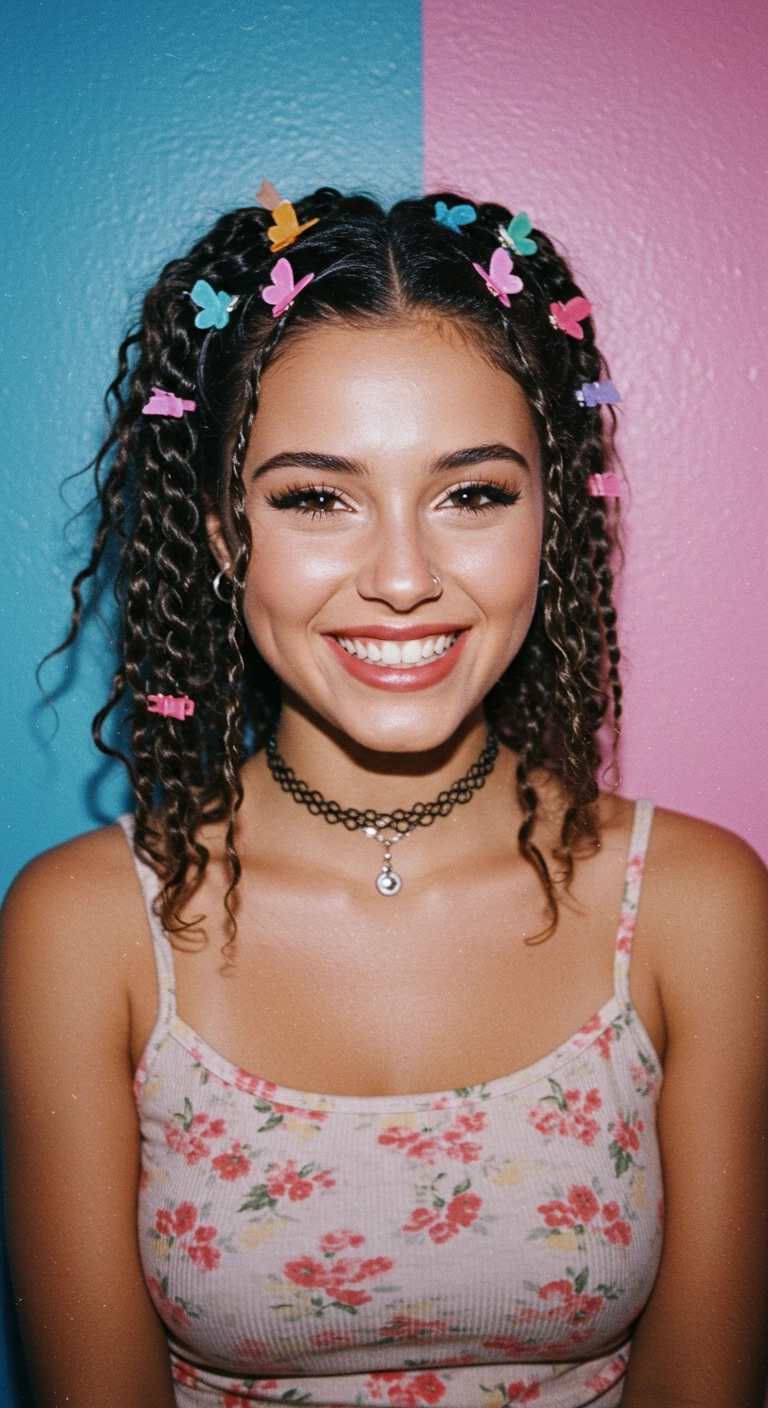
This hairstyle is pure 90s and Y2K festival nostalgia in the best way possible. You start by parting your hair straight down the middle and pulling out two soft, face-framing tendrils to frame your cheeks. From there, take small square sections across the crown and create neat two-strand twists, clipping vibrant little butterfly clips down each twist for that ultimate playful retro vibe.
How to do this
1. Start on freshly washed, damp hair and apply a generous amount of curl defining cream listed below to lock in moisture and definition.
2. Using a fine-tooth tail comb, create a clean, crisp center part down the middle of the head.
3. Leave out two thin, delicate front sections along each side of your temple to serve as face-framing curly tendrils.
4. Section the rest of the front and crown hair into neat one-inch squares, prepping each section with a lightweight styling gel listed below for smooth hold.
5. Divide each square into two even strands and tightly twist them around each other to form clean two-strand rope twists all the way down to the ends.
6. Secure the twists intermittently along the crown and sides using colorful mini butterfly hair clips listed below, spacing them evenly for that iconic 90s aesthetic.
7. Define the loose face-framing strands with a dab of curl foam and finish with a light mist of shine spray listed below for all-day glossy hold.
Can we take a second to appreciate the gorgeous bounce and definition of these natural curls?! I added this defined volumetric coily bob to the list because it's such an incredible celebration of natural 3C/4A texture and shape, don't you think?! You can keep it super tight and glossy with a wash-and-go routine as shown here, or fluff it out with an afro pick for even bigger retro-inspired drama. There are so many fun ways to style healthy natural curls, which I absolutely adore! Rock this joyful, full-bodied look with confidence wherever you go.
How to do this
1. Start on freshly cleansed and conditioned soaking-wet hair to maximize moisture retention and natural ringlet definition.
2. Apply a generous amount of the hydrating leave-in conditioner listed below evenly from roots to ends using praying hands.
3. Section the hair into four manageable quadrants and rake through the curl defining styling cream listed below, ensuring every coil is saturated.
4. Working in small sub-sections, use the curl defining styling brush listed below or finger-coil individual strands to encourage ultra-springy, uniform curl clumps.
5. Gently scrunch excess water out with a microfiber hair towel wrap listed below, being careful not to disrupt the curl formation or cause frizz.
6. Dry the hair thoroughly using a blow dryer fitted with the large diffuser bowl attachment listed below on medium heat and low speed, flipping your head gently to encourage maximum root lift and volume.
7. Once 100% dry, lightly coat your palms with a couple drops of the lightweight nourishing hair oil listed below and gently pick at the roots using a wide hair pick to fluff and achieve this stunning, rounded crown shape.
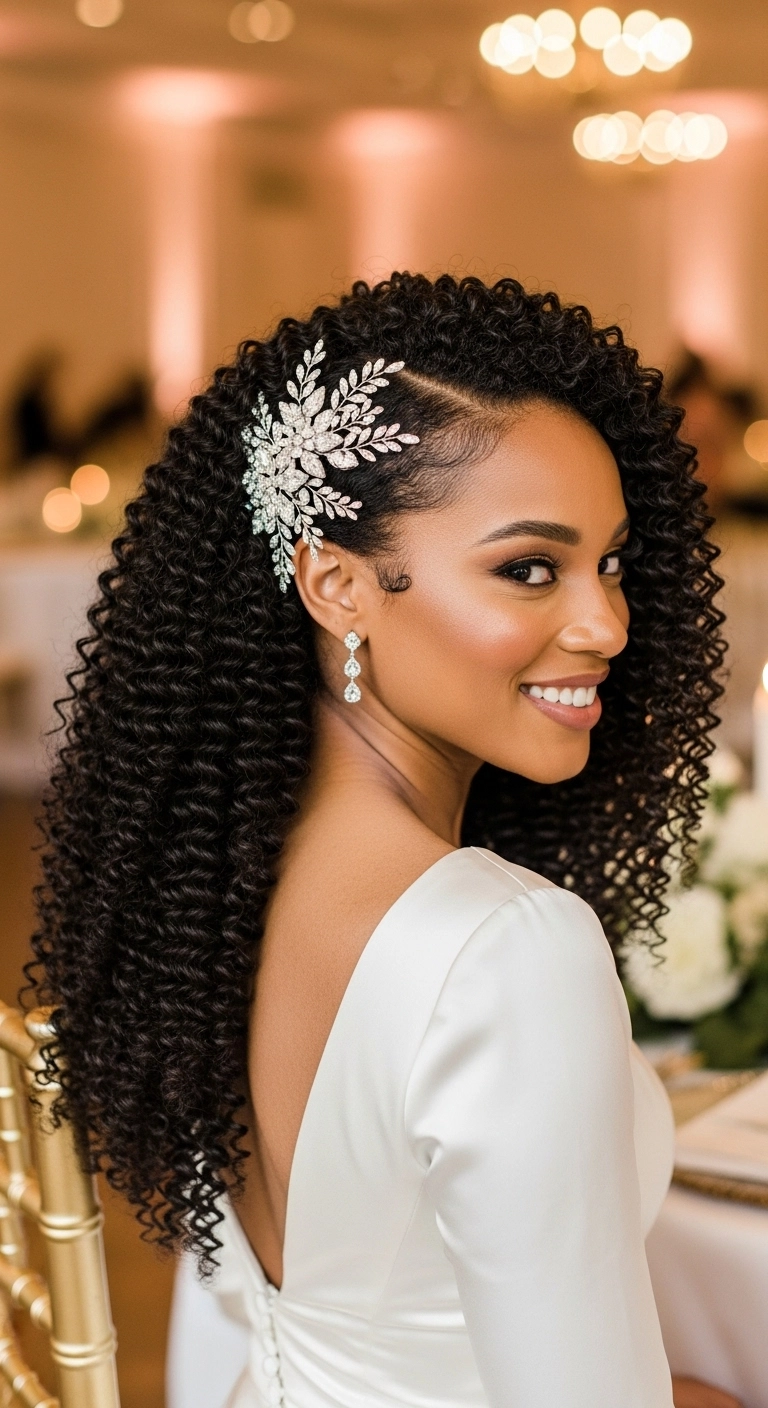
This bridal look is all about showing off gorgeous natural texture with timeless elegance. You create a crisp deep side part, smoothing down one temple with edge control to sculpt sweet little swirls. Then, pin that side securely behind your ear and pop in a dazzling crystal vine comb to let the rest of your lush, juicy spiral curls tumble down freely.
How to do this
1. Start on freshly washed, damp hair and apply a generous amount of the curl defining cream listed below from roots to ends to ensure moisture and maximum definition.
2. Section the hair and apply the strong hold curl styling gel listed below in small sub-sections, using a shingling or finger-coiling technique to create springy, uniform 3C/4A spiral curls.
3. Use a blow dryer with the large bowl diffuser listed below on low speed and medium heat to gently dry the curls completely without causing any frizz.
4. Create a clean, deep side part using the rat tail comb listed below, carving a crisp diagonal line from the arch of the eyebrow back.
5. Smooth down the hairline on the side with less hair using the edge control paste listed below and a soft bristle edge brush, carefully sculpting subtle baby hair swirls along the temple.
6. Pin back the smoothed section securely behind the ear with bobby pins, then nestle the sparkling bridal rhinestone hairpiece listed below directly above the ear to cover the pins.
7. Finish by misting the entire head with the high-shine lightweight finishing spray listed below to lock in radiant luster and keep every coil perfectly bouncy all night long.
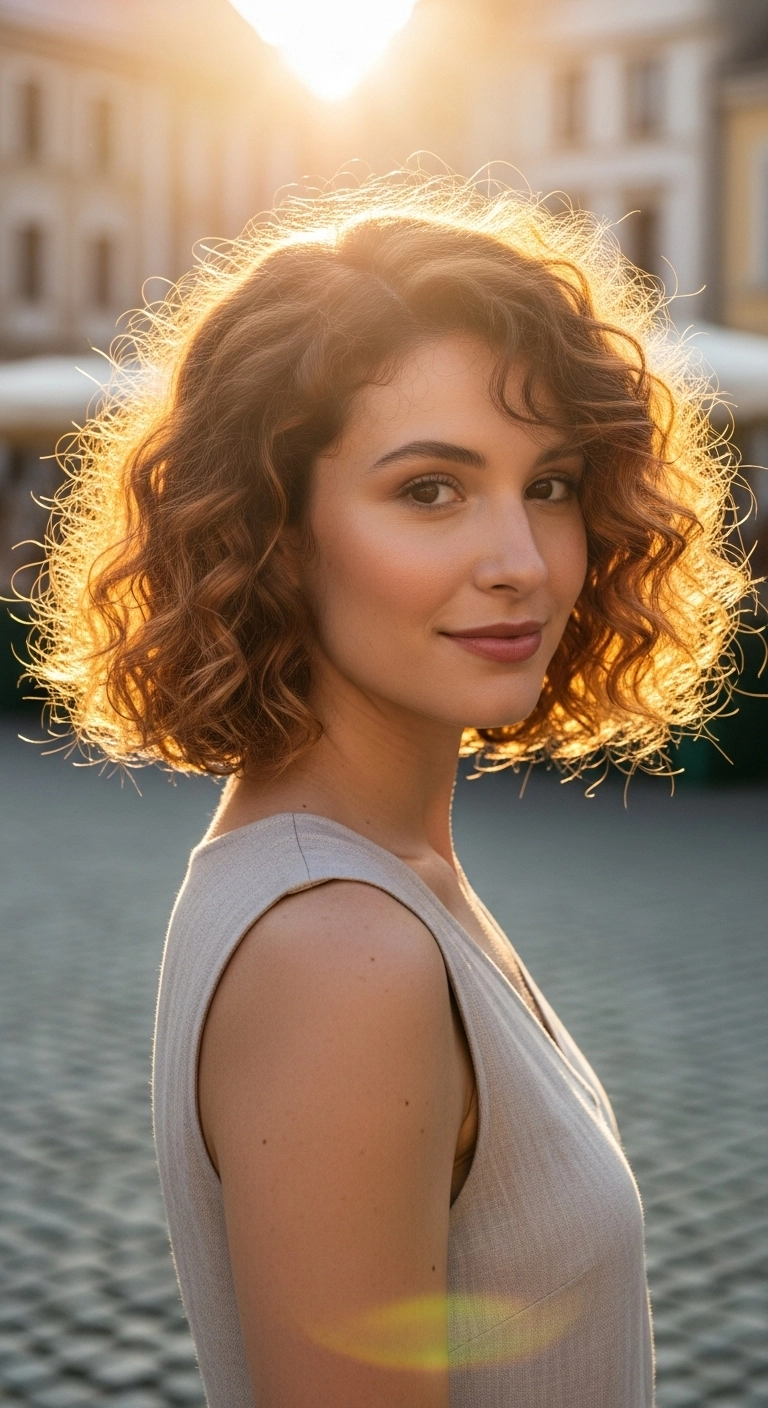
There’s nothing quite like a bouncy, layered curly bob that practically glows in the sunlight! I love how effortlessly this cut frames the face, giving you tons of natural volume without ever feeling weighed down.
How to do this
1. Start on freshly washed, damp hair and apply a quarter-sized amount of the curl defining cream listed below from roots to tips to encourage your natural pattern.
2. Gently rake through the strands using the wide-tooth detangling comb listed below to evenly distribute product without disrupting curl clumps.
3. Mist all over with the lightweight heat protectant spray listed below to shield your hair during the drying process.
4. Attach a bowl diffuser to your blow dryer, flip your head upside down, and cup sections of your hair upward on medium heat and low speed to build gorgeous volume and bounce.
5. Once 90% dry, flip back over and define any loose or unruly front pieces around the face using the 1-inch curling wand listed below.
6. Break up the curl cast by gently scrunching with a drop of the nourishing hair oil listed below to add gloss and eliminate any stiffness.
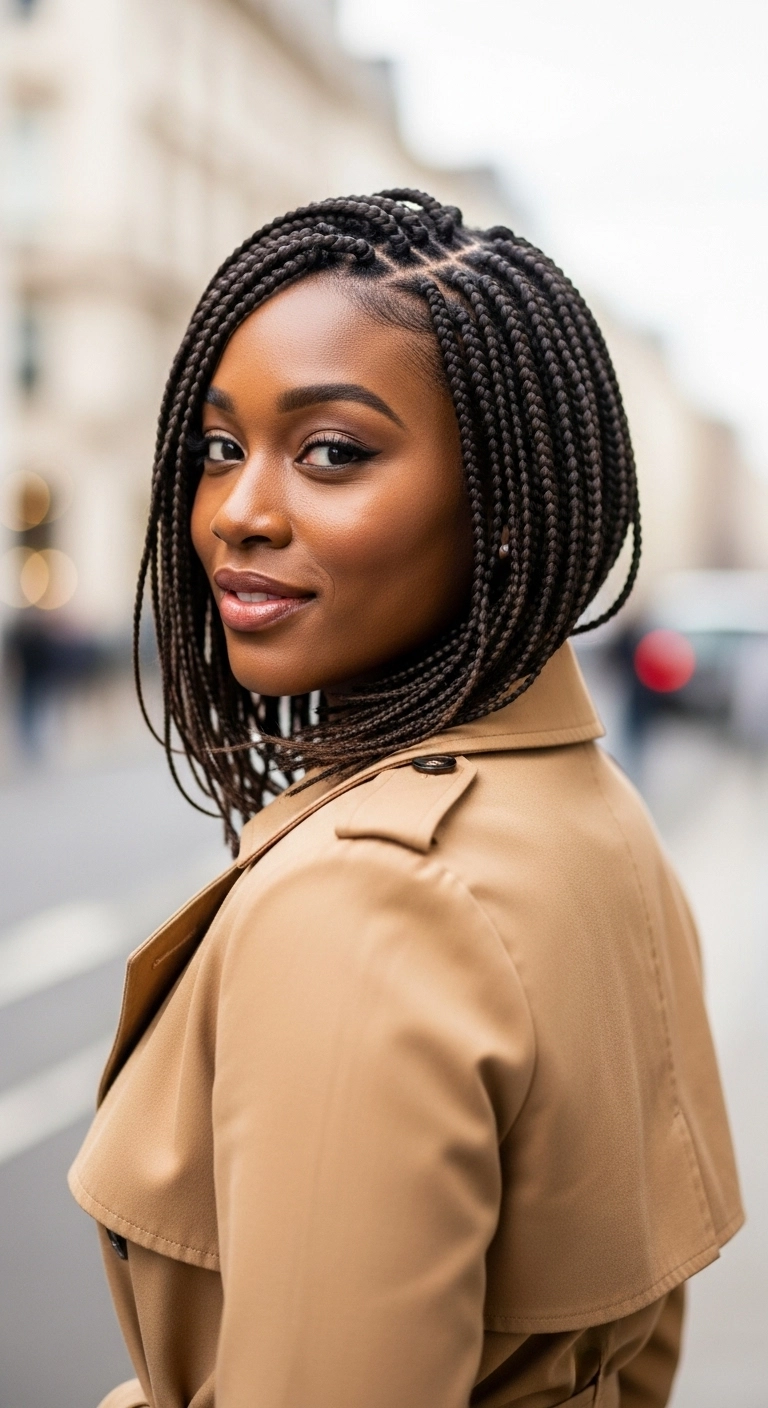
Isn’t this braided bob lob just so chic and classy?? This protective hairstyle gives you all the elegance of a classic cut without any of the daily styling hassle. One thing I love about this look is how light and bouncy it feels around the shoulders. It frames the face so beautifully and stays looking fresh for weeks with barely any upkeep!
How to do this
1. Start with freshly washed, deep-conditioned, and blow-dried natural hair, prepping the strands with the leave-in conditioning spray listed below.
2. Section your hair cleanly using a rat-tail comb and secure each section with styling clips, ensuring neat geometric parts for your knotless base.
3. Apply a small amount of the braiding conditioning gel listed below along each part to keep the grid lines super crisp and flyaway-free.
4. Begin braiding each individual section using the pre-stretched braiding hair listed below, feeding in small amounts gradually to create a seamless, knotless finish that sits flat against the scalp.
5. Continue braiding down to the desired collarbone or shoulder level, shaping the ends inward to achieve that classic curved bob silhouette.
6. Cut and seal the ends carefully by dipping the tips into boiling hot water to secure them and give them a soft, flexible fall.
7. Smooth down the edges gently using the edge control paste listed below, and mist all over with the scalp and braid sheen spray listed below for all-day shine.
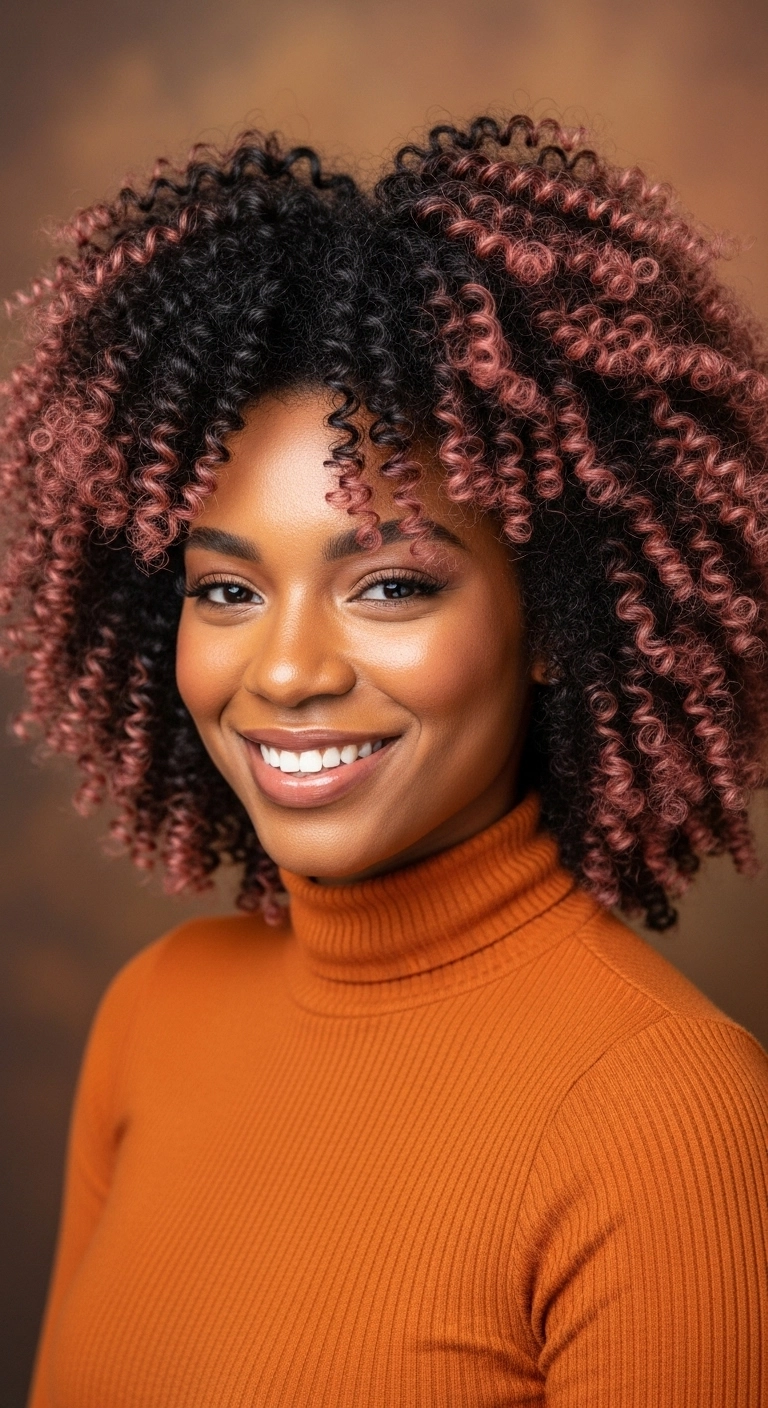
The rounded curly cut with dusty rose tips. Such a stunning vibe! I love how the soft pink ombre highlights every single coil while keeping the roots deep and natural. It gives your curls so much dimension and bounce without feeling over the top.
How to do this
1. Start on freshly washed, thoroughly detangled, damp curls using the microfiber hair towel listed below to gently remove excess water without causing frizz.
2. Section your curls into manageable quadrants and apply a generous amount of leave-in conditioning cream followed by the curl defining cream listed below to coat each strand evenly.
3. Work in small subsections, using your fingers or a specialized defining brush to coil each curl smoothly, ensuring consistent ringlet formation throughout.
4. Attach the universal hair diffuser listed below to your blow dryer, tipping your head forward and side to side while drying on low-to-medium heat to set the curls with maximum volume and zero disruption.
5. Once 100% dry, gently scrunch out any cast using a few drops of the lightweight nourishing hair oil listed below to add glossy shine and soft bounce.
6. Use the wide-tooth afro pick listed below at the roots underneath to gently fluff and lift the canopy, achieving that stunning rounded, full-bodied silhouette.
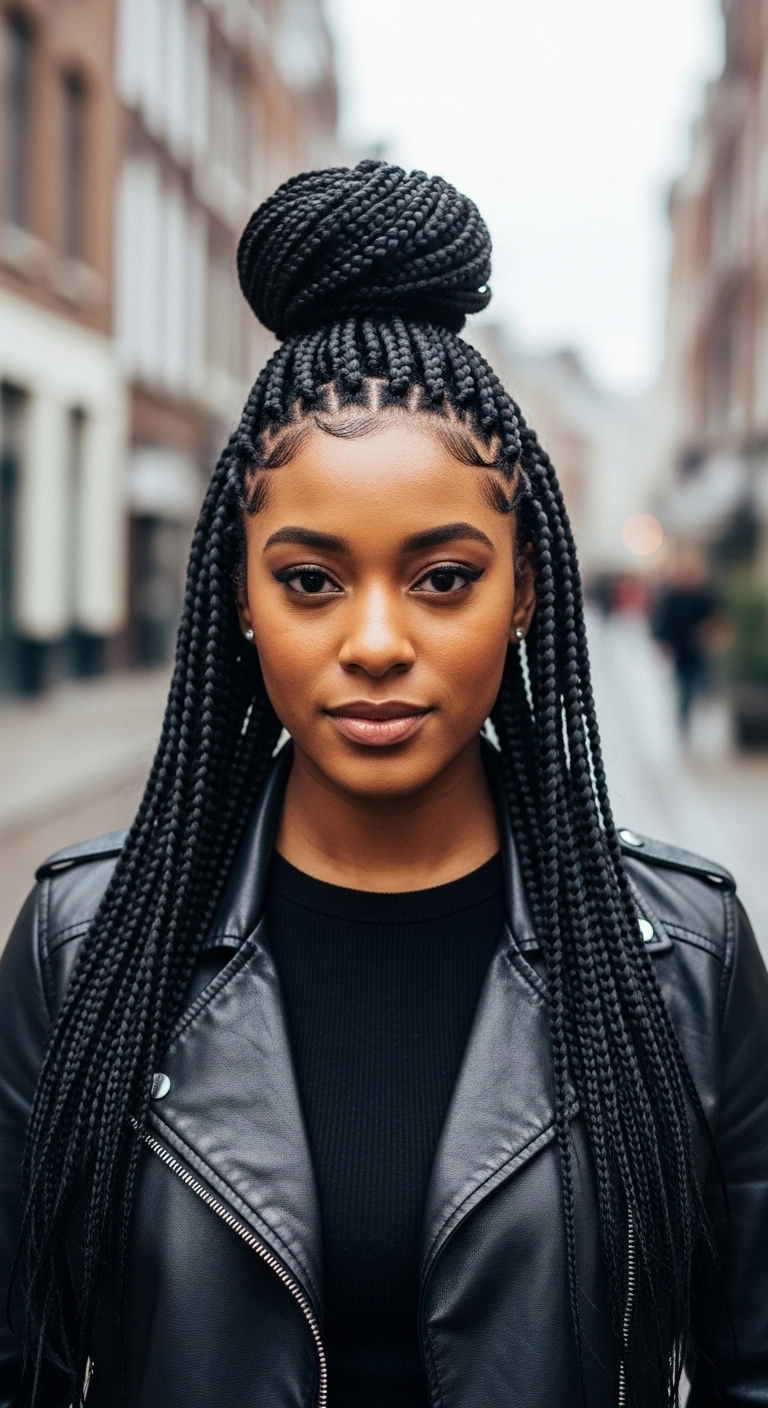
Half-up box braids with a fierce high top knot are literally the ultimate go-to when you want height, style, and zero fuss. Wrapping the top section into a neat crown bun keeps everything out of your face while letting the rest of your lengths drape effortlessly over a leather jacket. Throw in some swooped edges and you're good to conquer the day.
How to do this
1. Section clean, moisturized hair into neat square grids using a rat tail comb and apply a generous scoop of the braiding edge gel listed below to ensure razor-sharp parting.
2. Feed in synthetic braiding hair using the knotless technique, braiding firmly down to mid-chest length for each individual plait.
3. Once the full head of braids is complete, gather the top half section of braids from temple to crown into a high ponytail using an extra-strength elastic hair tie.
4. Twist and wrap the gathered braids smoothly around the ponytail base into a tall, structured doughnut-shaped top knot bun, tucking the ends securely underneath with bobby pins.
5. Lay and shape the delicate baby hairs around your forehead and sideburns into sleek swoops using an edge styling brush and the strong-hold edge control gel listed below.
6. Finish the look by misting your braids and scalp with the lightweight braid sheen spray listed below to lock in gloss and hydration.