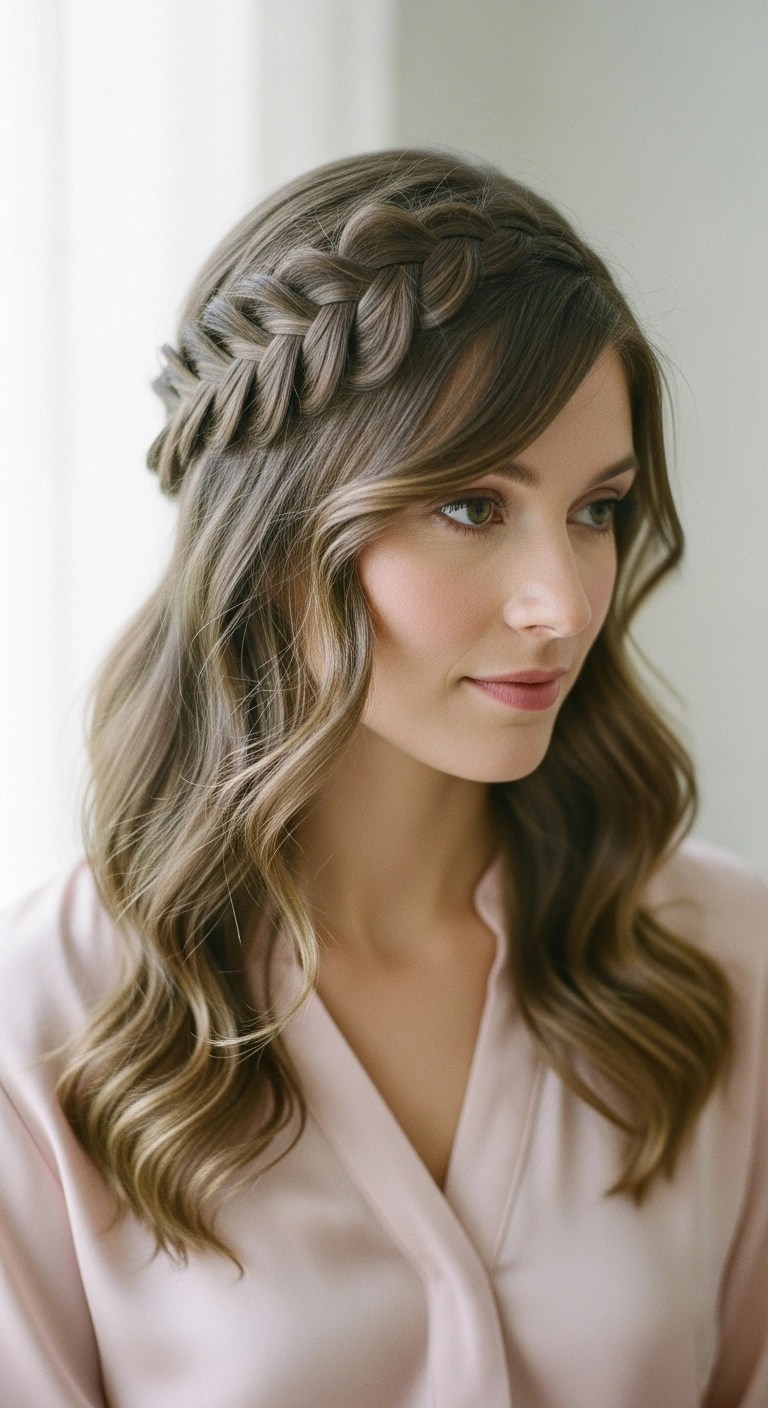
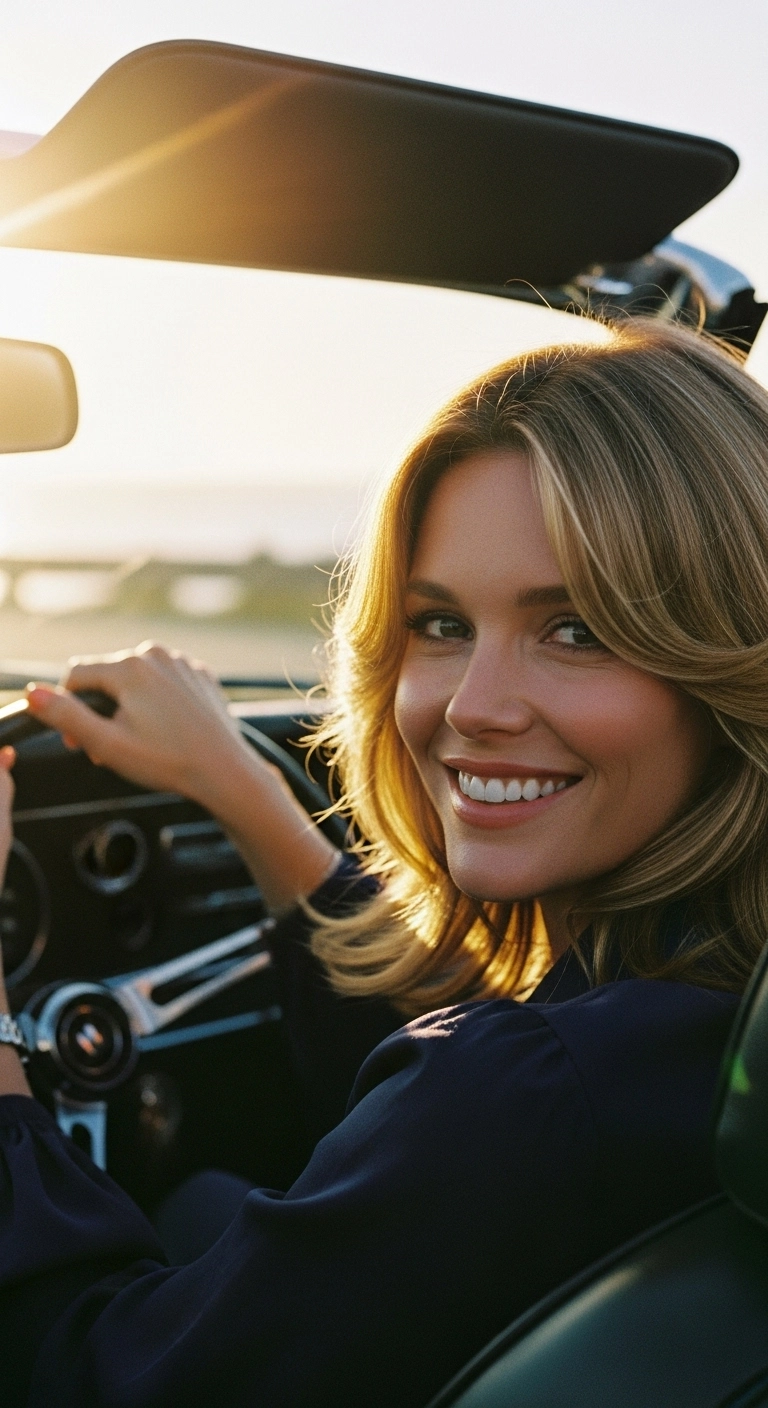
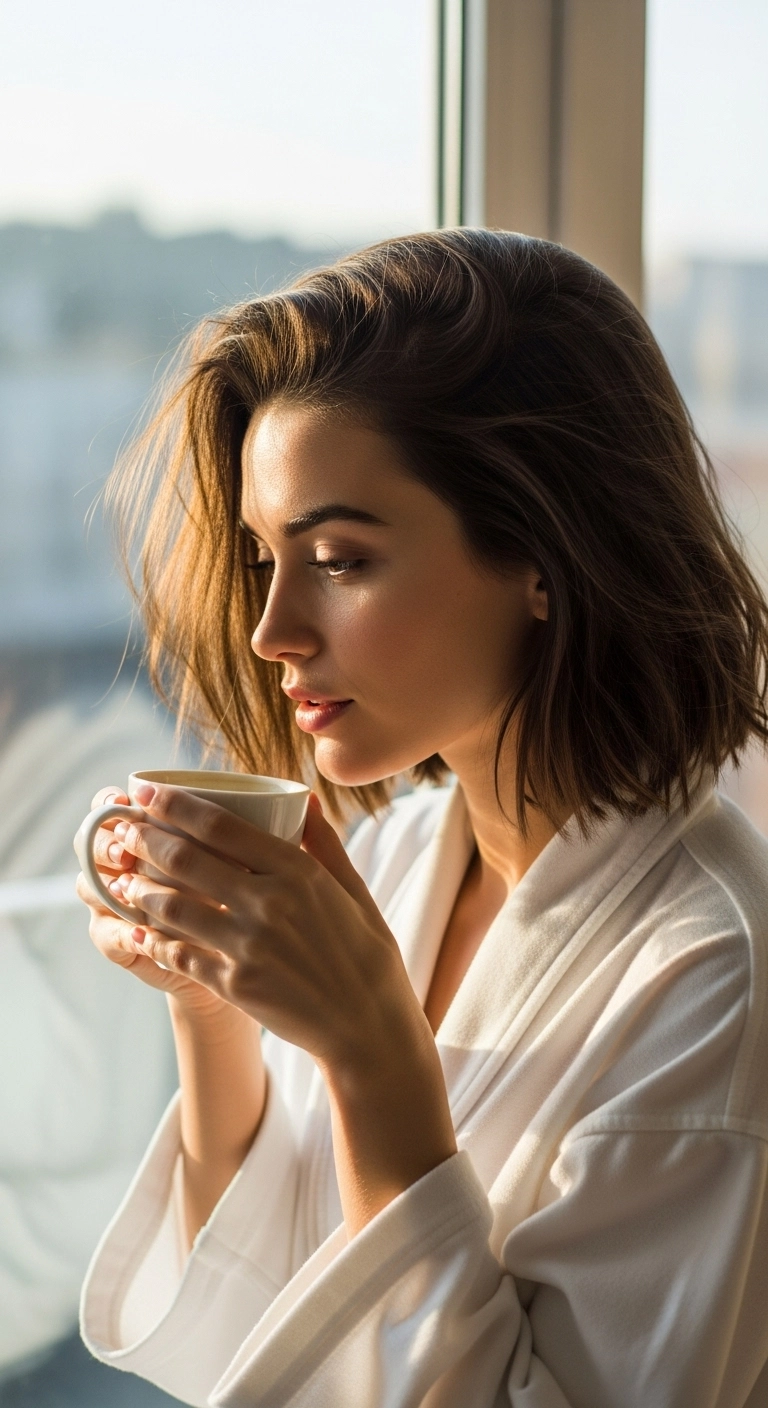
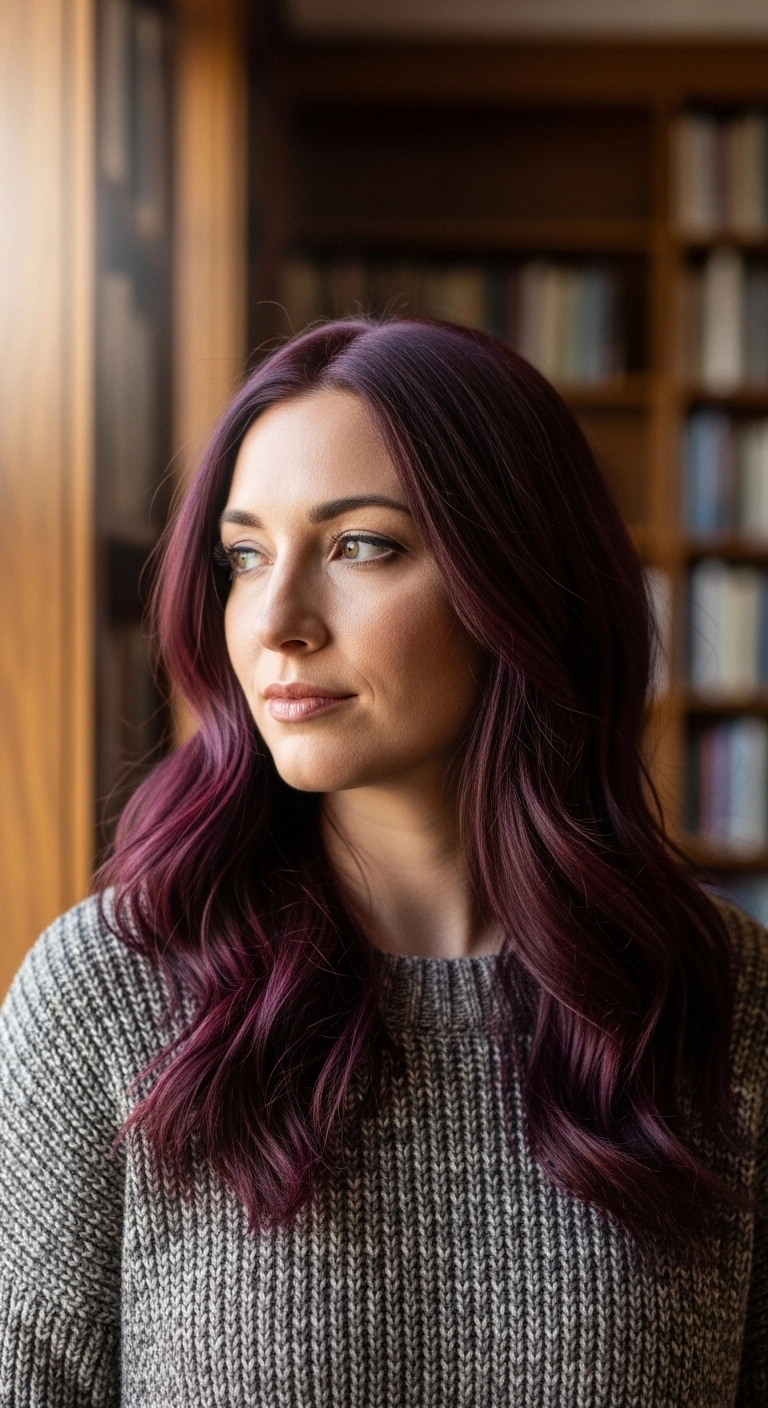
This is the ultimate romantic look if you're attending a wedding or just want to feel like royalty for a special date night. The Dutch braid headband keeps hair off your forehead while showing off smooth, cascading waves that frame your face beautifully.
How to do this
1. Start by prepping clean, dry hair with a generous mist of the heat protectant spray listed below to shield your hair and give it a silky foundation.
2. Section off your side-swept bangs in the front and clip them aside so they don't get tangled while you work on the braid.
3. Take a two-inch section just above your ear and begin creating an inverted Dutch braid across the top of your head, adding small sections from behind as you move over the crown.
4. Secure the braid behind the opposite ear using the matte bobby pins listed below, sliding them horizontally to lock the braid firmly in place.
5. Gently pull and pancake the outer edges of the braid using your fingertips to give it that soft, full, romantic texture.
6. Take a 1.25-inch curling iron to curl the remaining lengths in uniform, outward-facing directions to create glamorous waves, letting them cool completely.
7. Brush through the cooled curls gently with the wide-tooth comb listed below, shape your side-swept front fringe, and finish with a spritz of flexible hold finishing hairspray.
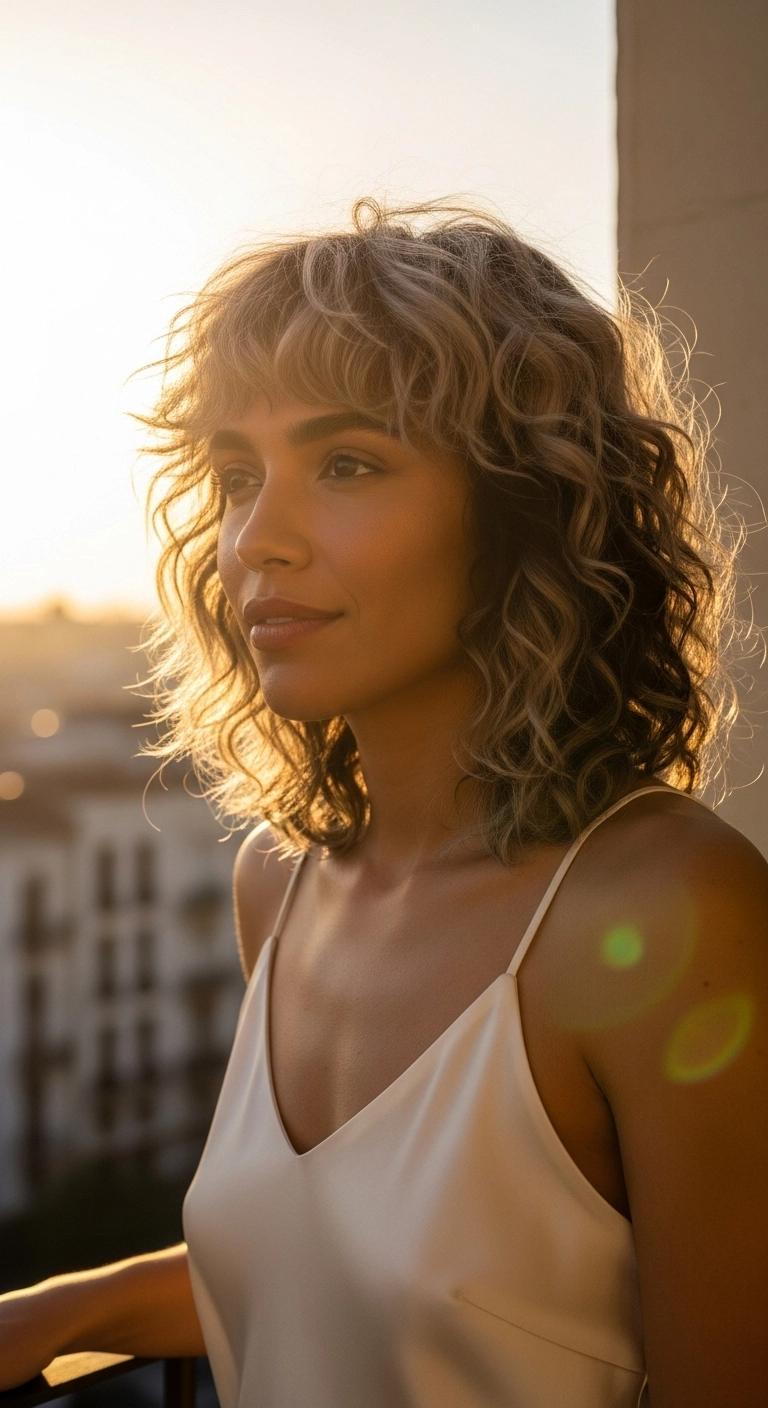
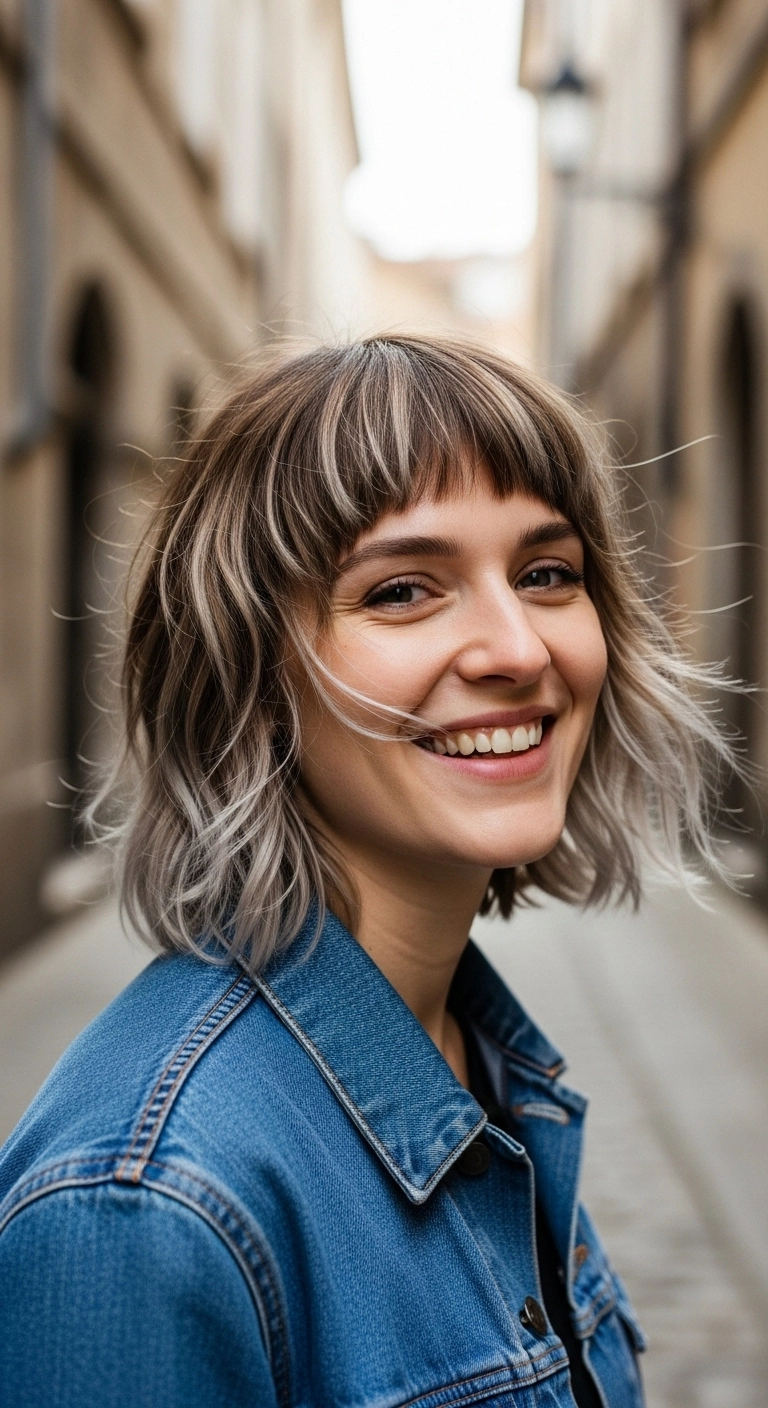
If you've been on the fence about getting bangs with your natural curls, this is your sign! A soft, shaggy lob with dimensional ash blonde balayage gives that effortless, rock-and-roll chic vibe without looking like you tried too hard.
How to do this
1. Start by washing hair with the sulfate-free curl enhancing shampoo listed below to keep your natural texture moisturized and bouncy.
2. On soaking wet hair, apply a generous dime-sized amount of the lightweight curl defining cream listed below from roots to ends, using praying hands to evenly distribute.
3. Gently comb through using the wide-tooth detangling comb listed below to encourage curl grouping and separation.
4. Cup sections of your curls in your hands and scrunch upwards toward your scalp, shaping the bangs with your fingers into soft, face-framing curls.
5. Attach the collapsible universal hair diffuser listed below to your blow dryer, setting it to low heat and low airflow, and gently cup ends until about 85% dry.
6. Once fully dry, mist the dry texturizing spray listed below at the crown and throughout the layers for that lived-in, effortless shaggy volume.
If you want that ultimate cool-girl hair that looks completely undone yet totally put together, this is it! The soft ash blonde balayage paired with a shadowy root gives so much depth, and that deep side flip adds instant, effortless drama. It’s chic, super flattering on almost every face shape, and so easy to style on busy mornings!
How to do this
1. Start on damp, freshly washed hair and apply a dollop of the volumizing root mousse listed below directly at your crown and root area for lift.
2. Mist hair from mid-lengths to ends with the heat protectant spray listed below, comb through gently to ensure even distribution.
3. Rough-dry your hair using a blow dryer until it is about 80% dry, flipping your head upside down occasionally to build baseline volume.
4. Switch to a medium ceramic round brush and finish drying in vertical sections, smoothing the lengths while keeping soft movement in the ends.
5. Create a deep, sweeping side part on your preferred side, allowing the heavier front section to drape naturally over your eye.
6. Take large, random 2-inch vertical sections and wrap them loosely around the 1.25 inch curling wand listed below for just 4-5 seconds, leaving the bottom inch out for that lived-in lob vibe.
7. Once all sections have cooled completely, gently rake your fingers through the waves to break them up into soft texture.
8. Shake and spray the dry texturizing spray listed below through the roots and mid-lengths to add airy body and definition.
9. Finish with a light mist of the flexible hold hairspray listed below to keep your sweep and texture looking effortless all day long.
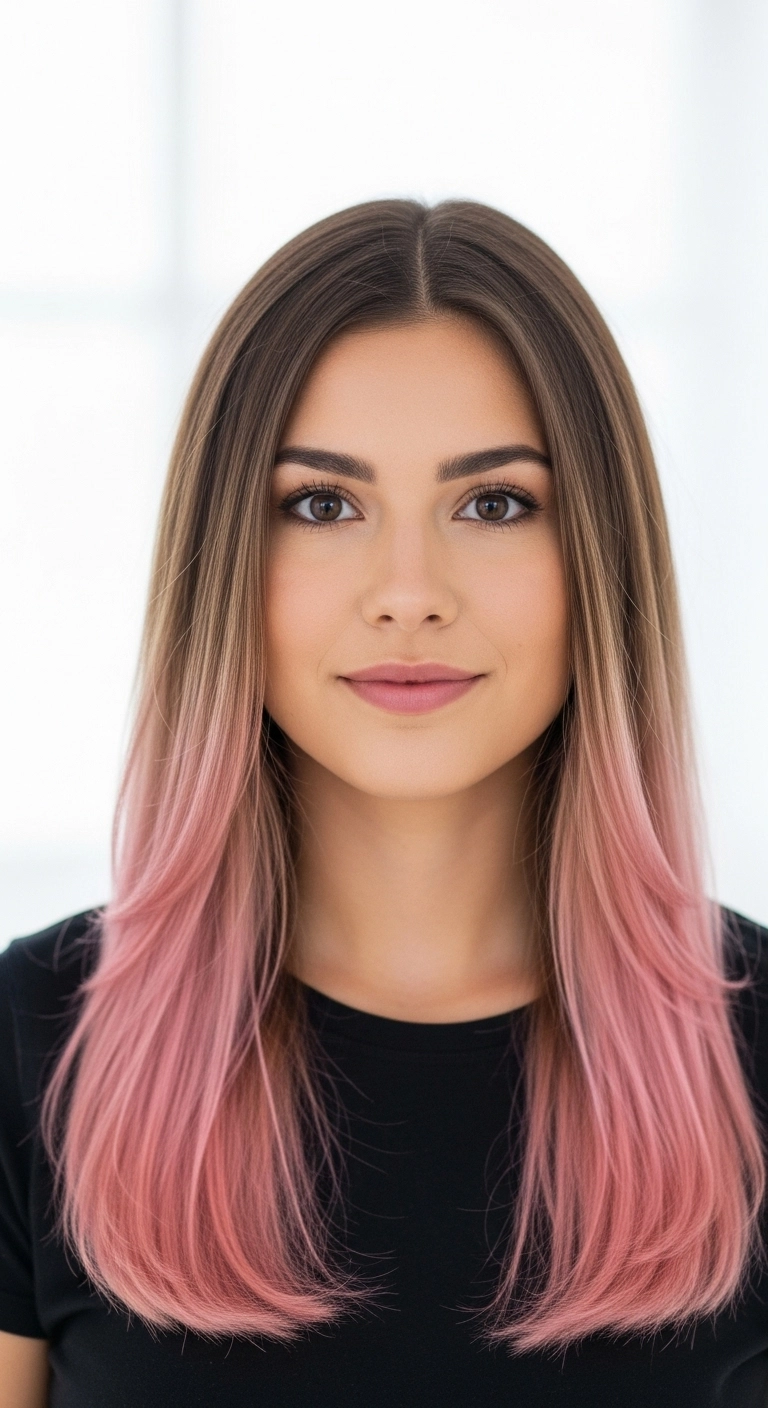
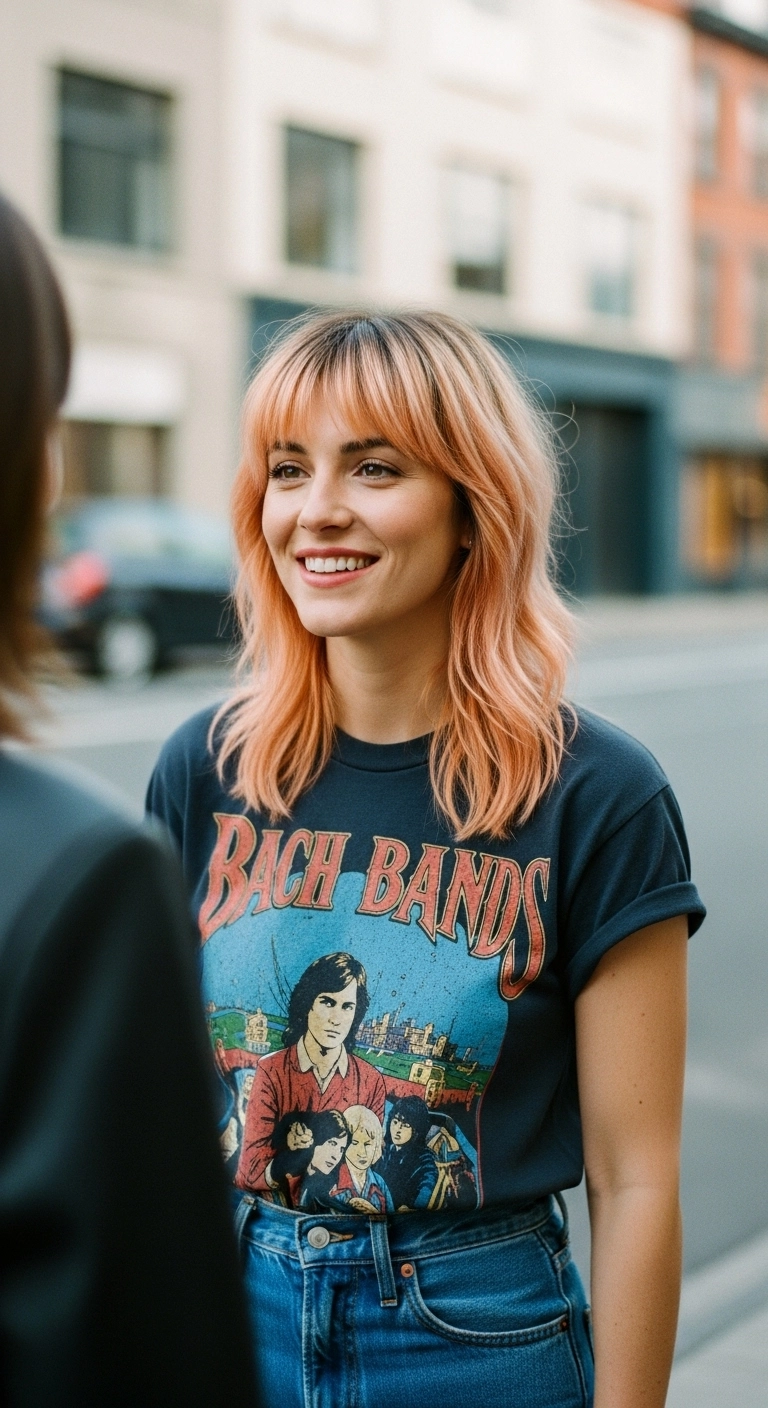
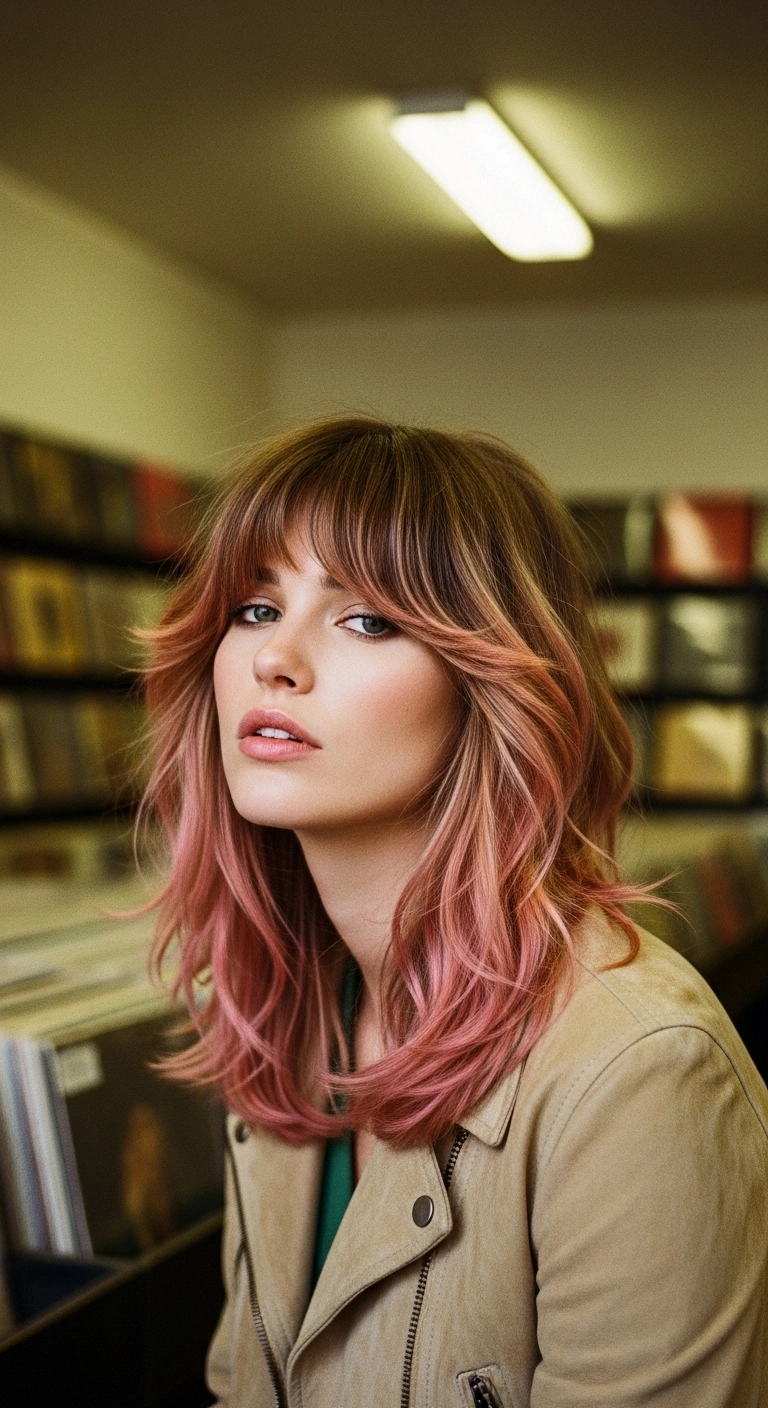
Adding a splash of pastel pink to your natural brown hair is such a fun, playful way to change up your look without committing to a full bleach job. The soft gradient fade keeps it super wearable and modern, while face-framing layers give your ends that bouncy, polished curve. If you want to keep the pink looking fresh between salon visits, just mix a little color-depositing conditioner into your routine once a week!
How to do this
1. Start by prepping clean, damp hair with a lightweight heat protectant smoothing cream listed below to shield strands and lock in smoothness.
2. Section the hair into manageable horizontal layers using sectioning clips.
3. Using the ceramic round blow dryer brush listed below, blow dry each section from roots to mid-shaft, keeping tension firm for maximum sleekness.
4. When you reach the mid-lengths and pastel pink ends, gently roll the brush inward toward your chest to bevel the feathered layers and give them a soft, bouncy curve.
5. Define the crisp middle part using the fine-tooth rat tail comb listed below.
6. Warm two drops of the weightless shine hair serum listed below in your palms and glide it lightly down the mid-lengths to the ends to tame any flyaways and boost vibrancy.
7. Finish the style with a light mist of the flexible hold hairspray listed below to maintain the soft inward bend all day.
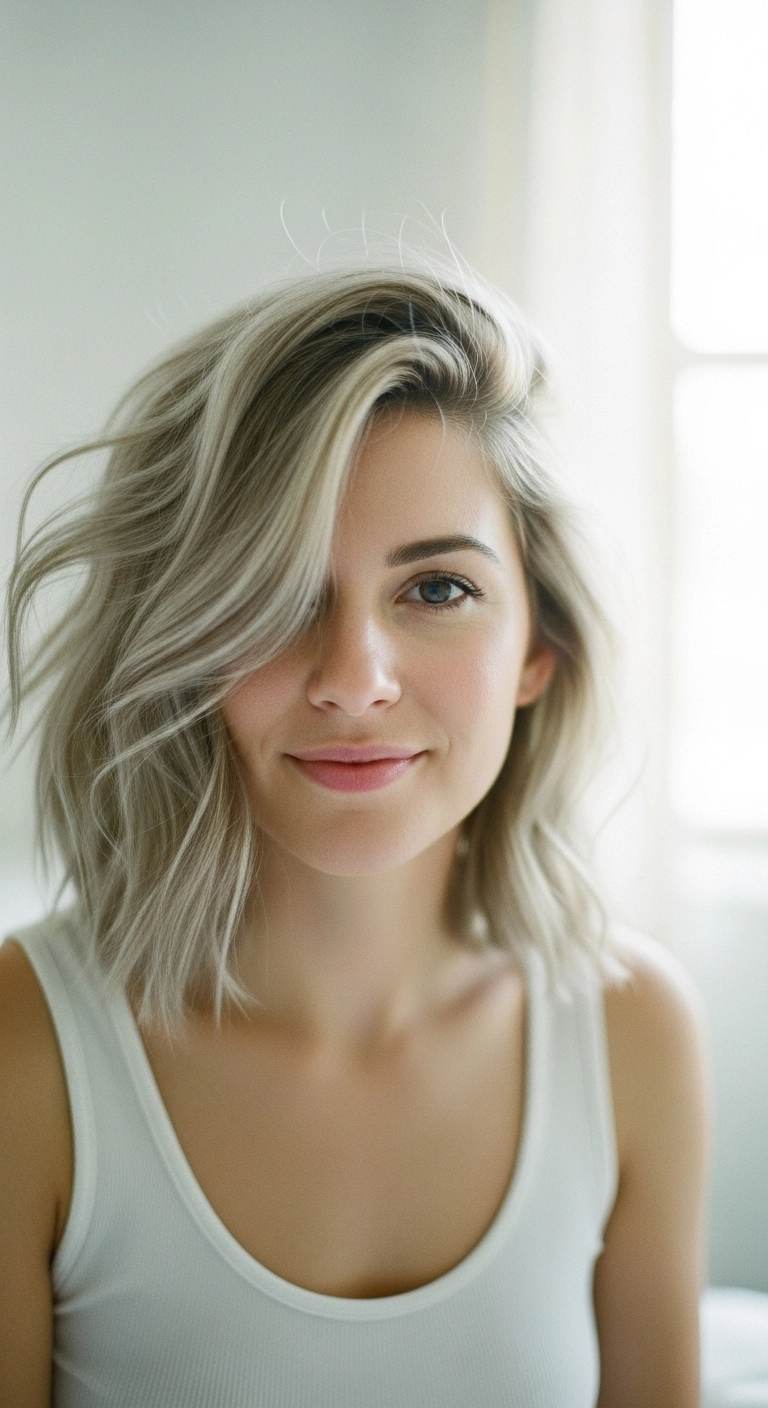
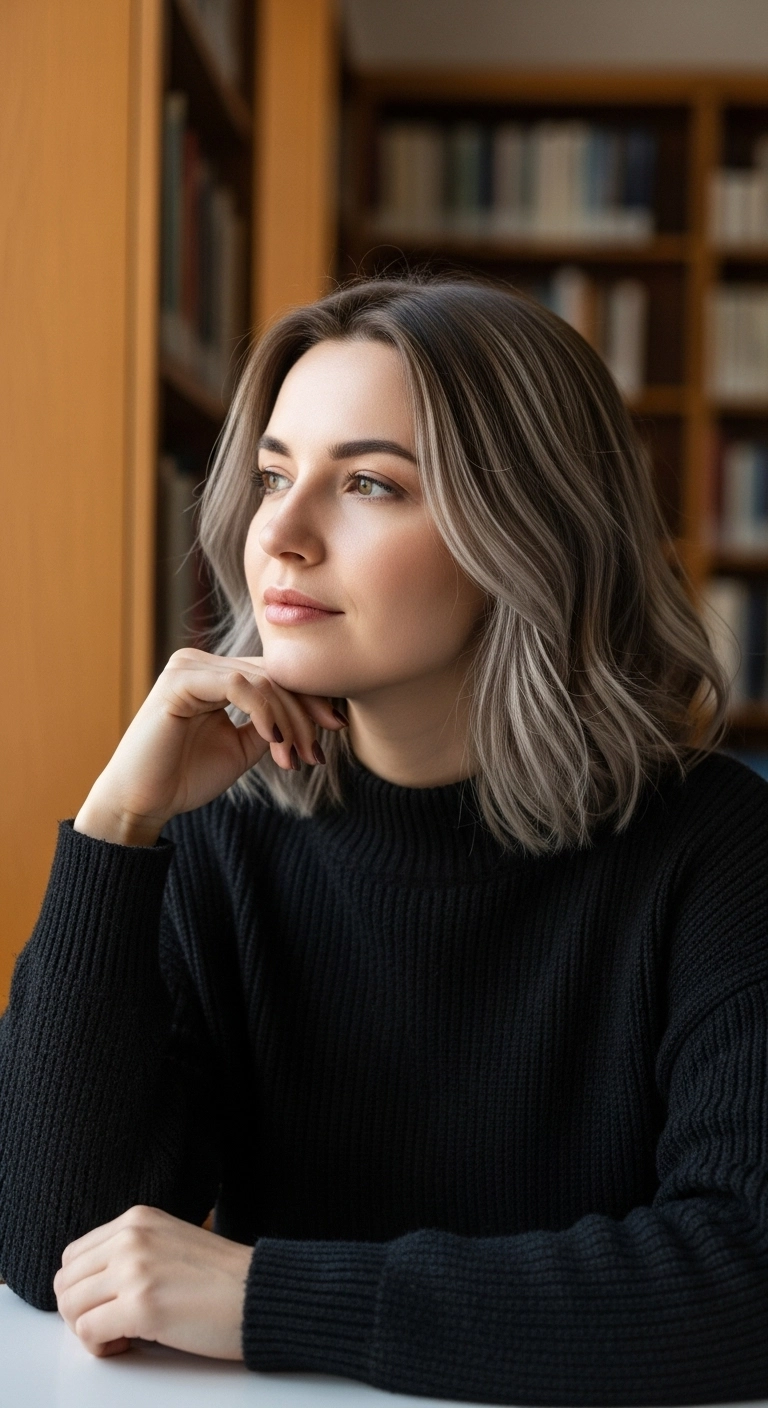
Mushroom blonde is seriously having its moment, and this cool-toned textured lob proves why! The shadowy root melt keeps it completely low-maintenance as it grows out, while the delicate ash blonde ribbons brighten everything up around your face. It's the ultimate effortless, cozy vibe that looks chic whether you're reading in a coffee shop or running out the door.
How to do this
1. Start by washing hair with a purple toning shampoo and a nourishing conditioner to keep cool ash tones crisp and banish brassiness.
2. On towel-dried hair, apply a dime-sized amount of the heat protectant blowout cream listed below throughout your mid-lengths and ends.
3. Blow dry using a large ceramic round brush, lifting at the roots for soft volume while smoothing the hair cuticle downward.
4. Take 1.5 to 2-inch vertical sections and loosely wrap the mid-lengths around a large barrel ceramic curling wand, leaving the last inch of the ends out for that relaxed, modern lob shape.
5. Alternate the curl direction away from the face, making sure the front face-framing pieces sweep gently outwards away from your eyes.
6. Once the curls have completely cooled down, gently comb through using the wide-tooth comb listed below to transform curls into effortless loose bends.
7. Finish the look by misting with the dry texturizing spray listed below at the roots and mid-shaft for lived-in fullness and airy separation.
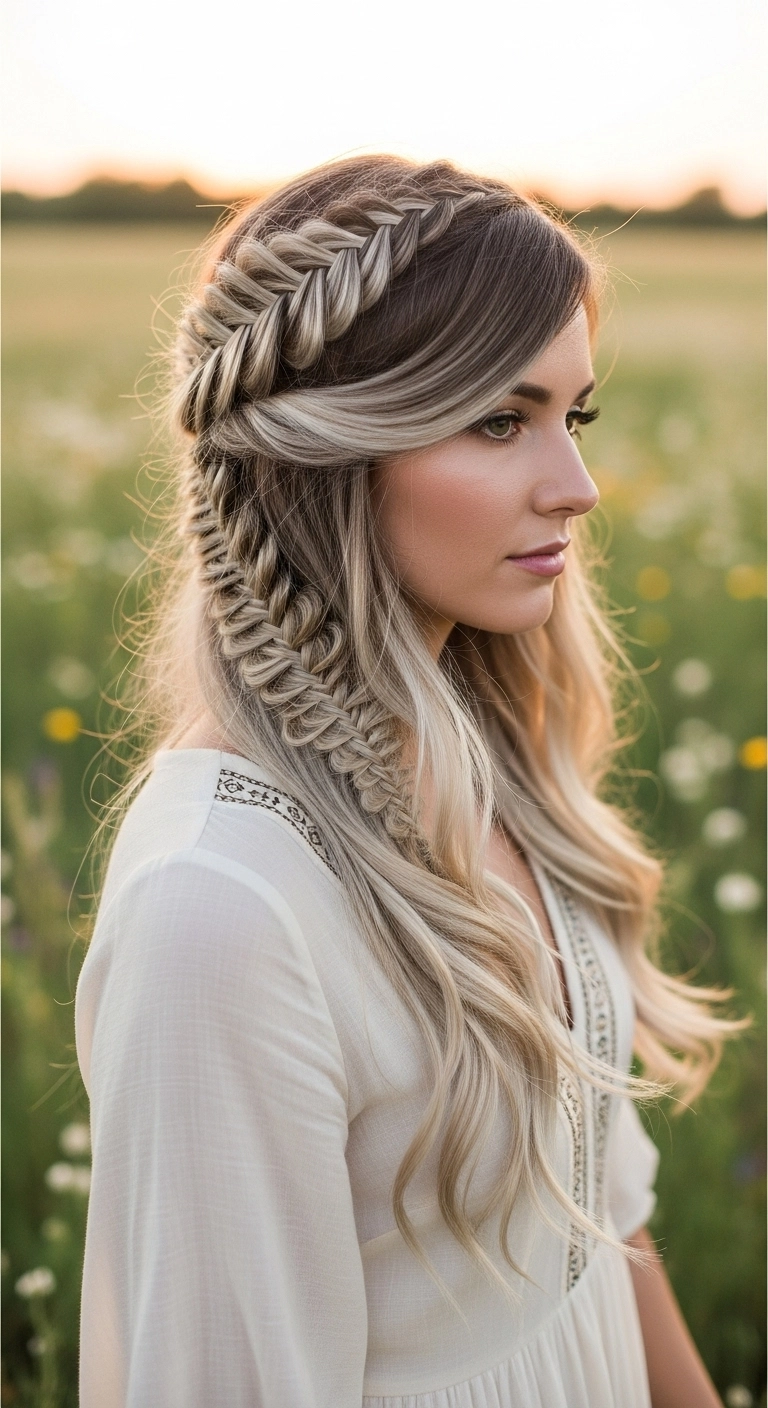
Braids will always be an absolute showstopper for romantic events and festival days. A detailed fishtail halo woven effortlessly into flowing mermaid waves creates unmatched dimension, especially on highlighted or balayage hair. If you want that full, ethereal look, never forget to pancake your braid gently once it's tied off—pulling apart those loops transforms a tight braid into a lush bohemian masterpiece!
How to do this
1. Start on clean, dry hair and prep the lengths with the thermal protection spray listed below before adding soft, loose waves with a 1.25-inch curling iron.
2. Mist hair with the dry texturizing spray listed below to add grip, making the braids hold securely without slipping.
3. Section off a deep side fringe across your forehead to frame your face softly, clipping it out of the way for now.
4. Starting near the crown on the heavy side of your part, grab a section of hair and begin an inverted Dutch fishtail braid, incorporating small pieces from each side as you curve it around the back of the head.
5. Continue braiding toward the side and down alongside the neck, transitioning into a traditional cascading fishtail braid through the mid-lengths, leaving the remaining hair flowing loose underneath.
6. Secure the end of the braid with a mini clear elastic band listed below.
7. Gently pancake the edges of both the crown braid and the hanging fishtail by pulling slightly on the loops to create maximum volume and dimension.
8. Blend the side-swept bangs smoothly over the temple, tucking the end neatly into the base of the braid, and finish with a mist of the flexible hold hairspray listed below.
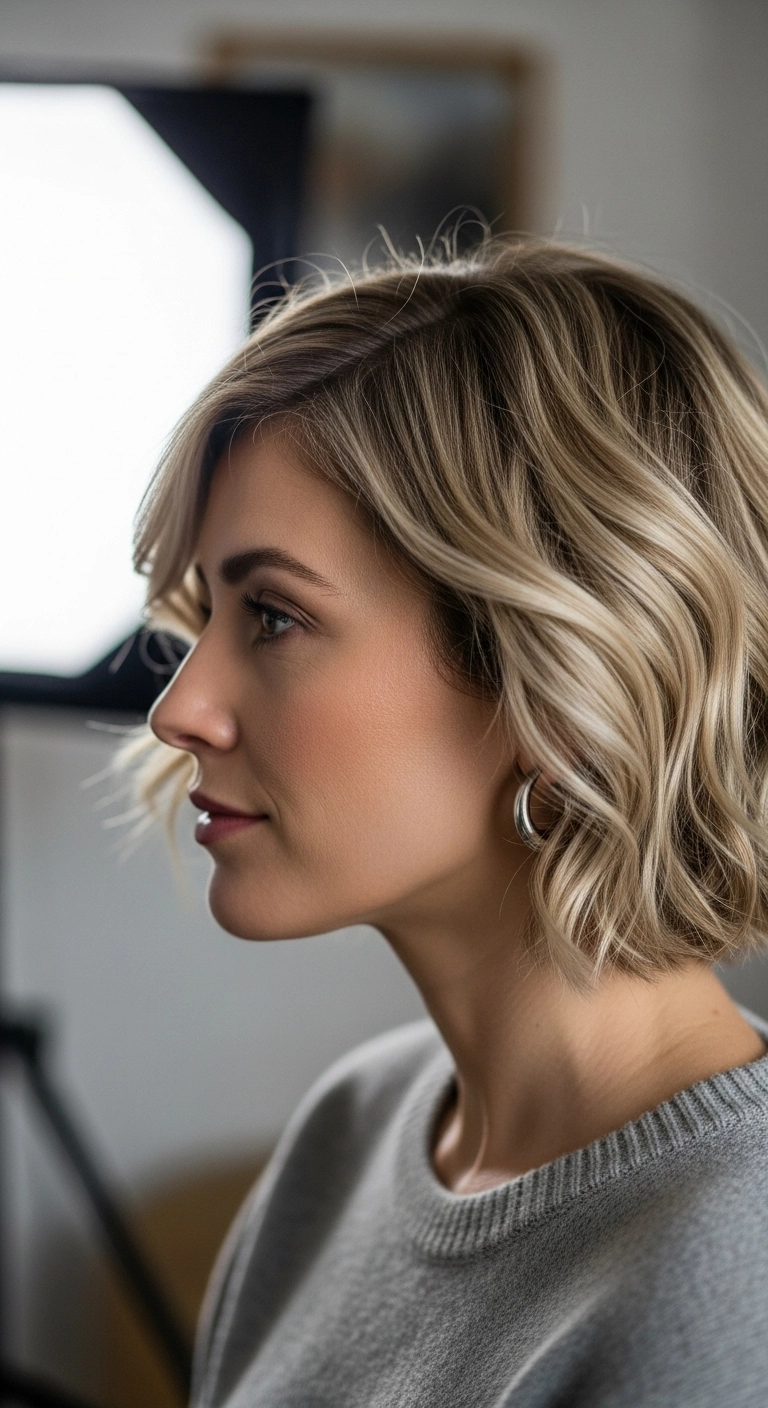
Oh, the wavy bob with cool ash blonde ribbons, how I love thee. It's so effortless, lived-in, and chic! Have you ever taken the plunge and chopped your hair into a bob like this?
How to do this
1. Prep clean, towel-dried hair by misting evenly with the heat protectant spray listed below to shield strands from hot styling tools.
2. Blow-dry using a medium round ceramic brush, lifting at the roots around the crown and side part to build soft, airy volume.
3. Section the hair horizontally into two manageable tiers to prepare for curling.
4. Take 1-inch vertical sections and loosely wrap them around the 1.25-inch curling iron listed below, leaving the bottom half-inch of the ends straight for that relaxed, modern bob shape.
5. Direct the front sections away from the face to create a soft, flattering side-swept swoop across the temple.
6. Once the curls have completely cooled, lightly rake through them with your fingers to break up the pattern into effortless S-waves.
7. Finish by spritzing the dry texturizing spray listed below through the mid-lengths and ends for separation, touchable texture, and all-day hold.
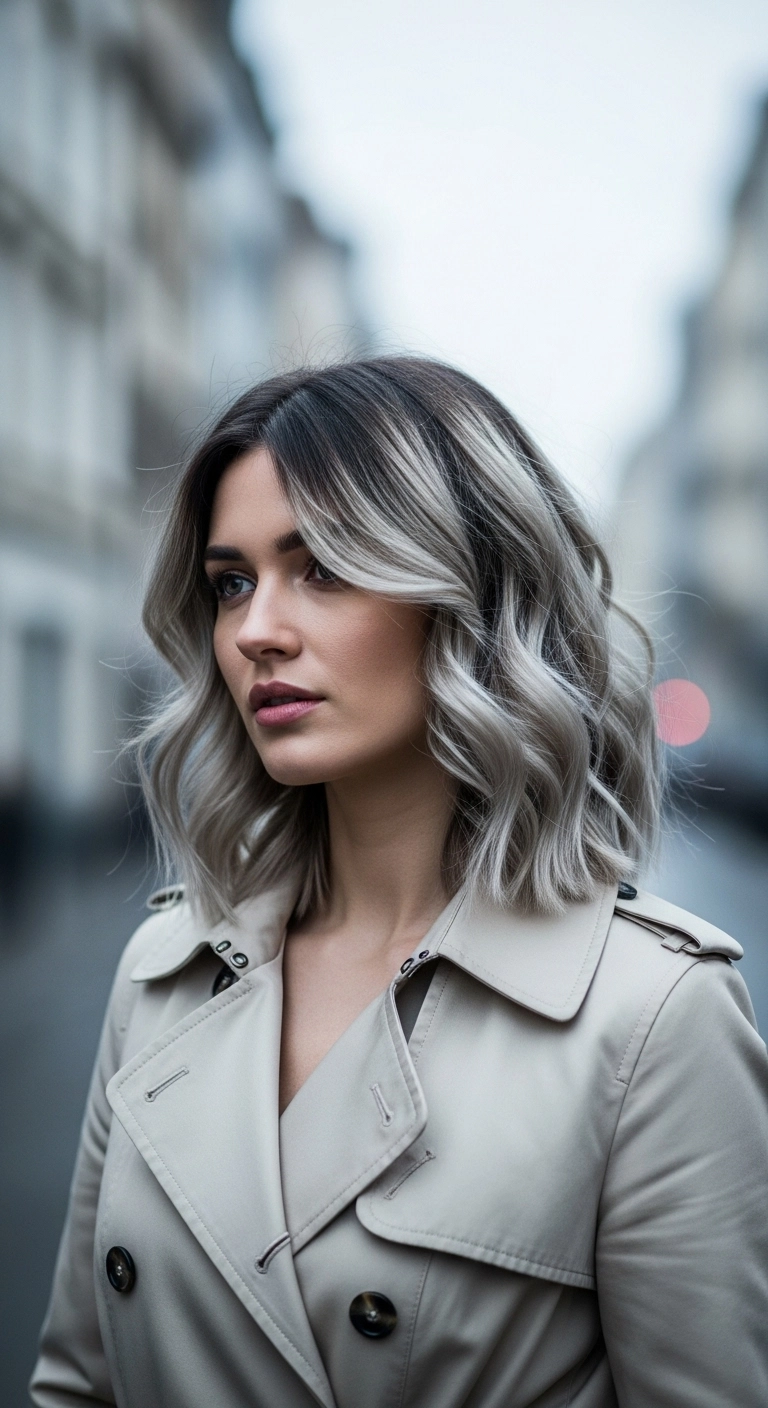
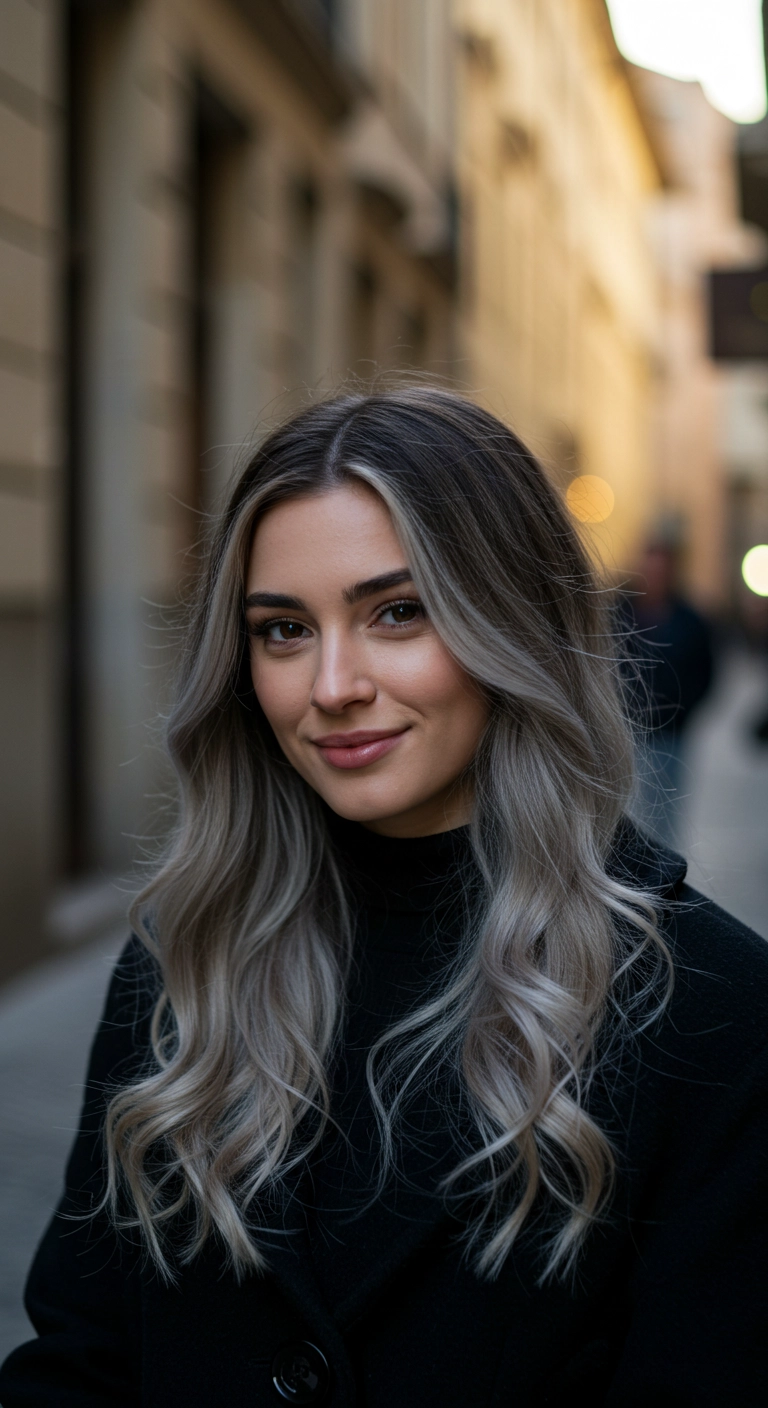
I love how effortless a textured lob looks when paired with a dramatic, cool-toned color melt! The deep ash brown shadow root blends seamlessly into shimmering silver-blonde lengths, making grow-out super forgiving. Adding soft, sweeping curtain bangs and undone loose waves brings movement that frames the cheekbones perfectly without feeling too styled.
How to do this
1. Prep clean, towel-dried hair with a lightweight heat protectant spray using the heat protectant spray listed below to shield strands from thermal styling.
2. Blow dry using a large ceramic round brush, focusing on lifting the roots at the crown and smoothing out the lengths for a silky, airy foundation.
3. Part the hair down the center and divide into manageable upper and lower sections.
4. Using the 1.25-inch curling iron listed below, wrap medium vertical sections away from the face, leaving the bottom inch of the ends out to maintain that modern, relaxed lob shape.
5. For the curtain fringe, gently curl outward and back away from the cheekbones to create a soft, cascading bend.
6. Allow all curls to cool completely, then mist hair thoroughly with the texturizing wave spray listed below.
7. Gently comb through with a wide-tooth comb or your fingers to break apart the curls into effortless, lived-in S-waves, and finish with a drop of nourishing hair oil through the mid-lengths and ends for silver shine.
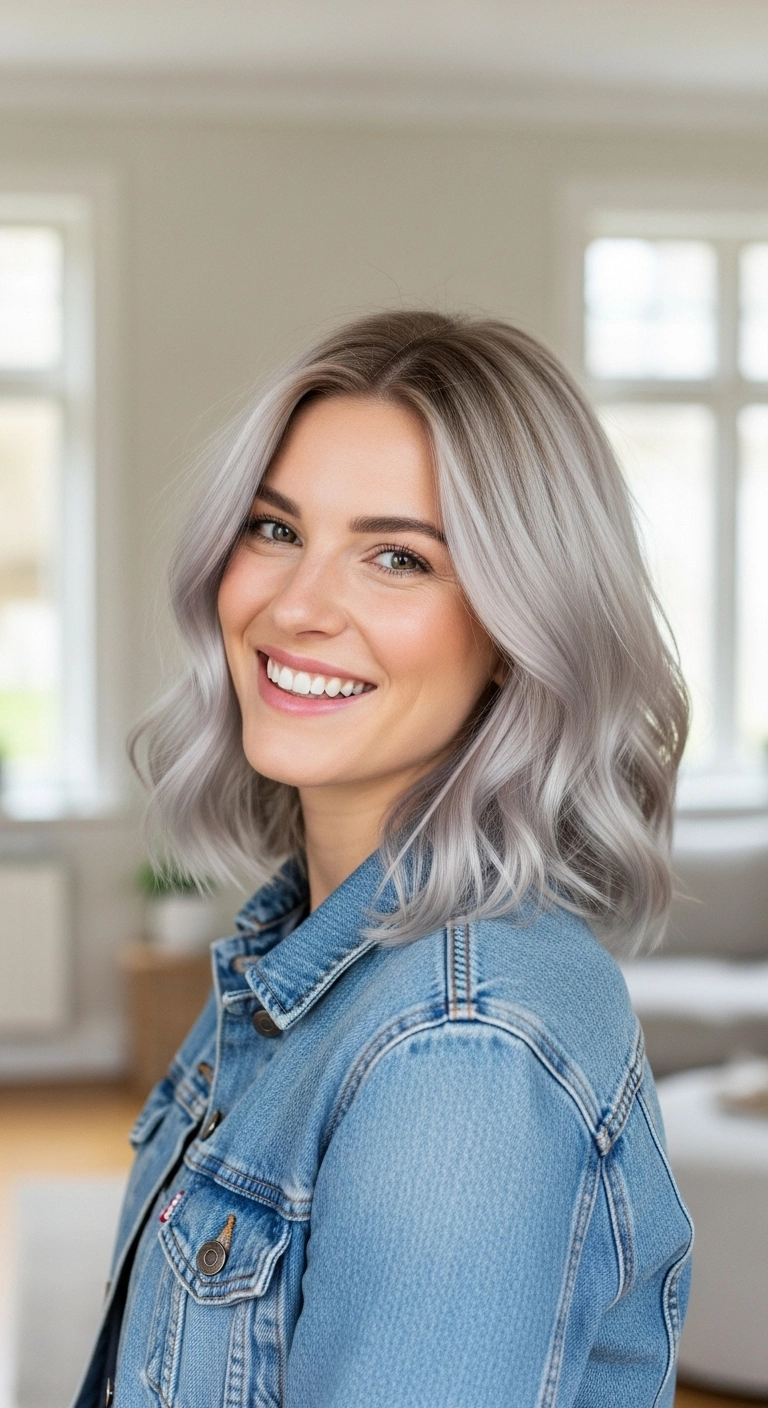
I am completely obsessed with this icy silver lob! It looks so fresh and modern paired with a natural shadow root so you don't have to stress about immediate regrowth. My favorite way to wear it is with these loose, lived-in S-waves turned away from the face—it gives that effortless, cool-girl energy without trying too hard.
How to do this
1. Start on freshly washed hair and apply a generous mist of the heat protectant spray listed below from roots to ends before blow-drying smooth with a round brush.
2. Section your lob horizontally into manageable 1.5-inch sections, clipping the top portion away.
3. Take vertical subsections and wrap them loosely around the 1.25-inch curling iron listed below, leaving about an inch of the ends straight for that relaxed, modern lob silhouette.
4. Alternate the curl directions around the back, but be sure to curl the front face-framing pieces back and away from your cheekbones.
5. Allow the curls to completely cool down so the shape sets, then gently rake through your waves using the wide-tooth comb listed below.
6. Spritz the dry texturizing spray listed below through the mid-lengths and shake the hair out with your fingers to create effortless volume and lived-in separation.
7. Finish by applying a tiny drop of the lightweight hair serum listed below onto the ends to keep that icy silver tone glossy and eliminate flyaways.
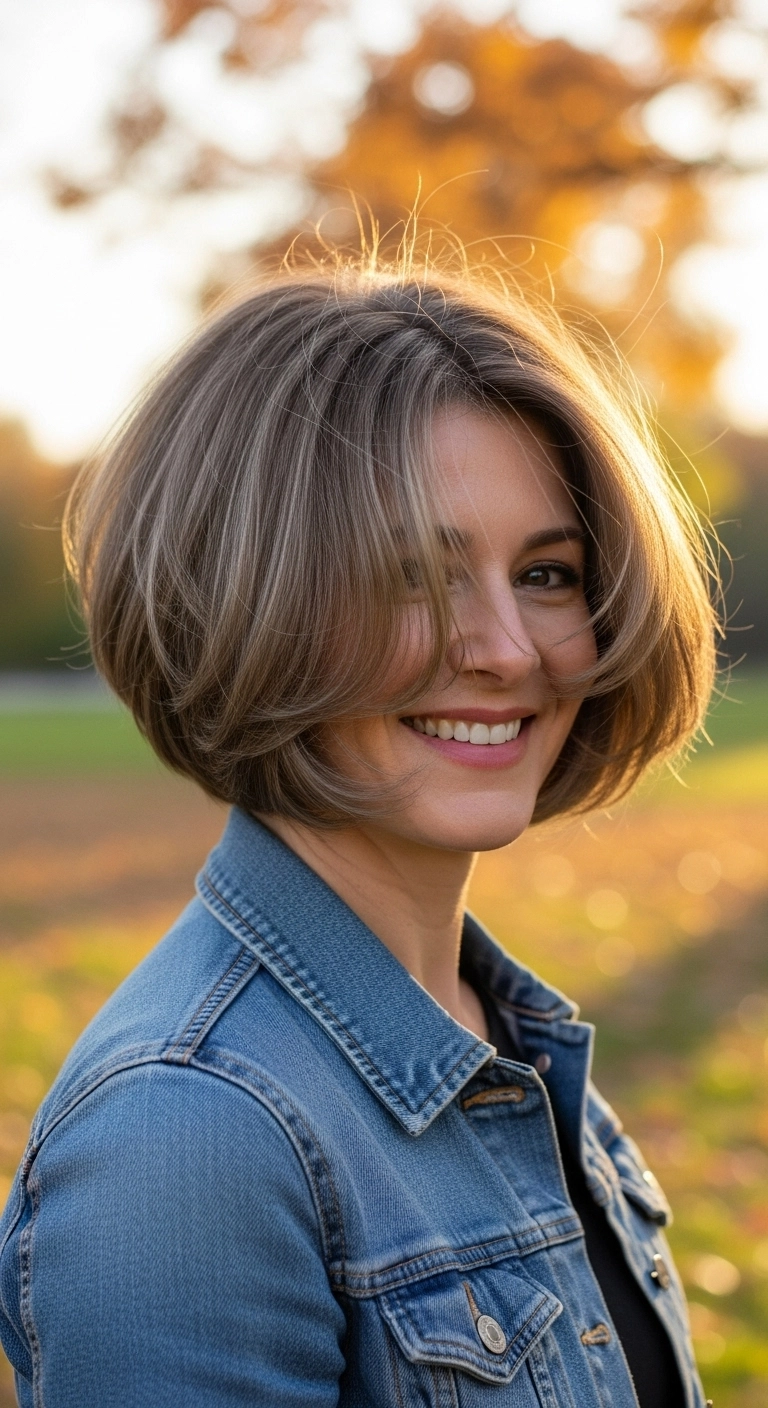
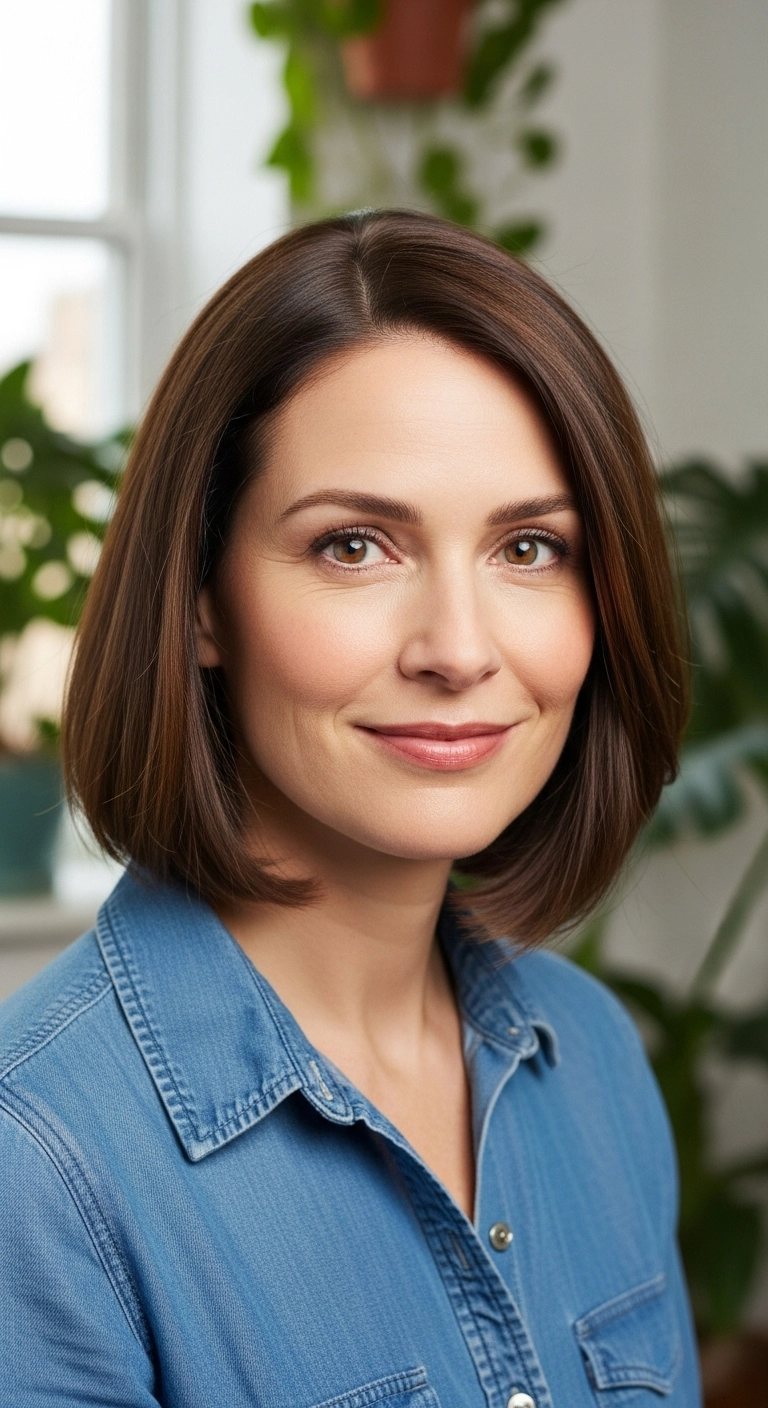
The bouncy rounded bob with cheek-sweeping curtain bangs. Such a timeless, flattering cut! I love how the soft under-curled ends hug the jawline while giving your hair tons of effortless fullness. It's chic, light, and looks amazing whether you're running errands or headed to a fancy dinner.
How to do this
1. Start by washing hair with a volumizing shampoo and apply a lightweight leave-in conditioner to damp strands.
2. Prep clean, damp hair using the heat protectant blowout spray listed below from roots to ends to protect against styling heat and boost body.
3. Apply a dollop of volumizing root mousse to the crown area to ensure full, airy lift.
4. Section hair into manageable horizontal tiers, starting at the nape of the neck.
5. Using the ceramic round blow dry brush listed below and a focused concentrator nozzle on your blow dryer, roll hair under smoothly while directing airflow downward to create rounded shape and sleek bevels.
6. At the crown and around the face, blow dry the face-framing curtain bangs up and back to encourage a soft, curtaining sweep over the cheekbones.
7. Finish by misting with the flexible hold hairspray listed below and lightly applying the lightweight smoothing hair oil listed below to the ends for brilliant, touchable shine.
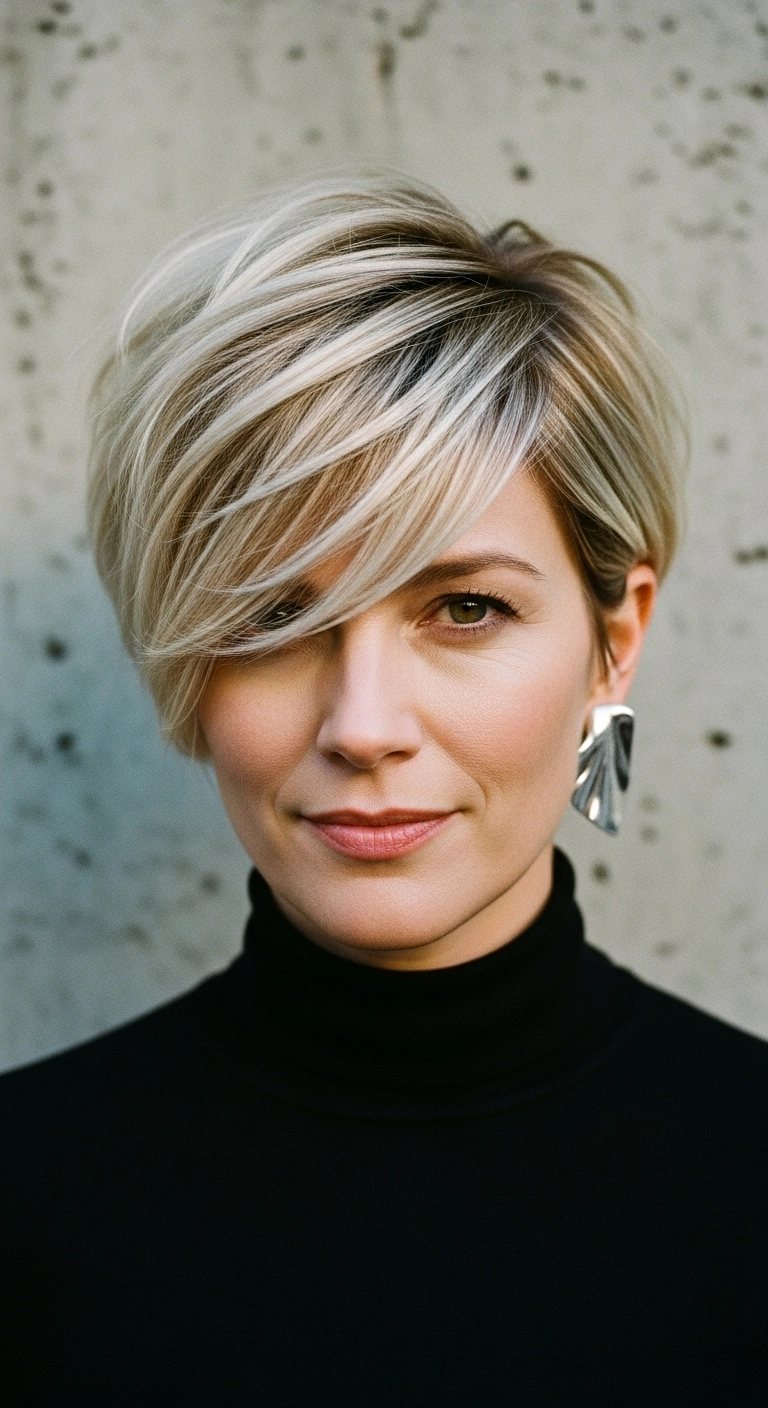
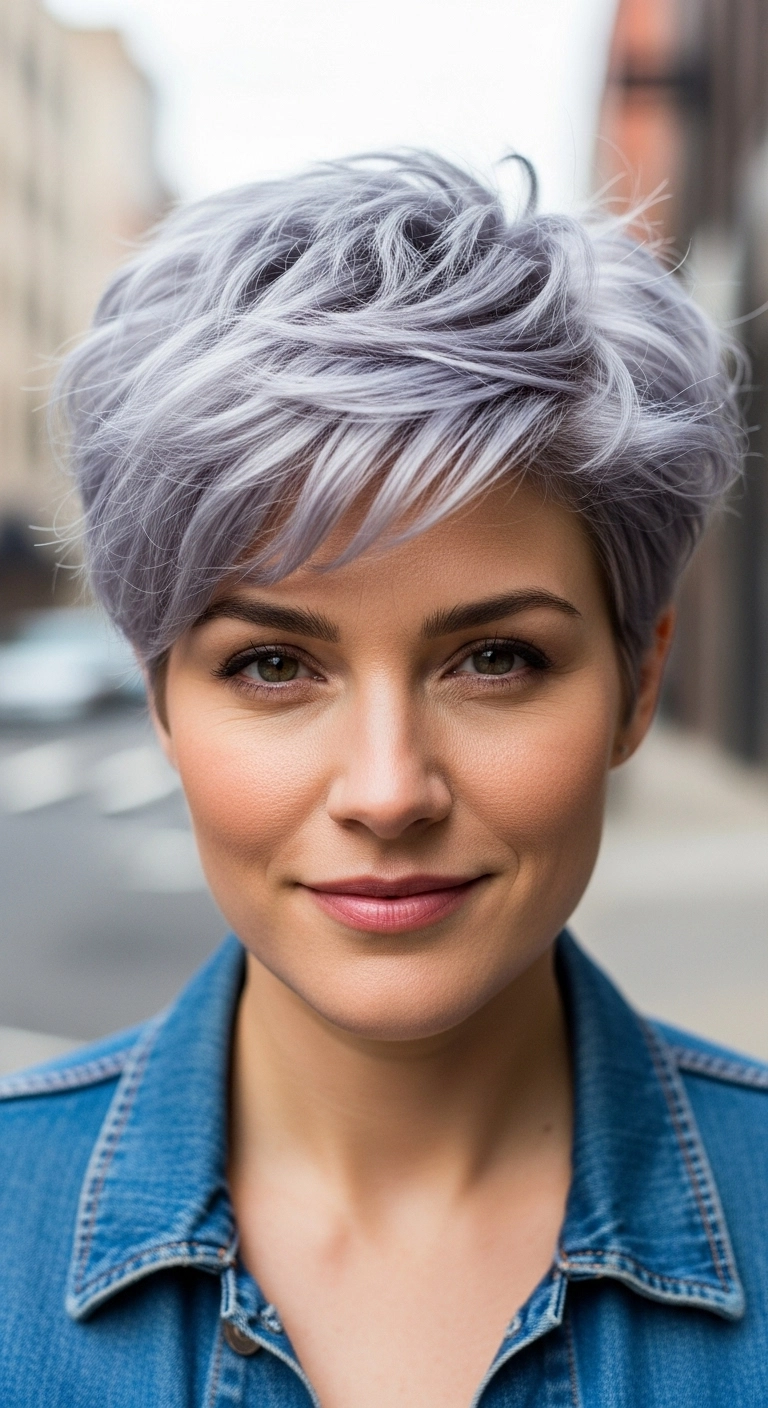
I’m absolutely in love with this cut because it gives you all the chic edge of a short crop while still keeping that gorgeous, feminine fringe to play with. It takes barely ten minutes to style in the morning with a quick blow-dry, and it looks insanely put-together whether you're heading into an important meeting or going out for dinner. Definitely give this modern pixie a try if you're ready for a fresh, sophisticated change!
How to do this
1. Start by prepping freshly washed, damp hair with a small amount of the lightweight volumizing mousse listed below, working it from roots to ends for lift.
2. Spray the heat protectant spray listed below evenly throughout your hair to guard against blow dryer heat and keep fine strands silky.
3. Using a small to medium ceramic round brush, blow-dry the top sections forward and over to the side to create that dramatic, face-skimming swoop.
4. Blow-dry the sides and nape flat against the head using a flat paddle brush or styling comb for a sleek, tapered finish.
5. Warm a pea-sized amount of the pliable texturizing hair paste listed below between your fingertips and lightly piece out the ends of the sweeping fringe.
6. Finish with a gentle mist of the flexible hold hairspray listed below to lock the sweep in place while retaining soft, natural movement.
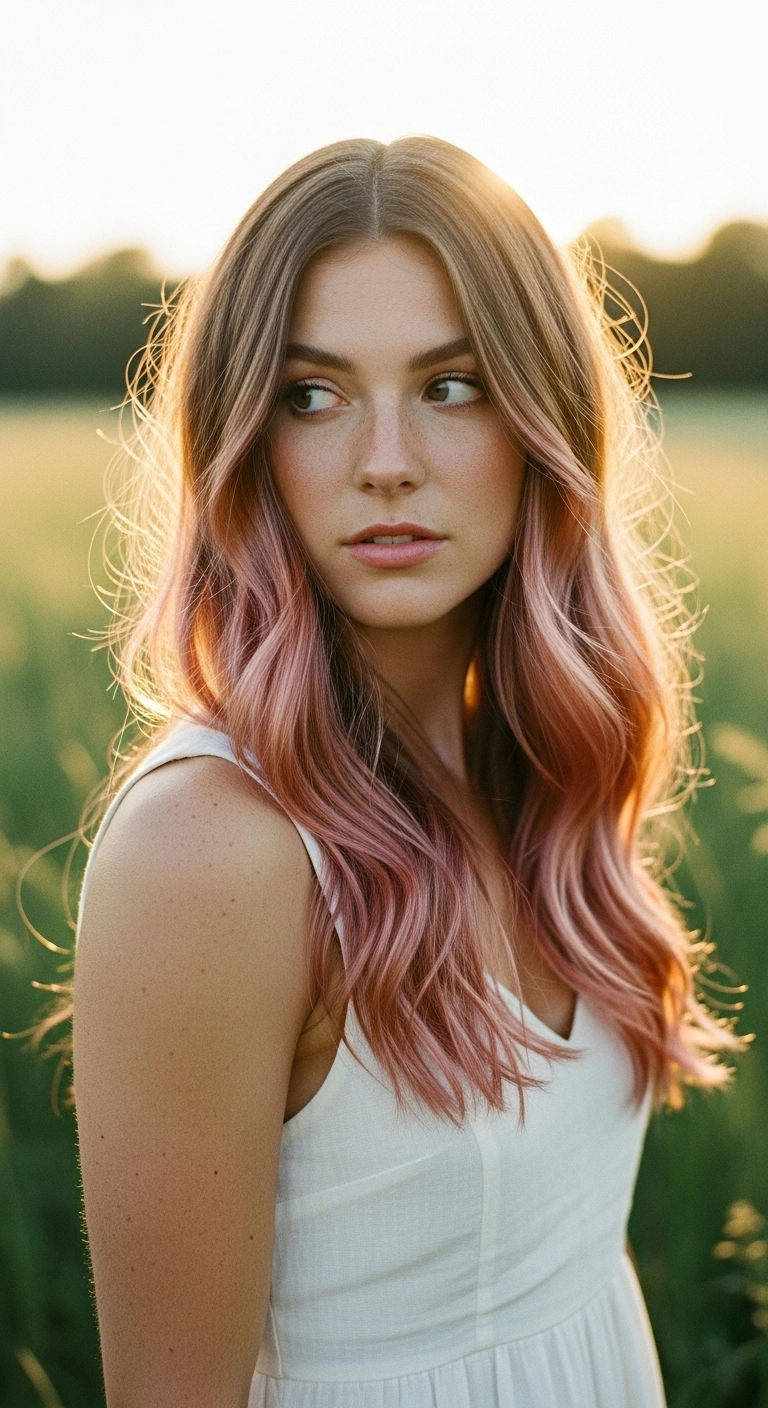
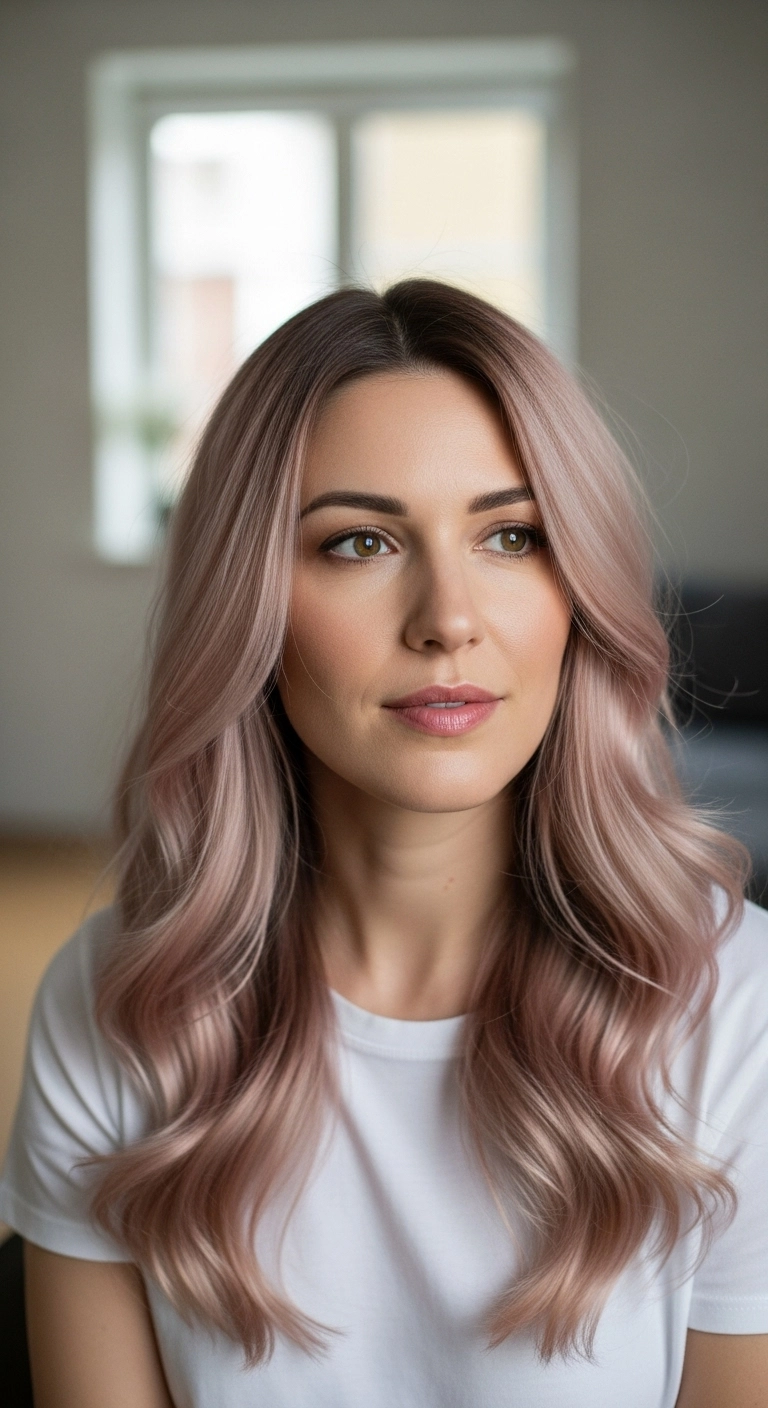
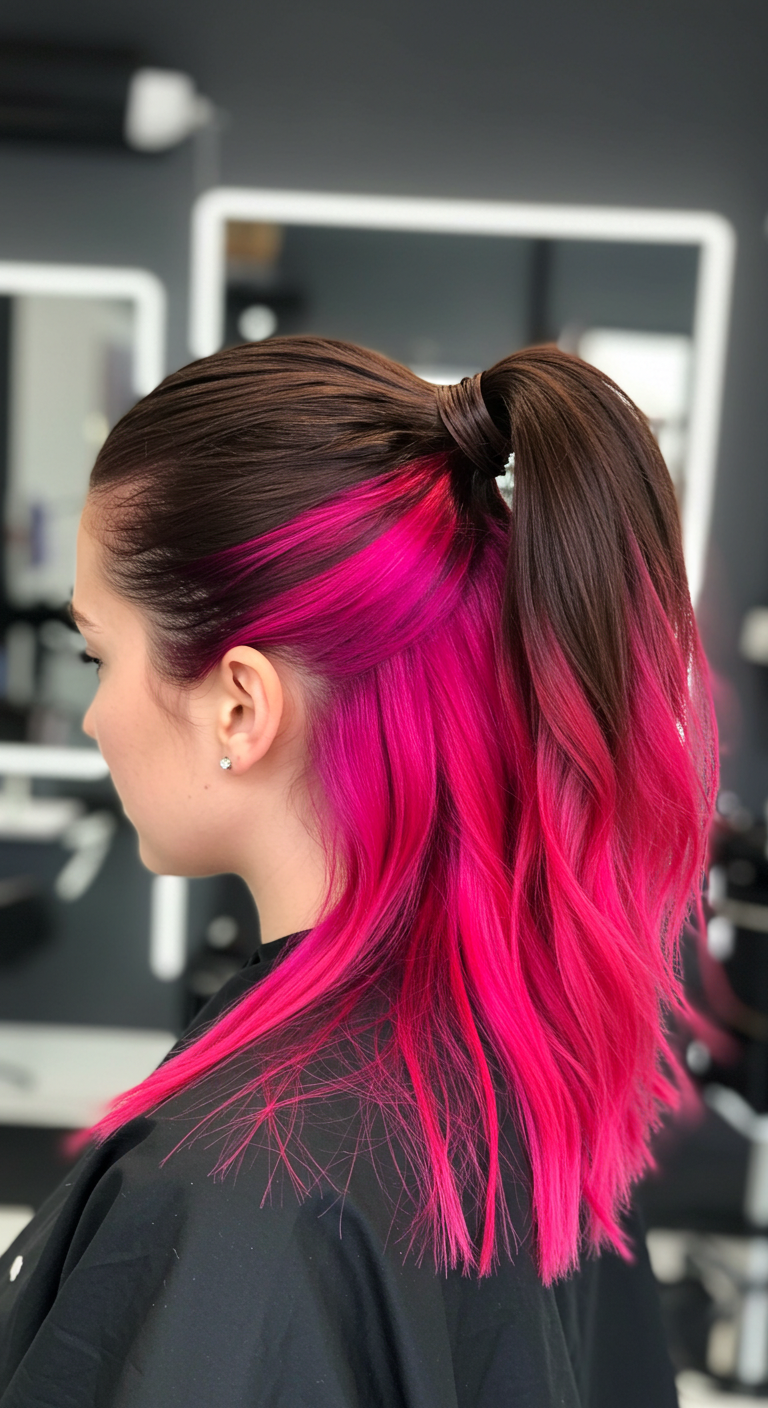
If you want to play with fun colors without committing to a full bleach-out, this pastel pink melt is an absolute dream! Keeping your natural brunette base at the roots makes grow-out totally effortless, while the dreamy rose gold ends give you that instant ethereal, golden-hour glow with zero fuss.
How to do this
1. Start by sectioning damp, clean hair and apply a generous misting of the heat protectant spray with argan oil listed below to shield strands from hot styling tools.
2. Blow dry using a round ceramic brush, lifting at the roots along the middle part to give natural, soft body.
3. Take 1.5 to 2-inch vertical sections and wrap them loosely around the 1.25 inch ceramic curling iron listed below, leaving the last two inches of the ends out for a lived-in wave.
4. Alternate the curl direction around the sides, but ensure the face-framing pastel sections are curled away from the face to showcase the soft rose tone.
5. Gently rake through the curls with a wide-tooth detangling comb to break them into fluid, effortless S-waves.
6. Work a pea-sized amount of the lightweight smoothing hair oil listed below through the mid-lengths and pink ends to enhance shine and eliminate flyaways.
7. Finish with a light spritz of the flexible hold hairspray listed below so the waves stay touchable and breezy all day long.
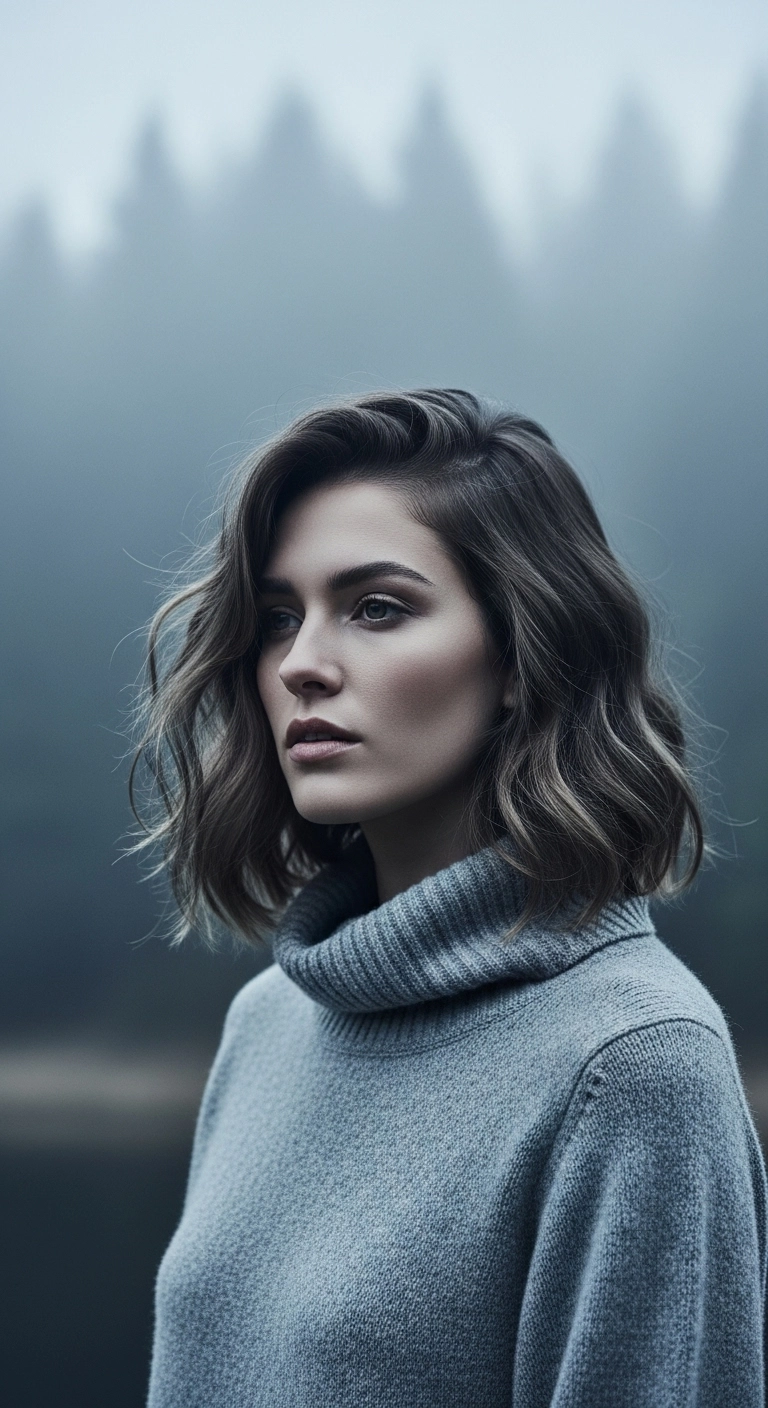
If you love low-maintenance hair that still looks put-together, this lived-in wavy lob is such a winner! I decided to sweep it into a deep side part to give it instant body without feeling stiff or over-styled. The subtle cool-toned babylights catch the light so nicely against the moody ash brown base. It's the kind of effortless, cozy style you can wear with an oversized turtleneck on a crisp weekend or dress right up for a dinner date!
How to do this
1. Start by prepping freshly washed, damp hair with a small amount of the volumizing mousse listed below, focusing on the roots for natural lift.
2. Blow dry using a medium ceramic round brush listed below, lifting upward at the roots and creating a deep, swooping side part to build soft volume on top.
3. Once the hair is fully dry, mist lightly with the thermal heat protectant spray listed below to shield strands from hot styling tools.
4. Take random 1.5-inch sections and wrap them loosely around the 1.25-inch curling wand listed below, leaving about an inch of the ends out to keep the lob modern and effortless.
5. Alternate directions with each curl to prevent them from clumping together, then let the waves completely cool down.
6. Gently shake out and separate the curls with your fingers or a wide-tooth comb.
7. Finish by spraying the dry texturizing spray listed below through the mid-lengths and ends for that undone, piecey movement and all-day hold.
I fell in love with this smoky rose gold shade the second I saw it! The seamless ash brown root melt makes growing it out feel completely effortless, while the metallic pastel tones give it that dreamy, high-end feel. Styled with soft, voluminous blowout waves, it frames the face beautifully without ever feeling too stiff or overdone. If you're looking to switch up your blonde or add some subtle pink romance to your everyday style, definitely give this shade a try!
How to do this
1. Prep freshly washed, damp hair by applying the lightweight heat protectant spray listed below from mid-lengths to ends.
2. Apply a dollop of the volumizing styling mousse listed below to your roots and mid-lengths to create body and hold for your blowout.
3. Blow dry using the large ceramic round brush listed below, lifting upward at the crown for maximum lift and rolling the front face-framing strands away from the face.
4. Once completely dry, wrap 2-inch vertical sections of hair around the 1.5-inch curling iron listed below, curling away from your face and leaving the last inch of hair out for that effortless, modern wave.
5. Allow the curls to completely cool, then gently rake through them with a wide-tooth comb or your fingers to break them into seamless ribbons.
6. Finish the look by misting with the luminous shine and flexible hold hairspray listed below to control flyaways and add a silky, glossy sheen.
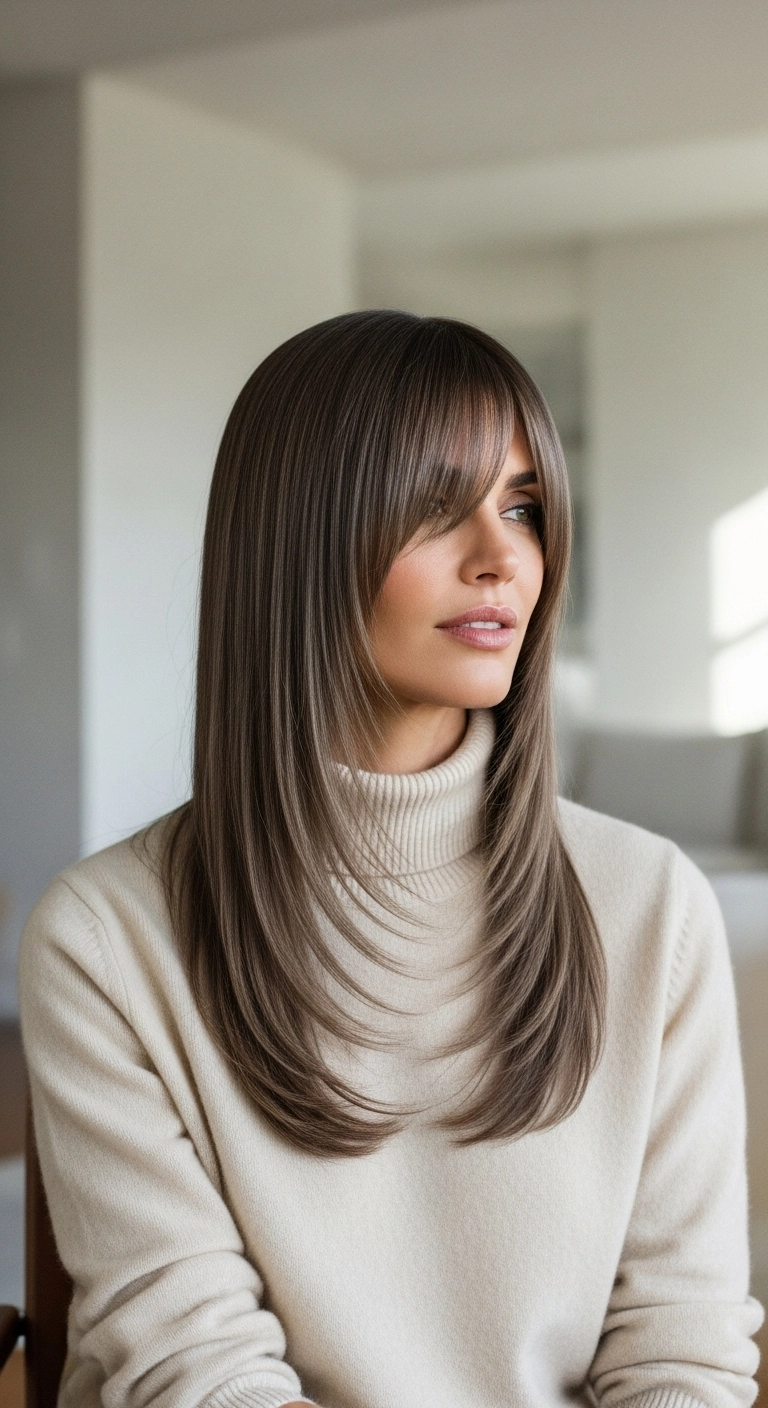
If you love that effortless 'expensive brunette' look, this style is definitely your next hair goal! The soft, sweeping curtain bangs blend right into cascading C-curve layers, giving you so much natural movement and bounce. It's super polished without looking overdone, perfect for looking effortlessly put-together every single day!
How to do this
1. Start with freshly washed, towel-dried hair and apply a smoothing blowout cream along with the heat protectant spray listed below to shield your hair and eliminate frizz.
2. Section out the bangs and front perimeter first. Blow-dry the curtain fringe using a round ceramic styling brush listed below, rolling forward and then sweeping them gently back to create that signature soft frame around your eyes.
3. Work through the rest of your hair in horizontal tiers from bottom to top, using the ionic blow dryer and round brush to smooth each strand from roots to ends.
4. As you reach the ends of each layered section, roll the brush inward toward your chest and hit it with the cool shot button to lock in that gorgeous curved C-shape.
5. Once fully dry and curved, work a few drops of the lightweight smoothing hair oil listed below through the mid-lengths and ends to give that ultra-glossy, liquid-smooth finish.
6. Mist lightly with the flexible hold hairspray listed below to keep every face-framing layer sitting perfectly all day long.
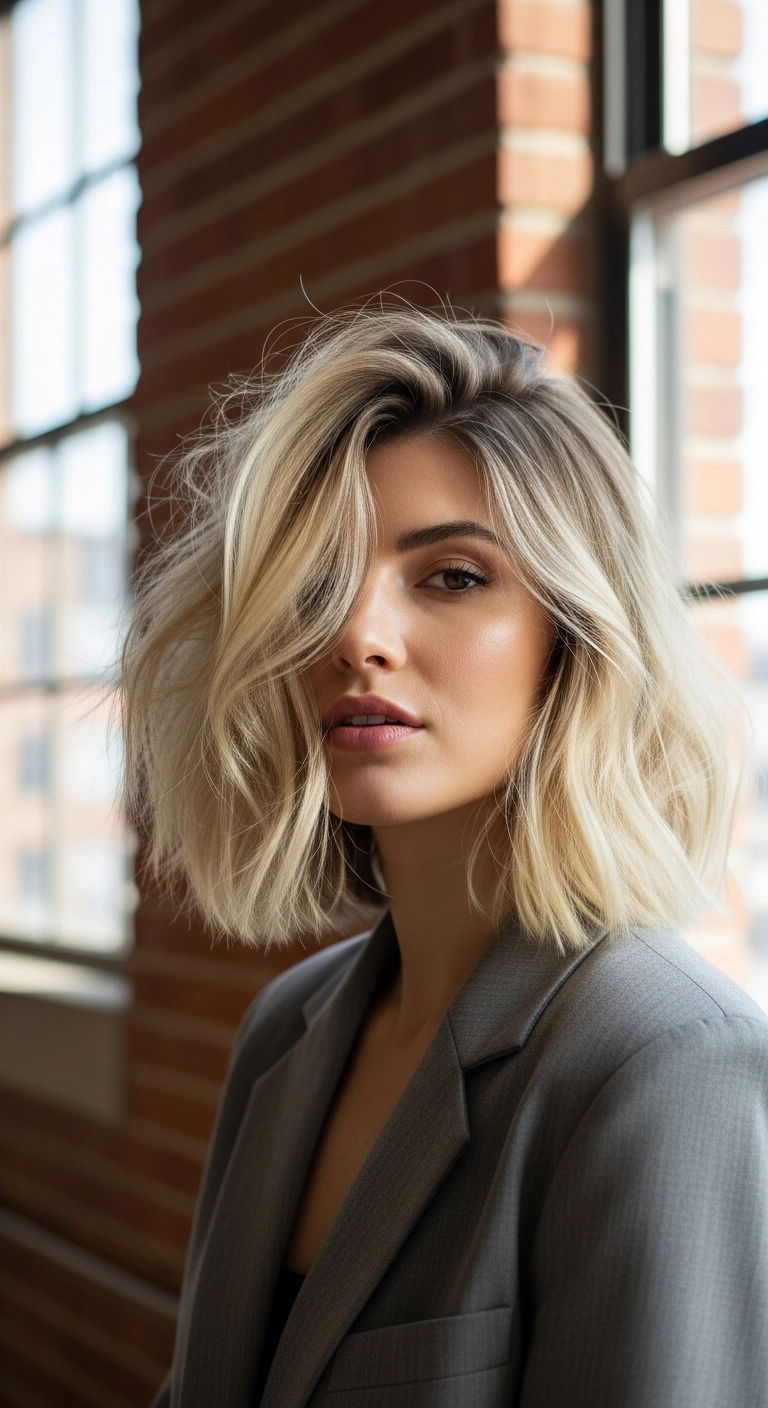
I think this textured blunt lob is hands down one of the most flattering, easy-to-wear cuts you can try if you want blonde without high-maintenance roots. The dark shadow root melt gives it that effortless, cool-girl vibe while letting your natural regrowth blend in smoothly. To get that perfectly undone finish, just curl a few random pieces away from your face and tousle it all up with a generous blast of texturizing spray!
How to do this
1. Start by prepping damp, towel-dried hair with a lightweight heat protectant spray with argan oil listed below to safeguard your bleached blonde ends from heat damage.
2. Apply a dollop of volumizing root lift mousse listed below right at your roots and flip your head upside down while rough blow-drying to maximize natural body and crown lift.
3. Once your hair is about 90% dry, grab a medium ceramic round hair brush listed below and smooth the lengths in medium sections, rolling the ends slightly under while lifting at the scalp for maximum bounce.
4. Take a 1.25-inch ceramic curling wand or iron listed below and wrap alternating 1-to-2-inch vertical sections loosely around the barrel, leaving the bottom inch out to keep that modern, blunt silhouette.
5. Use your fingers to break up the curls and create that undone, lived-in texture, then mist thoroughly with the dry texturizing spray listed below through the mid-lengths and crown for separation and hold.
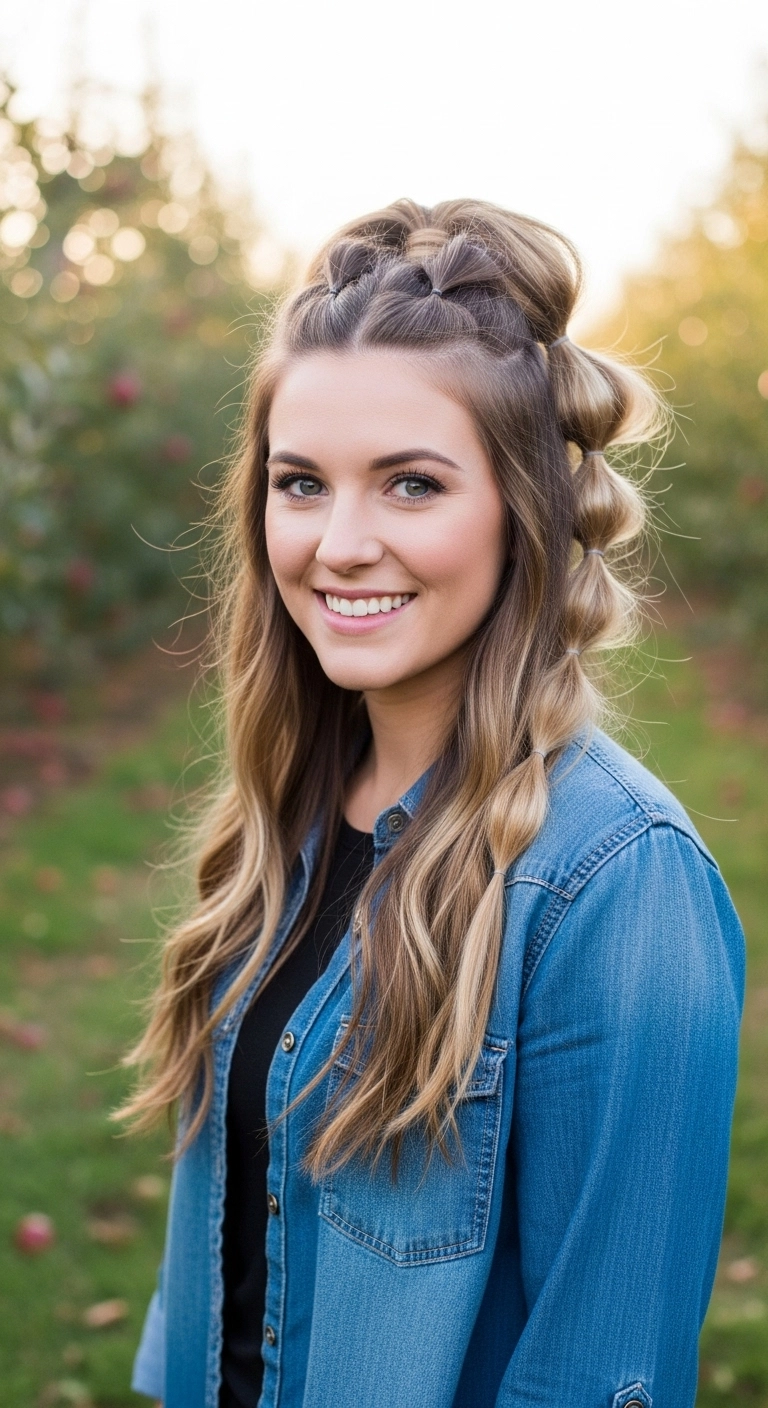
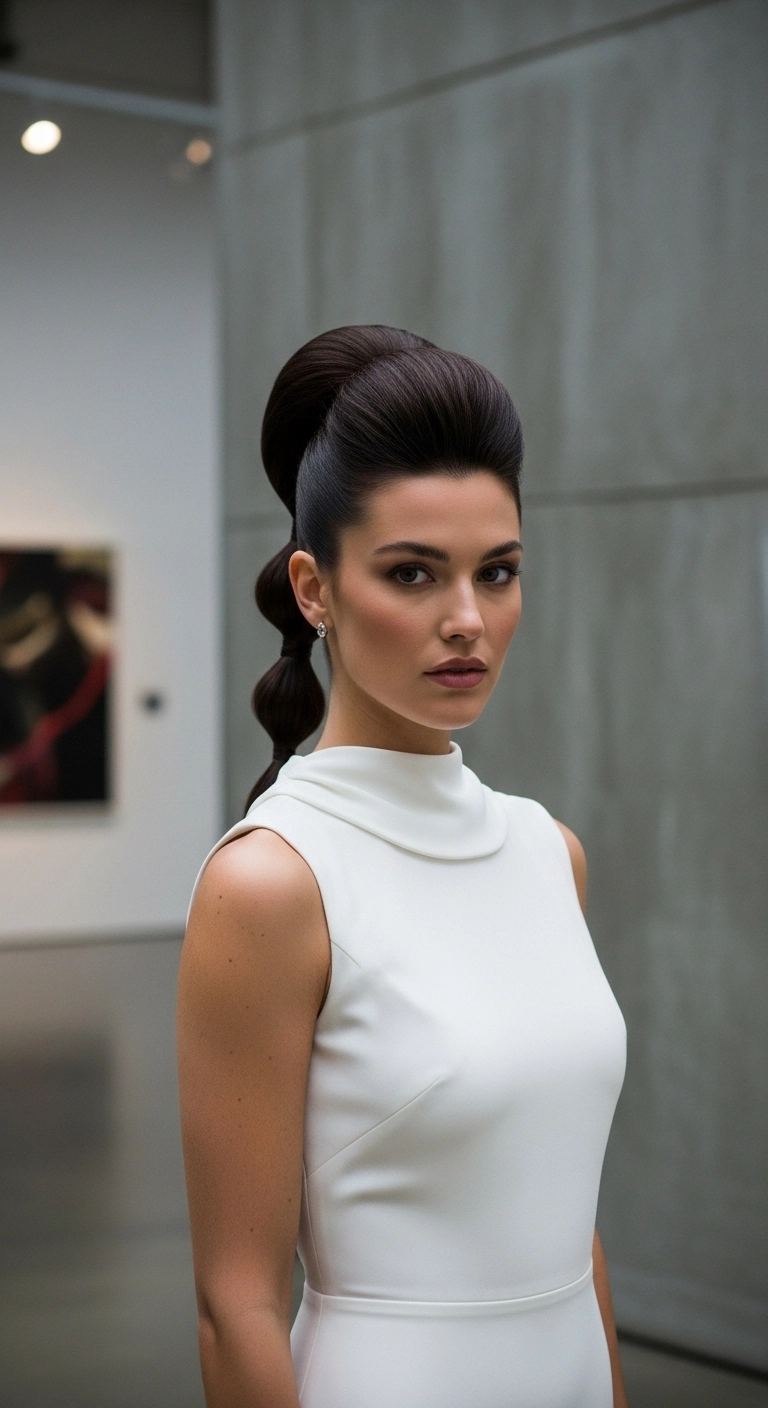
This one is super playful and totally upgrades a standard half-up hairstyle! Just pop in a few clear elastics, fluff them out into bubbles, and BOOM, you’ve got an effortless festival-ready look that took less than ten minutes to do.
How to do this
1. Start by prepping your dry hair with loose, soft bends using the 1.25-inch curling iron listed below to add subtle movement throughout.
2. Section off two small front pieces right near your center hairline and secure each with tiny clear hair elastics from the elastic pack listed below.
3. Pull those two front sections back toward the crown, combining them with a top crown section of hair, and bind them together into a high half-up ponytail.
4. Hide the top elastic by wrapping a thin strand of hair around it and pinning it underneath.
5. Place another clear elastic about two inches down the tail of the half-up ponytail.
6. Gently tug and 'pancake' the section between the elastics outward with your fingers to create a rounded bubble shape.
7. Repeat placing elastics every couple of inches down the ponytail, expanding each section into a bubble, until you reach your lower lengths.
8. Mist everything generously using the flexible hold texturizing spray listed below to hold the bubbles and loose waves in place all day.
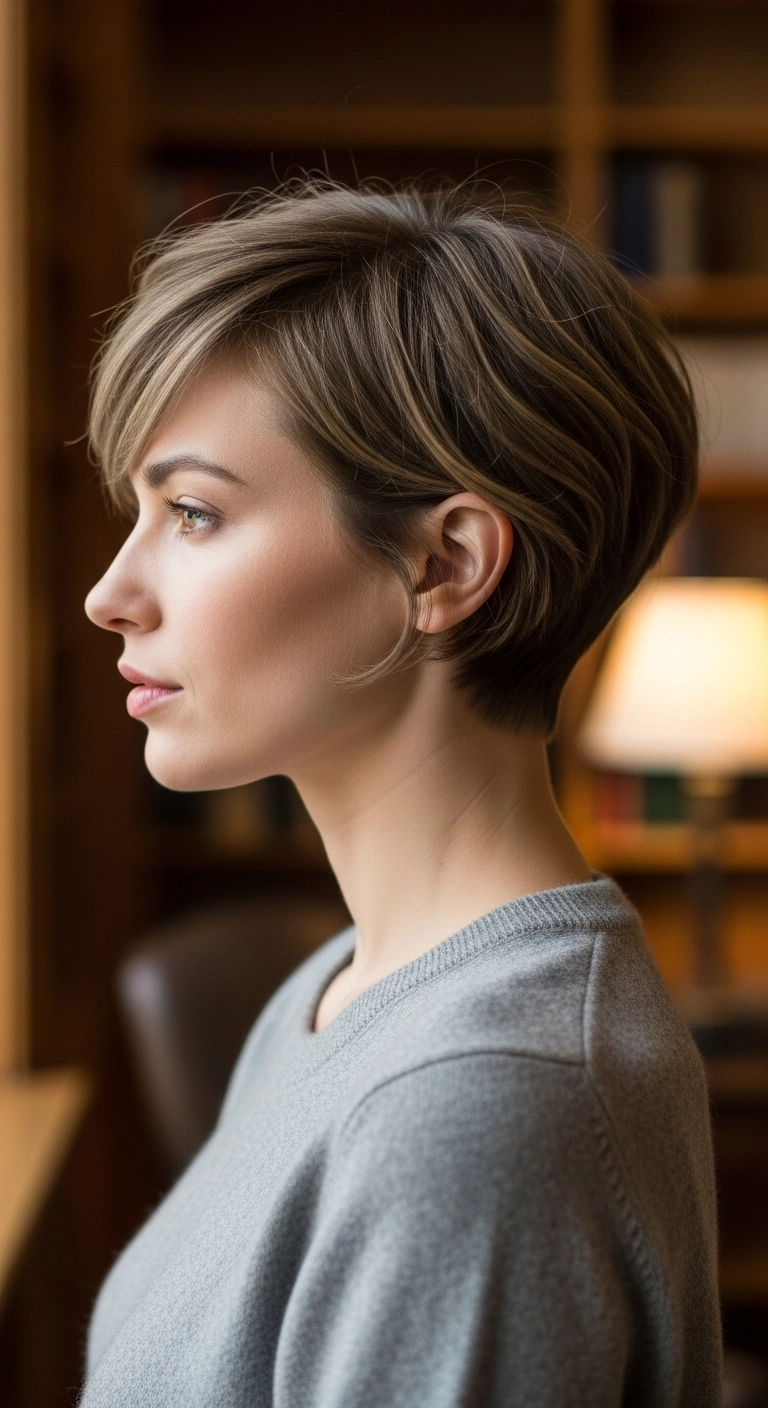
Are you thinking about going for the big chop? I am totally obsessed with this soft, layered bixie cut! It combines the effortless lightness of a pixie with the flattering, feminine face-framing length of a short bob. The gentle ash brown base paired with fine woven highlights gives it such stunning dimension and movement when the light hits. It feels so clean, chic, and low-fuss for everyday styling. If you want something sophisticated yet modern, this style is definitely worth trying out!
How to do this
1. Start on freshly washed, damp hair and prep with a lightweight styling mousse using the volumizing root lift mousse listed below to provide soft body without stiffness.
2. Comb through with a fine-tooth comb to establish a soft, deep side part directing the longer crown layers and bangs across the forehead.
3. Apply a heat defense shield using the heat protectant spray listed below evenly across the top and sides.
4. Blow dry using a small-to-medium ceramic round brush, focusing on lifting at the roots of the crown to create natural curve and volume while sweeping the bangs forward and to the side.
5. For the tapered nape and sideburn areas, use a flat paddle brush to dry the hair flat against the contour of the head.
6. Work a pea-sized amount of the matte styling paste listed below between your palms and gently piece out the ends around the ears and bangs for soft separation.
7. Finish the look with a light mist of the flexible hold hairspray listed below to keep the sweep in place all day.
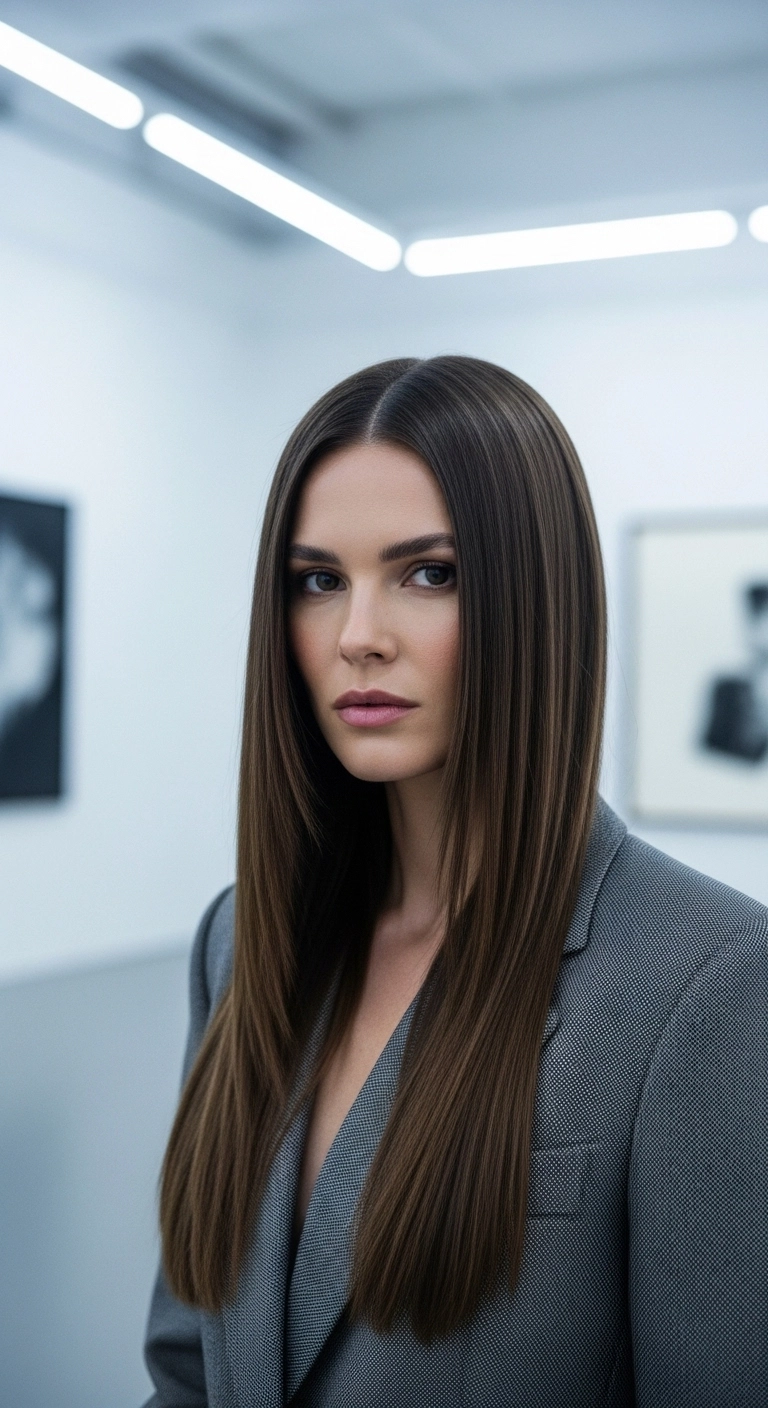
There is honestly nothing cleaner or more commanding than a sharp, glossy blowout like this. If you want a style that instantly screams polished boss without doing too much, this sleek liquid brunette look is your best friend. It elongates the face and looks ridiculously healthy with a center part!
How to do this
1. Start by prepping freshly washed, damp hair with a thermal protectant using the heat protectant spray listed below to shield strands from high heat.
2. Blow dry the hair straight down in sections using a high-powered blow dryer and a large round ceramic brush or paddle brush to smooth the cuticle.
3. Create a crisp, razor-sharp center part from the front hairline down to the crown using the rat tail comb listed below.
4. Divide the hair into thin, manageable 1-inch horizontal sections and pass through with a flat iron using the ceramic straightening flat iron listed below, keeping slow, steady tension from roots to ends.
5. Gently bevel the face-framing layers slightly inward toward the collarbone to frame the jawline naturally.
6. Finish by smoothing a tiny pump of the anti-frizz smoothing hair serum listed below through the lengths and mist with the high-shine finishing spray listed below to tame flyaways and maximize reflective shine.
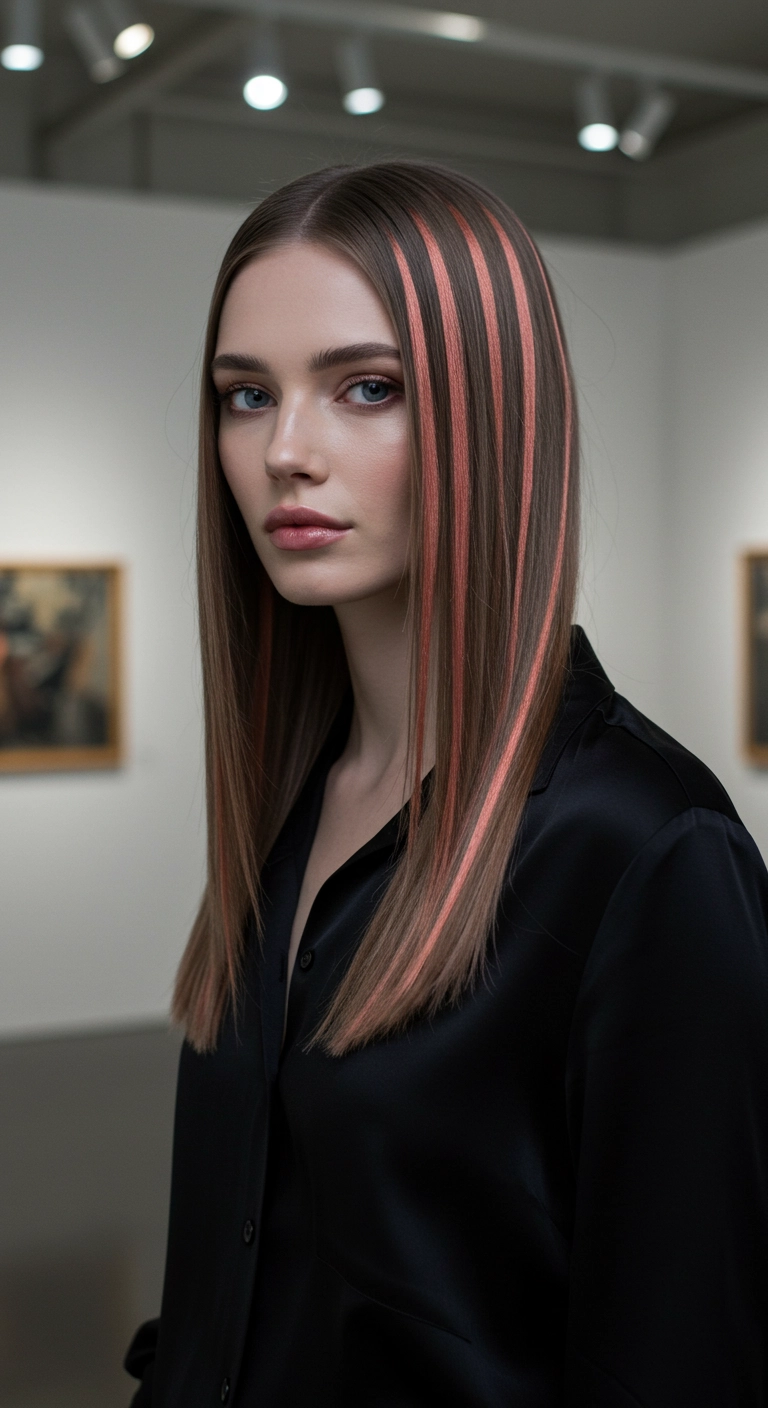
This hairstyle is what I like to call the graphic barcode look. You take sleek, center-parted brown hair and add clean, evenly spaced vertical stripes of pastel coral pink down one side. Run a flat iron through everything until it's pin-straight and glassy so those lines pop with maximum geometric contrast.
How to do this
1. Start by prepping damp hair with the lightweight smoothing serum listed below to eliminate frizz and create a sleek foundation.
2. Blow dry the hair straight down using a nozzle attachment and the ceramic paddle brush listed below, keeping tension consistent from root to tip.
3. Section out the precise rectangular panels on one side of the crown where the contrasting stripes will sit, clipping away the rest of the dark hair.
4. Pre-lighten these clean strip sections to a pale blonde and deposit the semi-permanent pastel peach-pink dye listed below, making sure each stripe has clean, razor-sharp borders.
5. Once rinsed and dried, mist all over with the thermal heat protectant spray listed below.
6. Run the tourmaline ceramic flat iron listed below through one-inch sections at a low-to-medium heat setting to lock in that ultra-smooth, glass-hair finish.
7. Finish by applying a drop of the high-shine finishing oil listed below across the lengths for maximum gloss and separation of the graphic lines.
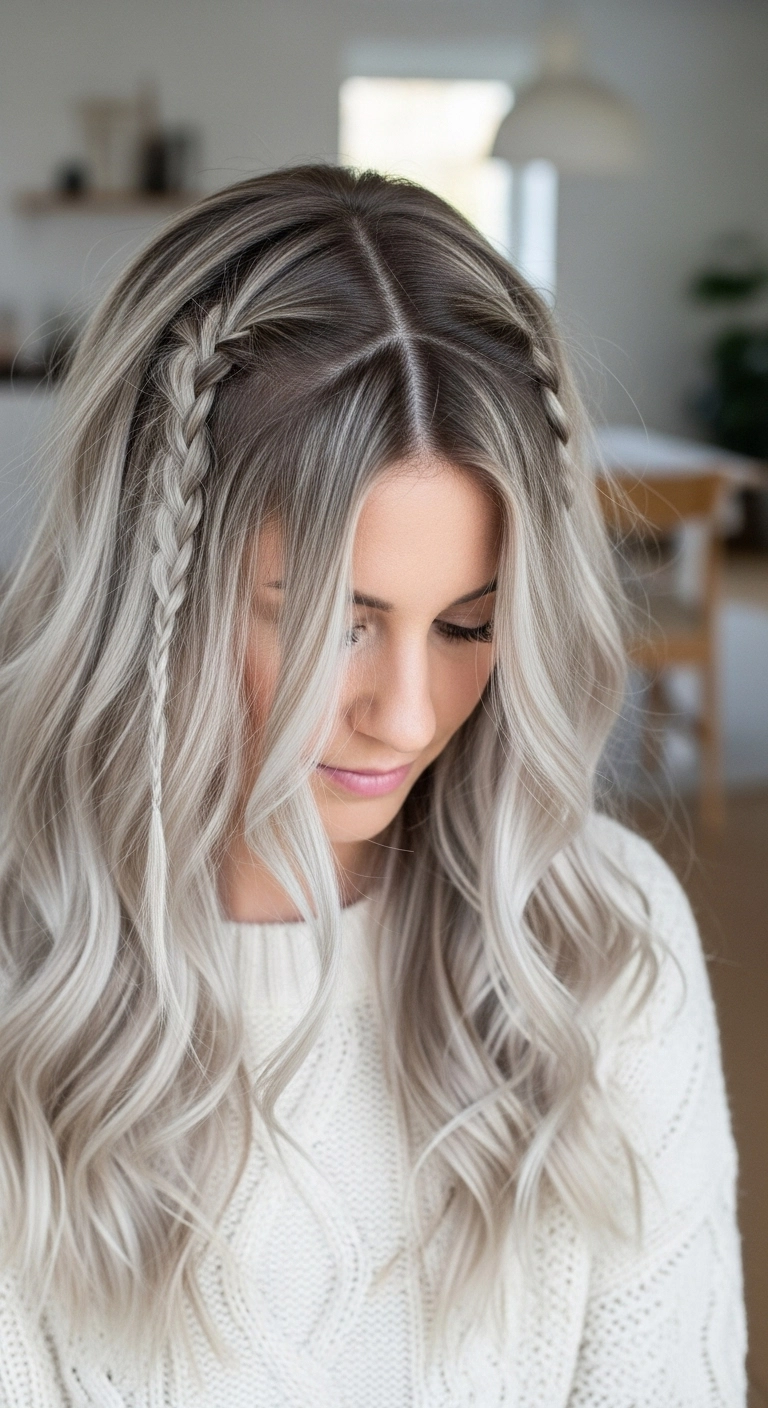
This hairstyle is super cute and bohemian, which makes it my absolute go-to for music festivals or casual weekend coffee dates – adding those two little front braids takes barely two minutes and elevates basic waves instantly!
How to do this
1. Start by prepping clean, dry hair with a generous mist of the heat protectant spray listed below to shield your lightened strands.
2. Using a 1.25-inch curling iron or wand, take 1- to 2-inch sections throughout your hair and curl them away from your face to create soft, relaxed beach waves.
3. Once all the curls have cooled, gently comb through them using the wide-tooth comb listed below to soften them into loose S-waves.
4. Create a clean center part, then section out a small triangle of hair on either side about an inch back from your hairline, leaving a couple of delicate face-framing strands loose in front.
5. Divide each small triangular section into three equal strands and plait a tight three-strand micro braid down the length, securing the ends with the mini clear elastic hair ties listed below.
6. Lightly spray the mid-lengths and ends with the texturizing finishing spray listed below and finish with a drop of the nourishing hair serum listed below on the ends for extra shine and separation.
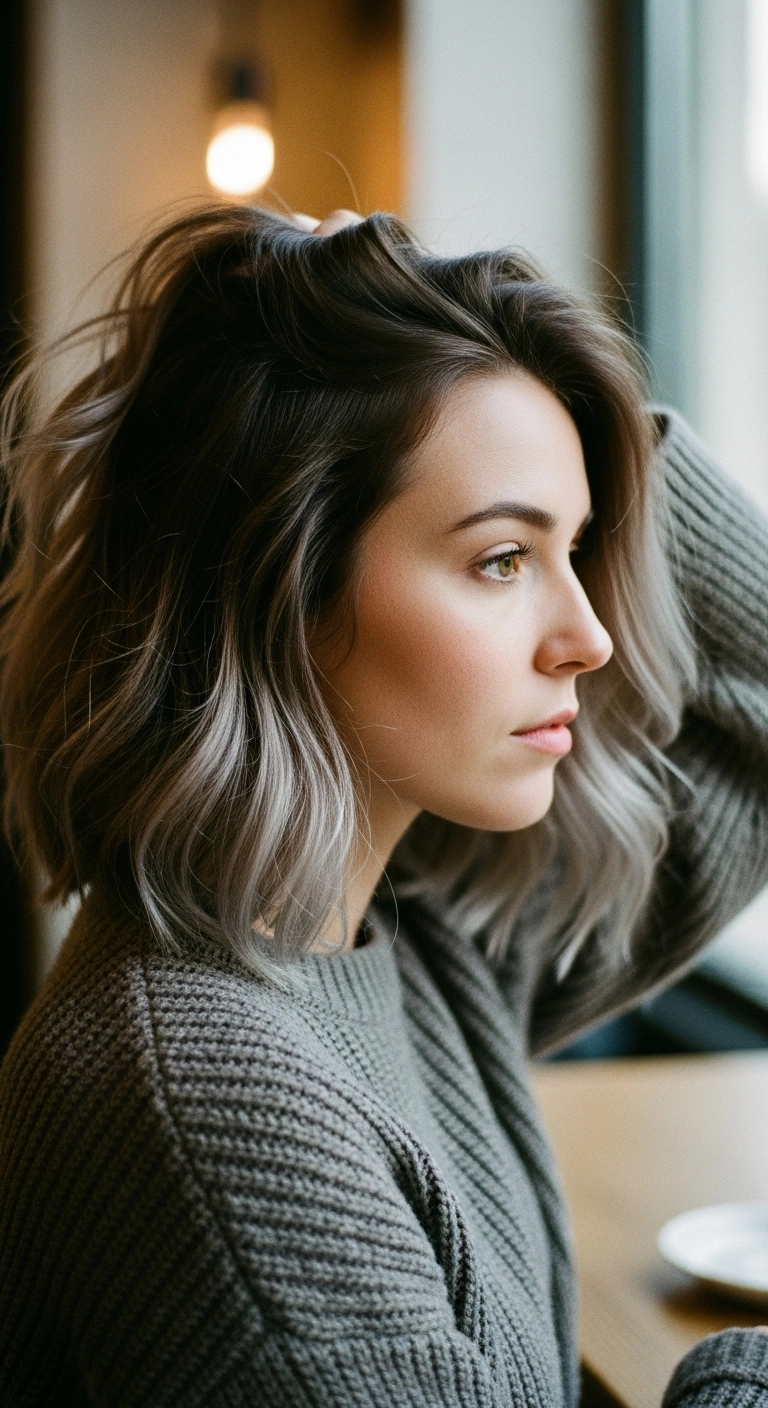
This look is all about that effortless, cool-toned contrast. You take a classic collarbone-length lob and melt a rich, natural ash brown base seamlessly down into silvery-grey ends. Add some loose, lived-in bends with a curling iron and shake it out with your fingers so it looks perfectly undone.
How to do this
1. Start on clean, damp hair and prep with the heat protectant spray listed below to shield strands and maintain cool tones.
2. Apply a lightweight volumizing mousse to the roots and mid-lengths, then rough-dry with a hairdryer using your fingers to build natural volume and lift at the crown.
3. Once completely dry, divide the hair into horizontal sections and create loose, relaxed bends using the 1.25-inch ceramic curling iron listed below, leaving the last inch of the ends uncurled for an effortless, modern shape.
4. Alternate the direction of your waves section by section to avoid the curls clumping together into a uniform shape.
5. Allow the waves to cool down completely, then mist generously with the dry texturizing spray listed below through the roots and mid-lengths.
6. Rake through the waves thoroughly with your fingers or a wide-tooth comb to break them up into soft, undone texture.
7. Finish by rubbing a dime-sized amount of the matte hair paste listed below between your palms and piece out the silver-tipped ends for definition and subtle hold.
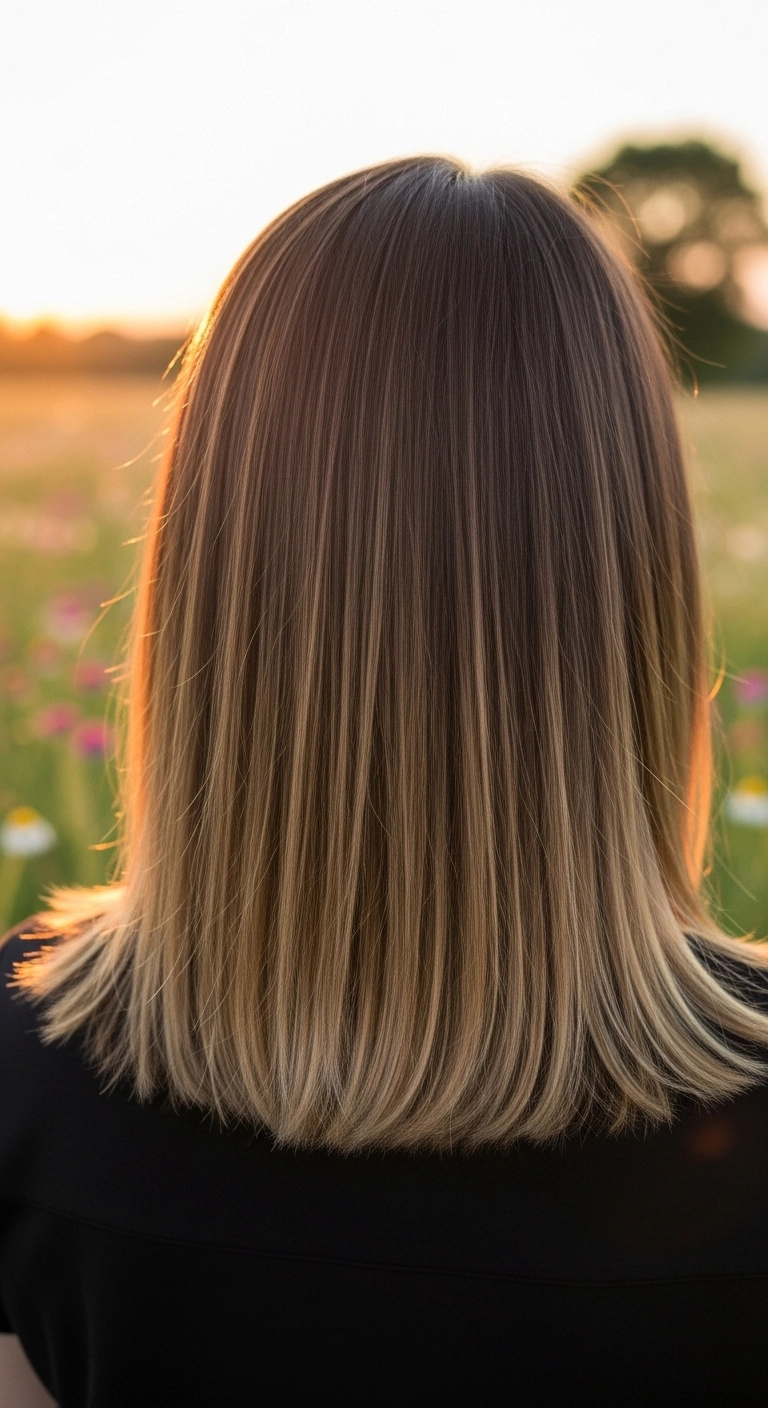
Looking for a timeless, effortless style that grows out gracefully without awkward root lines? This sleek blunt lob paired with a soft ash brown-to-blonde sombre gives you that high-end, clean girl finish. It catches the natural sunlight like a dream and keeps styling daily super simple!
How to do this
1. Start by prepping freshly washed, damp hair with a lightweight smoothing blow-dry cream listed below to protect against heat and frizz.
2. Section the hair into manageable horizontal layers using styling sectioning clips, starting at the nape of the neck.
3. Blow-dry each section with a ceramic round brush listed below, directing tension downward down the hair shaft to achieve that sleek, glass-like smoothness.
4. Glide a tourmaline flat iron listed below through 1-inch sections on medium heat, turning slightly outward at the very ends to mirror that soft, natural flick.
5. Finish by smoothing a tiny drop of nourishing hair shine serum listed below through the lengths and mid-ends to enhance reflection and tame any flyaways.
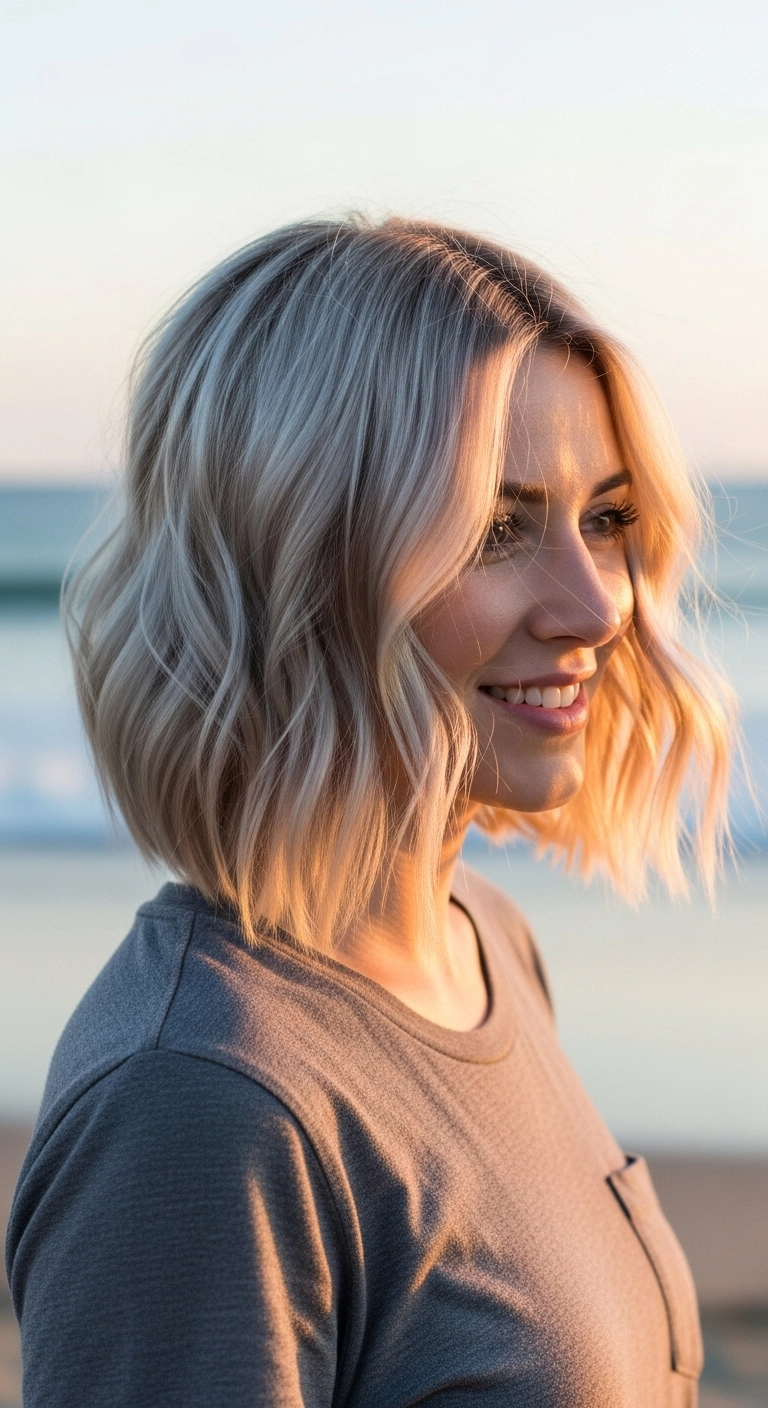
I’m seriously obsessed with this effortless wavy lob. It has the perfect icy ash blonde tone paired with a soft shadow root so growing it out is completely painless. Those relaxed, undone waves hit right at the collarbone and give it so much natural movement without feeling overly styled. It's honestly the ultimate cool-girl haircut that looks just as stunning on a beach day as it does dressed up for date night.
How to do this
1. Start by prepping freshly washed, damp hair with a lightweight heat protectant spray listed below to shield your blonde strands from heat styling.
2. Rough dry your hair using a blow dryer until it is completely dry, using your fingers to lift at the root for natural volume.
3. Section your hair into horizontal tiers, starting from the nape of your neck and working your way up to the crown.
4. Take one-to-two inch vertical sections and wrap them loosely around a 1.25-inch curling wand listed below, leaving the bottom inch of the ends out to maintain that modern, relaxed lob shape.
5. Alternate the direction of your curls—curling away from the face in the front sections to softly open up your cheekbones.
6. Once all sections are curled and fully cooled, mist liberally with the dry texturizing spray listed below.
7. Gently rake through the waves using your fingers or a wide-tooth comb to break up the pattern and create that effortless, undone texture.
8. Finish with a dime-sized amount of the lightweight hair oil listed below, focusing on the ends to seal split ends and add a soft, healthy shine.
If you've been wanting to try short hair with an edge, this is your sign! I am completely obsessed with the contrast between those soft micro bangs and the cool, smoky ash balayage on the ends. It gives such a chic, effortless European vibe that looks amazing whether it's styled or just air-dried.
How to do this
1. Start on damp, towel-dried hair and apply a quarter-sized amount of the lightweight heat protectant smoothing lotion listed below to safeguard strands and prep texture.
2. Blow-dry the micro bangs forward and slightly flat using a round styling brush, using back-and-forth tension so they sit softly across the middle of your forehead.
3. Rough-dry the rest of your bob with your fingers to build natural, effortless volume.
4. Take random 1-inch sections and create loose, subtle bends using the 1-inch ceramic curling iron listed below, alternating directions and leaving the bottom ends straight for that chic, undone shape.
5. Mist all over with the dry texturizing spray listed below, lightly shaking your roots with your fingertips to separate the waves.
6. Finish off the cool, icy ends by working a tiny dab of the matte finish styling paste listed below between your fingers and pinching the fringe and ends for piecey definition.
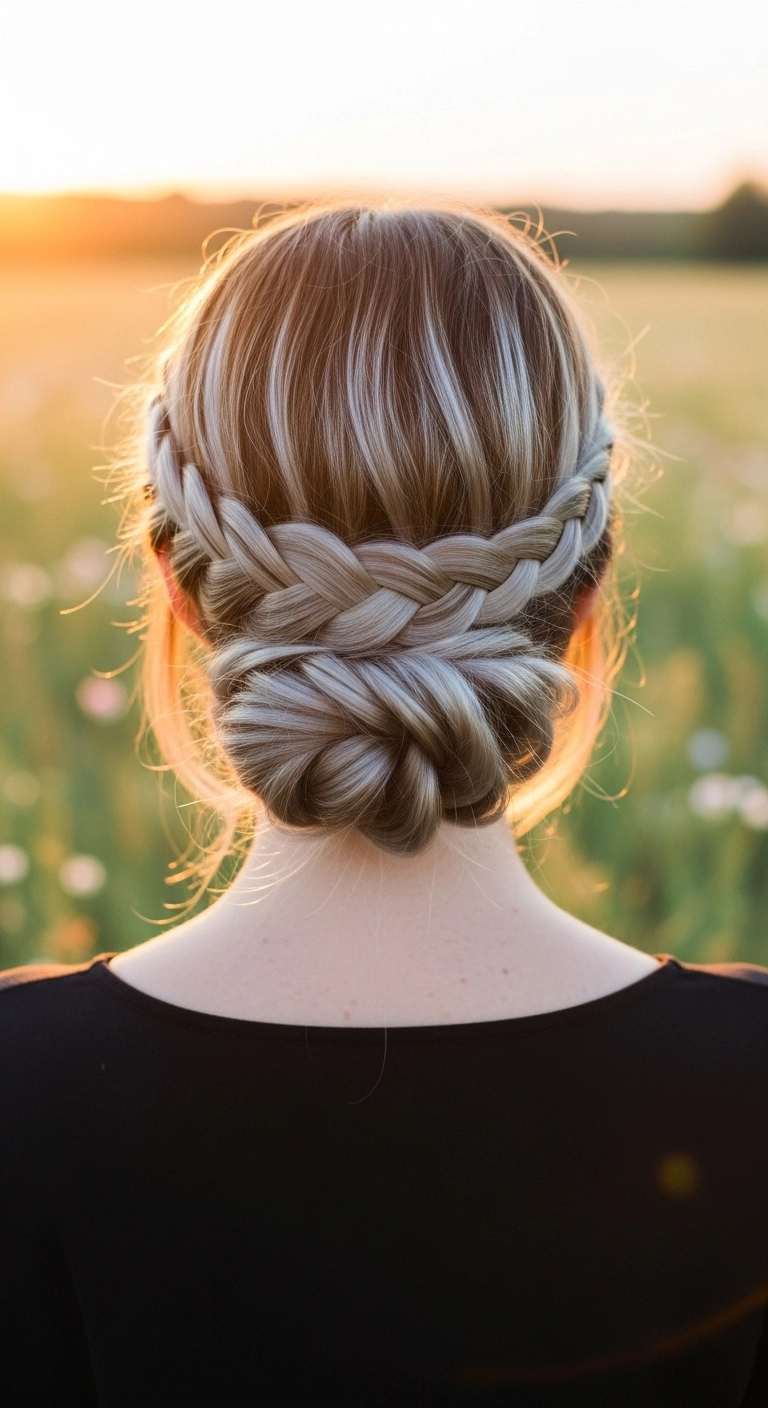
Whenever I have a wedding or outdoor summer event to attend, this braided updo is my absolute go-to! It keeps all your hair secure and off your neck while looking effortlessly intricate and romantic, especially if you have highlights to show off all the braid texture.
How to do this
1. Prep dry hair with a generous mist of texturizing spray using the dry texturizing spray listed below to give your hair grip and hold.
2. Part your hair down the center and section out two front panels along your hairline on both sides, securing the back lower section for now.
3. Begin creating a Dutch braid (or French braid) on one side starting from the temple, following along the hairline above your ear towards the back of your head.
4. Repeat the same braiding process on the opposite side, securing both braided ends temporarily with clear hair ties using the mini clear elastic hair bands listed below.
5. Gather the remaining hair at the nape of the neck along with the ends of both braids, twist it into a low chignon or roll it into a neat coiled bun.
6. Secure the bun firmly against your scalp using the sturdy matte bobby pins listed below, tucking the braided tails underneath to hide the elastic bands.
7. Gently pancake and tug the outer edges of the side braids to make them look full, soft, and dimensional.
8. Lock the entire updo into place and tame any flyaways around the crown using the flexible hold hairspray listed below.
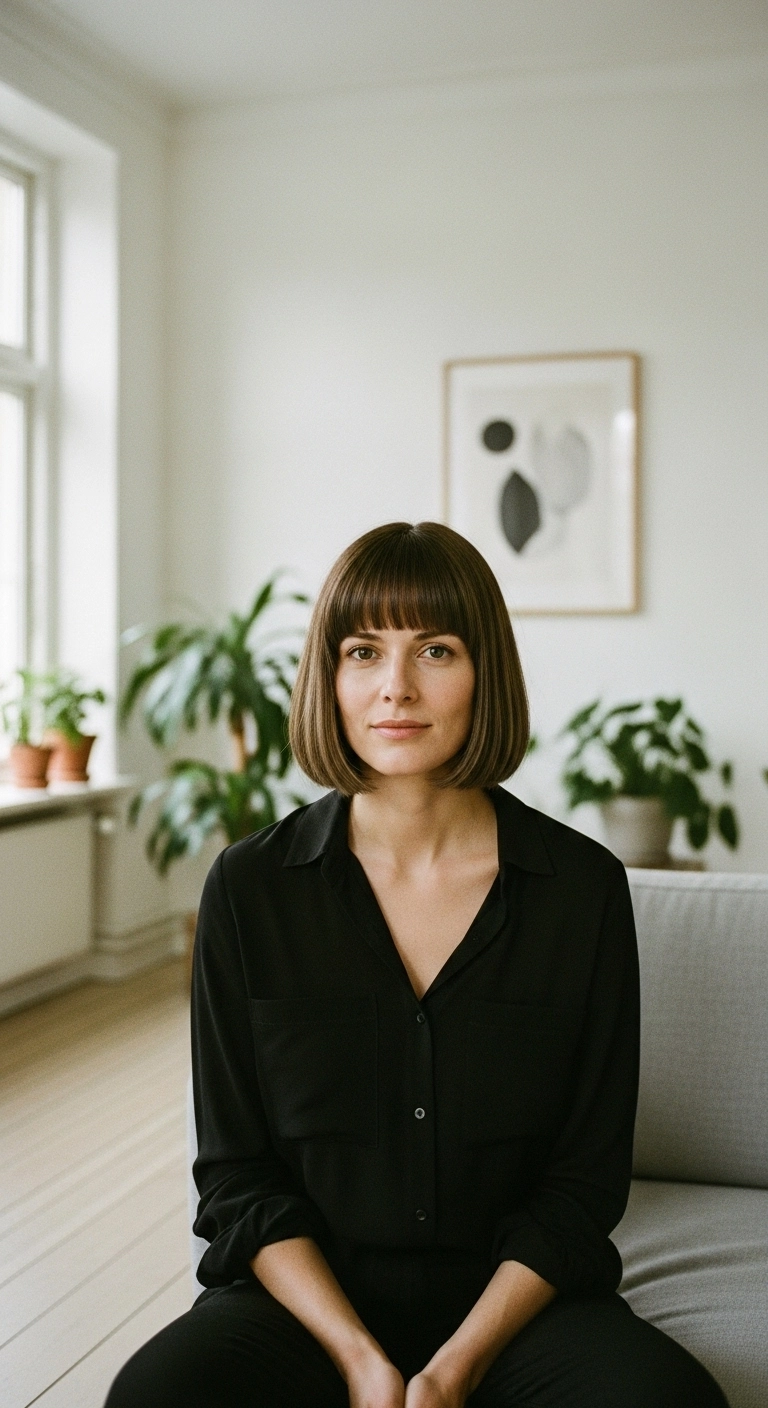
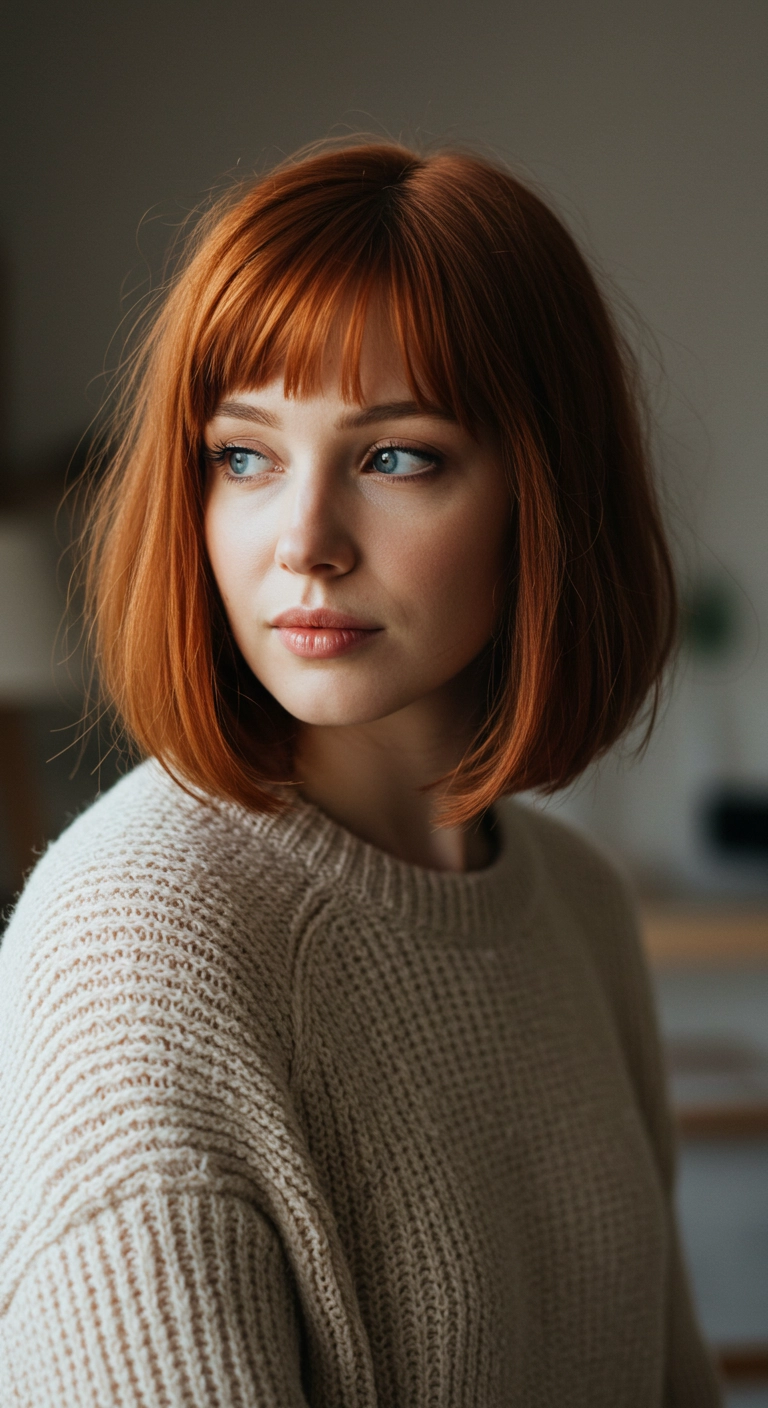
Honestly, there is nothing more effortlessly chic than a classic chin-skimming bob paired with sharp, full bangs! It gives that timeless French-girl minimalism that never goes out of style. If you've been on the fence about cutting bangs, this clean blunt cut is the ultimate sign to just go for it!
How to do this
1. Start on freshly cleansed, damp hair and prep with a lightweight leave-in smoothing lotion using the smoothing blowout cream listed below to combat any flyaways.
2. Mist your strands thoroughly with the heat protectant spray listed below to shield your hair during hot tool styling.
3. Blow dry your fringe first straight down using the boar bristle round brush listed below, sweeping side to side slightly before setting it directly over the forehead to keep it flat and neat.
4. Section the rest of your hair into horizontal layers and blow dry smoothly with the round brush, slightly rolling the ends inward to create that subtle bevel.
5. For a pin-straight, ultra-clean perimeter, take small vertical sections and glide the ceramic flat iron listed below through the lengths, gently turning your wrist inward just at the tips.
6. Finish off by smoothing a drop of the nourishing hair serum listed below through mid-lengths and ends for a mirror-like shine.
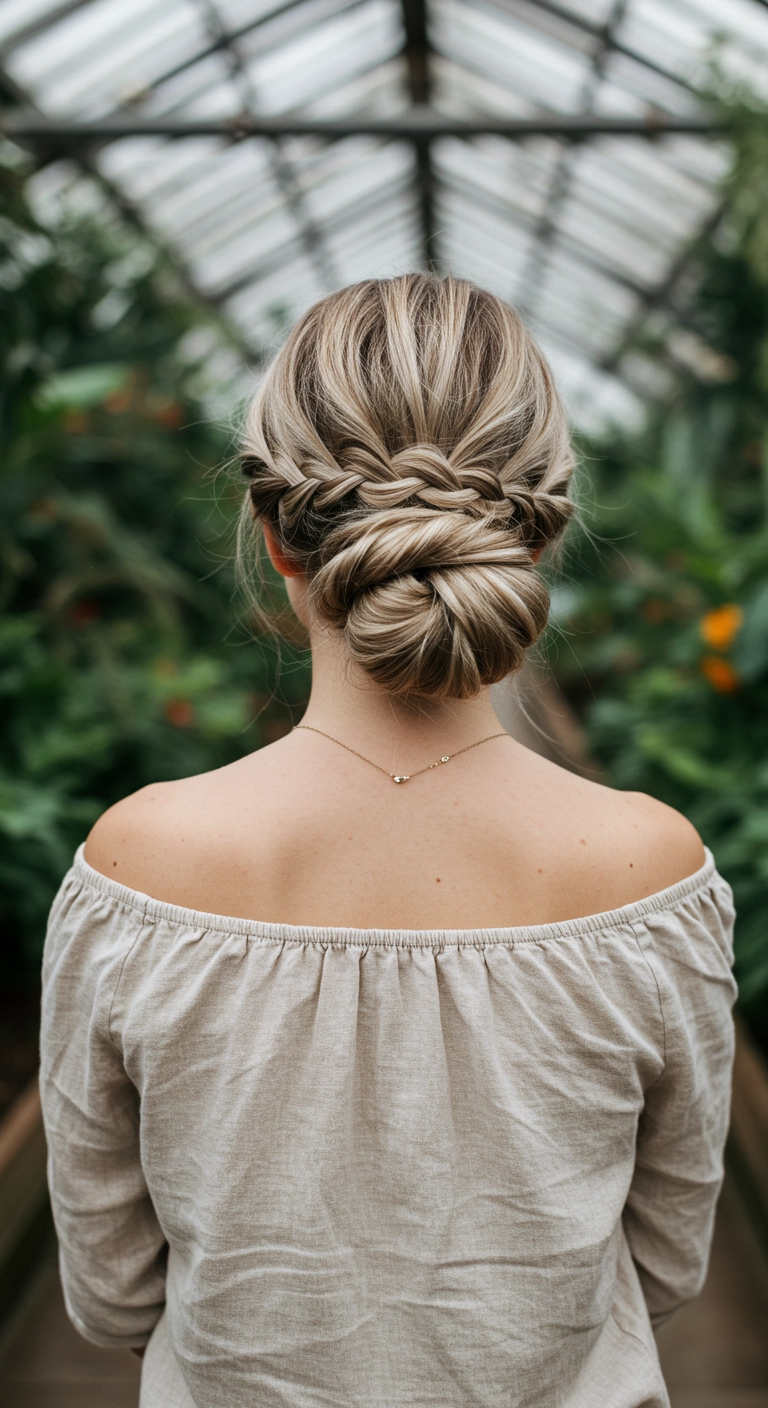
I fell in love with this style while searching for an updo that looks effortlessly chic without feeling stiff or overdone. The way the braided details intertwine into the smooth low bun highlights dimension in blonde or highlighted hair beautifully. It’s perfect for weddings, garden parties, or date nights when you want an elegant look that actually stays in place all evening!
How to do this
1. Start by prepping clean, dry hair with a spritz of the texturizing spray listed below to give your strands grip and light volume before styling.
2. Gently tease the crown section using the fine-tooth tail comb listed below to create soft lift at the back of the head, smoothing over the top layer lightly.
3. Section away the front sides just above the ears, and gather the remaining back hair into a low ponytail at the nape using a clear elastic band.
4. Form a smooth, rounded low chignon or rolled bun with the ponytail, securing it tightly against the nape using the matte bobby pins listed below.
5. Take the side hair sections and create two soft, loose French or Dutch accent braids moving toward the back, gently pulling the edges (pancaking) for extra width and romance.
6. Cross the braids over the top of the bun, tucking the remaining braid tails underneath the roll and pinning them discreetly into place.
7. Finish the entire style by misting with the flexible hold hairspray listed below to tame flyaways while keeping a natural, touchable finish.
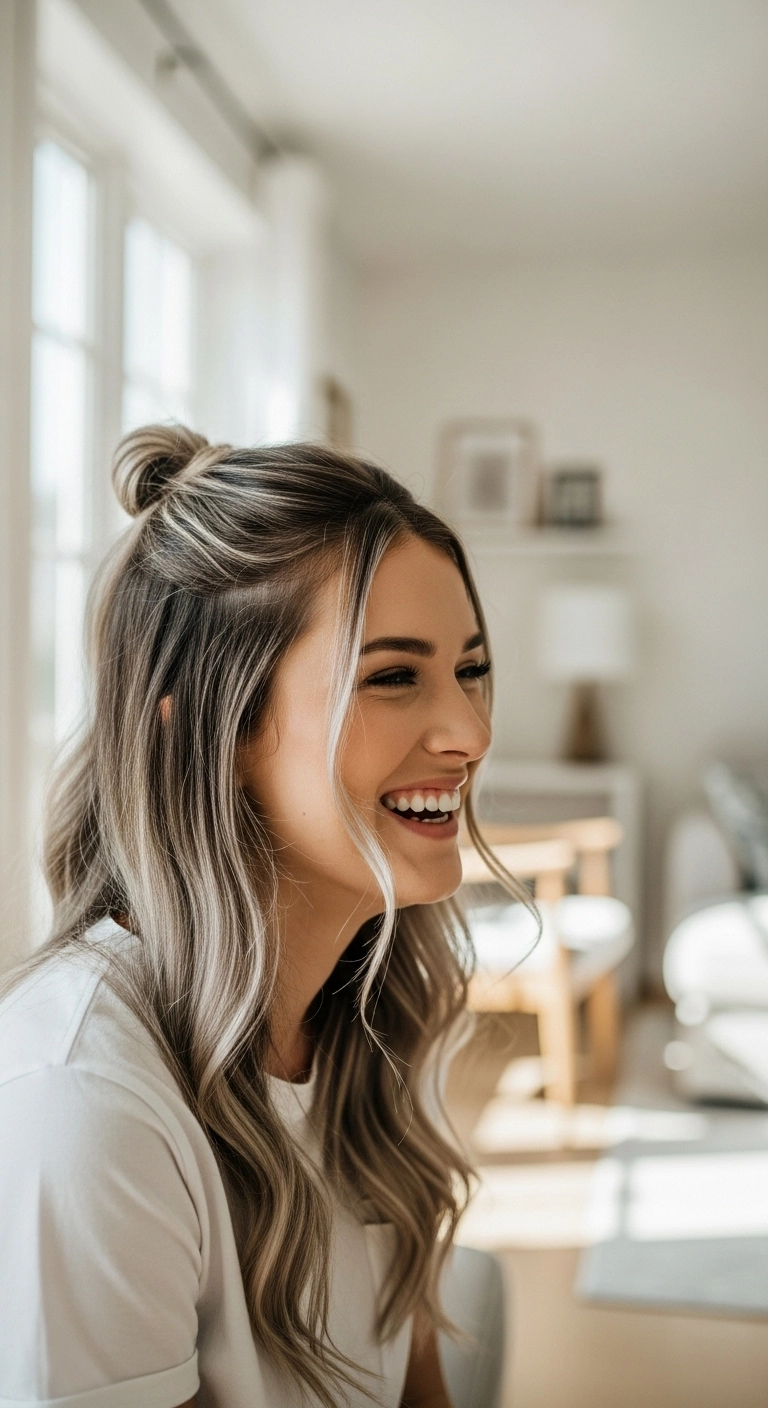
The ultimate quick and cute everyday style! I’m obsessed with a casual half-up top knot when you want your hair out of your face but still want to show off your length and loose waves. Leaving those two soft blonde pieces out in front frames the face so nicely, and the cool ashy balayage gives the whole bun the prettiest dimension. It's chic, easy, and looks like you didn't try too hard.
How to do this
1. Start by prepping damp hair with the lightweight heat protectant spray listed below, then blow-dry smooth with a large round brush to give the roots some natural lift.
2. Using the 1.25-inch ceramic curling iron listed below, wrap vertical sections away from your face to create loose, relaxed S-waves through the mid-lengths and ends.
3. Section out two delicate front tendrils around your face and leave them loose to frame your features.
4. Gather the top third of your hair at the crown, gently pull it back, and secure it into a small loop or messy bun using the clear mini elastic hair ties listed below.
5. Gently tug at the loops of the top knot and pinch the hair on top of your head to add soft texture and volume.
6. Finish the look by misting all over with the flexible hold texturizing spray listed below to keep the waves undone and touchable all day.
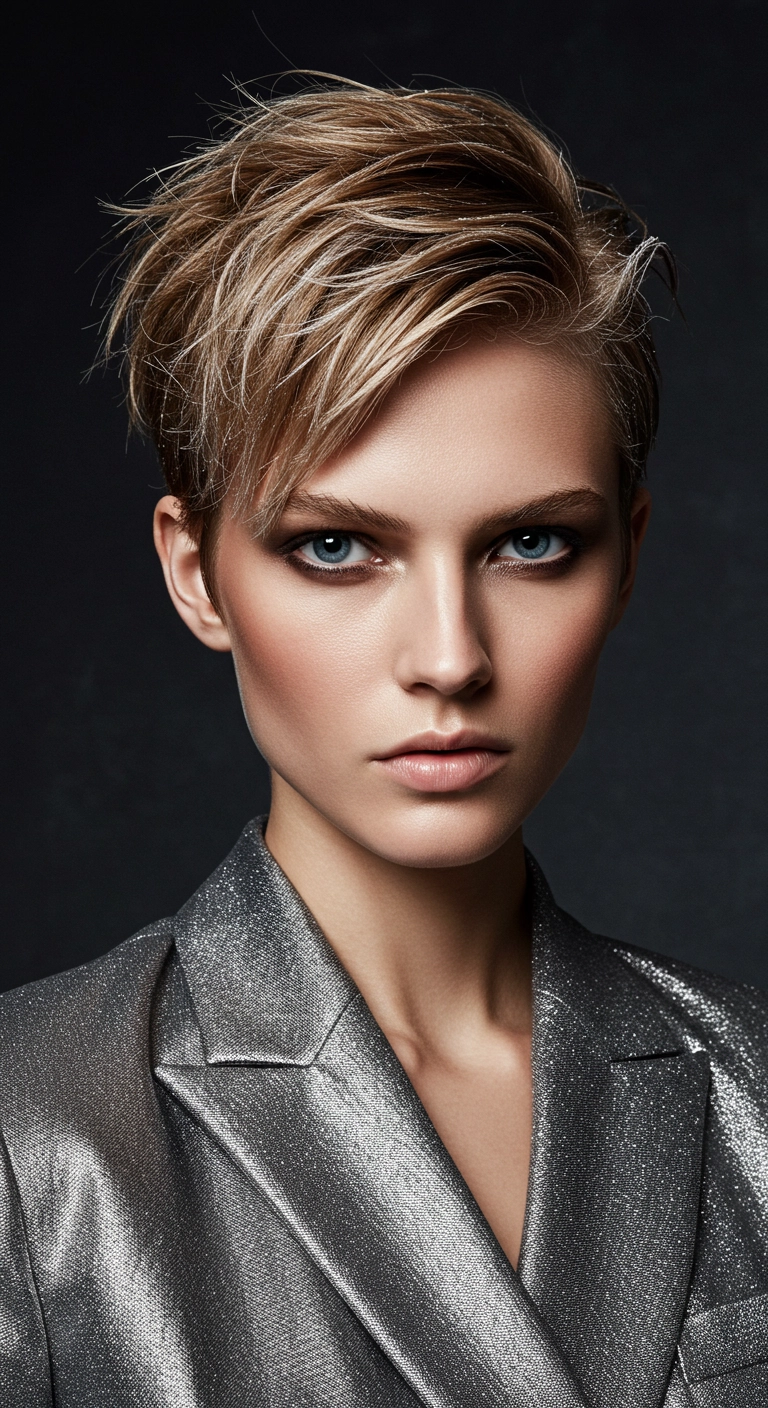
Oh, this textured pixie cut is an absolute dream! The piecey layers and sweeping side bangs give it such a sharp, effortless cool-girl edge. Paired with those dimensional ash blonde babylights, it's just perfection. Would you ever be brave enough to chop it this short?
How to do this
1. Start by washing hair with a lightweight volumizing shampoo and conditioner to prep the strands without weighing down the roots.
2. On towel-damp hair, apply a dime-sized amount of the lightweight styling mousse listed below evenly through the roots and mid-lengths.
3. Using a blow dryer and the small vent brush listed below, dry the sides and back downwards flat to the head.
4. For the top and crown, direct the airflow from roots to ends while sweeping the hair forward and diagonally across the forehead to create that piecey, dynamic sweep.
5. Warm a pea-sized amount of the matte styling pomade listed below between your fingertips and gently rake through the top layers to separate pieces and define the texture.
6. Finish with a quick spritz of the flexible hold texturizing spray listed below to lock the shape in place while keeping it touchable.